• When you click on links to various merchants on this site and make a purchase, this can result in this site earning a commission. Affiliate programs and affiliations include, but are not limited to, the eBay Partner Network.

Tearing down the 69 Charger!

greenmonsta79

Well-Known Member
Local time
2:33 AM
Joined
Mar 15, 2011
Messages
633
Reaction score
24
Location
Brazil,IN
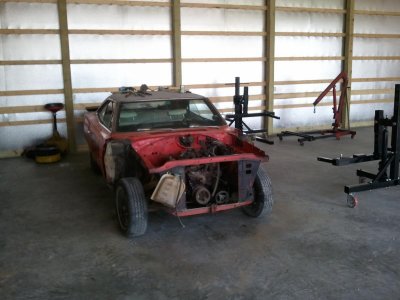
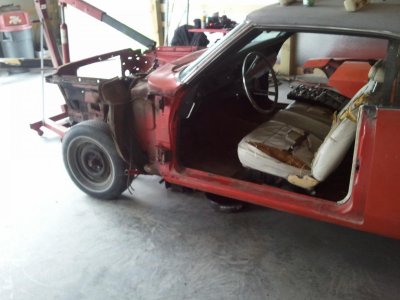
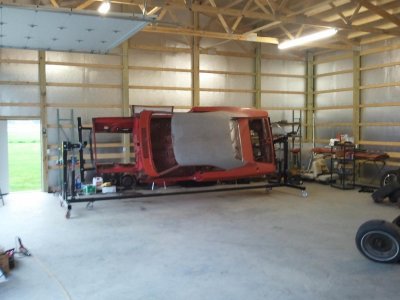
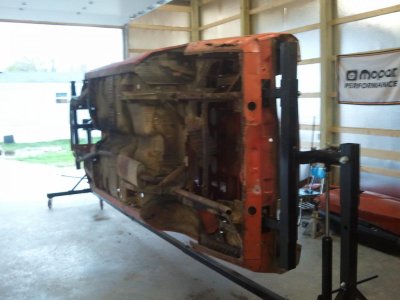
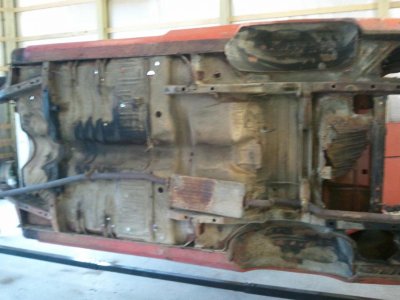
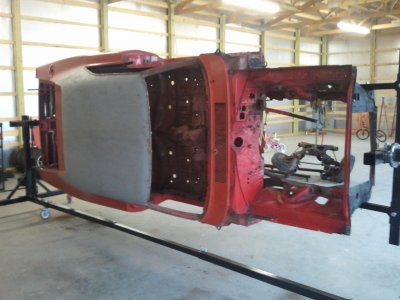
Well guy's I finally got it moved into my new garage (40'x64') and I just went to Greg Smith Equip. in Indy today and bought a Rotissere to spin the Charger on,
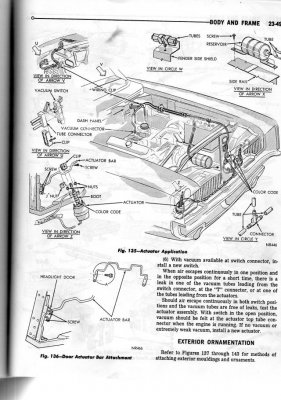
anyway I started tearing into the car Friday night and got the front valance off, bumper, and then I went to work on getting the grille out, Well let me say I have never messed with the headlight setup on a 69 Charger and Jeez what a nightmare I spent a good hour figuring what to remove to first without breaking the grille!!!! anyway got it all out and I broke 3 studs off the headlight bracket where they go into the fender wells no biggie I will just weld some all thread on and be good as new panel is far too clean to buy a new one. One question I have, how do the vacuum pods for the headlight doors work I noticed they have 2 vacuum ports each do they constantly have vacuum when open as well when the headlight switch is switched to off? what is the best way to test the operation of all the components before I re-install this (although that will be a while!!) Thanks!
 
Headlight actuators

Hello, on working with my headlight doors, I had a few problems. I attached some scans from my book on the testing of the actuators, hope this helps. Good luck. One question, Isn't Brazil, IN where they have the Covered Bridge Festival every fall ?
 

Attachments

  • actuator1.jpg
    actuator1.jpg
    137.8 KB · Views: 520
  • actuator2.jpg
    actuator2.jpg
    137.2 KB · Views: 805
ChargerRT, Thanks for those diagrams, where did you get the book? Also yes
the Covered bridge festival is every October, I hate it because I live right on 59 and from Mansfield and Bridgeton all the way through Brazil and sometimes all the way to I-70 will be backed up! mind you Bridgeton to I-70 is about 20 miles! Nuts anymore it's just junk vendors use to be a lot of craft and homemade items but since the late 80's its all commercial go figure!
 
Glad I was able to help. If I remember correctly the book came with the car and a few spare parts and other odds and ends. I think you can probably find one on EBAY or restoration suppliers. I bet they are expensive, now I think most of that stuff is on CD's. I still like the "old fashioned" books.
 
Yeah I like the old books not the CD's myself, Here are a some pics of the progress I finally got the engine and transmission out tonight as well as the tail lights, hopefully I will have the shell fully stripped by the end of the week so I can bolt it on the Rotiserre. I picked up a great set of 14x7 Vectors with decent tires for $400 I ordered some center caps today and the correct Caroll Shelby center cap decals.
 

Attachments

  • 2011-04-10 12.38.49.jpg
    2011-04-10 12.38.49.jpg
    102.2 KB · Views: 469
  • 2011-04-11 16.08.36.jpg
    2011-04-11 16.08.36.jpg
    87.9 KB · Views: 494
  • 2011-04-11 16.08.52.jpg
    2011-04-11 16.08.52.jpg
    97.6 KB · Views: 527
Finally got it on the Rotissere this past Sunday night, I purple powered the engine bay last night and man the grime that came off makes it nice getting the original undercoating off the floorpans. And all the dirt that comes out of all the nooks and crannies when you turn the car! WOW! I still have to get my garage wired for 220 yet (new project in a new garage! gotta love it) so I can get my Air compressor working so I can use my soda and media blaster,
I am about to place a big sheet metal order also!! going to use AMD parts
I still need to fab up a cart to place the body on when I do the sheet metal replacement I think I will make a run to the local Harbor freight for some casters and run by the metal yard to see if they have some discounted square tubing, let me know what you think!
 

Attachments

  • 2011-04-18 19.48.14.jpg
    2011-04-18 19.48.14.jpg
    96.8 KB · Views: 437
  • 2011-04-17 19.58.51.jpg
    2011-04-17 19.58.51.jpg
    86.4 KB · Views: 458
  • 2011-04-17 19.58.35.jpg
    2011-04-17 19.58.35.jpg
    99.2 KB · Views: 441
  • 2011-04-17 19.57.51.jpg
    2011-04-17 19.57.51.jpg
    98.8 KB · Views: 440
I'm so jelous of your shop!

Is that a Direct Lift rotisserie? How do you like it? I'm thinking about picking one up soon.
 
Ryan, Its a ATLAS Rotiserre (knockoff) but it works and is really nice for the money, I still have to move my lift in and they are coming Thursday to run power to the garage (Power company never gets in a hurry!!) need to get a bunch of parts in the sand blast cabinet and start I am chompin' at the bit, got about $1200.00 of sheetmetal parts ordered yesterday, one piece trunk, Valance, rear cross member, valance re-inforcements, driver frame rail, driver spring hanger. Then after all that is done I will order the full quarters, trunk drop-offs, rear tail panel, corners, outer wheel tubs. I bought a $12.00 heat gun at Harbor Freight the other day and a $2.00 scraper and man that does quick work on the original undercoating on the floors!!!!
 
X2 on the shop and how good things are coming on the progress of the Charger, looking forward to this build thread
 
Dang I wish my runner was that clean! You got a good one there.
 
Auto Transport Service
Back
Top