- Local time
- 1:06 AM
- Joined
- Jun 12, 2012
- Messages
- 35,252
- Reaction score
- 94,547
- Location
- NZ - just short of the South Pole
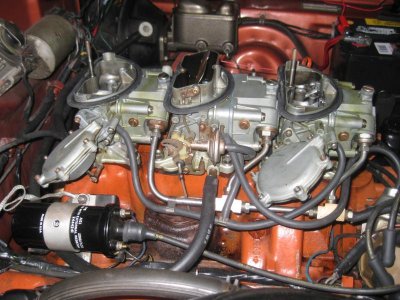
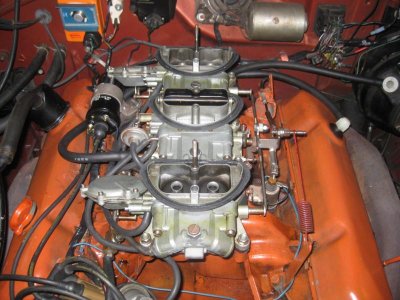
I have been asked several times lately about this, and thought it was appropriate to post these measurements and ideas. My car came with this style Air Grabber from the factory, but previous owners have tossed or lost the vital parts, and it was only about 5 years ago I managed to source at great expense a 383 baseplate, as 440 baseplates are as rare as Rocking Horse droppings. My GTX had been fitted as a 6BBL carb setup since about 1980, and that's how I bought it, so that's how it was going to stay....until the correct parts eventually turn up.
Meanwhile I needed a more reliable carb and intake setup, as the knowledge base here on 6BBL carbs and tuning is somewhat lacking. By learning on FBBO, I picked up some good advice and ideas, and managed to source some trick upgrade metering plates for a start. Also hoping to refine the jetting of all 3 x carbs, and also eventually learn the correct plumbing of all fuel and vapour lines for the engine.
OK, I have done some measurements of the Air Grabber system on my '70 GTX.
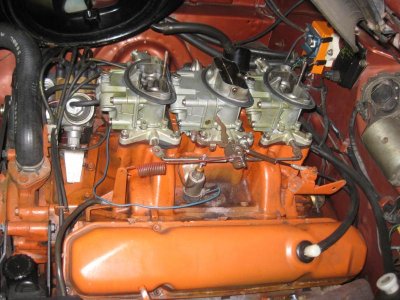
First up I measured the stock iron intake - note that the carb face has a slope towards the front of the engine - which means that the back end is higher than the front. Front of carb face to top of block = 2-7/8" (74mm), and the back of carb face to top of block = 3-7/8" (98mm)


Next we measure the top of the block to the top of the existing Edelbrock Performer 440 Intake manifold (Part #2191) = 3-7/8" - this manifold appears to be level front to back, which gives another 1" at the front in height compared to the stock iron intake.

Next, measure top of regular drop-base aircleaner unit which only just clears the hood when shut - top of block to top of air-cleaner lid in the centre (higher than sides) = 9-3/4", and to the rim = 9-1/8"


Then by fitting the modified air-grabber baseplate and filter - from top of block = 10-3/8" which prevents the hood from closing.


Now - I started with a stock 383 air-grabber baseplate, because they were really hard to find and there were no re-pops at the time, so I had a friend cut this one down for me - measure from the base of the horn to the underside of brace for the wingnut = 1-3/8" (38mm)

I hope that helps you all out somewhat. I am posting this as a technical topic in the hopes it will help people out in the future. Hopefully I can buy a 440 air-grabber baseplate, but the two suppliers who stock them don't show any measurements, and it is a lot of money to spend and end up with the same thing. If I get an answer out of them I will post here, unless someone already has one and can share the depth dimensions.
So, please feel free to add for the benefit of me and others.
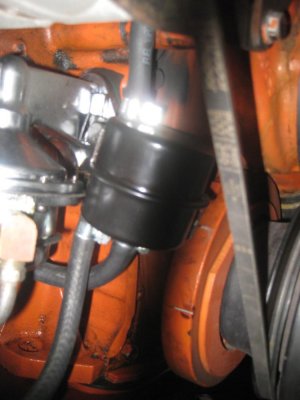
Also, if anyone can show the correct plumbing/routing of fuel and vapour hoses to and from the carbs, I would be most grateful. I also need to know exactly what the purpose of the top valve on the centre carb serves. And why some people route the hose from it to nowhere - or just above the exhaust area. :icon_thumright:
Meanwhile I needed a more reliable carb and intake setup, as the knowledge base here on 6BBL carbs and tuning is somewhat lacking. By learning on FBBO, I picked up some good advice and ideas, and managed to source some trick upgrade metering plates for a start. Also hoping to refine the jetting of all 3 x carbs, and also eventually learn the correct plumbing of all fuel and vapour lines for the engine.
OK, I have done some measurements of the Air Grabber system on my '70 GTX.
First up I measured the stock iron intake - note that the carb face has a slope towards the front of the engine - which means that the back end is higher than the front. Front of carb face to top of block = 2-7/8" (74mm), and the back of carb face to top of block = 3-7/8" (98mm)
Next we measure the top of the block to the top of the existing Edelbrock Performer 440 Intake manifold (Part #2191) = 3-7/8" - this manifold appears to be level front to back, which gives another 1" at the front in height compared to the stock iron intake.
Next, measure top of regular drop-base aircleaner unit which only just clears the hood when shut - top of block to top of air-cleaner lid in the centre (higher than sides) = 9-3/4", and to the rim = 9-1/8"
Then by fitting the modified air-grabber baseplate and filter - from top of block = 10-3/8" which prevents the hood from closing.
Now - I started with a stock 383 air-grabber baseplate, because they were really hard to find and there were no re-pops at the time, so I had a friend cut this one down for me - measure from the base of the horn to the underside of brace for the wingnut = 1-3/8" (38mm)
I hope that helps you all out somewhat. I am posting this as a technical topic in the hopes it will help people out in the future. Hopefully I can buy a 440 air-grabber baseplate, but the two suppliers who stock them don't show any measurements, and it is a lot of money to spend and end up with the same thing. If I get an answer out of them I will post here, unless someone already has one and can share the depth dimensions.
So, please feel free to add for the benefit of me and others.
Also, if anyone can show the correct plumbing/routing of fuel and vapour hoses to and from the carbs, I would be most grateful. I also need to know exactly what the purpose of the top valve on the centre carb serves. And why some people route the hose from it to nowhere - or just above the exhaust area. :icon_thumright:
Last edited:

