• When you click on links to various merchants on this site and make a purchase, this can result in this site earning a commission. Affiliate programs and affiliations include, but are not limited to, the eBay Partner Network.

Best way to locate hood pin holes and hood to carb location?

SUPERSTOCKRACER

Well-Known Member
Local time
6:16 PM
Joined
Jul 18, 2008
Messages
6,372
Reaction score
1,344
Location
Oblivion
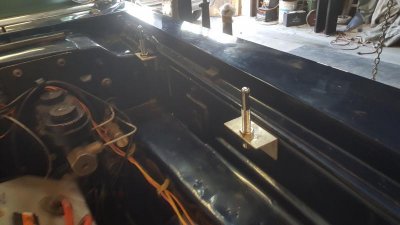
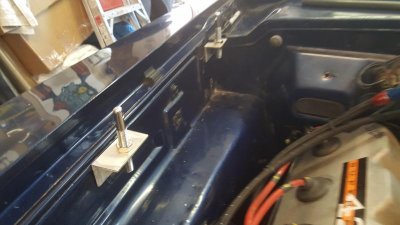
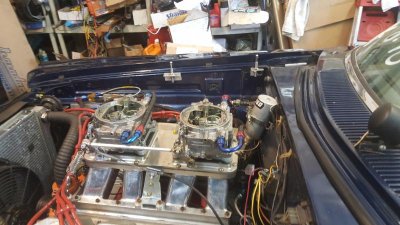
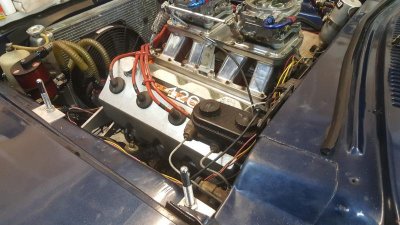
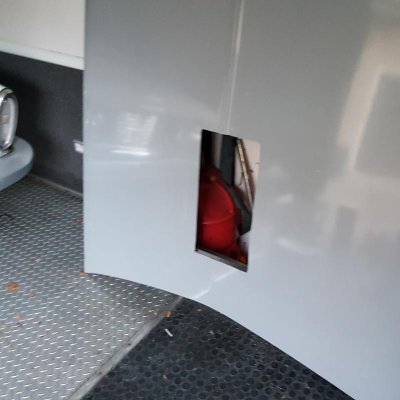
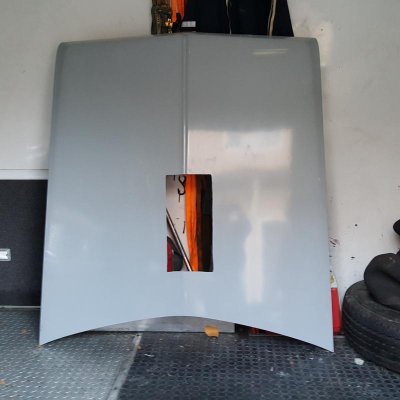
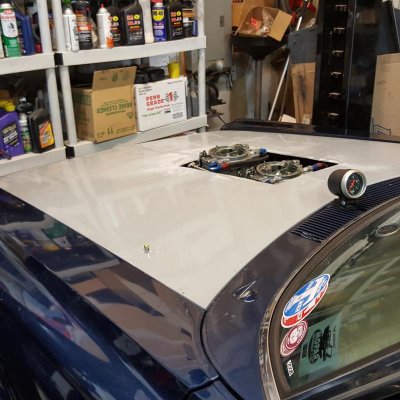
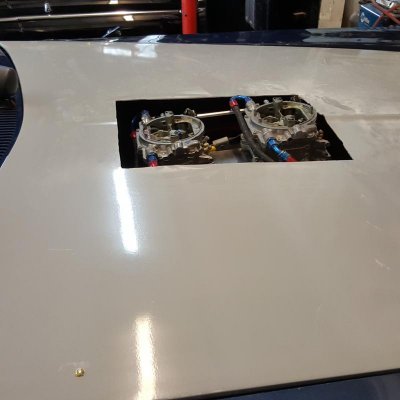
Looking for ideas on what the best way you guys locate your holes in your fiberglass hood to drill your hood pin holes and to cut the opening for your carbs.
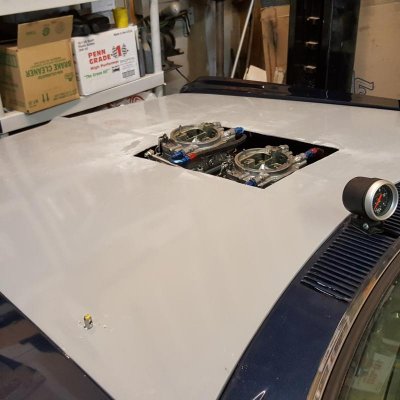
Getting close now.
Hood scoop is being painted at my body shop now. Hood going to him this week after holes are drilled and hood is lined up correctly.
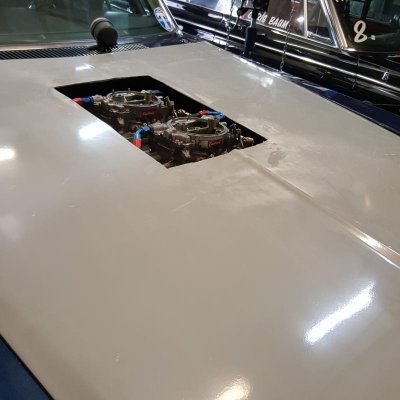
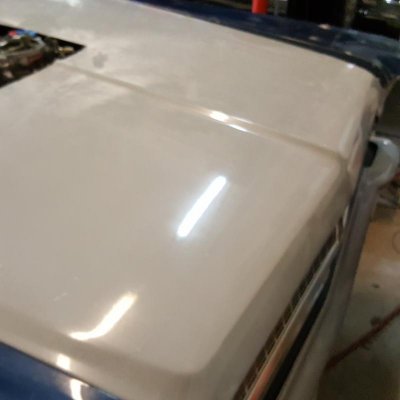
 

Attachments

  • hood pins1.jpg
    hood pins1.jpg
    39.8 KB · Views: 432
  • hood pins2.jpg
    hood pins2.jpg
    44.8 KB · Views: 464
  • hood pins3.jpg
    hood pins3.jpg
    68.6 KB · Views: 441
  • hood pins4.jpg
    hood pins4.jpg
    67.5 KB · Views: 498
Put a dab of white paint on the top of each pin. Then lower the hood straight down. Drill small holes using the white dots as a guide. Use small drill bit at first to ensure you have the right location. Worked great on my 69 Roadrunner.
 
X2. Did the same for my glass deck lid. I used a glob of whiteout on each pin cuz it's pretty thick stuff. I then drilled with a bit just big enough to fit some long #10 machine screws (which I happened to have), then used them to fine tune location before drilling the big holes.
 
I need to open up my carb location 1st. My carbs hit the hood, so I cant even lower the hood down yet.

I marked my 1/4-20 threaded rod for each carb location with yellow paint pen but my opening seems to be over 8" wide for each carb to sit above the hood.

How would you cut the opening for each carb. I have a 5" Milwaukee hole saw but that's not big enough.
 
Piece of cake. Measure across from each fender to the carb studs. Make sure you measure forward from the rear corner (hood /cowl/fender intersection) to the point where you measured 90 degrees across to the carb studs. Carbs are not centered, they will be off to the right side. Take a straight edge and run a line through the carb studs to the rear of the hood/cowl intersection. Remember to subtract for hood gap (aprox 3/16"). Lay that all out and cut two 1/2" holes at the two carb stud intersecting measurements. Then set the hood on and make sure your measurements are good. Carb studs should be centered in the holes. If not make a small adjustments they should be very close. Now you can cut the full size hole/s. Measure the same way for the hood pins, Don't forget to subtract the edge gap form your body measurement before transferring to the hood. I found running the front pins in the front fender tie bar prevents the front of the hood from flexing up. It is a little tricky because you have to tweek the pins forward to follow the contour of the hood. Also the pins will be to short. I made a threaded adapter to lengthen them.
Doug

A13.jpg 0125141346a.jpg 0125141345.jpg
 
Piece of cake. Measure across from each fender to the carb studs. Make sure you measure forward from the rear corner (hood /cowl/fender intersection) to the point where you measured 90 degrees across to the carb studs. Carbs are not centered, they will be off to the right side. Take a straight edge and run a line through the carb studs to the rear of the hood/cowl intersection. Remember to subtract for hood gap (aprox 3/16"). Lay that all out and cut two 1/2" holes at the two carb stud intersecting measurements. Then set the hood on and make sure your measurements are good. Carb studs should be centered in the holes. If not make a small adjustments they should be very close. Now you can cut the full size hole/s. Measure the same way for the hood pins, Don't forget to subtract the edge gap form your body measurement before transferring to the hood. I found running the front pins in the front fender tie bar prevents the front of the hood from flexing up. It is a little tricky because you have to tweek the pins forward to follow the contour of the hood. Also the pins will be to short. I made a threaded adapter to lengthen them.
Doug


Thankyou.
What did you use to cut your carb openings with?
 
I basically did it the same way Doug did but I used tape from the fender to the other side fender and from the cowl to front of the hood. Put the tape where I wanted to put the pins and the tape helped to make the measurements much easier. Then transfered the measurements to the hood. Ron
 
The carb openings were done with a hole saw in the corners to make a nice round edge. Then connect the corners with a cut off wheel.
Doug
 
The carb openings were done with a hole saw in the corners to make a nice round edge. Then connect the corners with a cut off wheel.
Doug


Any pictures of your hood opening for the carbs? Great idea with the rounded edges. I'm ready to cut today.
I have a electric jigsaw that I was thinking of cutting but also I do have a cutoff wheel which I've used before.
 
Any pictures of your hood opening for the carbs? Great idea with the rounded edges. I'm ready to cut today.
I have a electric jigsaw that I was thinking of cutting but also I do have a cutoff wheel which I've used before.

I'll have to take one. Only cut a small hole, maybe 8"x 14". I have this sick though of installing stack injection one day. That way i could still run the hood w/o the scoop.
Doug
 
Any pictures of your hood opening for the carbs? Great idea with the rounded edges. I'm ready to cut today.
I have a electric jigsaw that I was thinking of cutting but also I do have a cutoff wheel which I've used before.

Go to my build "Behind the Green Door" post #48, lots of pics of carb/ air cleaner cut out process I devised...

Gary
 
I'll have to take one. Only cut a small hole, maybe 8"x 14". I have this sick though of installing stack injection one day. That way i could still run the hood w/o the scoop.
Doug


I just got the nerve to cut it out. LOL
Same way, 1/2" hole saw for all the 4 corners, straight edge across and down and nice straight rectangle.
Mines 9" x17". Haven't dropped it down on the car yet to check the fit but it looks real good.
 
Here's the cutout of the hood.
Came out nice, Now have to get it on the car to drill out for the hood pins.
Then off to the body shop for some color. Hood scoop is painted Nostalgia theme.
 

Attachments

  • 65 hood2.jpg
    65 hood2.jpg
    48.9 KB · Views: 205
  • 65 hood1.jpg
    65 hood1.jpg
    47.3 KB · Views: 206
I'm so glad I went with a AAR/Stinger fiberglass hood.
This hood fits like a glove. I opened up the carb openings a little bit more to clear the dual inlet -6 AN Fittings.
Just need to drill the front radiator support for the front hood pins. Not looking good for this weekend. Rain, rain and then snow. I should have been at the paint shop by now. 3 weeks till opening day.
 

Attachments

  • 65 HOOD3.jpg
    65 HOOD3.jpg
    60.7 KB · Views: 190
  • 65 HOOD4.jpg
    65 HOOD4.jpg
    53.9 KB · Views: 189
  • 65 HOOD5.jpg
    65 HOOD5.jpg
    85.5 KB · Views: 181
  • 65 HOOD6.jpg
    65 HOOD6.jpg
    33 KB · Views: 185
  • 65 HOOD7.jpg
    65 HOOD7.jpg
    44.6 KB · Views: 184
Hey Chris!
I'm at the body shop
They want you to pick up the one car and bring the other one.
It came out really nice!
 
***update***
Got the paint put on today and have the new stripes put on,
What do you think?

65 plymouth paint1.jpg 65 plymouth paint2.jpg 65 plymouth paint3.jpg 65 plymouth paint5.jpg 65 plymouth scoop1.jpg 65 plymouth paint11.jpg 65 plymouth paint10.jpg
 
All loaded for Saturday. The finished product. Stripes going on the roof maybe in a month or so. But this will do for now.

65 plymouth scoop2.jpg 65 plymouth scoop3.jpg
 
Here's the finished product. Going out this Saturday. I'm hoping all goes well. All loaded up

65 plymouth finished2.jpg 54 plymouth finished1.jpg
 
Auto Transport Service
Back
Top