• When you click on links to various merchants on this site and make a purchase, this can result in this site earning a commission. Affiliate programs and affiliations include, but are not limited to, the eBay Partner Network.

Modern Fuse Box Replacement

Moparfiend

FBBO Gold Member
FBBO Gold Member
Local time
4:20 AM
Joined
Oct 27, 2017
Messages
2,962
Reaction score
2,981
Location
HOT
Hi I was hesitant to start another thread but this might be one that is focused on updating your old crap *** fuse box.

So my old box might be restorable however I am looking really to upgrade it as I work through a number of electrical issues.

Anyone updated their fuse with blade stayle boxes? If so what did you use and did you like how it worked out?

Thanks for your participation!
 
I used a Painless fuse block, but it was an add, not a replacement for the original block. I'm running the EFI, Classic Air and radio off the new block. Easy installation, helpful instructions.
 
I upgraded my a-body with a painless 7 fuse box, and it bolted in the stock location.
The old box had 6, the lighter wasn't used, and one was for the instrument lights coming from the light switch.
I used an inline fuse for the instrument.
I then ran the 7 circuits directly to where the old ones went, 1 to the ignition, 1 to the heater, radio, etc. I think I have 1 extra. Didn't disturb the existing harness, just removed the wire from the original plastic connector, crimped a new stock style connector on and slid it in the plastic.
Bypassed the ammeter.
Mounted a positive junction block for the ignition start/run, (electronic ignition), efi, and other items.
Put a ground junction block in the engine bay.
Added relays for the headlights.

It was so simple, easy, and inexpensive.
Get a wiring diagram, determine what needs constant power and what needs switched.
 
Last edited:
I upgraded my a-body with a painless 7 fuse box, and it bolted in the stock location.
The old box had 6, the lighter wasn't used, and one was for the instrument lights coming from the light switch.
I used an inline fuse for the instrument.
I then ran the 7 circuits directly to where the old ones went, 1 to the ignition, 1 to the heater, radio, etc. I think I have 1 extra. Didn't disturb the existing harness, just removed the wire from the original plastic connector, crimped a new stock style connector on and slid it in the plastic.
Bypassed the ammeter.
Mounted a positive junction block for the ignition start/run, (electronic ignition), efi, and other items.
Put a ground junction block in the engine bay.
Added relays for the headlights.

It was so simple, easy, and inexpensive.
Get a wiring diagram, determine what needs constant power and what needs switched.
Was it this one?
https://www.summitracing.com/parts/prf-70107/
Oh and how did you separate switched and unswitched power on the block?
 
Yes, except I got 70207, it has the cover and silicone on the back. I thought I was going to use it as an add on in the engine bay, but soon realized it made a perfect replacement to the old box.
Having the cover is nice, it has a list on the inside you can write the circuits on, but not needed.
 
Going to help Mike wire his '69 coronet with a Ron Davis wiring kit. Almost everything on the car is custom.
Has Speedhut Revolution gauges. Pretty cool gauges that have several choices in colors, fonts, and face graphics.
https://www.speedhut.com/about-revolutiongauges.html
Tail lights are sequential LEDs, Sniper EFI and ignition system.

Trying to decide if we should re-use the bulkhead connector for the forward wiring, or close the bulkhead connector hole and try routing the wires in a way that hides them better?
 
If everything is custom screw the bulkhead connector. Plus it's not really in an ideal location in the engine compartment.
I kept mine for simplicity but routed new wires thru it, no connectors. Only factory wiring left is the wiper and something else I can't recall.

I've heard of people who build a channel under the inner fender to hide wiring and keep dirt out. Sometimes on both sides to get to alternator or distributor. Wires can come out thru inner fender or go thru radiator support.
 
I used a ron francis setup and have run wiring under fenders. I had also purchased one of the cheepo harnesses like the one from speedway and was not impressed. When compared to the ron francis setup the wires are not even in the same league. The cheapos use tin,ed copper with really thick insulator to make them look the proper gauge were as the Ron Francis kit uses real copper wires for everything and also has built in relays for fuel pump and power windows and fans.
 
I'd consider the painless or Ron Francis kits. For what it's worth I read quite a few magazines and they seem to always use the painless solution.
When the time and money is available I'll go with painless or Ron Francis kits.
 
I'd consider the painless or Ron Francis kits. For what it's worth I read quite a few magazines and they seem to always use the painless solution.
When the time and money is available I'll go with painless or Ron Francis kits.

My big issue with Painless is they play the Mopar premium game like so many other aftermarket manufacturers. Ron francis charges basically the same amount for the chevy, ford and Mopar kits. Painless sells you a GM kit with a few special Mopar connectors and colored wires then charges twice the cost of their standard universal 21 circuit kit.
 
51031FC4-0AAF-4278-B365-1943388F1C90.jpeg
The one from YO is on the shelf. This from West Marine was a marine-grade add on. Now supporting efi, ac, pwr windows, Alpine, and a host of other electronics. Valentine One, Navigation, dash cam and on.
 
My big issue with Painless is they play the Mopar premium game like so many other aftermarket manufacturers. Ron francis charges basically the same amount for the chevy, ford and Mopar kits. Painless sells you a GM kit with a few special Mopar connectors and colored wires then charges twice the cost of their standard universal 21 circuit kit.
Thanks. I agree in that I avoid the mopar tax whenever I can.
 
If interested, these are my notes. I may have changed a thing or two since.

Original fuse box has 5 fuses:
1) Dash lights
2) To light switch for interior lights and to hazard flasher/stop light switch
3) Lighter
4) Heater
5) Radio

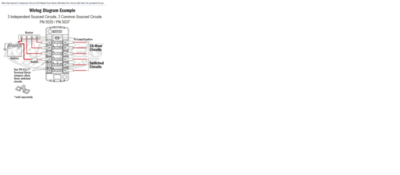
Bought Painless 70207 fuse block, 7 circuits (3 Constant, 4 Ignition), 20amp fuses, circuit breaker included.

Removed old fuse box, mounted Painless in same spot, fits perfect.

Ammeter/Alternator Charge Wire
1) Ammeter and wiring with welded splice eliminated entirely by just bypassing it, left in place within the dash harness.
2) New Denso 60 amp Alternator.
3) New Alternator charge wire to Starter Relay – 8-gauge wire with a 6 inch 12-gauge fusible link.
4) New Sense wire with inline fuse from Alternator to Starter Relay.

Headlight Relay Kit
1) Bought from a FABO member.
2) Relays and fuses can be mounted anywhere, under the battery, radiator support.
3) 2 power wires can be routed across the firewall to the Alternator stud, or in front of the radiator support with the headlight harness.
4) Eliminates power going directly to headlight switch then back out to headlights.

Positive Junction Block
1) Connected the ‘Start’ wire (Brown).
2) Connected the ‘Run’ wire (Blue Tracer).
3) New wire to positive on coil.
4) New wire to a voltmeter.
5) Tach power.

Painless Fuse Box
3 Constant

1) Wire directly to light switch (B1, replaces BLK-TR). Light Switch was not originally fused.
2) Wire directly to ignition switch (replaces RED wire). Ignition switch was not originally fused.
3) Wire to pink/pink splice where fuse box was (to light switch for interior lights and to hazard flasher/stop light switch).

4 Ignition
1) Wire directly to heater switch (BLACK-TR).
2) Wire directly to new alternator.
3) Wire directly to aftermarket radio.
4) Extra.

That leaves 3 wires where the old fuse box was:
1) BLACK – into the fuse box – comes from the ignition, goes to a welded splice, then out to the Directional Flasher, Gauges, and fuse box. It is an Ignition power source, so I connected it to the Painless Pink wire.
2) TAN – into the fuse box, it is the feed from the Light Switch to adjust the Instrument Lights.
3) ORANGE – out from fuse box, it is the power to the Instrument Lights
4) TAN and ORANGE – inline fuse holder with a 10amp, spliced them together, zip tied to the side of the Painless.

Notes
1) Distributor power from positive on coil.
2) Original ORANGE wire for radio lights used for lights on Tach/Accessory Gauges.
3) Aftermarket radio came with fused constant power from battery.
4) When running wires directly to original plastic connectors, used terminals that fit and lock in.
5) Original harness runs on driver side inner fender, removed wiring from engine on passenger side and routed on inner fender. Factory holes already there, used factory harness clips.
6) Use harness tape, connectors, heat shrink, etc.
7) New instrument circuit boards and lights.
8) Negative hub mounted on firewall next to battery.
9) Replaced headlights with H4 and new housings.
10) Replaced interior bulbs with LEDs.
11) Replaced taillight and reverse bulbs with ones for a Honda, more $ but last decades.
12) Replaced both flashers with the NAPA solid state one, it’s like $10 but well worth it.
13) See Daniel Stern Lighting for bulb and flasher info.
 
Last edited:
I used an EZ wire 21 ckt on my wife's car, it was very easy and inexpensive . Ive been chasing a gremilin for a while though, when in accessory her fuel pump and electric fan would run, thought I had something on the switch backwards but everything was right. Checked for back feeds ect and no luck. I finally called ez wire asking for a diagram of their buss layout and was asked for what reason. I told him the issue and he told me that the govt requires elect fuel pumps to be on the accesory buss which also supplies the the electric fan ckt.
Last weekend I pulled the panel off it's base and verified that was the case. Ended up tapping off of the signal ckt to control the relays...pita!!! Good isn't cheap and cheap isn't good...
 
Last edited:
I will be going through the same journey shortly. Ditching the bulkhead and going with a painless set up possibly.
 
I bought an upgraded dash wiring harness from M&H for my 69 El Camino. It's the Classic Auto Fuse Series dash harness and includes ATO (aka bladed) fuses. All the wiring looks oem but the fuse panel uses ATO/bladed fuses and has more fused and unfused circuits for modern accessories.

From M&H's website:
ATO Style / New Style Fuse Boxes?

All of our 1958-1978 dash harnesses include fuse boxes that are set up to use Buss style (aka Glass type) fuses, as original. Our Classic Auto Fuse Series Dash Harnesses feature ATO style fuse boxes. Most 1979 and up vehicles used ATO style fuse boxes, which we include in most cases.

FYI, for some unknown reason M&H doesn't sell Mopar harnesses directly. So, you have to buy from YearOne.
 
Thanks guys for your inputs!
 
Auto Transport Service
Back
Top