• When you click on links to various merchants on this site and make a purchase, this can result in this site earning a commission. Affiliate programs and affiliations include, but are not limited to, the eBay Partner Network.

'70 RR Vert Custom Clone

jpilone

Active Member
Local time
12:24 PM
Joined
May 23, 2011
Messages
39
Reaction score
24
Location
Boca Raton, FL
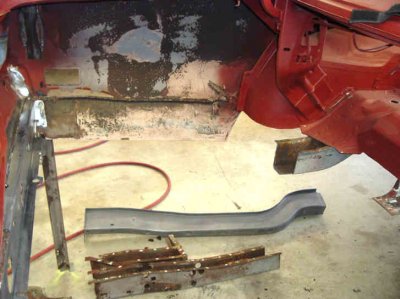
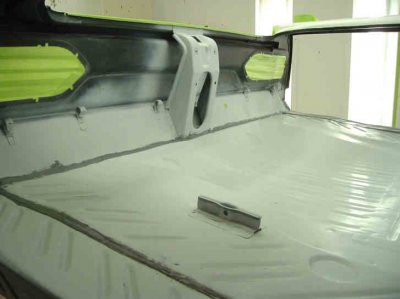
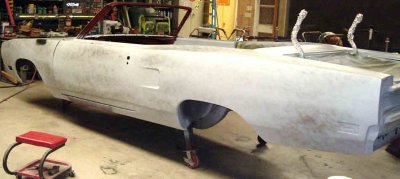
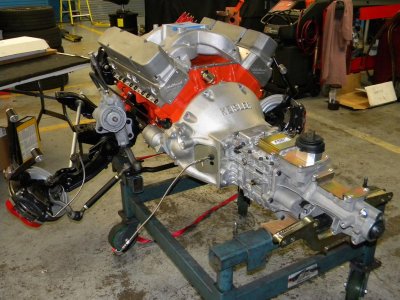
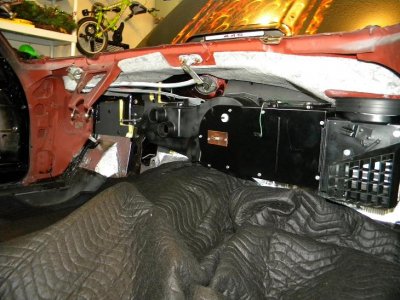
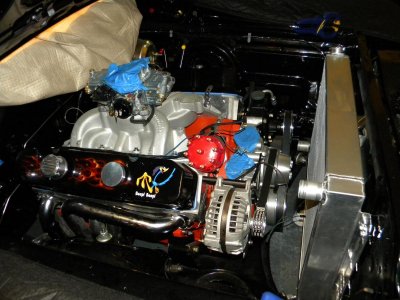
I've posted these on many other sites, but I'll start fresh here. I've owned this car since February of 1999. It had a non original 318/904/8.25 combo in it, but was a good 20/20 car. Originally burnt orange with a burnt orange/white interior. I drove it for two years daily after getting it, and went through two hand-me-down 318's in the process. I had a good engine in it for the last year of driving, and ended up removing it to put it in a 4 door '69 dart I had, which was a better daily since I had a new family and the dart had workign AC. What a bonehead move that was!! The car hasn't been on the road since. I did have a "teardown party" in January of 2006 when a bunch of friends and I bagged and tagged the car.
 
After taking the car apart and getting it media blasted we found a whole lot more rust than anticipated. What started with a "Let's put quarters on it and call it a day" turned into quarters, rear frame rails, trunk floor and extensions, and little patch repairs here and there. My good friend of 15 years Richard Romanelli who has an excellent reputation here in South Florida did all the fab/body/paint work.
 

Attachments

  • 70RR_016.jpg
    70RR_016.jpg
    31 KB · Views: 331
  • TRUNK.jpg
    TRUNK.jpg
    18.7 KB · Views: 340
  • QUARTER_LINEX.jpg
    QUARTER_LINEX.jpg
    94.8 KB · Views: 308
It took many months and many dollars to get the body to this condition, but I've had the car a long time, and building what I want, full custom, was my dream. I couldn't do this to a #'s matching car, so I figured what the hell, it was only money (yeah right! That was back when I was banking it..)
 

Attachments

  • 1_049.jpg
    1_049.jpg
    30.7 KB · Views: 326
At first, I decided I wanted the car to be Moulin Rouge (FM3), but my friends, painter included, had an intervention.. Richard actually said "Let's paint it black, it would look so sinister"

And from that point, I figured if we were going that far, it needed to be custom paint. He was just dabbling in the "true fire" airbrushing and I said we should use my car as the second test mule (he painted my harley already, came out awesome). Everything in the paint started with "You know what'd be cool?" So with that in mind, I said "You know what'd be cool? What if we do the stripes on the hood in fire instead of flat black" and he said "cool".
 

Attachments

  • D2X_0672.jpg
    D2X_0672.jpg
    143.2 KB · Views: 332
Then I said "You know what'd be cool? What if we did the dust trails in fire and painted the bird on, but more like the real cartoon character" and he said "cool"

So I had the box from the GMP diecast RR near me, and showed him the bird on it, and this is where that came from, Richard added the helmet..
 
Then Richard suggested for the rear stripe, that we paint that on, also in fire, but he wanted to do a desert scene in the middle of it, I told him to do whatever he wants, that I trust him. And boy did it come out awesome! He painted the bird in there, and added some sass to him!
 

Attachments

  • D2X_0670.jpg
    D2X_0670.jpg
    112.8 KB · Views: 332
  • D2X_0666.jpg
    D2X_0666.jpg
    128.4 KB · Views: 379
So after that, I suggested that the car needs a super slick gloss with all this airbrushing. So 6 coats of clear followed by wet sanding down to 3000 grit and buffing to perfection, you now have a mirror
 

Attachments

  • D2X_0677.jpg
    D2X_0677.jpg
    101.4 KB · Views: 328
So that takes us up to January of 2007, the car sat for a while at his shop while he was working on other projects and I was working on other assemblies and such. In July of '07 I got great news that I had been laid off from my nicely paying job, so in a matter of a few days, we got the suspension and all under the car to make it a roller. front lower control arms were boxed in, tubular upper arms, poly bushings, and edelbrock IAS shocks all around (no swaybars yet, but they are going to be on the car front and rear for sure). I had already purchased a wilwood disc kit for the rear, and AR brackets and wilwood calipers for the front, which use 73-76 A body spindles and late 70's B body 11.75" rotors. Got the car home and resting comfortably in my garage while I figure my life out
 

Attachments

  • IMG_0911.jpg
    IMG_0911.jpg
    20.9 KB · Views: 320
So fast forward nearly 3 years to 2010, I got my *** in gear after going through unemployment, divorce, and depression. I found a new career in late 2007 as a Service Writer for a Chevy Dealer, been here ever since, loving it. I was able to convince my boss to let me bring the car to work and use an empty stall to get the drivetrain in the car.. Used a platform that's used for trans removal on Venture van's as a dolly for my 440 with Keisler TKO 5 speed behind it.
 

Attachments

  • IMG_0905.jpg
    IMG_0905.jpg
    161 KB · Views: 334
Richard painted my indy cyl head logo-less alum. valve covers for me, anything normal wouldn't suit this car... Got the engine in with minimal issues, tidied up my front and rear brakes as well (all new stainless lines)
 

Attachments

  • art 011.jpg
    art 011.jpg
    73.2 KB · Views: 316
  • 6067343-DSCN1386.jpg
    6067343-DSCN1386.jpg
    115.5 KB · Views: 323
  • IMG_0832.jpg
    IMG_0832.jpg
    133.1 KB · Views: 310
  • IMG_1015.jpg
    IMG_1015.jpg
    112.1 KB · Views: 313
In October last year, had to get the car out of my work, so it came home to my new home (moved out of divorced home, living with girlfriend now), smaller garage, but able to make due. I now try to do as much as I can, but it's hard with kids and work. I try to spend at least an hour a week on it.

I'll keep updating now and then..
 

Attachments

  • DSCN2071.JPG
    DSCN2071.JPG
    94.2 KB · Views: 318
  • housings.JPG
    housings.JPG
    52.4 KB · Views: 373
Here's my mocking up of the radiator, went with a 26" griffin universal aluminum, need to do some trim work to make it fit, right now it's too far from the core and my OEM Chevy HHR fan doesn't fit, so a cardboard template to fit the humps in the core support will transfer to the bracket on the rad. and I will cut away with a dremel to make it fit flush on the core support. My radiator hoses are a street rod style setup, and Richard is going to paint the tubes and maybe some graphics on them, and I'm using a single-4bbl 6-pak style air cleaner, of which he will be doing graphics on too, which I think we have a design down already..
 

Attachments

  • hose_kit.jpg
    hose_kit.jpg
    113.6 KB · Views: 300
  • DSCN2072.jpg
    DSCN2072.jpg
    143.9 KB · Views: 276
that thing looks real nice so far also looks like its costing a fortune as well. keep up the good work (or the paying for the good work, lol)
 
I've done everything myself except for the body/paint, but yeah, it's been an expensive project. I could have bought a new challenger SRT8 and a Challenger R/T together for what I've got invested in this car since I took it off the road in 2001.

However, I'm not building it to sell it, I'm building it because it's my dream car and I'm going to enjoy the hell out of it!!
 
Looking good!

Very nice, hang in there brother, its getting close now! enjoy that thing!:ufo:
 
Auto Transport Service
Back
Top