• When you click on links to various merchants on this site and make a purchase, this can result in this site earning a commission. Affiliate programs and affiliations include, but are not limited to, the eBay Partner Network.

Anyone use these 73-4 RR/SAT reproduction bumper fillers?

QuickBpBp

FBBO Gold Member
FBBO Gold Member
Local time
10:05 PM
Joined
Oct 14, 2010
Messages
17,214
Reaction score
58,373
Location
SE PA
https://www.ebay.com/itm/1973-1974-Plymouth-B-body-REAR-BUMPER-FILLER-SET-Satellite-Road-Runner-GTX/143440718572?fits=Year:1973|Model:Road+Runner&hash=item2165bbaaec:g:0rwAAOSw9A5ctK2e

Looking for feedback on these. I know they have been out for awhile now. I could get by with just the center as I have good used ends and 1 Nos end but they would match easily if I just bought the whole set. They are expensive @ $295 plus $13 shipping plus $19 Tax... So if anyone can give me a clue as to how they look and fit it's greatly appreciated...
 
I believe the correct color is argent.

You would have to paint those anyway.
 
I believe the correct color is argent.

You would have to paint those anyway.

Thanks, I believe my Nos one is just molded grey like these but with-out holding those in my hand I can't tell whether it's correct color or not. Most important is the quality and whether they fit...
 
my originals seem to be molded in dark gray almost black, but they are definitely a shade of silver or metallic gray on the exterior surface.
 
These are Nos A-body so I will have no problem with the color. I know what color is molded from the factory. It's the expense if they don't fit properly..

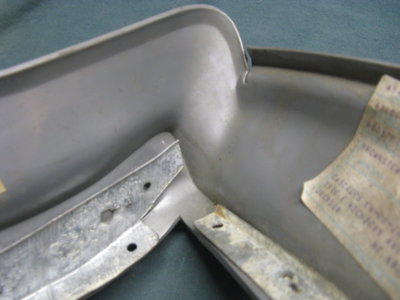
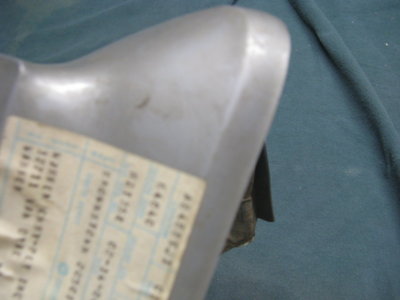
IMG_2071.JPG IMG_2072.JPG
 
...and there is a slight texture to them.
 
...and there is a slight texture to them.
The reproductions have a texture? Or are you saying the ones you have a texture? If the ones you have a texture it is only because the surface is breaking down they are smooth both sides from factory just like the ones I posted......
 
perhaps it is the paint
 
Okay boys and girls, here is the low down on these reproductions.

The center section: I originally used the center section with some original end pieces I had, and was ok for a while, however, the issue is the reproductions don't have the metal strip through them like my original did and the section that goes over the bumper isn't quite the right width, so the new ones tend to sag and pull away from the bumper.

The end pieces: Not bad for reproductions, mine came with the metal braces and they fit nice.

I tried to paint both and no go, even with adhesion promoter any crease when installing would cause the paint to crack, so I installed them with original color.

Here are some pictures of what I did to get the center section to not sag. I used an aluminum strip on the underside of the bumper, with some really good adhesive. Once in place I used the same adhesive to glue on the center section, I had to remove the rubber part that normally would go under the bumper. So far, its held no problem. The end pieces have no issues either. Unfortunately, the colors don't exactly match, but I don't think it looks too bad. The only other issue is the two parts don't mesh real well, so the end pieces don't lay down properly on to the center section.

20190530_160144.jpg


20190531_192628.jpg

20190531_192655.jpg
 
Okay boys and girls, here is the low down on these reproductions.

The center section: I originally used the center section with some original end pieces I had, and was ok for a while, however, the issue is the reproductions don't have the metal strip through them like my original did and the section that goes over the bumper isn't quite the right width, so the new ones tend to sag and pull away from the bumper.

The end pieces: Not bad for reproductions, mine came with the metal braces and they fit nice.

I tried to paint both and no go, even with adhesion promoter any crease when installing would cause the paint to crack, so I installed them with original color.

Here are some pictures of what I did to get the center section to not sag. I used an aluminum strip on the underside of the bumper, with some really good adhesive. Once in place I used the same adhesive to glue on the center section, I had to remove the rubber part that normally would go under the bumper. So far, its held no problem. The end pieces have no issues either. Unfortunately, the colors don't exactly match, but I don't think it looks too bad. The only other issue is the two parts don't mesh real well, so the end pieces don't lay down properly on to the center section.

View attachment 905500

View attachment 905499
View attachment 905501
Thanks. This is exactly the feedback I was looking for. I like what you did to give it some rigidity. I think I may try to do what you did except have the aluminum piece made on a metal brake so I can install as it's intended over the bumpers edge and glue it on that way. I hate having to cut it knowing it's $$$ for the kit. Thanks again for taking the time for your detailed experienced.
 
Auto Transport Service
Back
Top