• When you click on links to various merchants on this site and make a purchase, this can result in this site earning a commission. Affiliate programs and affiliations include, but are not limited to, the eBay Partner Network.

Degree an installed/unknown camshaft

what did b3 say about cup type adjusters (since you do not have pushrods yet)
let's you use a longer pushrod - hint hnt
 
what did b3 say about cup type adjusters (since you do not have pushrods yet)
let's you use a longer pushrod - hint hnt

Yes, that is true and i am aware of that...but...
How about oiling?
The hydraulic lifters have a hole in the center, but i don't know if there is oil flow coming from there, in that case i could use a push rod with oiling hole and replace the adjusters with a cup type.
That will improve the geometry more, but as of now i have gained 0.010" lift over the specs of the camshaft.
I will be gaining more lift by doing so, and i am not sure if i should go for more lift.
Yes, added power i guess but what about idle and vacuum, thats where i want to gain some more.
 
cup type lifters and hollow pushrods work for me
additional lift not an issue
do whatever b3 says is best
 
He never mentioned i should change over to cup type, besides that not knowing these lifters i think i will leave it as is.
Get the right size push rods and finalize the rebuild and drop that monster back in the car.
Still have heaps of work to do before it is all done.
By the time i am finished it is becoming nice weather again so need to get ready for action. :)
 
Well, i had set my adjustable push rod at 9.700", which is an extra 0.300" to compensate the height difference between my hydr. lifter and the solid one.
I checked both valves with the solid lifter and found below:

Intake: 0.578" lift.
Piston-to valve clearance: 0.145" @ 10* ATDC

Exhaust: 0.580" lift.
Piston-to-valve clearance: 0.130" @ 10* BTDC

Cam specs say 0.572/0.576" so still have a slight increase in lift.
I had played around with lengthen and shorten the push rod 1 turn in each direction but in both cases i actually lost lift...maybe 0.005" each direction.

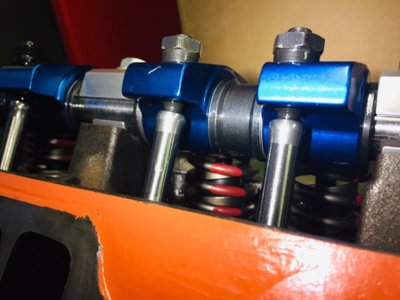
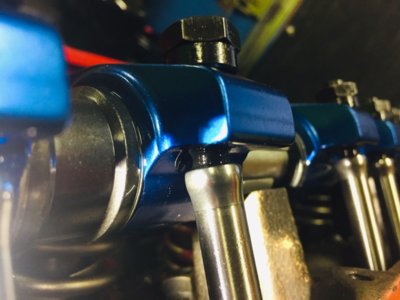
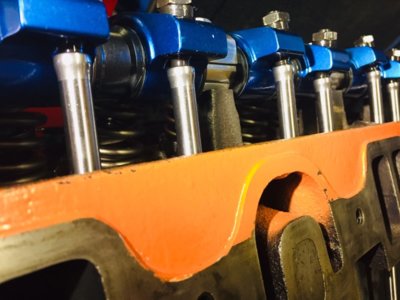
I had all the adjusters set 0.300" below the rocker, showing around 1 thread.
The push rod length of 9.400" is what sits perfect on most valves, some need a 1/4 turn more or less adjustment.
Adjustable rod cup depth was 0.155", so 9,400=0.155" is 9,245" effective length.
I will add 0.050" pre-load which gives me a total effective length of 9,295", or as Smith Brothers goes by increments of 0.050" i will need a 9,300" effective length push rod.

Did i miss out/forgot on anything here?
 
Take a lesson folks
Weitse gets it
"I had played around with lengthen and shorten the push rod 1 turn in each direction but in both cases i actually lost lift...maybe 0.005" each direction."
that's what happens when you have your geometry correct
 
Finally i got something done right! :rofl:

Now just hope it runs as good as it looks!
 
Hey guys,

Long time, no update...have had not much time with Christmass etc. but in the mean time received my new push rods from Smith Brothers.
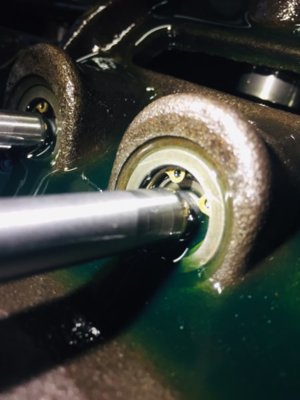
Also got myself an oil priming rod to check the oil feed and get oil back in the lifters.
Once all lifters were found stiff, installed the push rods and torqued down the rocker shafts and set the pre load to 0.050" (1-1/4 turn)
Cranked engine over by hand and checked on cylinder #1 the PV clearance which was still found same around 0.130".
Also checked and found both camshaft locations that provide oil to the rockers and found them...plenty oil coming up.
After i had to redo everything to remove the checking springs and install the normal springs and valve seals.
Rotated the engine and checked for any push rod hitting the cylinder head but they all have enough clearance.
I applied 30lb/ft torque on the adjustment screws and 35lb/ft on the rocker shaft hold down bolts.
I was not sure about the adjustment screws but figured 30 should be near enough.
Now not sure for anything else to check right now.
If that's it i will continue and close the valley pan with new cover and intake.
I got myself a new intake from Mancini racing, it is not an Edelbrock but like a copy of it.
Was on discount and since my intake is all cut up i rather install a decent one.

Ony comments or suggestions of what else to check before i close the valley?
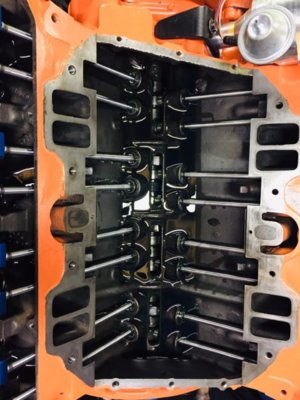
IMG_4636.jpg IMG_4637.jpg IMG_4638.jpg IMG_4639.jpg IMG_4640.jpg
 
you spun the oil pump over with a hex shaft and a drill?
looking good W
those lifters with the snap rings are the good ones
remind me where you got them
 
Yes, the battery drill hard a hard time with the 20W50 being around 10* C.
These lifters were in the engine before, not sure where they came from, i guess they were bought with the camshaft so they could be old type supply from Hughes Engines.
Now Hughes selling Hylift Johnson lifters, maybe a previous generation made by them, they seemed well build and a decent retainer is used.
I tried and seemed like there is beyond 0.150" of adjustment on these lifters.

I dismantled one lifter before to see the internals but was looking good and clean, and the cam wear is normal pattern so i don't want to replace them.
 
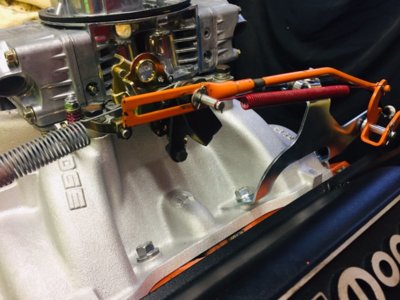
I've got the engine closed up again, also test fitted the new manifold, the new raised, throttle cable bracket and springs for throttle and kick down lever...start to look better and better again.
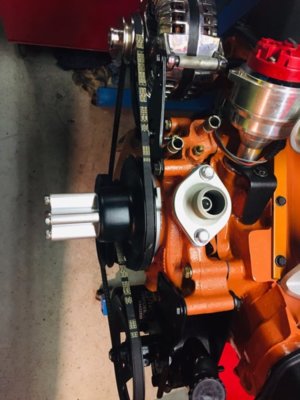
Shot blasted and painted all the alternator and power steering pulley's and brackets, got a new power steering pump which i had lying around already for some time. (old one i will re-seal and paint and keep as as a spare one)

And on as the cherry on the cake ordered a TTI exhaust.
Gotta go work for 3 weeks tomorrow, hopefully when i get back home the weather is better and i can keep the car outside and lower the engine back in the car.
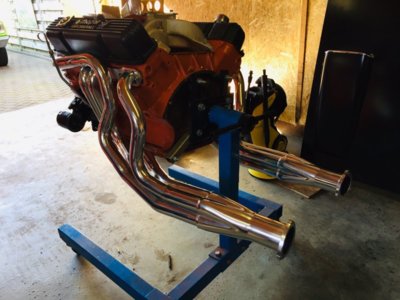
I had a trial on how the new TTI headers will fit in the engine bay prior to lowering the engine, seems like this is not going to be a nice job...
I left the headers in the bubble wrap they came in and will use that as a protective barrier during installation, these are the polished ceramic coated version so i don't want to screw that up.

I am hoping this long story will turn out in a trouble free engine.
For sure i did learn a **** load of stuff thanks to you all in helping me out, cheers for that!

IMG_4707.jpg IMG_4712.jpg
 
Little update, prepared the engine for installation and test fitted the headers.
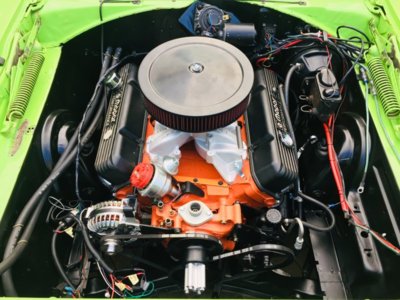
Dropped her back in place and start connecting stuff back.
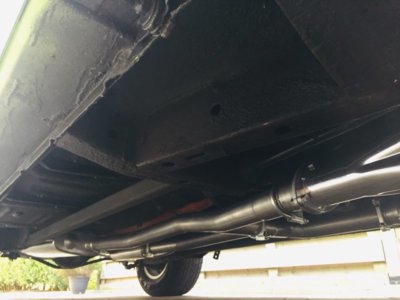
Also installed the 2,5" TTI exhaust system, TTI is good stuff with top fitment.
Still need to re-route the new starter wiring and transmission oil cooler lines to keep them away from the headers.
Hopefully i can fire her up in a few days!

IMG_5181.jpg IMG_5222.jpg IMG_5217.jpg
 
Can't wait
put a double spring on that throttle return- one goes inside the other broken springs can be deadly
double check your timing so it fires on the first few cranks then bring the revs up to break in the cam
no idling for the first 20 min
change the oil and inspect the filter
then drive easy to warm it up and 10 increasingly mor power blasts up to some illegal speed and let it coast back down to suck some oil past the rings
then good to go
cheers
 
Yeah i changed that throttle spring on the picture for a doubler....i had it before the throttle got stuck :eek:

Cam is not new, so no break-in required.
Although i will have to check the valve train components after a little running to check all is ok.
Yesterday evening i realized i forgot to weld the bung for the O2 sensor on the exhaust which i had planned to do before installing the exhaust...:BangHead:
So thats first job for today.
 
Ok, i came that far today i fired her up!
Because i installed the distributor 180* out at first it backfired but recognized straight away there was something not right with the ignition.
After sorting that out it fired right up, checked vacuum and ignition advance and sorted that out.
Now it's at 16* advance, idle mixture screws around 1 turn and vacuum at 7Hg, which is not much but anyway it works.
Every time you turn the key it starts straight away with no need of pumping gas or whatsoever, only issue i noticed is that it smokes from the exhaust, specially after revving a bit (not high high) and let the throttle drop.
O2 sensor is showing 12.0-13.0 at idle, i know it is not really reliable at idle but i did notice changes made on the idle mixture screws.
I am afraid now i might have a leak on the intake manifold that is entering oil to the intake.
I had removed the PCV valve hose and checked if there was still suction on the crankcase breather but i did not notice any vacuum being pulled.
Where else could i search, nothing else has changed on the block itself, heads were not removed, lower block never stripped apart.
Either intake manifold, or valve stem seals? Seals are new though for what it's worth.
 
Just a thought, the fuel in the car is at least six months old as well.
But that might just cause it to run bad if the fuel is no good right?
Should not cause excessive smoking..
 
Went for a test drive today, that nervous edge has gone now with the cam back at basics, but still going strong if you give it a bit.
Smoking exhaust has not returned so i guess it was just from all greasy **** that had come loose, also inside the exhaust was still left overs of cutting oil which might have burnt up.
I did check the crankcase pressure/vacuum by blocking it off while idling and checked on the gauge, it is slowly building up pressure so no vacuum leak at the manifold.
Now i have to suffer a bit as the engine and headers stink really bad, the engine enamel paint is curing and releasing all gasses, also the ceramic coated headers stink a bit.

I had spoken to A/JFormS about the tune for the carb, i have drilled a 1/16" hole in each primary blade to allow some more air in after testing this with an additional bypass on a vacuum port to allow more air in and see what it does.
Rpm increased by allowing more air in through the bypass till a certain point so it did need some more air.
I did play a bit with the curb idle screw and ignition initial advance to get the initial advance down as it was near 30* after playing around.
For some reason it really likes a lot of initial timing, i did change the distributor springs to something heavier to have an all-in at 3500 rpm.
Think tomorrow i will open the rocker covers and check over all the fasteners of the valve train, just in case.
I did notice there is a little bit more valve train noise, no hard ticking and sounds like all create the same noise so i am not too concerned but it makes me wonder if i should add a bit more preload?
Now i am running 0.040 or 0.050", can remember but i think i stayed with 1 full turn on the adjuster.
 
Auto Transport Service
Back
Top