• When you click on links to various merchants on this site and make a purchase, this can result in this site earning a commission. Affiliate programs and affiliations include, but are not limited to, the eBay Partner Network.

Unknown part for 69 Dodge Super Bee

Eddie Collett

New Member
Local time
9:19 PM
Joined
Jun 24, 2011
Messages
4
Reaction score
0
Location
Newnan, Georgia
:hello2: Hi, I have been working on the restoration of my 1969 2 door hardtop Super Bee for a little over three years. Can someone take a look at the attached pictures and tell me where they go, what they are for and what they are called? I thought they went on the back quarter windows but I can not figure out how they attach if that is where they actually go. Thanks! Eddie
 

Attachments

  • pic1.jpg
    pic1.jpg
    57.2 KB · Views: 600
  • pic2.jpg
    pic2.jpg
    39.1 KB · Views: 579
Those parts clip/slide on top your metal interior door frame (under the screw on upper metal door panel), in the very back of your quarter window area

Some sort of splash/ dust shield
 
Yes...dont confuse him with anything about the doors. THey do go at the very rear lower corner of the quarter window opening...inside....
 
Yes they are dust or water splash guards that go on the inside of your rear quarter windows. They do not attach to the doors but to the inside frame of your window. If putting your car back together, it would be a good idea to get yourself a factory service manual for your year of car. Check ebay for the manual, they are on there quite often.
 
Thanks for all the help guys. Hopefully I can figure this out now. I thought I remembered that it came from the back quarter windows, but now that I know it was off the back quarter frame that should help alot. I do have a couple of the 69 coronet/dart/charger service manuals, but I still see no mention of these shields. I will look it again tonight before I go to bed. Hopefully I will get a chance tomorrow to see if I can figure this out now. I will take a pic of my car and put it on here when I get a chance. I am very proud of the work I have done on it. A freind of mine also helped with me on my project. I could have never done it without him. I have alot of time and effort in my car and it is looking pretty good. Got the interior ordered for it a couple weeks ago. The body is completed and the engine is too. All I have left is the outside trim, grill and tail panel work. I also have the passenger window and driver window to install. All glass in my car used to be clear but I bought all new tinted glass for it. It looks great with the B5 blue original color with white bumble bee stripe. It has a bench seat with the four speed shifter. The engine is a 383 which was blown up with the four speed transmission that now is completely rebuilt. It was in the trunk when I bought the car. Ramcharger hood with all the air grabber parts underneath are on the car too. All that is rebuilt. The car was a mess when I started this project, but I am very pleased how it is coming along. I will take some pics and post them on here soon. Thanks again everyone for your input! If anyone has a pic of these shields and where they go, please put them on here for me. Pictures are worth a thousand words as they always say. :jerk:
 
Figured it out!

Thanks for everyone's help. I figured out where they go. I had to remove the inside window quarter panel but they are installed now. It was simple once you told me where it was. Thanks again! Here are the pics I said I would post of my 69 Super Bee. I am proud of my car. My friend and I put tons of work into it. Enjoy!!
 

Attachments

  • IMG_5943.jpg
    IMG_5943.jpg
    133.4 KB · Views: 462
  • IMG_5942.jpg
    IMG_5942.jpg
    140.8 KB · Views: 461
  • IMG_5941.jpg
    IMG_5941.jpg
    144.8 KB · Views: 469
  • IMG_5940.jpg
    IMG_5940.jpg
    123.1 KB · Views: 460
  • IMG_5939.jpg
    IMG_5939.jpg
    141.8 KB · Views: 501
  • IMG_5944.jpg
    IMG_5944.jpg
    155.9 KB · Views: 473
  • IMG_5945.jpg
    IMG_5945.jpg
    132.1 KB · Views: 507
  • IMG_5946.jpg
    IMG_5946.jpg
    139.4 KB · Views: 564
  • IMG_5947.jpg
    IMG_5947.jpg
    158.9 KB · Views: 469
That is the first part that came to my mind before I even opened the thread. Seems to come up a lot especially if the car is purchased in pieces.

Eddie: Great looking bee. Is it restored correctly to the tag or is it what you wanted? Just curious. Looks fantastic!
KID
 
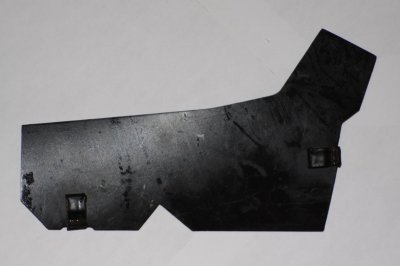
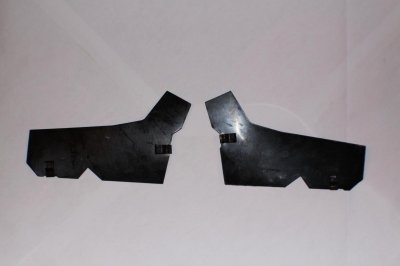
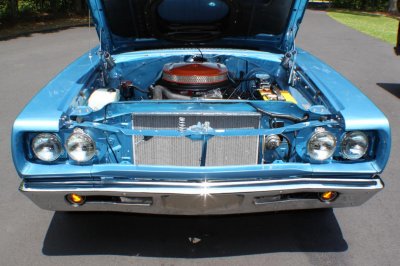
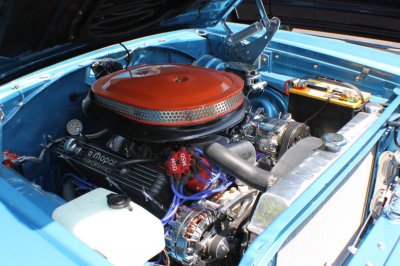
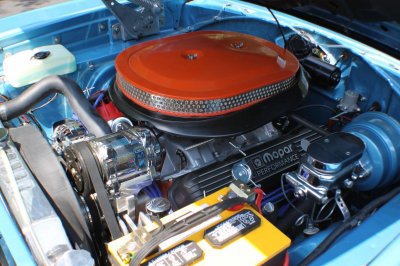
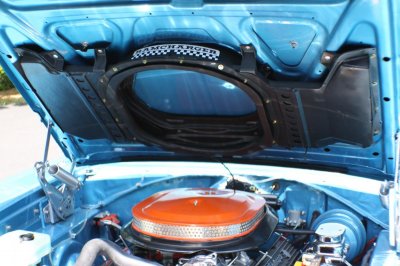
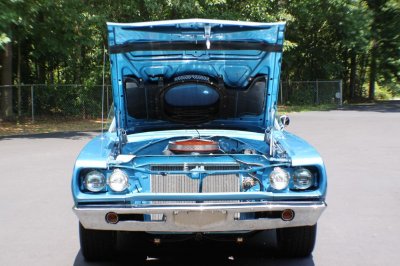
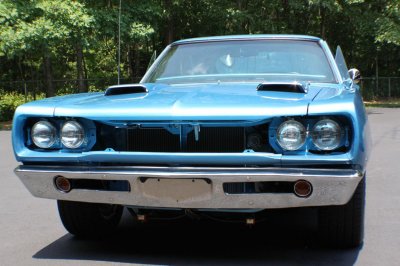
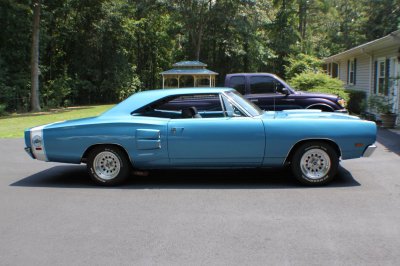
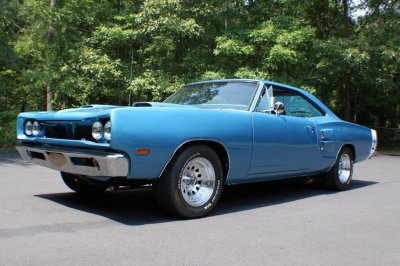
Hi Kid, Thanks for the compliment. When I bought the car, it was a complete rust bucket. I even thought I had taken on too big of a job once I saw all the hidden eaten metal. I had to replace both rear quarters, the trunk pans, the trunk extensions and the rear drivers frame rail. Both wheel wells in the back had to be cut and replacement metal was used. Inside behind the quarter, the heavy metal quarter rockers had to also be rebuilt onto the steel frame of the car. The whole back plate where the bumper goes through also had to be replaced. We had to brace the car in many places to keep the car together. There was also alot of metal behind the tail panel, around the lights, that had to be cut out and replaced. It was alot of work and alot of money but yes... it was mostly restored to the tag but I added alot of extras onto the car for myself. I love my 69 Bee and it is like a part of me now after going through all this. I am no pro. This is my first restore job. I now respect anyone that does this for a living. The only items that are not on the tag are the optional side scoops, interior color will be B5 blue with white trim upholstery instead of the B7 original blue, front disk brakes, power steering and AC is added onto the car. I have already stripped the original bench seats down to metal and blasted, then painted them. I found a black 68 road runner bench seat and put it in the car till the original bench seats are completed next month. The engine and transmission was in the trunk when I bought the car. The engine is the 383 that came with the car bored 30 thousand over and has 440 closed chamber heads with 1.6 roller rockers, edelbrock carburetor, edelbrock aluminum intake, aluminum water pump housing with aluminum water pump. I also installed MSD electronics instead of the old electronic system. If you look closely at the engine pics... you will see a march performance serpentine system instead of the old belt system. Chrome high output alternator (summit racing), chrome power steering pump (march performance), chrome AC compressor (march performance) and an aluminum 26 inch 3 layer radiator. The car was completely taken apart and put back together by my friend and I. We used all stainless steel bolts. I even made a bracket and put stainless steel horns back on the car which were made by ongaro. The two horns sound like the originals. One is a lo and the other a hi. Sounds good. I did put a grant steering wheel on it too. If you look at the firewall, you will notice it is smooth. We took all the wrinkles out of it and tried to give it a show car look. You will notice that we hid the wires the best we could. The wire harness is new by painless. There is alot of newer upgrades i did to the car. The whole front end was completely rebuilt. Of course, I had to put the 1970 pistol grip in it and put all new bushings in the Z bar assembly. Everything and i mean everything was either new or rebuilt and I am still working on it in my small three car garage. The grill, trim and the tailpanel will be the last thing i do on the car. All the glass is changed to reproduction tinted. The rear end was gone through and so was the transmission. Anyway... i could go on and on with this car. I and my freind have done so much to keep the original look of the car with upgrading the old failing components. It has always been my dream to build this car the way I wanted to build it and my dream is very close to a reality. Wish me luck in completing my dream and again... Thanks for the help!! Eddie
 
Auto Transport Service
Back
Top