• When you click on links to various merchants on this site and make a purchase, this can result in this site earning a commission. Affiliate programs and affiliations include, but are not limited to, the eBay Partner Network.

70 Hemi Superbird Restoration..................errr.....scratch that........

Hemirunner

Well-Known Member
Local time
6:39 PM
Joined
Jul 12, 2011
Messages
5,579
Reaction score
7,323
Location
Down South
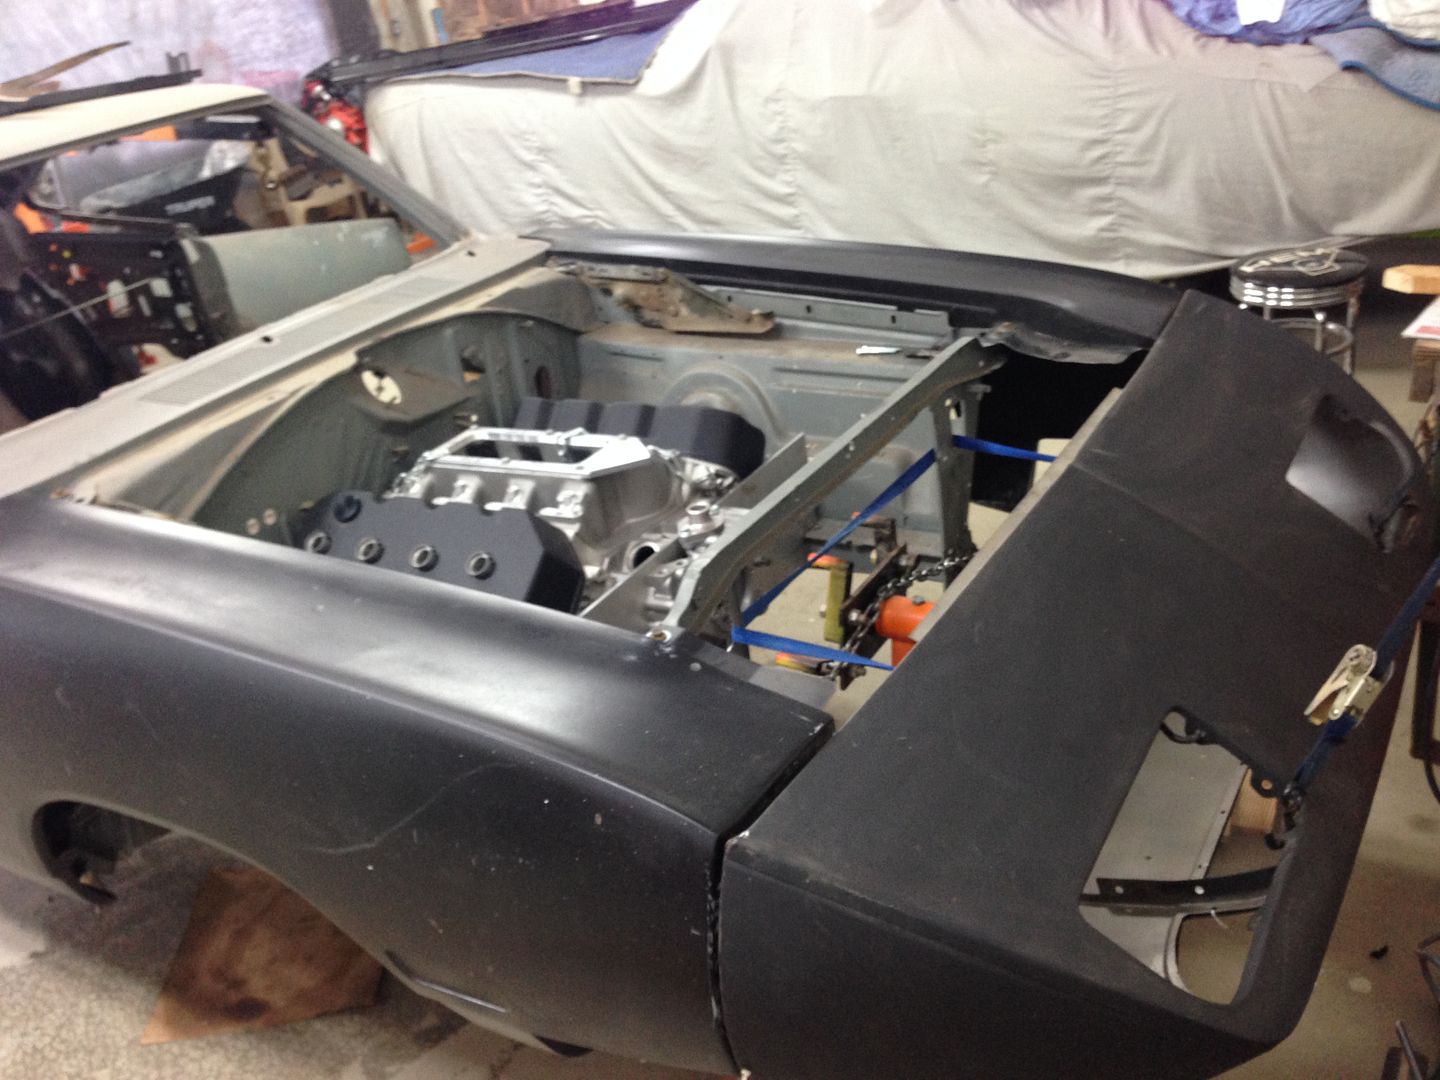
Ok, so the title may be a little bit deceptive, but I need a place to put a build thread to keep me motivated. This is a hemi superbird, but it's a clone, and it's no restoration! I love the superbirds, but the stock look just leaves a ton to be desired in my eyes. This will be a little different and the purists will puke, but hey, whatever. Here's what I have in mind....

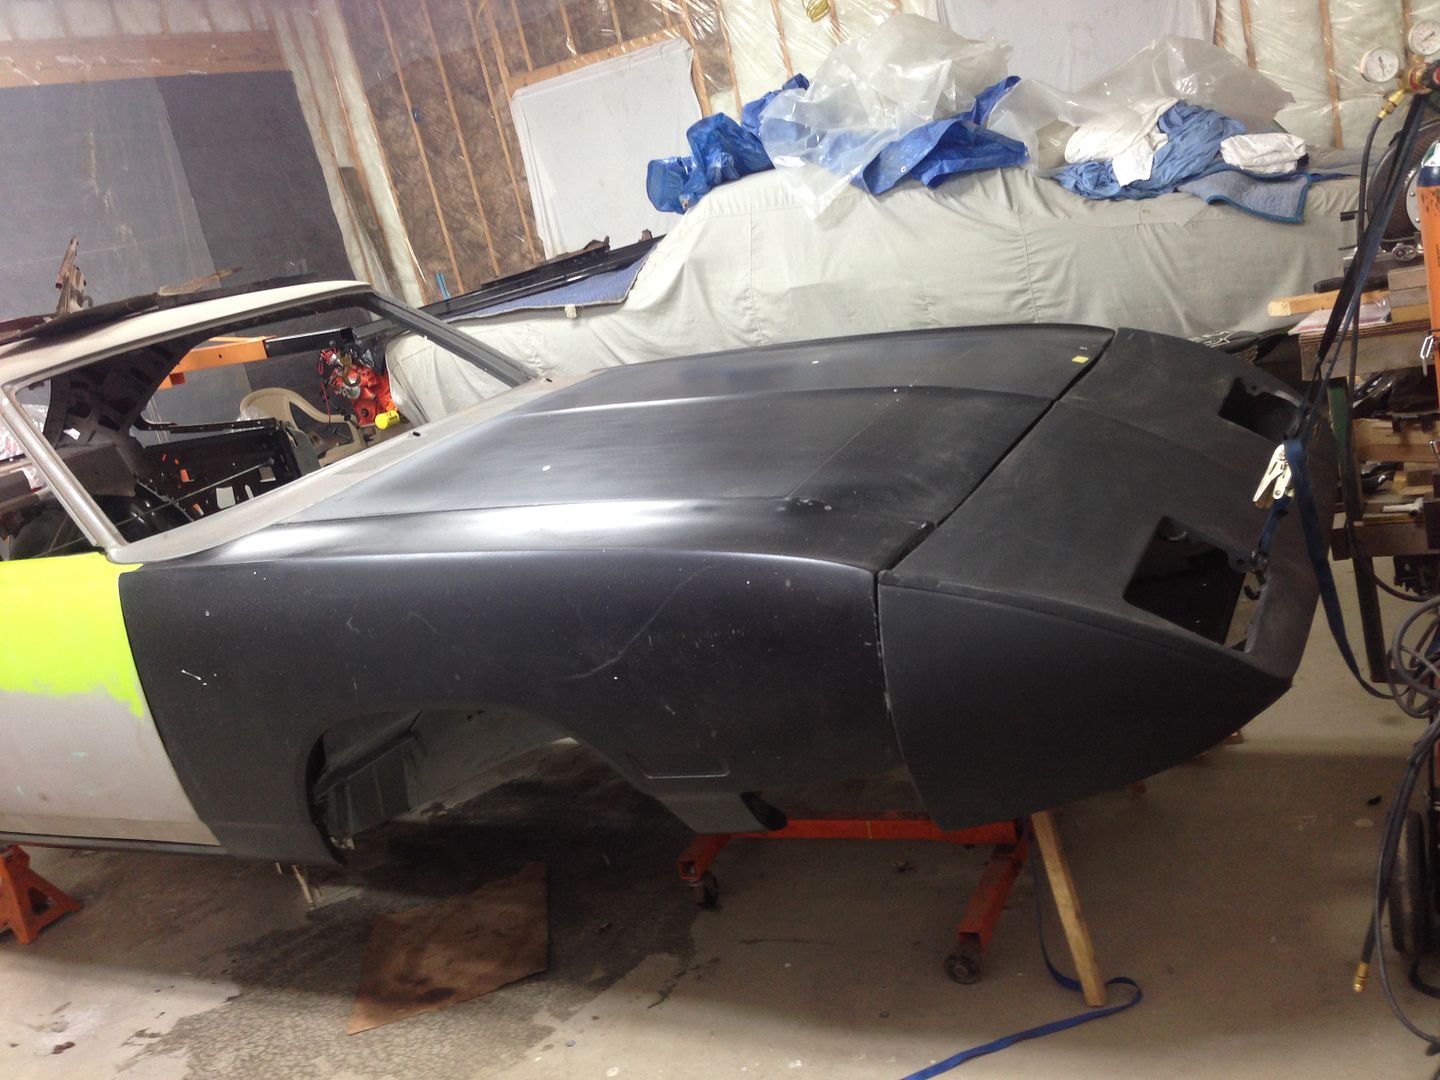
All black, street legal, 1970 Plymouth Superbird
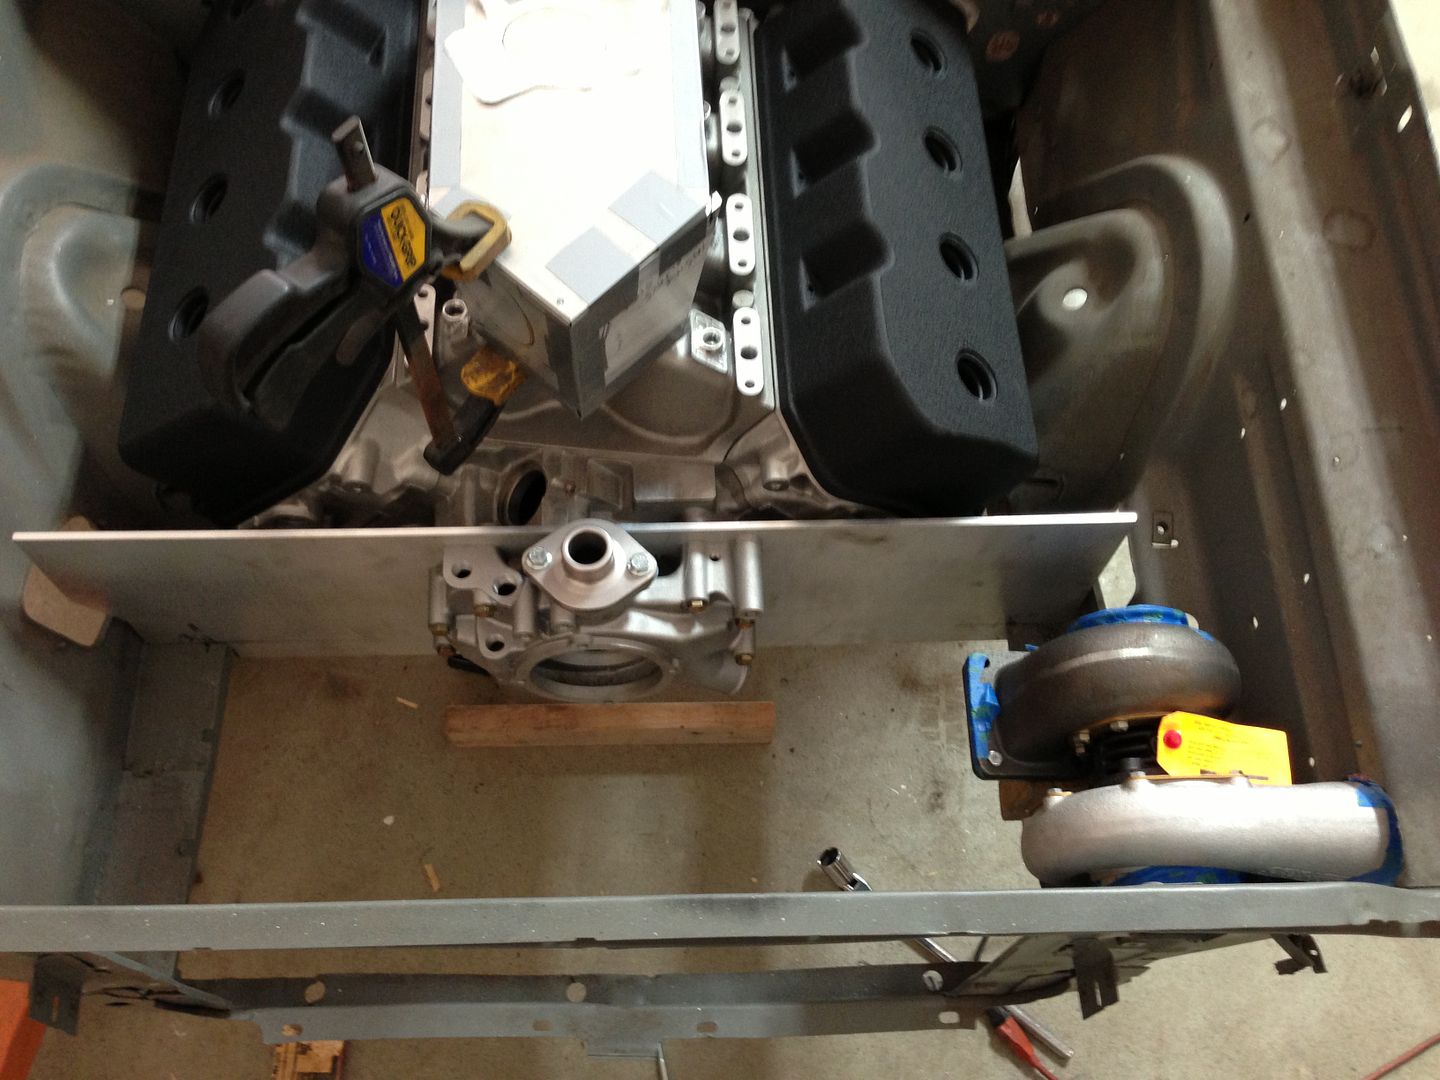
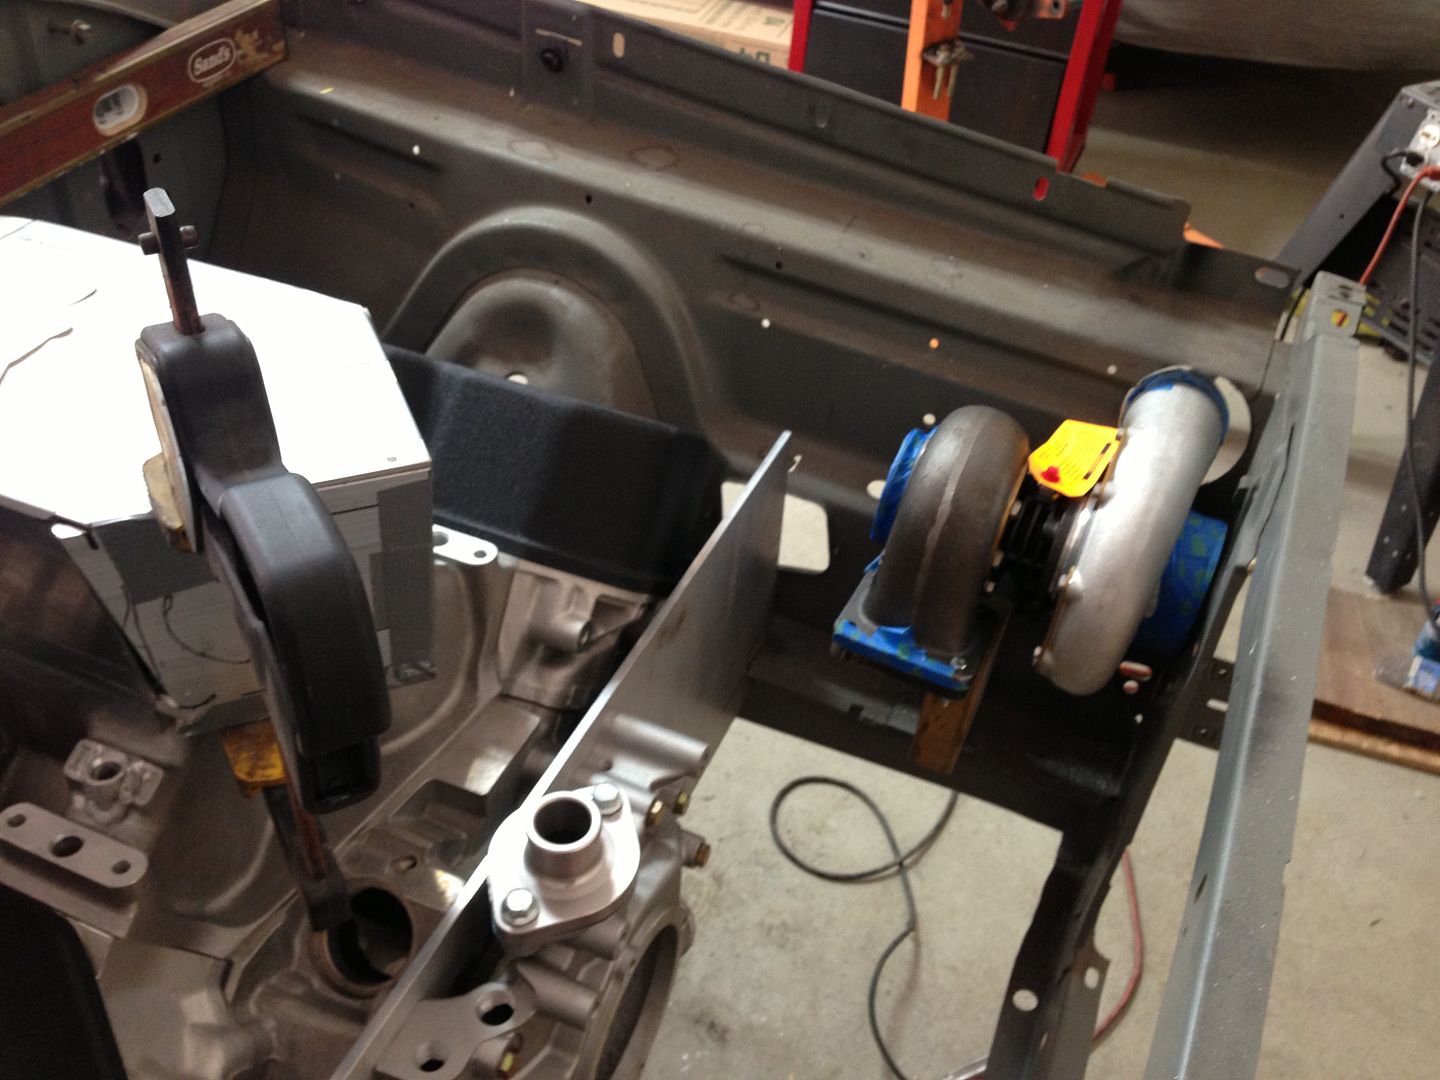
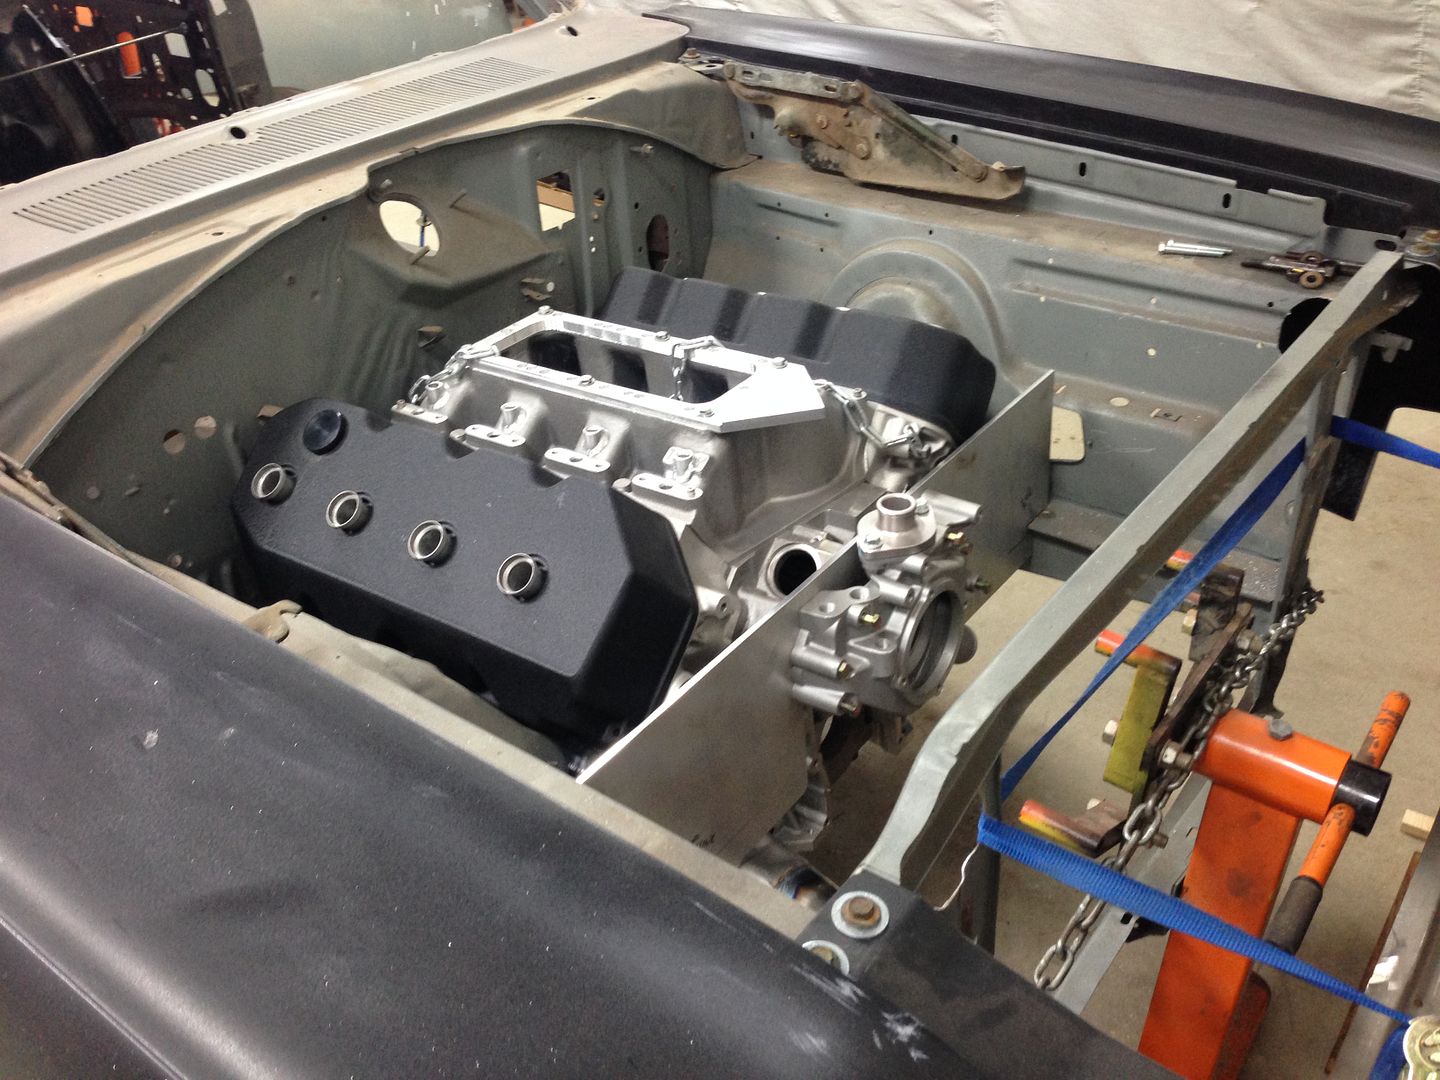
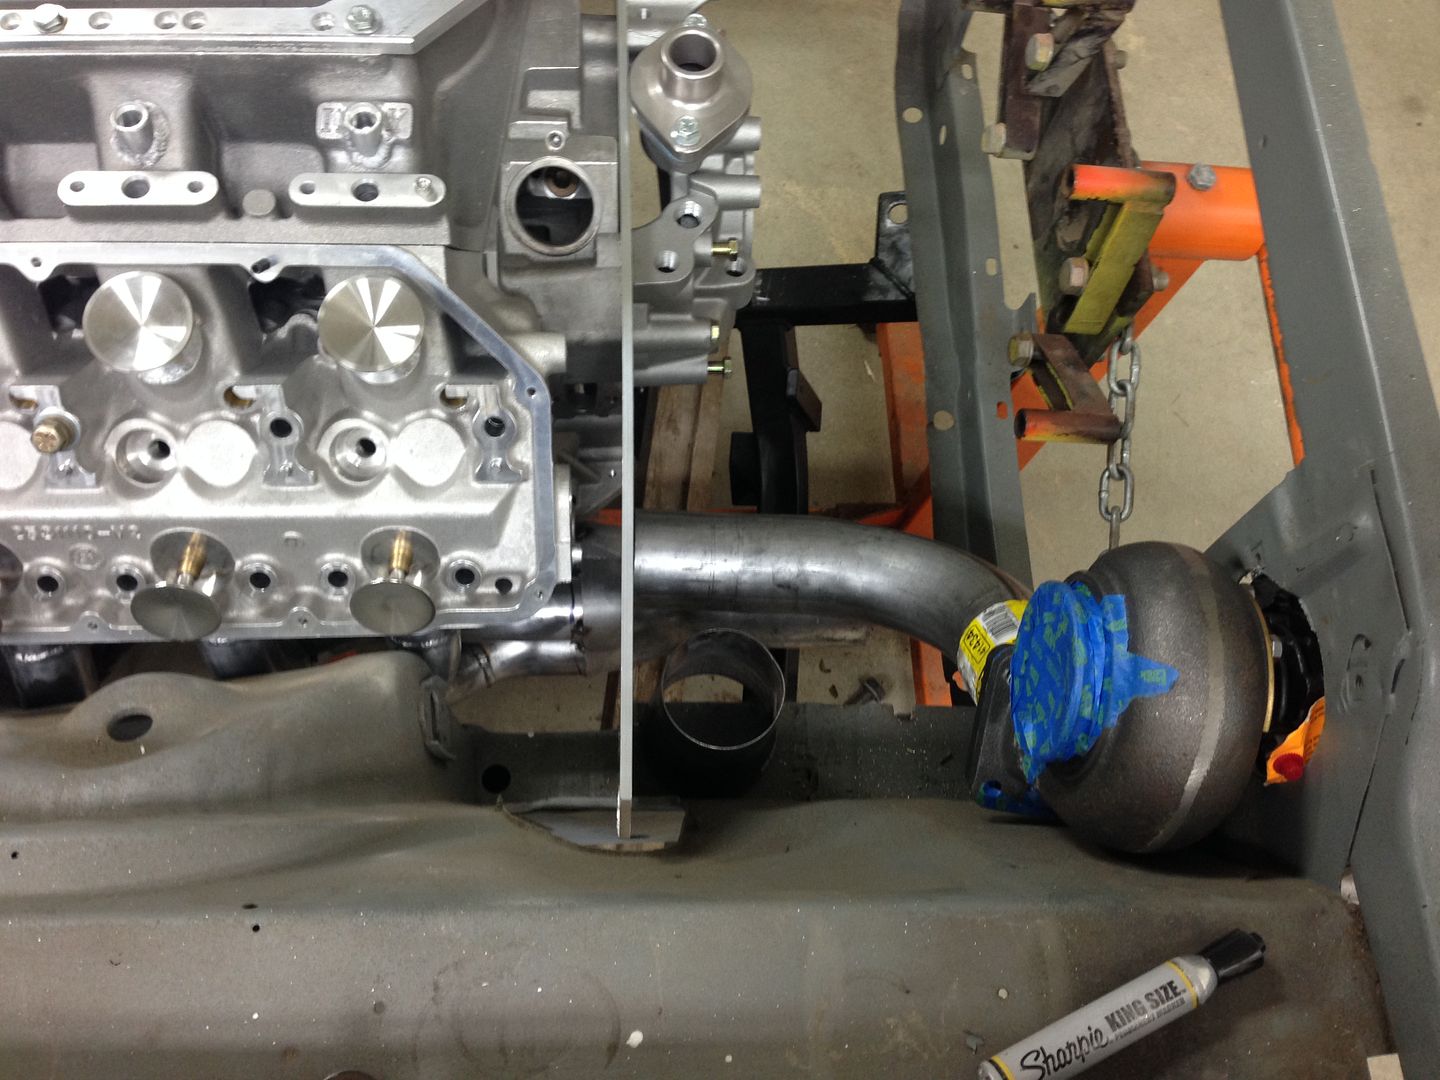
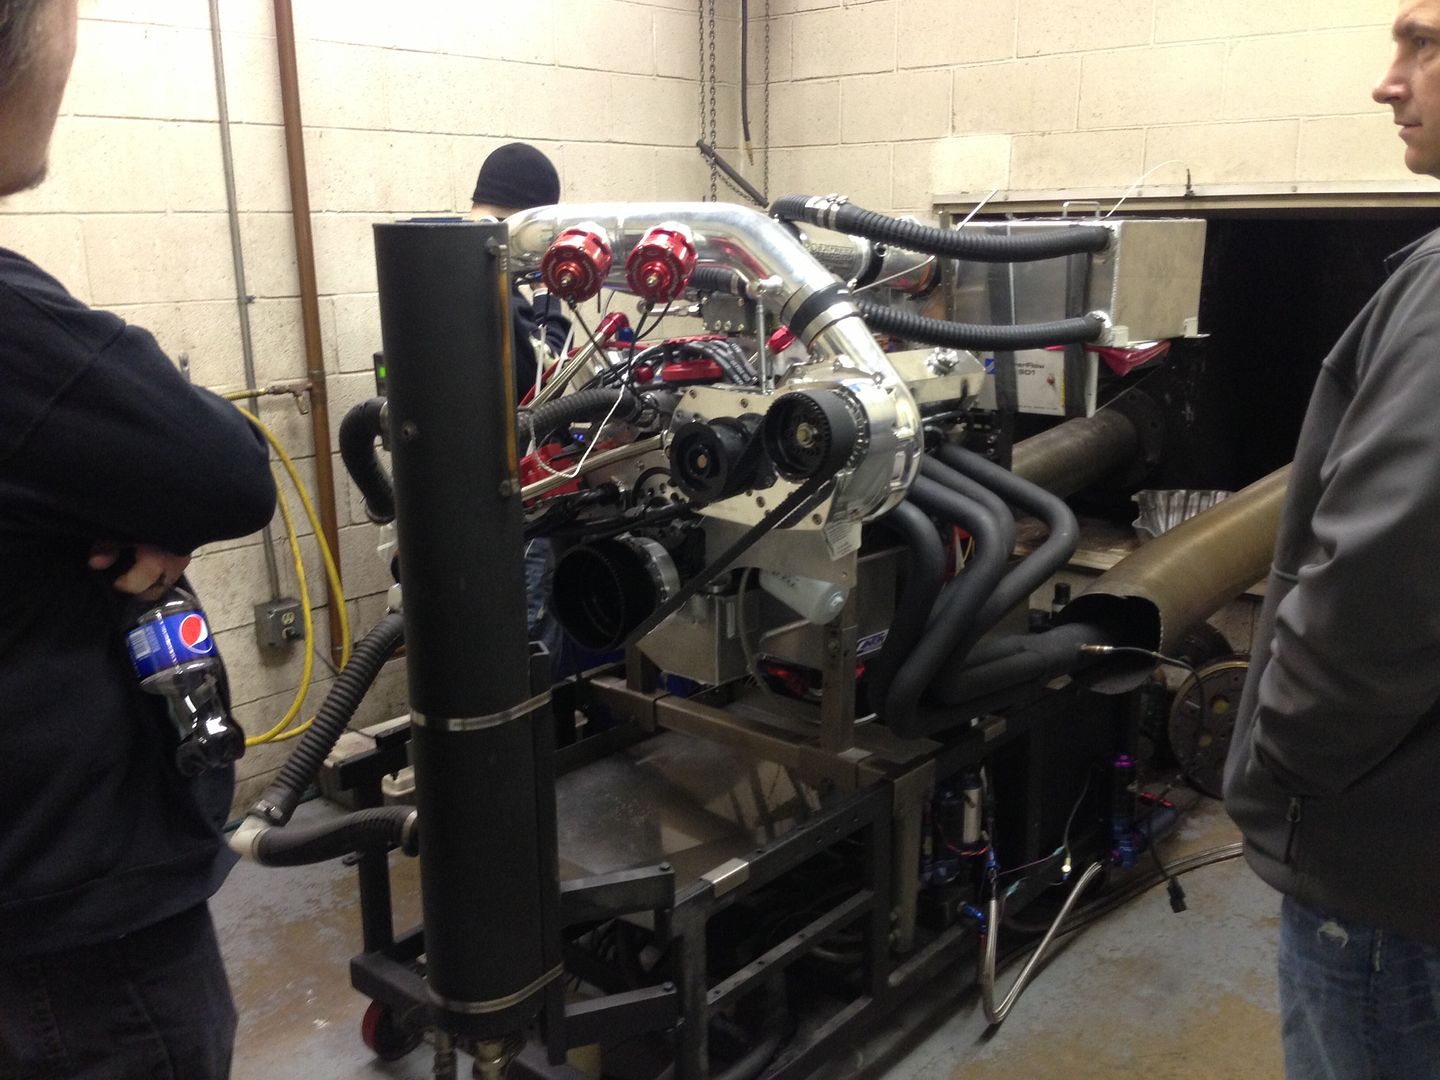
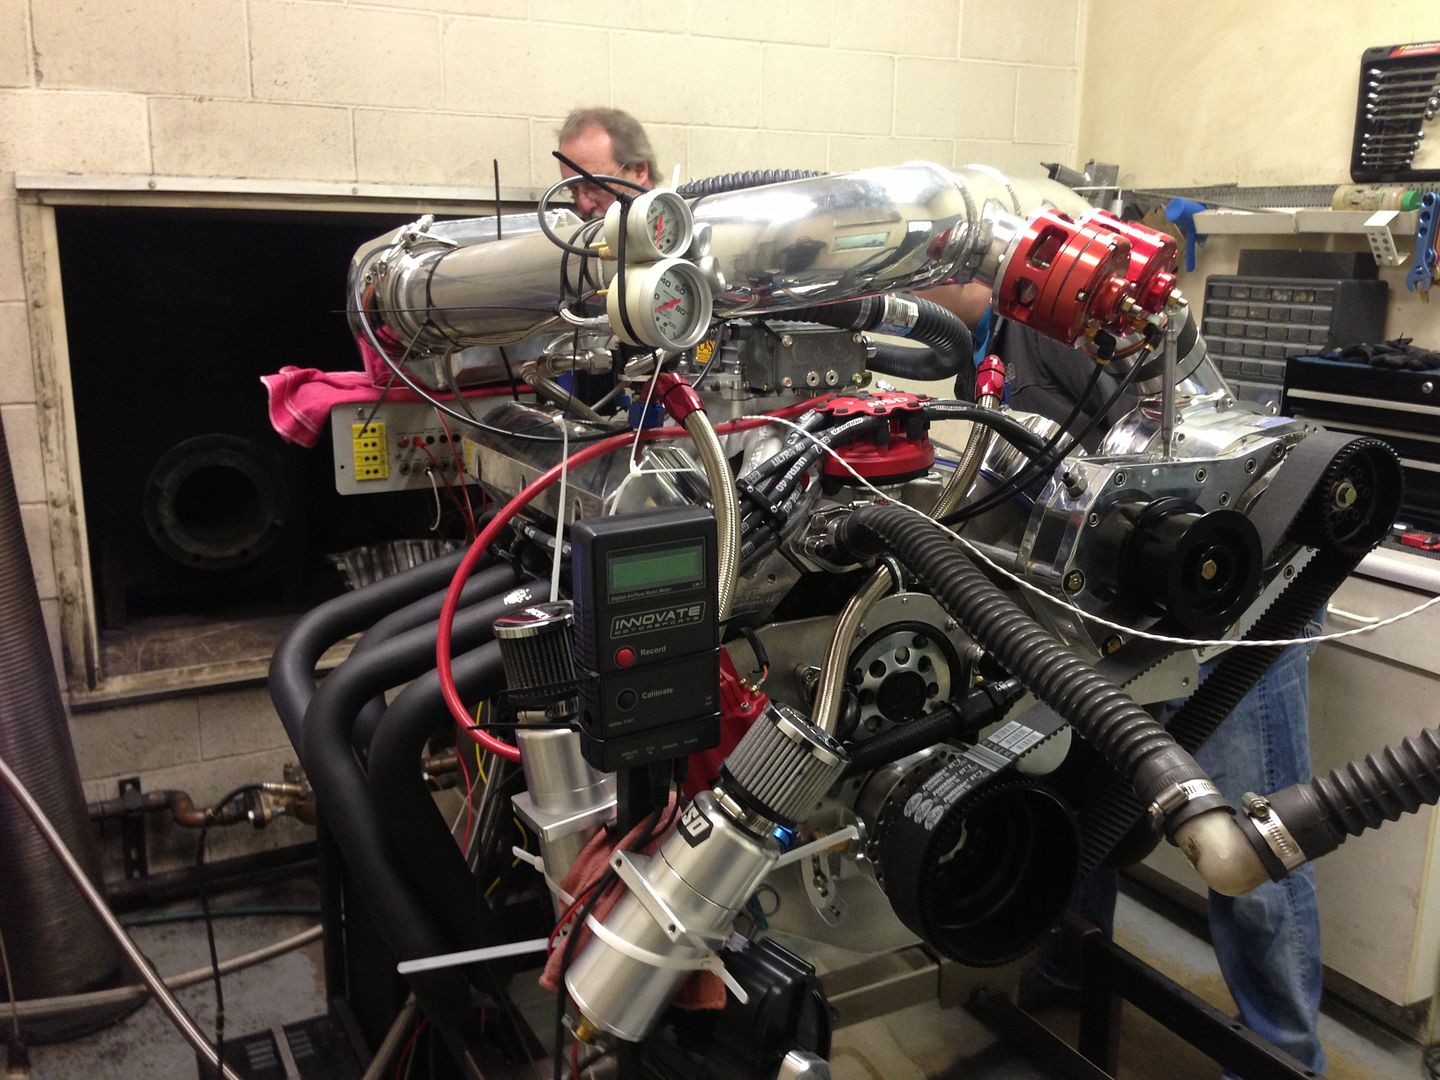
All aluminum hemi - cubic inches yet to be determined
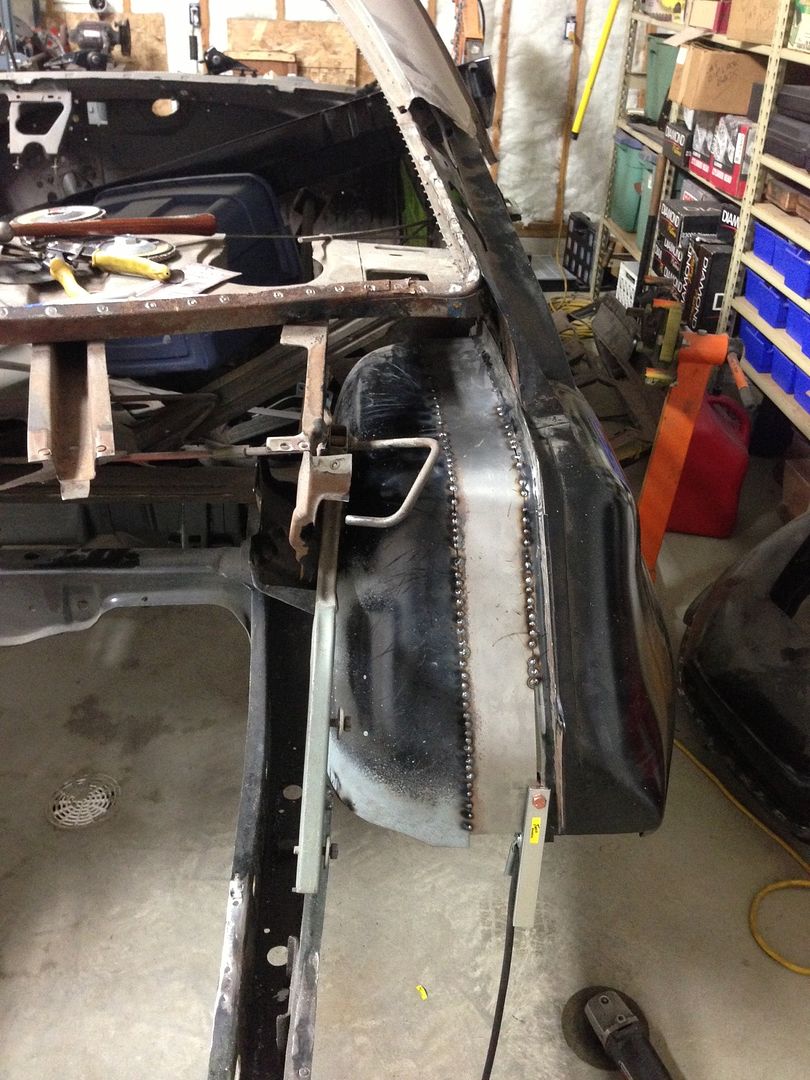
All steel with the exception of the hood and a few repop pieces.
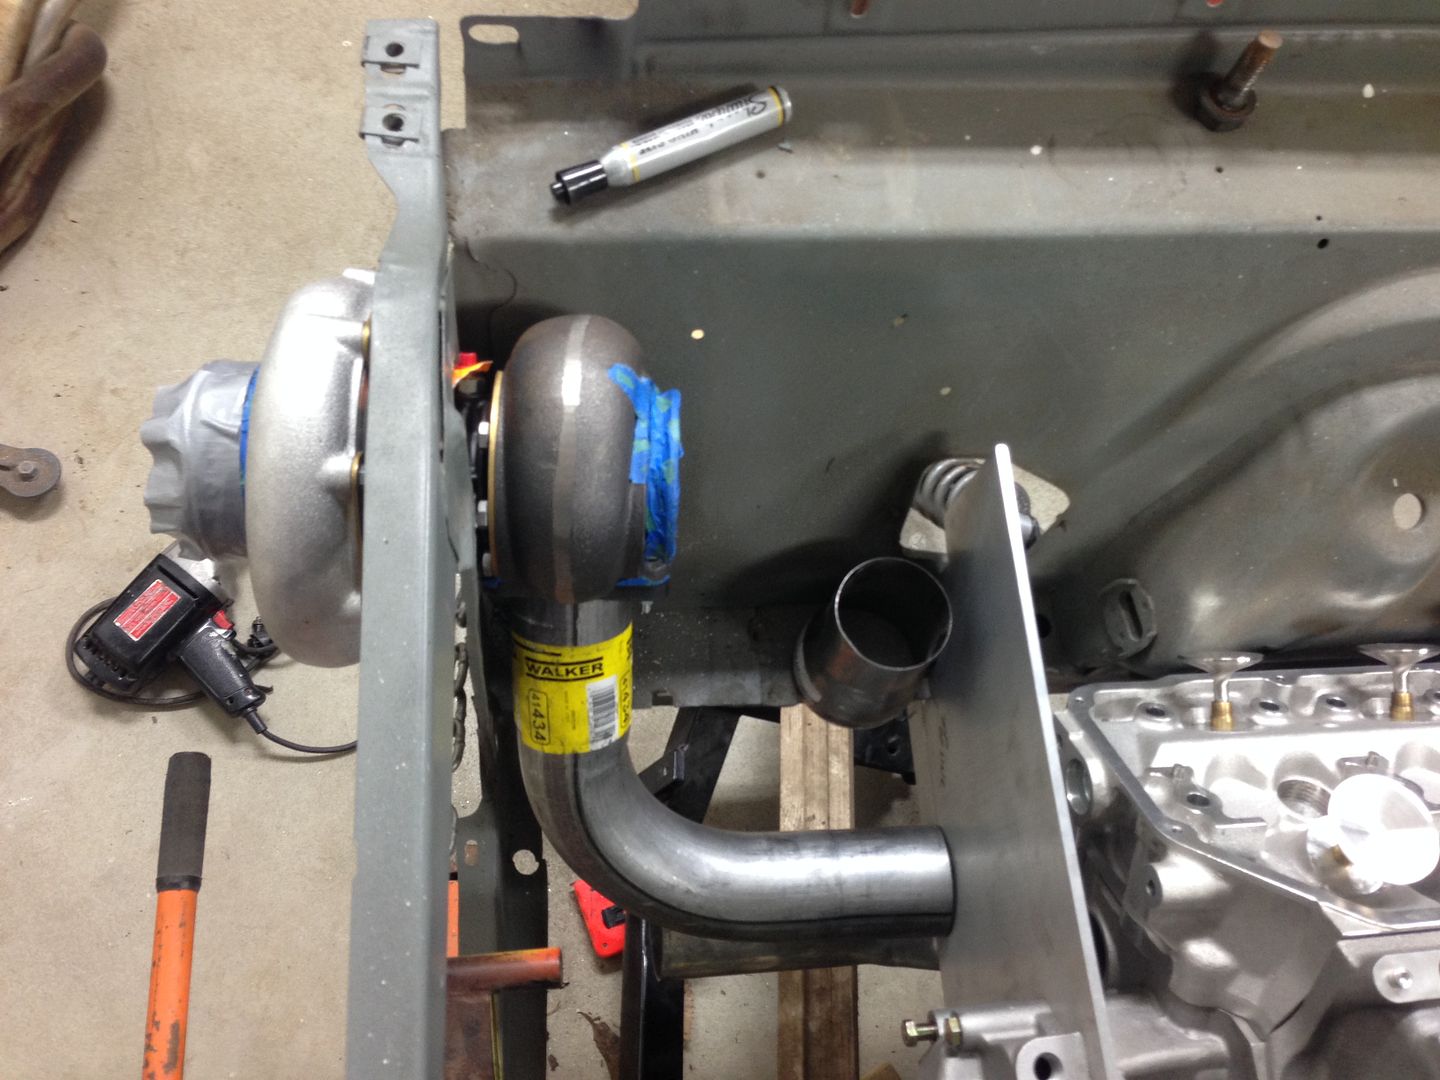
Two Precision turbo chargers and EFI
Power windows
Air Conditioning
Killer tunes
Alterktion coil over front
Leaf spring rear - caltracs and monoleafs
SFI 25.3 chromoly chassis (I will leave off the funny car cage until we reach those speeds and ET)

The intent is to use this for Drag Week, the Maxton mile and street cruising. It will be slammed on the ground with big drag radials and double beadlock Champion wheels. I've been planning it in my head for ten years but couldn't bear the thought of cutting up my other 70RR to do it. I'm deep into it now since I found another victim to slaughter! I'll start the write up later this weekend.

- - - Updated - - -

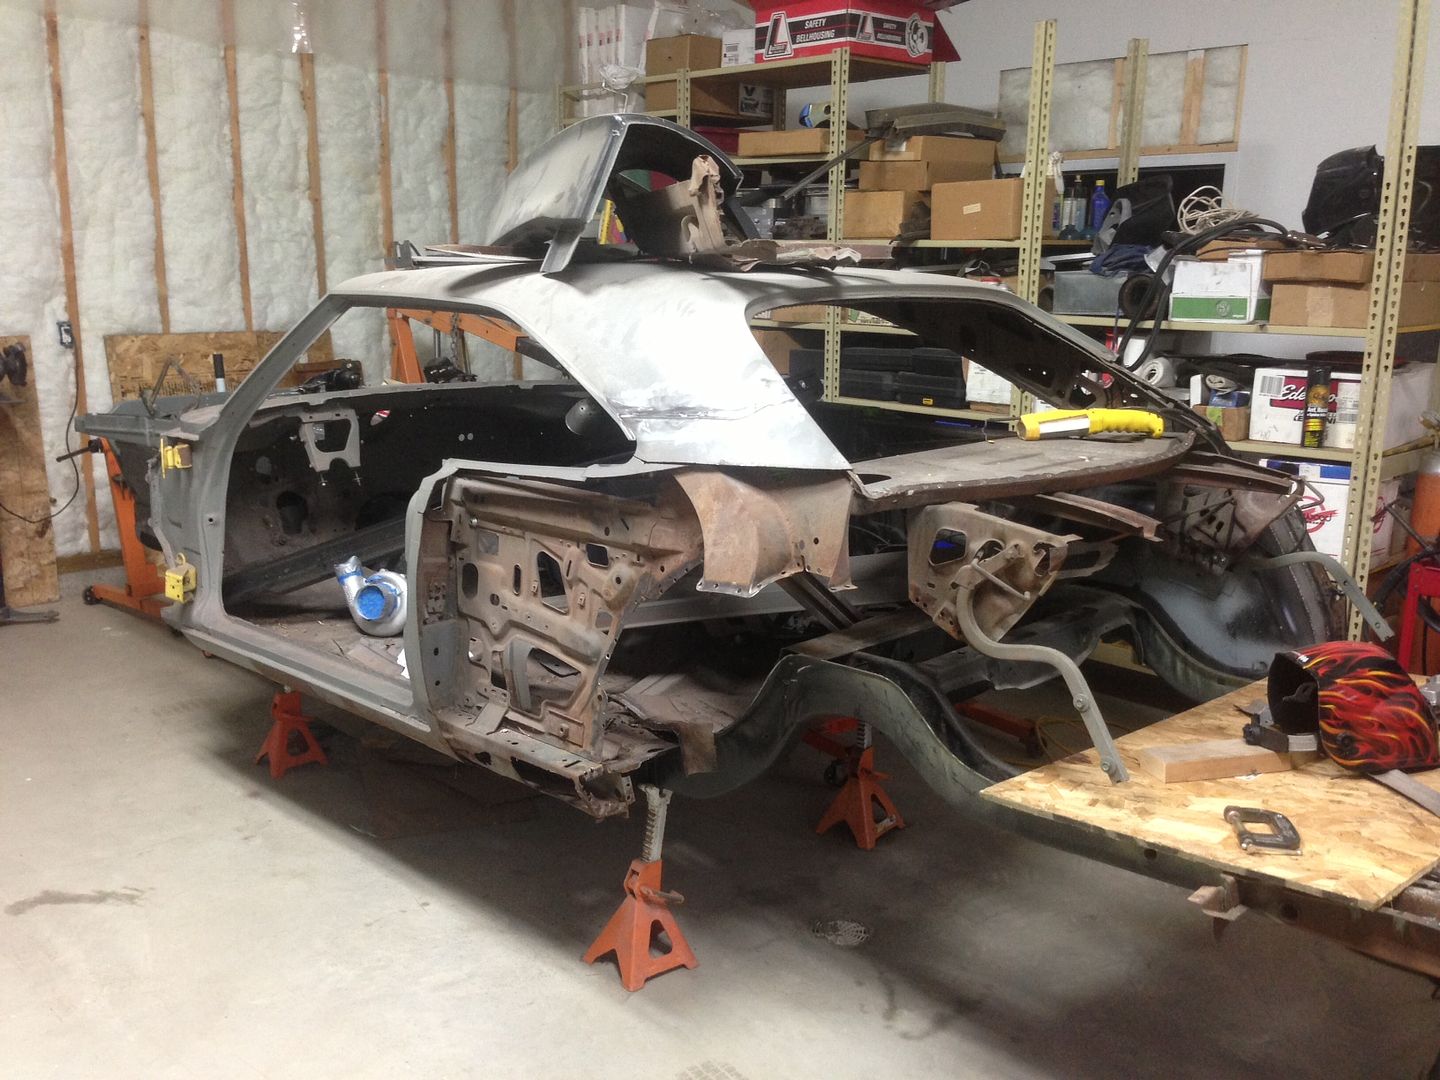
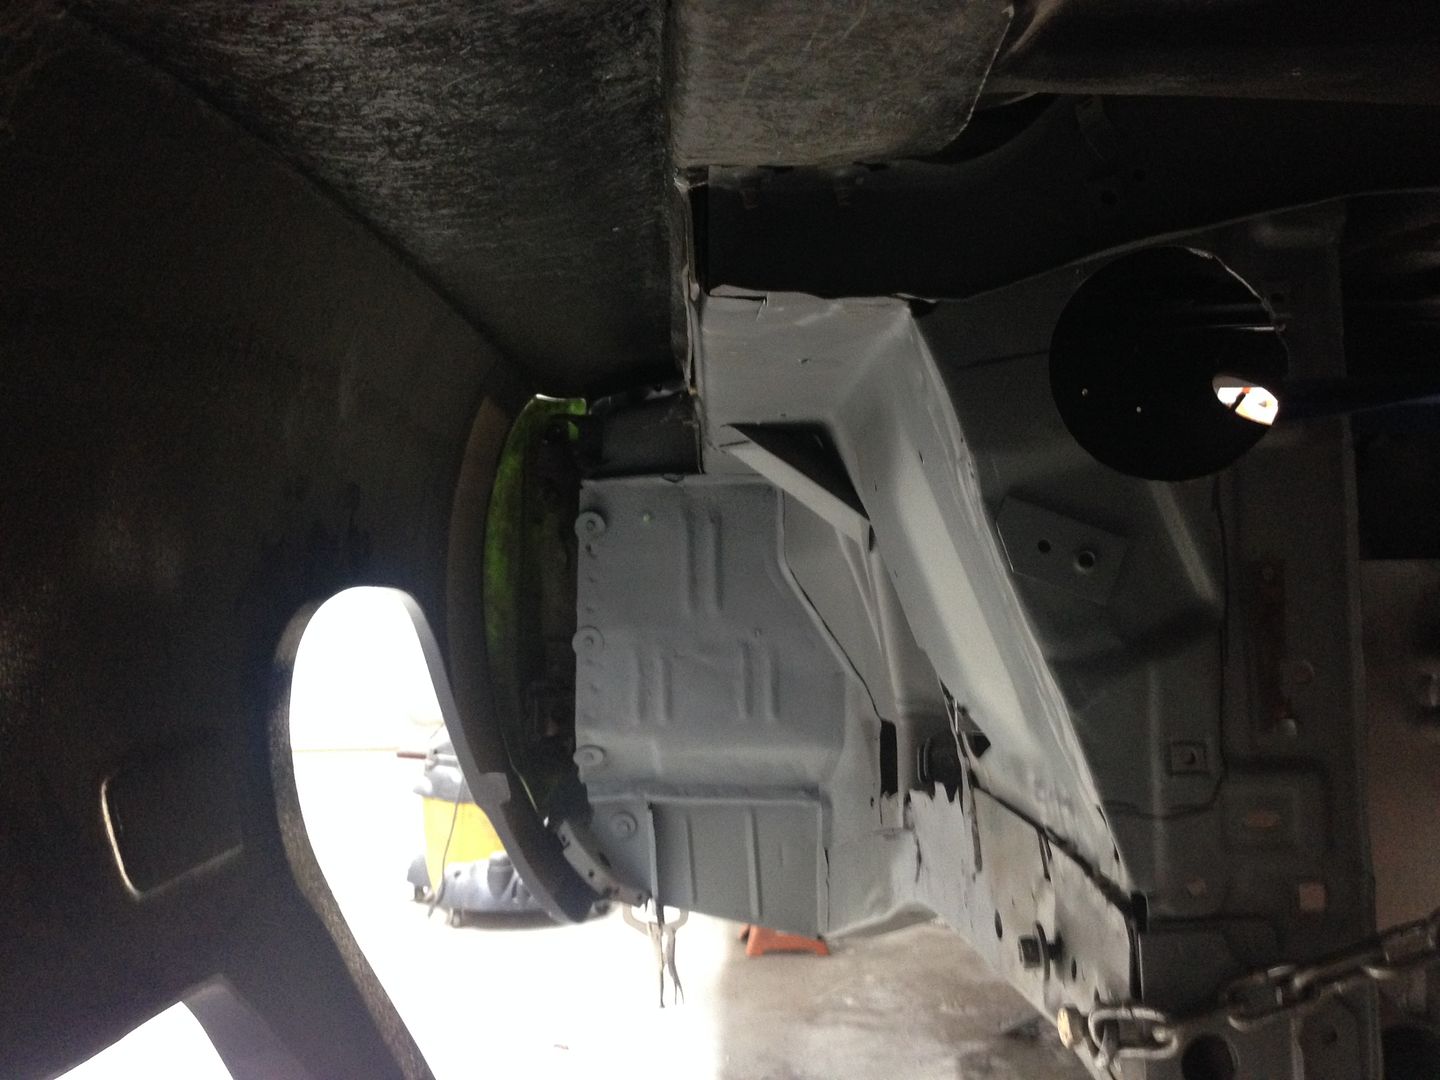
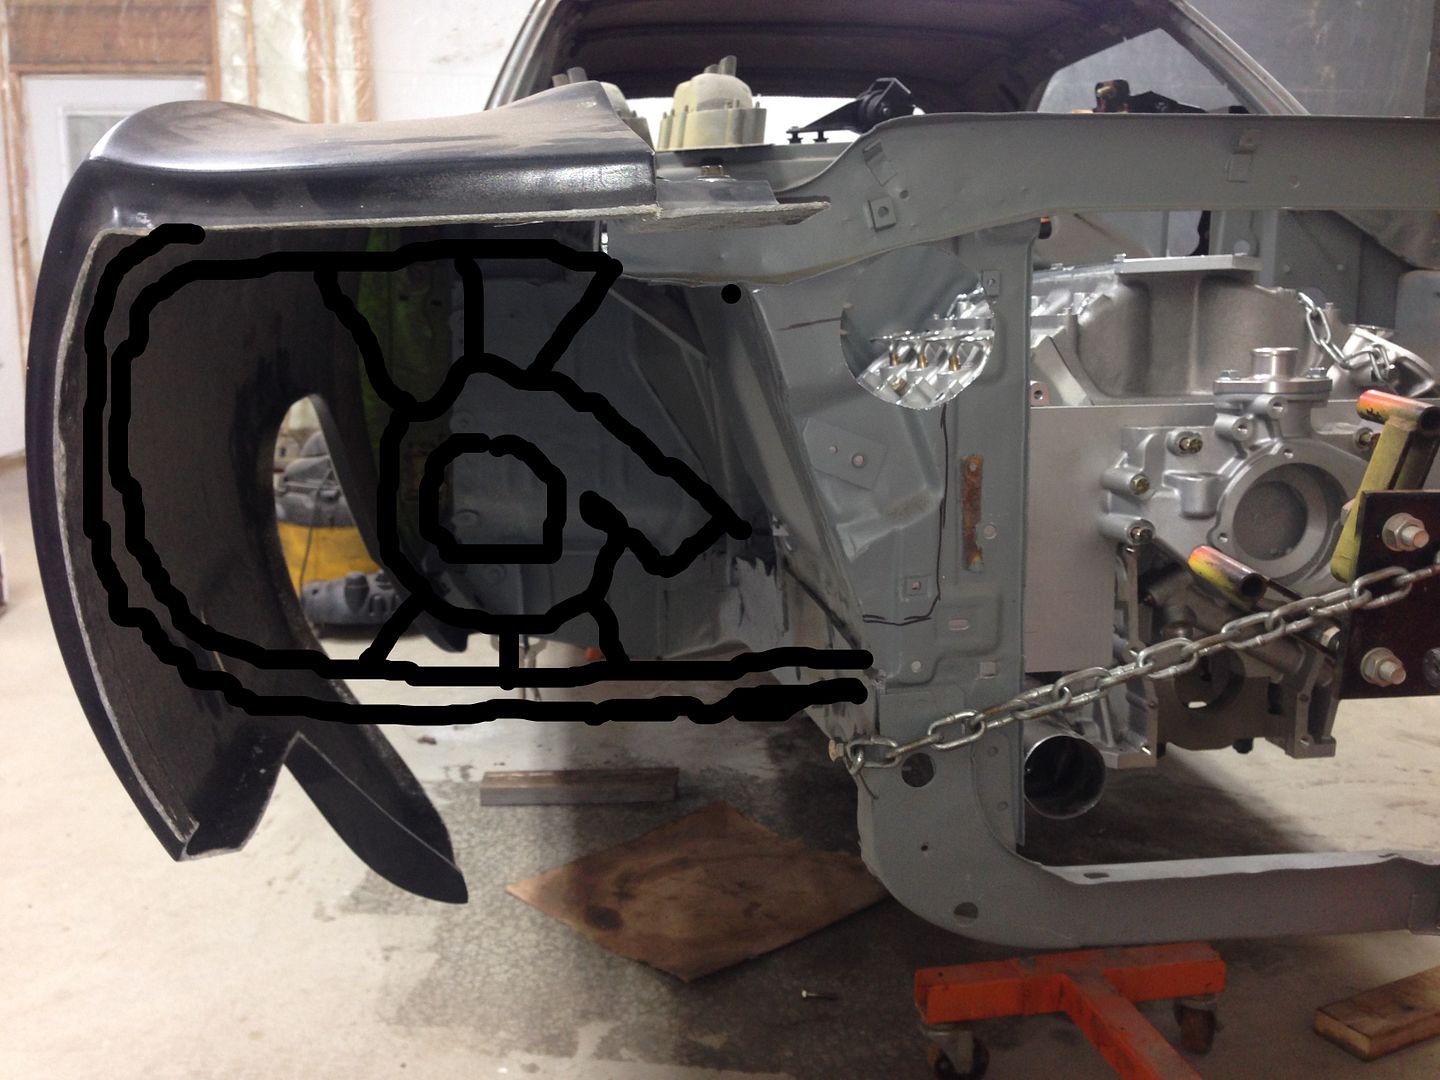
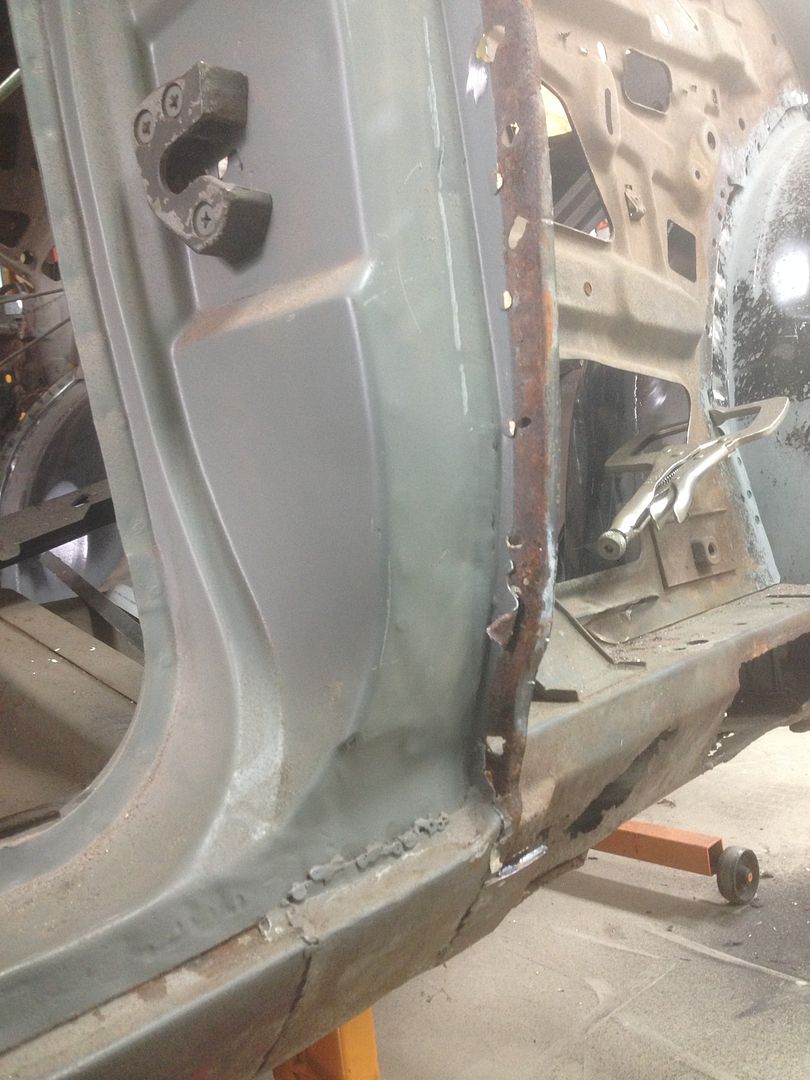
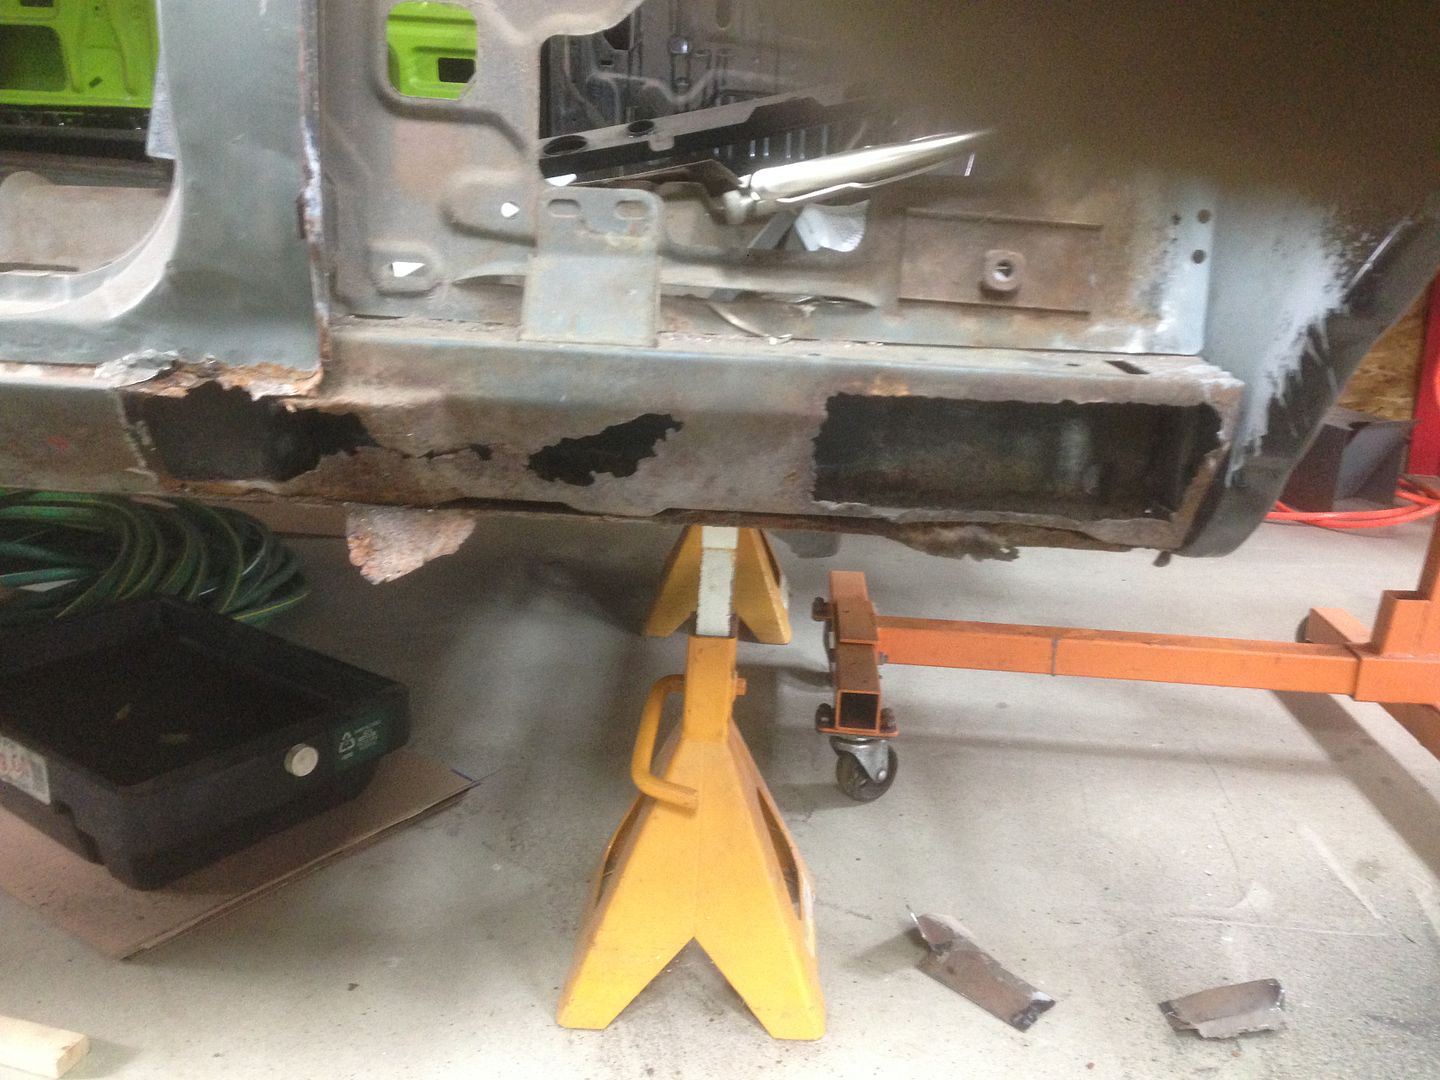
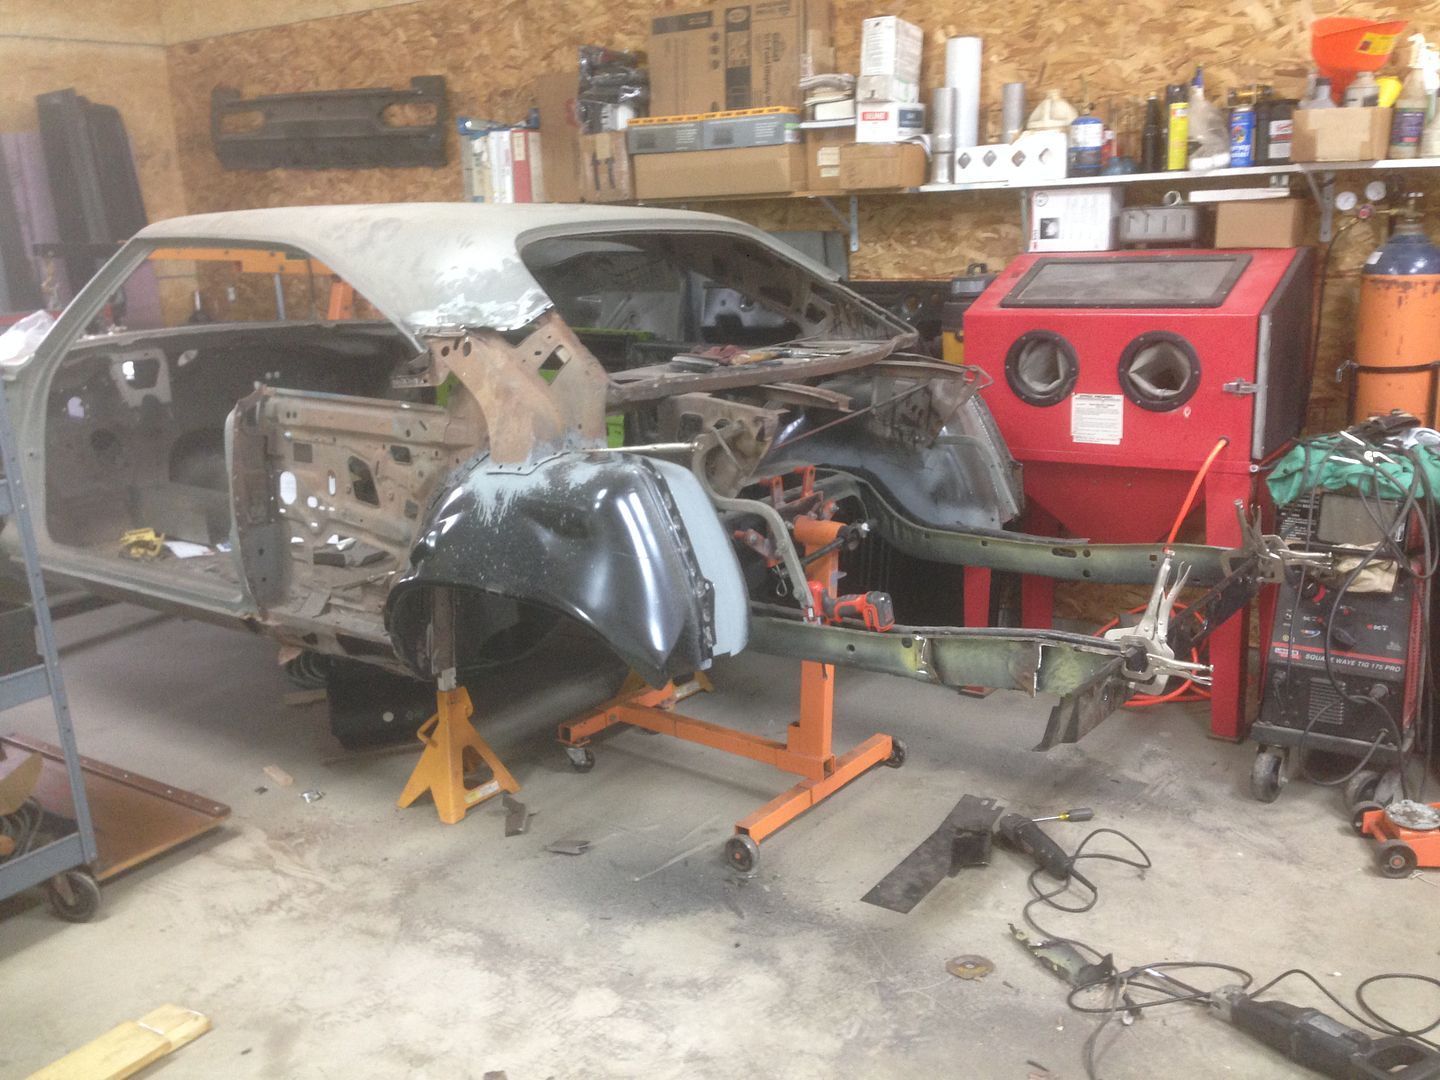
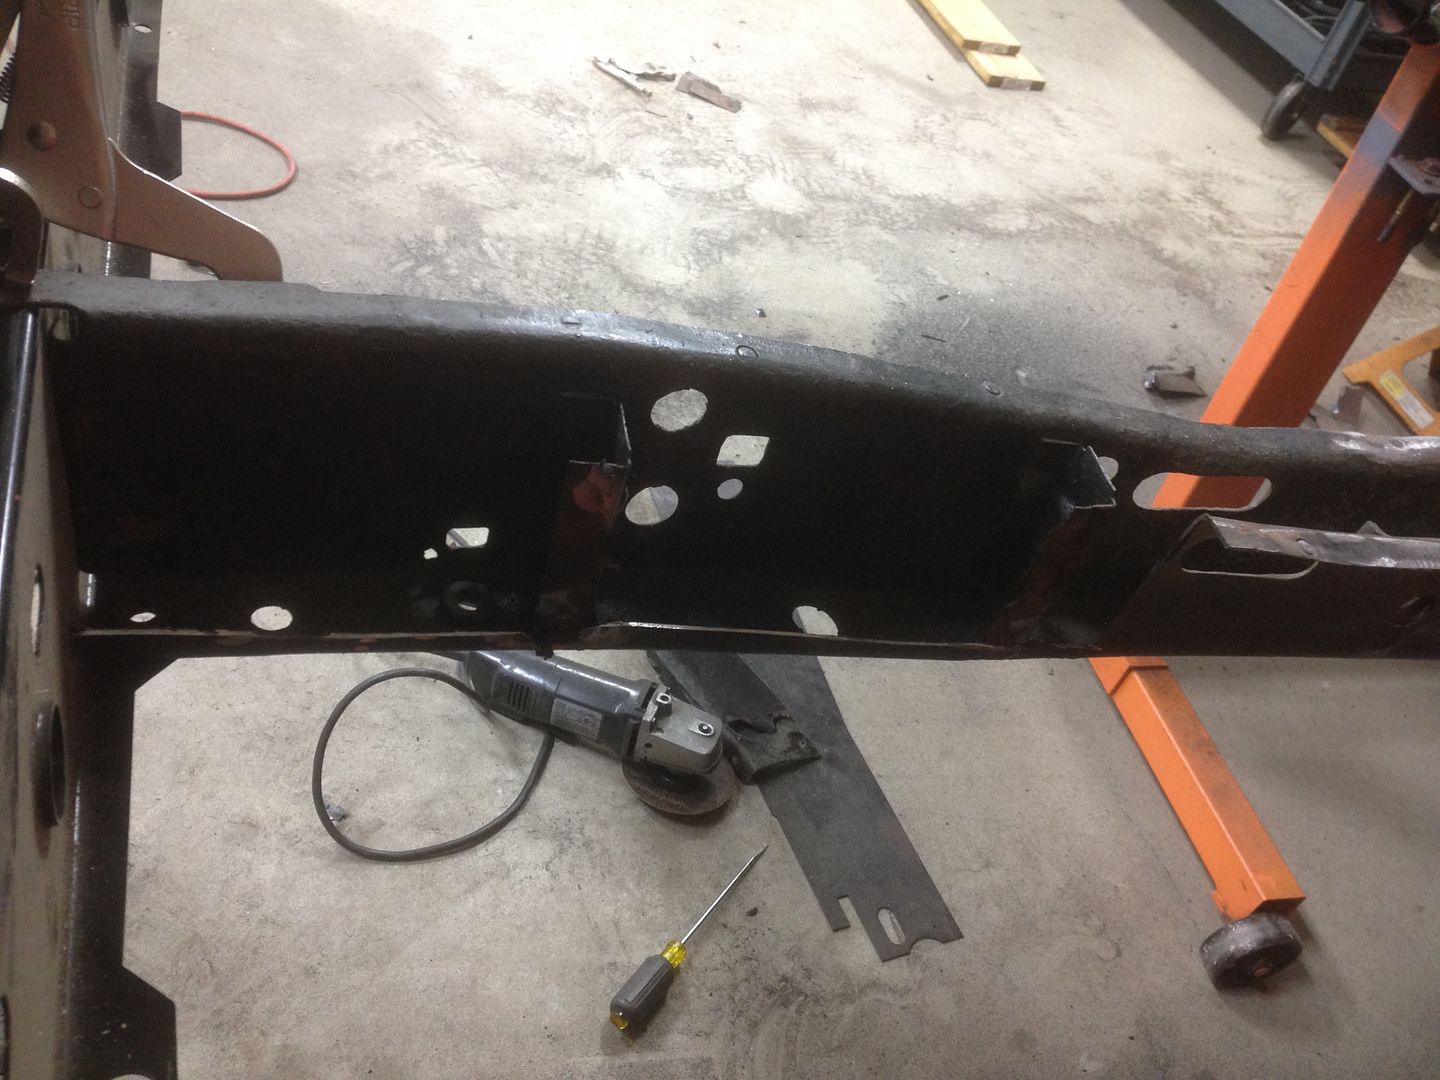
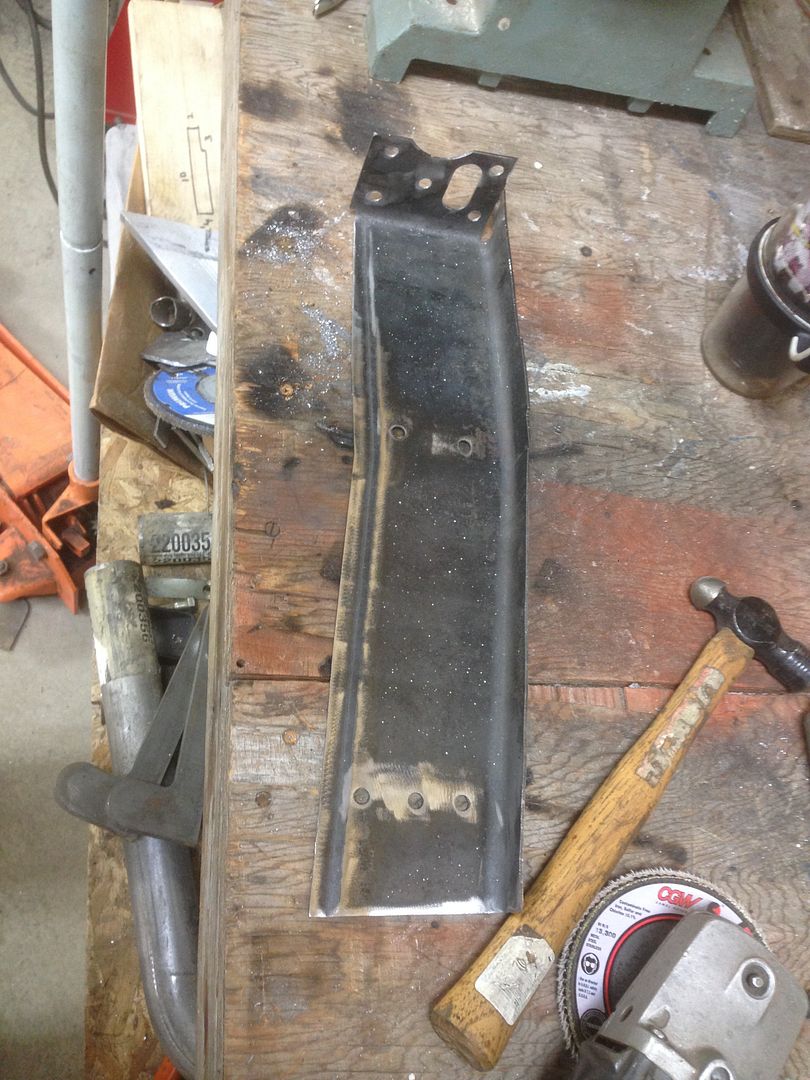
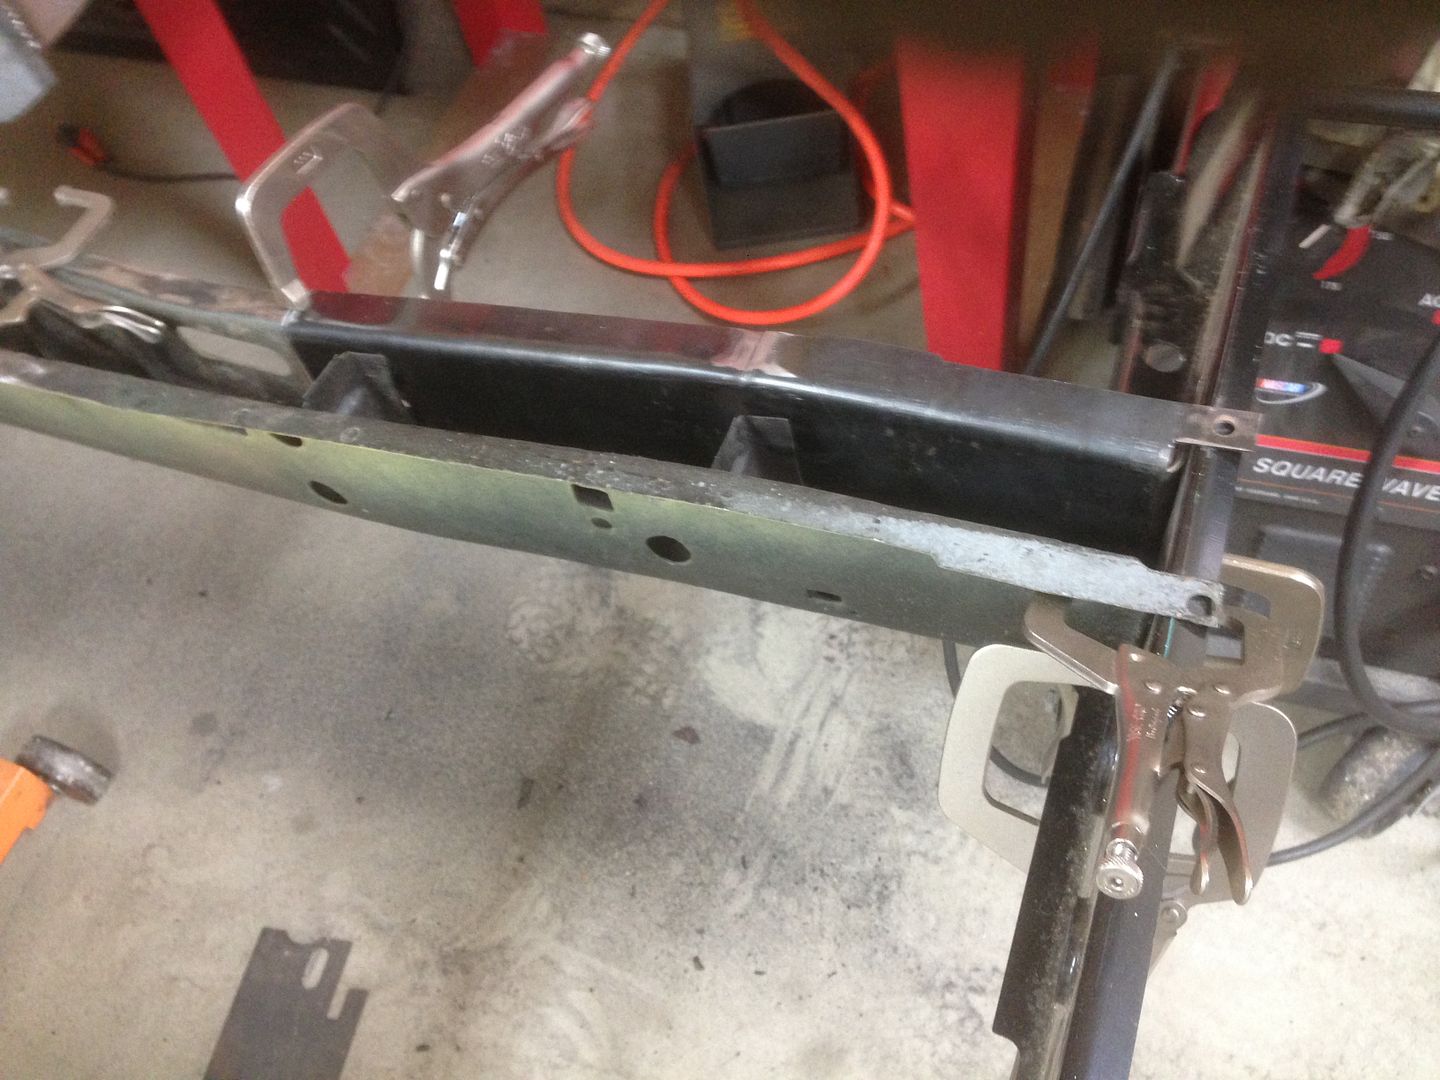
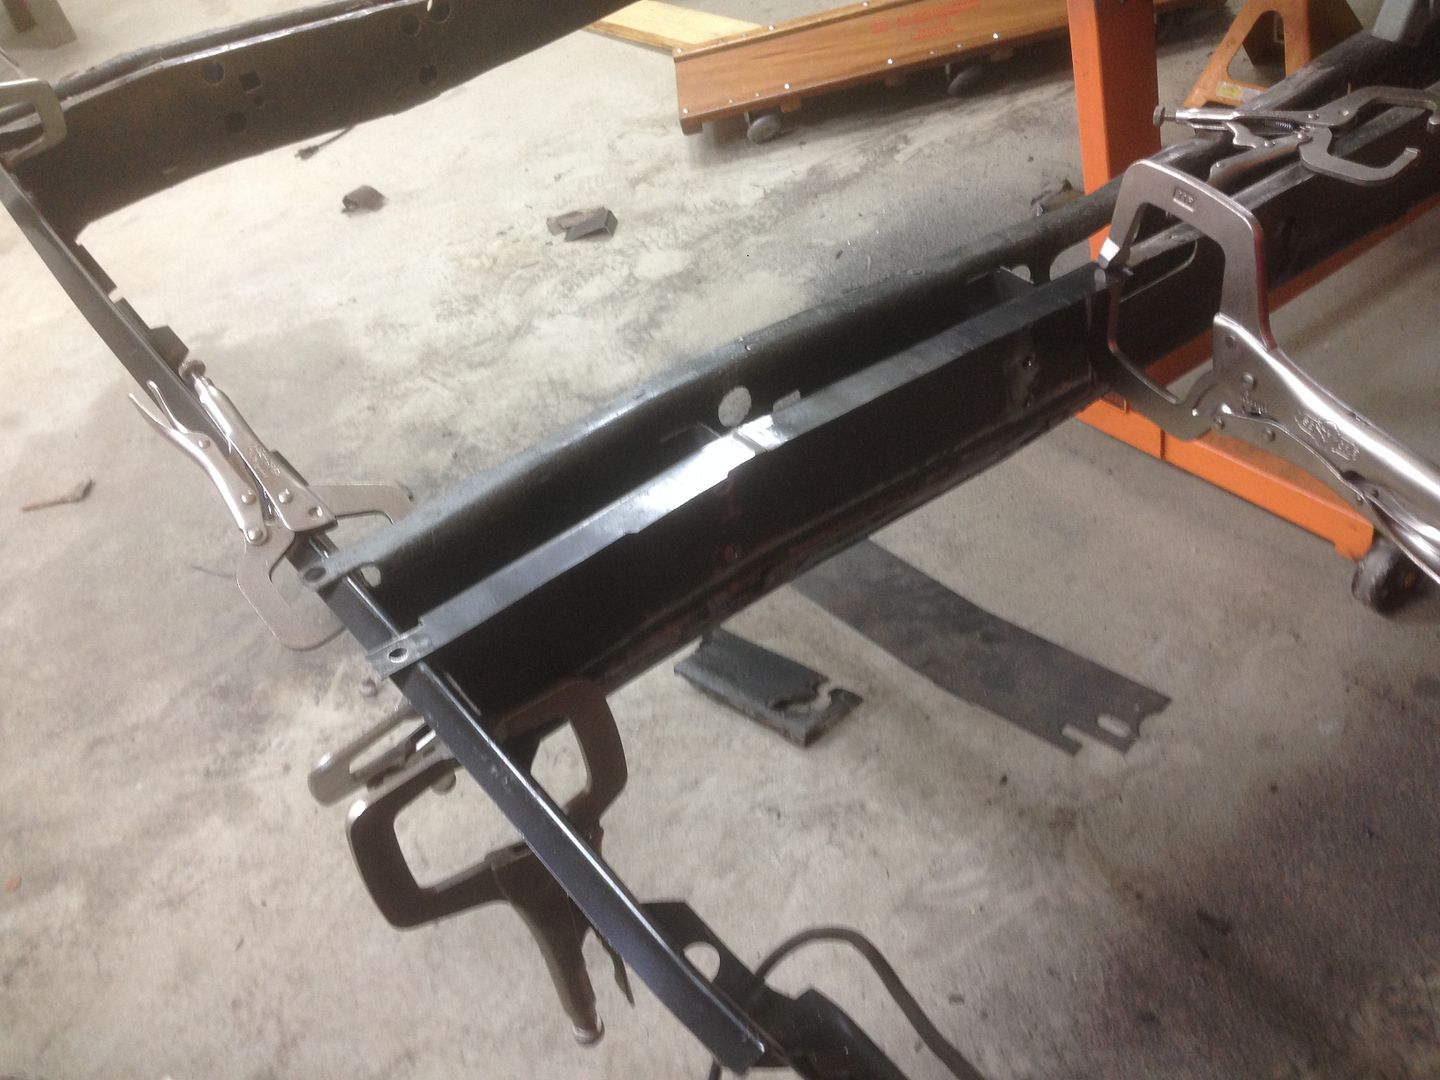
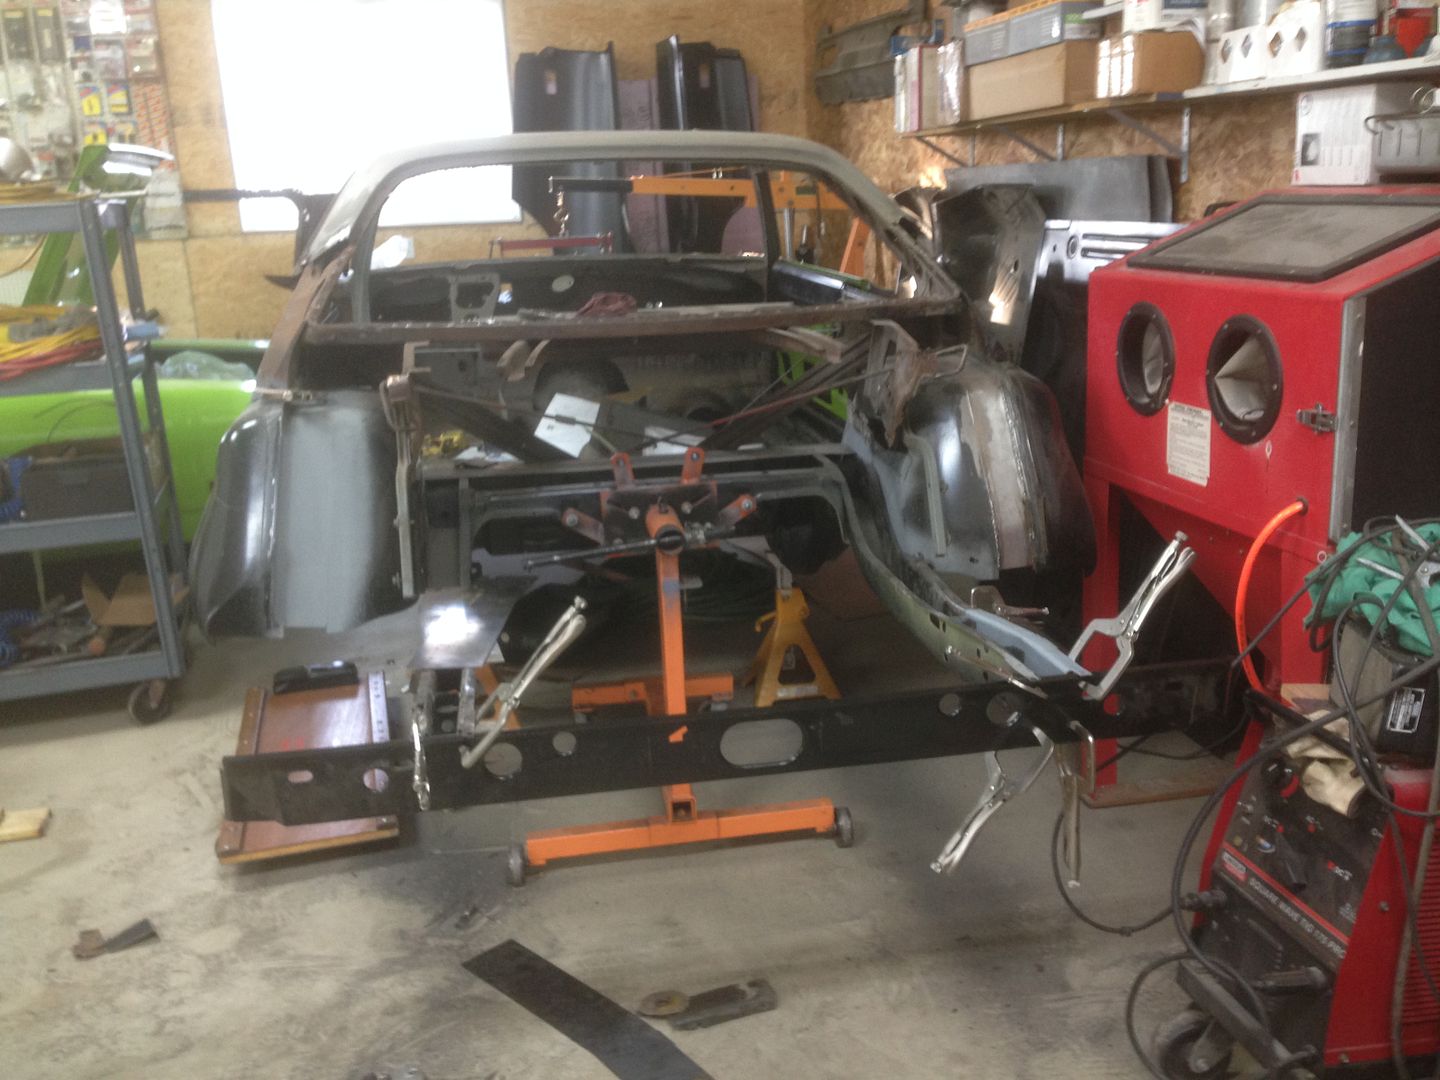
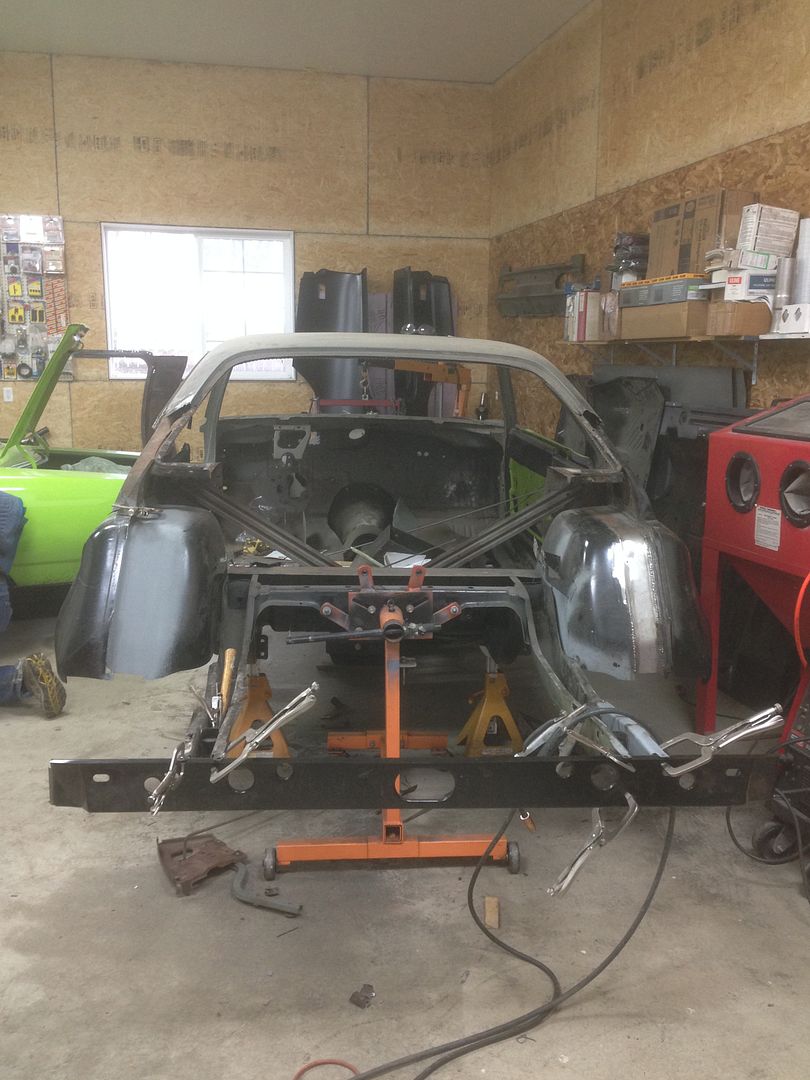
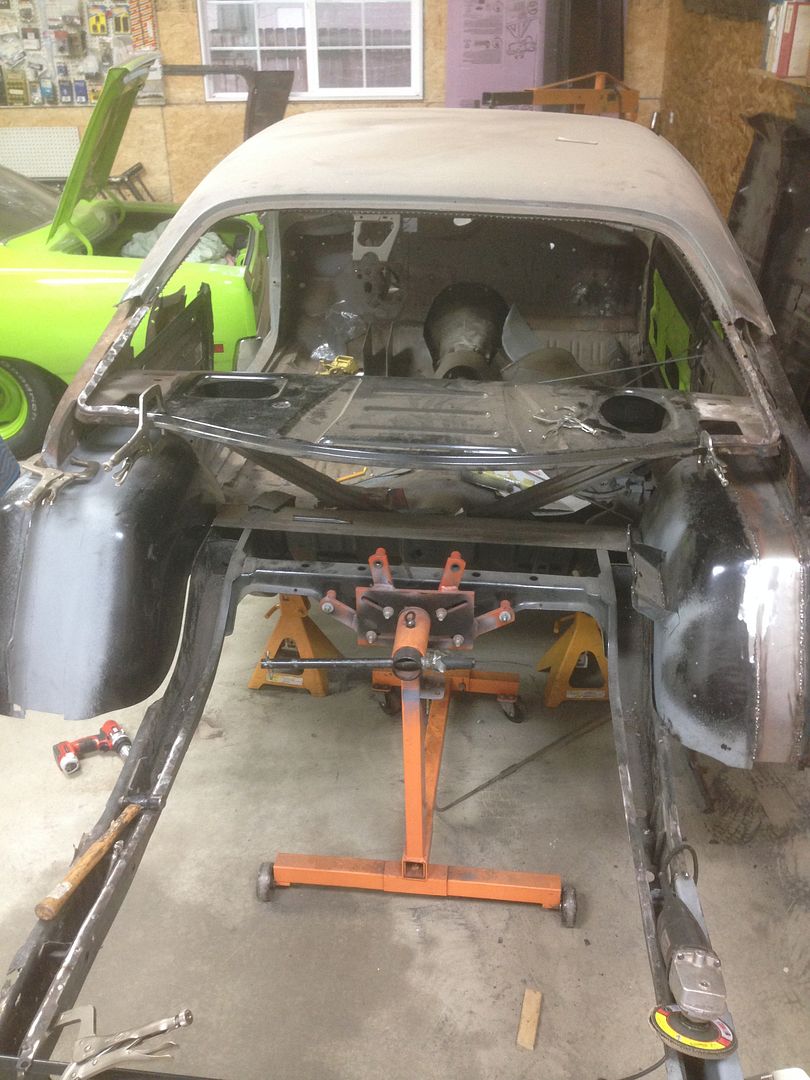
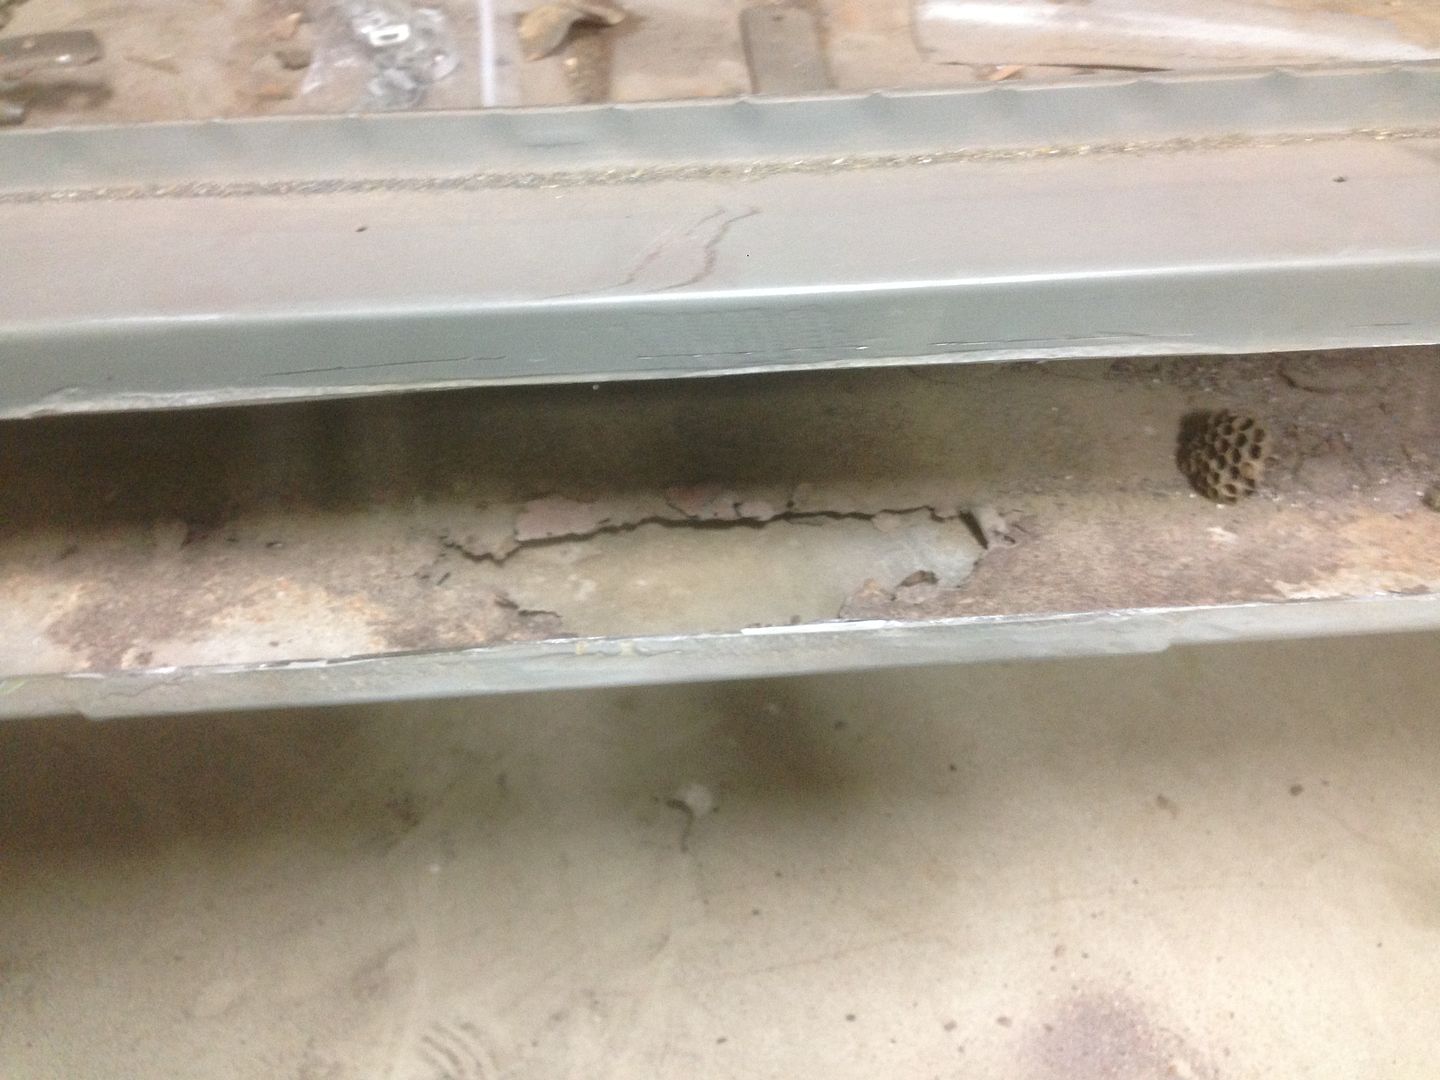
The "victim"....when I went to get it. This car looks so much better here than it really is. What you don't see is the fact that there's no passenger quarter panel, trunk floor, and not much left of the rear frame rails. It came with a bunch of AMD metal and I bought it so cheap that I almost felt guilty. I sold off the AG hood, trunk lid and few other pieces that I won't use. The car was just a shell and not much else came with the car, save for the numbers matching block. It's a B5 blue, 383 auto car with a full fender tag.
NewRR2.jpg
 
Only thing I can say is start saving your money,it ain't going to be cheap !
 
SuperbirdBuild002.jpg


- - - Updated - - -

Got it moved into it's new quarters and started on removing the other quarter panel and dutchman panel.

- - - Updated - - -

Only thing I can say is start saving your money,it ain't going to be cheap !
Nothing ever is but you've got experience in bird conversions!

- - - Updated - - -

I bought a new sheet metal nose from Gene Gregory, a bolt on superbird hood and front fenders from Glasstek. I'm no longer using the fiberglass fenders so they'll go in the attic.
Superbird002.jpg


- - - Updated - - -

Twin air compressors........
Turbo001-2.jpg


- - - Updated - - -

And a block.......
alhemiblock.jpg
 
Awwww man this is gonna be a bad BIRD!! LOVE IT something you can tear the hell out of and not feel one bit of guilt about tearing up a REAL BIRD but you still have the jaw drop effect awesome sing me up on yet another great build on here!!:headbang:
 
Too cool!! Good luck with this hot rod, can't wait till it's done . I have a 70 body also,,, really rough and thought about something of this nature , the reality is funds will never allow it so I'll just live my dreams through your posts, lol
 
Picked up a set of Hemi heads that were CNC'd by Jeff at Modern before he past away. Got some valve covers and an Indy mod man intake base as well.
540TurboHemi001.jpg
 
Looks like a winner man, we do what we need to if were to enjoy our cars, i love the regular 70 Road Runners but this is your ride, Go for it and have fun!!! keep us updated please!
 
Yeowza! This is gonna be nuts! :headbang:
 
You've got my attention but I'm scratching my head to as why you need he extra motivation????? Like others have said this is going to be badass and I'm definitely going to be following along.:headbang:
 
The body.....or what's left of it needs a ton of work.
photo_zps93148548.jpg


- - - Updated - - -

To get the big drag radials under it, we'll need some wider tubs... 3" strips inboard.
photo_zps6aed89d4.jpg


- - - Updated - - -

The other tub was already installed so I zipped the inner half back out and then added the strip.
photo_zps2fb2b0b9.jpg


- - - Updated - - -

747, when they get to this stage, you need all the motivation you can get. Bodywork ISN'T my specialty!
photo_zpscf99188f.jpg


- - - Updated - - -

While I was getting the minitub stuff going, I decided to see how the 727 and gear vendors would fit.
photo_zps854f701d.jpg


- - - Updated - - -

photo_zpsbcac0677.jpg


- - - Updated - - -

I decided to mock up the turbos to see what would work best.... this would work, but isn't what I decided on.
3DBF7723-1E6B-48F5-846E-257CAE542278_zps7bvwiqvp.jpg


These little 76mm precisions are easy to package but probably way smaller than what I really need.

- - - Updated - - -

This is a great location and would let me keep the inner fenders but I decided that I didn't want the heat under the hood so I'm putting the turbos under the front fenders. I saved the center of that hole so I can plug it back up.
E4E38ACD-D7EE-48FC-99CE-ECB72D37D874_zps3a8cbcer.jpg


- - - Updated - - -

More mockup shots... I got the engine plate fitted for height with the 727/GV setup. I'm going to run a dry sump on this engine to keep the oil pan up in the car. It will also have a belly pan under the engine to keep oil off the track in case it all goes wrong.
4AE30383-B46B-4874-98E4-7DCA959728A8_zpsdrelpa0z.jpg


- - - Updated - - -

First fitting of nose and fenders. I'm not digging these fiberglass fenders from a practicality standpoint. They're very flimsy, I'd hate to try and pull a valve cover and run lash over them. My other options are steel and making them removable with Dzus fasteners. Both options have their pros and cons.
48453398-BF53-4083-AD87-60CEFA4E270A_zpsnwj517rc.jpg


- - - Updated - - -

I still need to make something to hold the nose on. It isn't a restoration so I don't want the massive stock setup with all pieces and parts. I want to be able to easily remove the nose and set it on the ground next to the car if I have to work on something at the track. I'll probably put two "legs" on each side of the chin spoiler and a couple of "skid plates" on the rear edge of the nose where it meets the lower valance.
F0EF7225-86E4-471B-AF40-C4636FE59214_zpsvznpox8s.jpg


- - - Updated - - -

Turbos will be under here.... Plenty of room and then some.
651EF15F-BC44-4D5B-BB8B-E19C699AA3E9_zpsk1ytfmvd.jpg


- - - Updated - - -

The hole in the above photo is from this mock up. Another decent location but has drawbacks. Metal work and having the hot side right by the radiator being the two big ones.
A6DF576C-5AE4-4CE7-9ED5-3907533EFD22_zpsisz7fhlc.jpg


- - - Updated - - -

41B87A00-42E6-4823-92EA-CE285A8AE22C_zpsmxfxx7ut.jpg


The down pipe from the turbo would be easy to run under the car here, but underhood heat and trying to pull valve covers over a hot down pipe made me look to move them under the fenders.

- - - Updated - - -

Took time out to help my buddy build a small block ford and dyno it. He made 1600hp and his car is lighter so I have to hit 1800hp. We'll see
BBAC65CF-EDBC-4C31-8F54-22D434405975_zpslva6ozmf.jpg

81FC45B1-9155-4D31-A6C5-40EF54CEA98F_zpsqcqv7qjg.jpg


- - - Updated - - -

79627CBA-FE7A-4060-8F72-2A598D31AC23_zpsu36m6x2n.jpg


- - - Updated - - -

Oh well, back to playing with turbos. Painted this pic.... it's a work of art, lol.
3d899266-046a-40b6-a975-c8b4bd23d281_zps6676aee4.jpg
 
That is just ridiculous, 1,600hp??????????
 
That is just ridiculous, 1,600hp??????????

That's a street car. 2000hp and up is race car territory these days. 1000 at the flywheel today is like 500 was back in the day, weak. Mine will hit 1800 on the engine dyno or I'll be selling the 76's and moving to 88's or 91's. My eventual goal is to drive a couple hours to a track, pull in, run a 7 and drive back home. This combo should be good for mid to low 8's.
Anyway, back to the body work. I noticed that the guy who had fixed some previous damage had put a driver's side quarter skin on and did some shoddy work in the process. He ripped the spot welds right out of the door jamb when he took off the original quarter. More work to do.
09595755-2B22-4DE6-9744-7F0AD2928F22_zpsd7mkftdm.jpg


- - - Updated - - -

Notice the rocker panel behind it? Luckily, the passenger side already had a new AMD rocker on it but the driver side was up to me. I wasn't tearing all those original spotwelds out so I chose to cut it down the sill seam and cut the AMD rocker to matc
09BD55D6-AF7B-4CAE-835A-B933CF2F54A8_zpsrxatduts.jpg
h.

- - - Updated - - -

The rear frame rails were rotten and needed a bunch of work. The previous owner had laser cut some patches for them. Since this was no restoration, and since I was going to cut into them for the rear spring sliders, I chose to use the patches.
4D1012C9-5A74-435F-B909-1A5161169BFF_zpsoi6p3z7m.jpg

32CED1C4-B4A2-4E25-B0AB-368F080404A2_zpsrewsd3sa.jpg

Laser cut patch pieces. Much cheaper than AMD rails!!!
4C66C410-30E7-4681-B77D-5C625669CAD9_zpsrd0xcbwj.jpg


Got this one in place. If it weren't for certain rules requiring the original frame left in place, I would have just cut these out and fabricated chromoly round tube rails.
E82E3B0F-C0EE-4E67-A74D-7ED5856D1F73_zpsw1xegmqz.jpg


- - - Updated - - -

0E8AE692-6EF6-4CCF-9A1D-CA4DD63659A7_zpsul9shkfo.jpg

0BF7D9DA-17E7-46F1-9441-226B08984CC3_zpspyciyurv.jpg


I got the rear cross member in place and removed the package tray that was butchered to put in a roll bar "back in the day"!!
59F693F5-FA37-4A99-A2E2-DFD0F1B10BD1_zpsr1esmjh7.jpg


- - - Updated - - -

0C728641-E600-4CAC-AF31-D3A43EB4884B_zpsudapxiwd.jpg


- - - Updated - - -

Test fit the tray.
F6791848-73F2-4181-A77B-8D53C31BE524_zpsfxembm7l.jpg


- - - Updated - - -

I cut the rocker off while I was removing things. Looks like it was patched right over the rust hole. Great work, whoever you are!!
D393B808-A52F-4B0F-8044-E5D3A529DB23_zpsdcf5mymk.jpg
 
A9BE3E8E-7FC1-408C-8BB3-BF9CB864D125_zpsfo6vso4t.jpg


- - - Updated - - -

Another frame rail patch.... fun. Not really!
578203B3-86C6-47D2-A2BC-97D76F1A1C45_zps6rw3ewdk.jpg


- - - Updated - - -

EE43FCEE-625C-42F2-84F7-87B50F196348_zps1rb5zoxe.jpg


I made a patch for this hole as well. These frame rails are junk, but I can't justify the price of AMD for a drag car. With the chromoly chassis in, these won't do anything any except hang there.
2D8D9E6F-3683-441E-90E0-F567901FA745_zpsxgcbxro3.jpg


- - - Updated - - -

I welded the patches into the frame rails but didn't get too wrapped up about finishing them since I'll be cutting back into them to put in the rear leaf sliders.
91043306_L.jpg


I also didn't add back in the original braces and shackle mounts to the frame as that's just more weight to drag around.

I fit the trunk pan and cut the upper part to fit in between the wheel tubs that were widened.
93759C87-4FF0-4DB0-A795-B0B894B9BA5E_zpserriyvf7.jpg


- - - Updated - - -

I did a sheet metal mockup just to see how the rest of the puzzle went together.
3057A22D-6D6D-4C6A-951E-53F1385C378B_zpsq8gqwwek.jpg


- - - Updated - - -

I need to see stuff like this to get me through the tedious stuff like plug welding and patching.
F2FCE05F-E965-47A5-A9EF-36F5EB48872F_zps0spwkkuw.jpg


- - - Updated - - -

I marked and drilled all the spotwelds in the trunk floor and then mounted the tank cross brace to the floor.
288A0C45-957F-46FA-9673-3E2493E3F61C_zpsolnkn7av.jpg


- - - Updated - - -

E9A3B753-119C-4C6A-88A4-754AEEED71ED_zpsz8ovxovz.jpg


- - - Updated - - -

After all the welding, the driver side rail had bowed in 1/4 or so and they went out of square. I had to put a strap on it and square it up before I mounted the trunk pan. I had to weld the pan to the passenger side rail first, then do the front and rear. I did the driver side rail last. I'll show you how I pulled that out in a few shots.
1D0FB737-9EF5-4D87-BDC8-6F331E677B7A_zpsd0ynwqgn.jpg


- - - Updated - - -

These are poor man's CLECO pins, and frankly, they work better in some applications.
5FB37699-32AB-4688-B7E5-09A73F22A066_zps9q86jju7.jpg

5FB37699-32AB-4688-B7E5-09A73F22A066_zps9q86jju7.jpg

Before I welded the trunk pan to drivers side frame rail, I had to pull it out. I put the rotisserie against the front and rear of the rail and used another ratchet strap to put it. I pulled on it a bunch to get it to stay out that extra 1/4".
E97391E4-B0A3-4BC8-9B52-50F616F313F7_zpsoekivssq.jpg


- - - Updated - - -

2CB8BB9D-D1BD-43F6-B899-B5B07F7316B4_zpsdpp5iiag.jpg


- - - Updated - - -

In and plug welded. I'm not a fan of all this metal work, and I'm just getting started!
48CF3D24-D354-4567-889F-73F102F97C80_zpsd5xkfdbl.jpg

BE50DF4F-6A67-49EA-B427-0DC496F9362A_zpsw2mb6ooy.jpg

Not bad for a racecar!
D75A78D3-B09E-4200-BC43-2BF395E397F5_zpsuyqyi3fx.jpg


- - - Updated - - -

7ECEF1D0-E6BD-46A8-BC0D-1110C7C3A994_zpsxyjacfzu.jpg


- - - Updated - - -

Since the drivers wheel tub wasn't welded in, I removed it to make it easier to put the curved area around the tubs back in.
BBFF19A6-59DE-4C7F-9DF7-64A042E072BB_zps8iwq5vzv.jpg


- - - Updated - - -

6B8DAF51-663D-42D2-B5E7-859503462FB4_zpscrpqbrv8.jpg

To break up the monotony of body work, I tend to jump around. I'm guessing it's not a good practice, but hey, I have to bow to my ADHD....so I worked on the rocker panel. Here's my test fit.
91399C2E-3B97-4FD6-8CE3-35C2F18CC0C8_zps6mfjg8l4.jpg

A3D200E1-DC0B-4623-A514-5CEFC75DED96_zpsq5h6ufu0.jpg


- - - Updated - - -

It isn't show car perfect, but we're gonna ride this bird hard and put it away wet anyway.......so no big deal.
6ED9B1E5-6E46-4408-8639-210AE95EEBEB_zpscvlaokpg.jpg


- - - Updated - - -

469FC226-A484-4CD2-A7D3-6EE646E41179_zpslj8eu1ip.jpg


- - - Updated - - -

Tacked in. Nine billion more teeny, tiny weld dots and it'll be done. Did I mention the ADHD?
8EA6CF5C-A707-4D54-9301-97BE7971034C_zps3h1o80is.jpg


- - - Updated - - -

After 7 billion little welds, (at least that's what it seems like), the left wheel tub piece is finished.
40C261DA-3C3D-46F8-BB29-482F3E3E7361_zpsbch590xx.jpg


- - - Updated - - -

Since I was at this stage, I decided to see if my wheel wells were wide enough to run some big 325 drag radials. They'll fit, but due to the sloped outer tub, the tires have to get pushed to inside by 2-3" to get the car low enough for me. It looked completely stupid so I decided to whack up the outer tub and add 2-1/2 to it. I won't go into detail on it here, but you can check out that thread here. httphttp://www.forbbodiesonly.com/moparforum/showthread.php?85007-Mini-tub-cars-anyone-do-the-outside-of-the-tub-Please-post-up-some-pictures://

- - - Updated - - -

On to the passenger side tub. A little work to get that patch in.
818140B0-574A-44EF-9A18-C2F9699912B4_zps6sgxhuvs.jpg


- - - Updated - - -

81208C4A-2DB0-45E1-A8F8-96351E68DA2B_zpsrqtyfgfa.jpg


- - - Updated - - -

Now it's starting to look like something.
D0ECBD1A-650E-488C-A30C-B0CB0B442A51_zpsmatp3hch.jpg


- - - Updated - - -

More tacks on the rocker..... oh look, a shiny penny....
A8FCD90A-FDD1-4A68-967E-D65C4FE4D656_zps8rgnqihq.jpg


- - - Updated - - -

I figured that when I mount the rockers, I'd like to have the doors on to work that profile against the quarter and make sure I wasn't making a mess, so I took another break and rebuilt the door hinges. You can read all about that right here. I enjoyed that little distraction. Easy stuff for a change.
http://www.forbbodiesonly.com/moparforum/showthread.php?85351-Door-hinge-rebuild-Resto-Rick-Rebuild-Kit
showthread.php


- - - Updated - - -

Boom, we have doors!! That actually don't drop an inch when they're opened!
589C3C9F-5418-4DDD-B8AD-723EF6871D2B_zpsruqmzjae.jpg

2D7FB501-73E3-4A43-A791-304A011361A3_zpsqdkkinl2.jpg


- - - Updated - - -

80B314D4-BE08-4BF7-B6BA-6E23BE2B9E69_zpscrdrvnrr.jpg


- - - Updated - - -

Here's how my Maxitub job fit with the quarter panel.......... really well!
F565468D-2BBF-4698-AFD1-FDC7B74785CE_zpssldguwvb.jpg


- - - Updated - - -

More mock up. My philosophy is lots of mock up and minimal rework. I like doing work, I don't like doing rework.
FAF2E8DC-EC27-46E7-9AB6-BFC9A491C699_zpsjsdrqmxd.jpg


Still a lot of work needed on the door jamb to get this all right.

- - - Updated - - -

Eh, good enough here....
41087C2B-3B0C-477C-B414-42BAF8BCC487_zpsx45zpwso.jpg


- - - Updated - - -

This area is a mess and the little corner pieces need a bunch of work to fit right. Still more mock up here.
1591EEF5-3966-444F-84E0-B5B448EA3CE7_zpsp5jqdpet.jpg


- - - Updated - - -

F8C2C57B-ECE5-4100-BA40-8E170BAC88C7_zpsmufs8l8g.jpg


- - - Updated - - -

Went and cut the passenger side tub up. I cause more work than I finish sometimes.
14F4CABE-EA50-4A81-AAF8-ADE6AAD03C9D_zpsajwscwsd.jpg


- - - Updated - - -

Took a little trip to pick up some steel front fenders. The slow class at drag week (limited to 8:50 quarter mile times), requires that I have an all steel body including fenders but allows me to use a fiberglass hood and deck lid. So I put the fiberglass ones in the attic and I'll get more metal working (yeah....not) practice with these fenders.
e3ae8c4c-f0d1-418d-b1ba-d959d8259f11_zps8156af50.jpg


- - - Updated - - -

Turbo mounts right here!!!:headbang:
F3C5822C-54F5-4D7D-A849-09D9BE0ABEE0_zpsmawxrgfl.jpg


- - - Updated - - -

Back to body work... Ughhh....
Driver side quarter trunk floor extension. These are either made too long or I'm a shoddy body metal guy. I'm leaning towards a combination of the two. Found out later, that it's all me, lol.
9CFD7193-ACC3-4CAC-BAB2-8DCB96BA55F3_zpscwecm1kj.jpg


- - - Updated - - -

Laying on your back while welding these makes a fun game to avoid the hot spatter dropping on you. I can't wait until I can put this car on the rotisserie..
A8C9D411-9A4E-4C56-AEF7-9F3BDA8BAC32_zpsgrasjvwq.jpg


- - - Updated - - -

One down, one to go........

B7CFAD16-1BAC-4E93-A8CC-F9DC009FA674_zpsuk06e3iq.jpg


- - - Updated - - -

Corner support....
17B685ED-498D-4364-91D7-49CB468D9CF5_zpstlpzfdfi.jpg


- - - Updated - - -

This makes a handy work bench. If I were smart, I'd put the cage main hoop, back bars, and rear frame rails in before I button up the trunk.
078178C9-B102-49F5-8B35-408A0021F50F_zpsqnjsounx.jpg


- - - Updated - - -

Started to work on the driver side door jamb.

B4BBF383-4904-4555-8AC8-E2372007A1C2_zpstpk6khkq.jpg
 
OK, so I've gotta stayed tuned and see how this turns out. It's going to be one bad black bird!
 
Auto Transport Service
Back
Top