Cop Magnet
Well-Known Member
I've posted this on other forums, and it's really a restomod, so I hope you will forgive my posting it here. I know the site is mostly collectables but there are some details here you might appreciate. While most of the detail is applicable to Chargers, there are some new approaches I took to fixing up the plastic that I think any of you could use.


- - - Updated - - -
This is what the mounting tabs are supposed to look like. A clip goes through the end and the metal part of the grille screws through these to hold the plastic part in place. I suppose this is to allow the grille to flex a little and not crack where it's mounted. In my case, most of the mounting tabs were cracked or broken right off. I'll show you how I repaired them.

This is the key:


I used JB Weld epoxy-based plastic putty for the repairs.
Quick tip, if you've worked with too much material and it starts to harden before you've used what you've prepped, you can microwave it for a few seconds and gain some extra time.


If you really want to get crazy with strength, you could throw a washer in between the mesh and plastic as a through point for the screw. I didn't do that, however.


File the inside part down so your retaining clip can still slide over.

Grinding and sanding the outer part down. This will get drilled through at the original mounting point for the retaining clip.

Quick jump ahead to the finished product. Obviously, the inner part doesn't show, so I wasn't concerned with extra material.

- - - Updated - - -
For the repair of my mostly intact meshwork:

I built up JB Weld where it wouldn't show on the back side of the grille. I couldn't think of any other way to do it. Any other ideas?

From the front it looks good though:

- - - Updated - - -
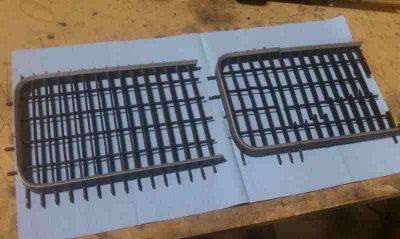
So on to the repair of the "horns" on the grill. This part fills in the space between the grill and front bumper. This is what is should look like. I didn't have either side to mock up a part from, so I bought an otherwise useless piece except it did have this horn in perfect shape. Note the little cut out on the lower horizontal. The bumper mount fits under there, I believe.

I made a mirror image piece using mesh and JB Plastic.


I used a lot of measurements and eyeballing it.


Jumping ahead one more time, this is the finished piece after paint:

- - - Updated - - -
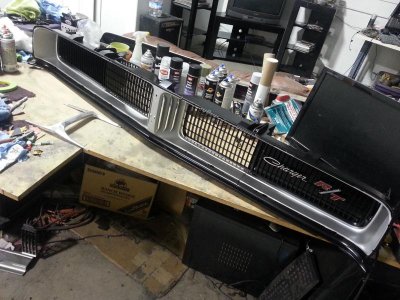
On to the Charger script on the grille.
Mine was in terrible shape.


I bought a reproduction piece that was, well, less than factory perfect.


Just didn't look good. Maybe I'm a perfectionist. So be it.

I sanded down the edges where there was a lot of casting flash. Then paint.


I'm not sure what I will do with the little logo that goes up with the pop up headlight door. I have a friend who teaches CNC at our local community college. I've been talking to him about machining both the Charger script and perhaps a small SRT-10 logo for the door.
- - - Updated - - -
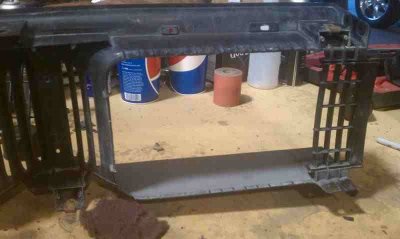
On to the frame and light modifications:
This is the kit I bought to use. BMW halo headlights with HID conversion and LED conversion for the ring light. These fit 89-94 BMW E34/E32 5 and 7 series. The original trim ring is at the top for reference--although the lights are listed as the same size, the new ones are slightly larger and of course deeper.


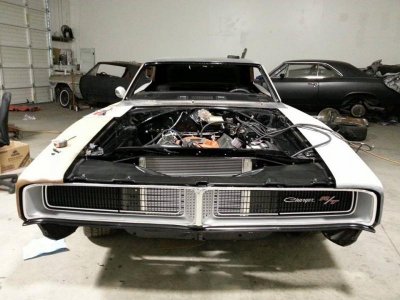
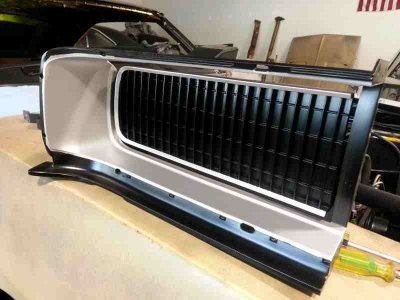
Look how nice the end horns turned out. Given that I had no original reference to work from, I think it turned out pretty awesome. I will motorize the doors once I get the car nearer to completion and can figure out how best to mount the motors.


- - - Updated - - -
This is what the mounting tabs are supposed to look like. A clip goes through the end and the metal part of the grille screws through these to hold the plastic part in place. I suppose this is to allow the grille to flex a little and not crack where it's mounted. In my case, most of the mounting tabs were cracked or broken right off. I'll show you how I repaired them.
This is the key:
I used JB Weld epoxy-based plastic putty for the repairs.
Quick tip, if you've worked with too much material and it starts to harden before you've used what you've prepped, you can microwave it for a few seconds and gain some extra time.
If you really want to get crazy with strength, you could throw a washer in between the mesh and plastic as a through point for the screw. I didn't do that, however.
File the inside part down so your retaining clip can still slide over.
Grinding and sanding the outer part down. This will get drilled through at the original mounting point for the retaining clip.
Quick jump ahead to the finished product. Obviously, the inner part doesn't show, so I wasn't concerned with extra material.
- - - Updated - - -
For the repair of my mostly intact meshwork:
I built up JB Weld where it wouldn't show on the back side of the grille. I couldn't think of any other way to do it. Any other ideas?
From the front it looks good though:
- - - Updated - - -
So on to the repair of the "horns" on the grill. This part fills in the space between the grill and front bumper. This is what is should look like. I didn't have either side to mock up a part from, so I bought an otherwise useless piece except it did have this horn in perfect shape. Note the little cut out on the lower horizontal. The bumper mount fits under there, I believe.
I made a mirror image piece using mesh and JB Plastic.
I used a lot of measurements and eyeballing it.
Jumping ahead one more time, this is the finished piece after paint:
- - - Updated - - -
On to the Charger script on the grille.
Mine was in terrible shape.
I bought a reproduction piece that was, well, less than factory perfect.
Just didn't look good. Maybe I'm a perfectionist. So be it.
I sanded down the edges where there was a lot of casting flash. Then paint.
I'm not sure what I will do with the little logo that goes up with the pop up headlight door. I have a friend who teaches CNC at our local community college. I've been talking to him about machining both the Charger script and perhaps a small SRT-10 logo for the door.
- - - Updated - - -
On to the frame and light modifications:
This is the kit I bought to use. BMW halo headlights with HID conversion and LED conversion for the ring light. These fit 89-94 BMW E34/E32 5 and 7 series. The original trim ring is at the top for reference--although the lights are listed as the same size, the new ones are slightly larger and of course deeper.
Look how nice the end horns turned out. Given that I had no original reference to work from, I think it turned out pretty awesome. I will motorize the doors once I get the car nearer to completion and can figure out how best to mount the motors.

