• When you click on links to various merchants on this site and make a purchase, this can result in this site earning a commission. Affiliate programs and affiliations include, but are not limited to, the eBay Partner Network.

Rook's 68 Charger - What have I gotten myself into this time?

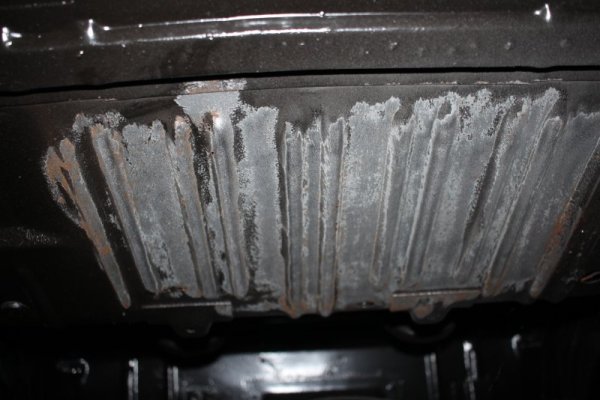
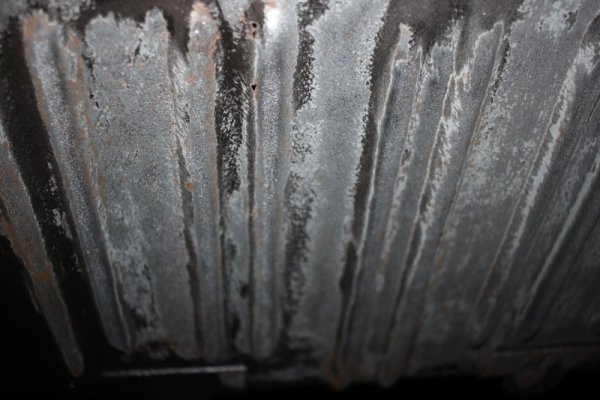
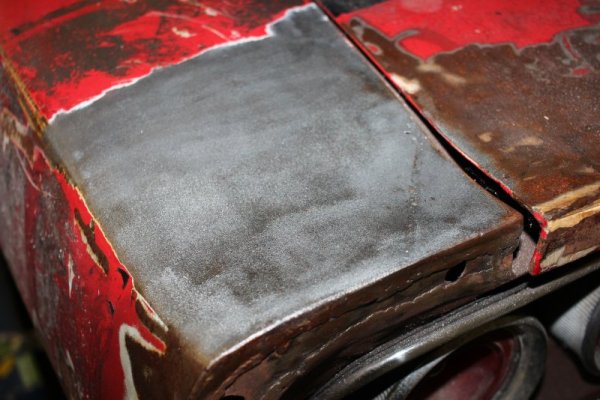
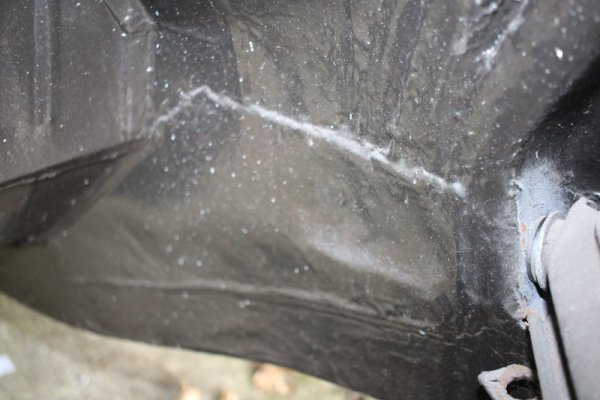
Agreed with the rest, looks like a solid project. I'm working on a '70 Charger. My body man fabricated a simple, straight repair patch for the trunk floor extension on the driver's side. It obviously doesn't look original, but it works for Grendel...she's a driver.

Trunk1 (Large).jpg


Trunk2 (Large).jpg


TrunkFloorDone1.jpg
 
I'm all about cars that handle well but just how well does a person want them to handle vs ride quality going down the highway? Heavy duty springs vs lighter springs but bigger sway bars is what I like for a street driven car. Never did like my cars to ride like a heavy duty truck going down the freeway so they got a bit softer spring and bigger sway bars with better shocks. Think about it.....3/4 ton truck going straight down the freeway or one that rides smoothly going down the freeway.....but handles well in the corners? It can be accomplished unless you want a car that handles really really well in all aggressive cornering but rides like a 3/4 truck (or even a 1 ton) in the straight line riding.
 
I'm all about cars that handle well but just how well does a person want them to handle vs ride quality going down the highway? Heavy duty springs vs lighter springs but bigger sway bars is what I like for a street driven car. Never did like my cars to ride like a heavy duty truck going down the freeway so they got a bit softer spring and bigger sway bars with better shocks. Think about it.....3/4 ton truck going straight down the freeway or one that rides smoothly going down the freeway.....but handles well in the corners? It can be accomplished unless you want a car that handles really really well in all aggressive cornering but rides like a 3/4 truck (or even a 1 ton) in the straight line riding.
I agree...I want my Charger to handle better than it did in 1970, what with the new radial tires and some suspension upgrades, but not at the cost of riding like an ox-cart. I think I'm aiming for a compromise suspension situation with all new shocks, offset Moog UCA bushings, and maybe the 1.03" front stabilizer upgrade and quick-ratio Pitman arm...and add a rear stabilizer bar if budget permits. I'll leave it at that.
 
I agree...I want my Charger to handle better than it did in 1970, what with the new radial tires and some suspension upgrades, but not at the cost of riding like an ox-cart. I think I'm aiming for a compromise suspension situation with all new shocks, offset Moog UCA bushings, and maybe the 1.03" front stabilizer upgrade and quick-ratio Pitman arm...and add a rear stabilizer bar if budget permits. I'll leave it at that.
I lowered my 66 Belvedere at least 2" and installed 15x7 wheels with 235-75 tires at all 4 corners. Yeah, the tires were tall but that's what I had on hand. The car didn't even have sway bars on either end but I pulled out weight that started with 3370 to 2950 lbs. Could not believe the difference it made. My 71 Cuda with factory front and rear bars responded very well with better shocks and tires. It too surprised me with the way it handled with 275-60's on 8" wheels the back and 14's on the front. Don't even remember the tire size on the front but it ended up being pretty neutral unless I stabbed the loud pedal in a turn and only then would it turn into total over steer lol. That was one car that I totally regret selling....
 
With Kern Dog's suggestion to lower the front end along with the offset UCA bushings, getting as much caster as you can, hopefully makes a big difference.
 
Hi folks,


My name’s Paul, and this is my first classic car project.
I’m especially interested in the sheet metal and fabrication side of things, so I’m looking forward to learning a lot as I work through this ’68 Charger build.

From what I could gather from the seller, the car was originally torn down for a restoration back in 2016, but the project stalled and the car was stored away then later changed hands with the current seller having too much on the plate to get it done.
There’s been a fair amount of patchwork repair—possibly due to limited availability of full panels at the time—so my thinking is we’ll likely need to scrap a lot of what's been previously done and start fresh in many areas. I’ll get into more detail of the ugly in a following post but as a spoiler its clear this car has had a hit on the front passenger side at one point.
For now, here are some overview photos some bad some good, I'm new to these cars so please feel free to share insights but be kind:


View attachment 1861360

View attachment 1861361
440 with a 727 transmission and an 8 3/4 based on the imagery I've seen online. Orange paint on the block implying its a later model motor thats likely been swapped in? Only have the VIN, no fender tag to work off of.
View attachment 1861362

View attachment 1861394

Maybe it was originally Burgundy before being resprayed to red?
You can also see the outline of the patching that was done around the arches and the front and rear sections of the quarter panel.

View attachment 1861397
Looks like the trunk extensions and the outer fender wells have been patched (true for both sides) Not very impressed with the execution so we're probably going to need to take the quarters off and do this properly.
View attachment 1861425
I did find a pair of AMD outer wheel houses in the trunk though so maybe that was always someone's plan.
View attachment 1861395
I can still see what I believe is the lead filler - shame they approached the quarter panels the way that they did.
You can also see they replaced the panel on the back of the rear window before the trunk.

View attachment 1861396
The trunk floor looks okay with some patches having been done but since the car has been undersealed its hard to really tell whats hiding under there.
View attachment 1861428
It was also hard to see what was hiding underneath all the junk on the floor of the car..

View attachment 1861427
The good news is that as I went through the parts - its pretty complete as far as I could tell, maybe I can do a review of what I found in a following post before I get to the challenges at hand.

Thanks for taking the time to read up so far, I think im limited to 10 photos per post so I'll leave it here for now.
Nothing that cannot be fixed up with a few lazy Sunday afternoons and a few twelve-packs. :lol:

You have a decent jump on a good looking car to restore....we've seen way worse on these here pages over the years. :thumbsup:
 
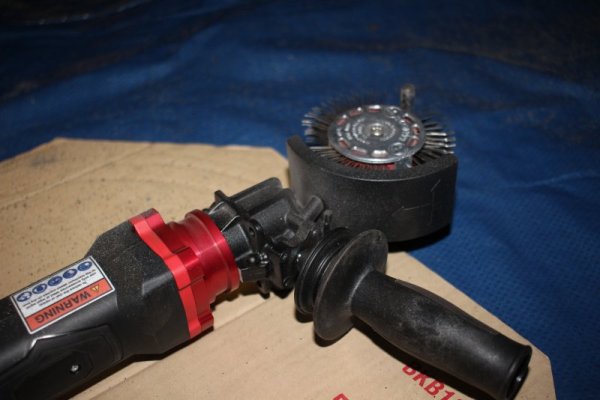
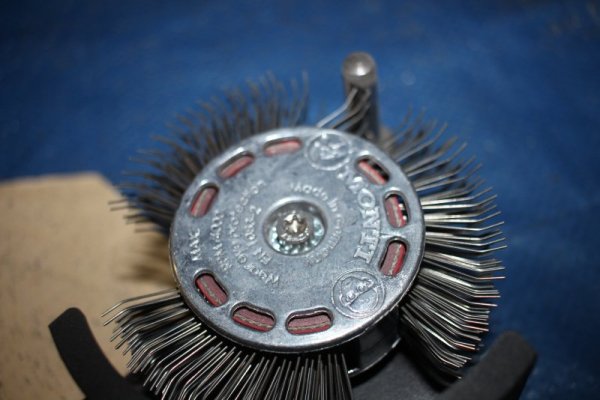
Thanks, guys — a buddy of mine lent me a Bristle Blaster for stripping the underseal.
That’s where I plan to start, just to see if anything’s hiding underneath. I can already see some patchwork on parts of the frame rail, so I guess in the interest of managing scope creep - does it warrant full replacement, or is it something I can live with for now?

I'm planning on stripping the car back to bare metal then getting it on a jig.


Right now, I’m thinking of picking up the following from AMD:

  • Pair of rear quarters (which also gives me a chance to replace the patchy outer wheel wells using the AMD set that came with the car, and replace the trunk extensions)
  • Pair of new front inner fenders, with upper and lower cowl to fender brackets
  • New drip rails

Would be great to hear your thoughts on this approach.

Will get started on the taking off the underseal next week
Strap on a respirator mask, face shield etc to keep the junk out of your body.
 
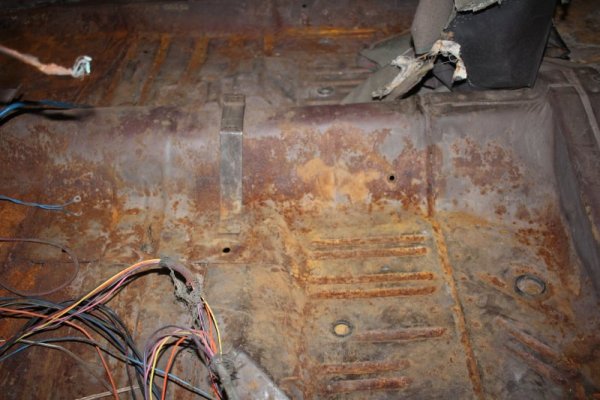
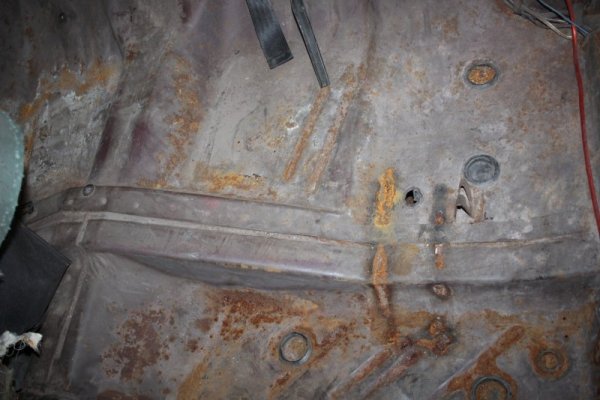
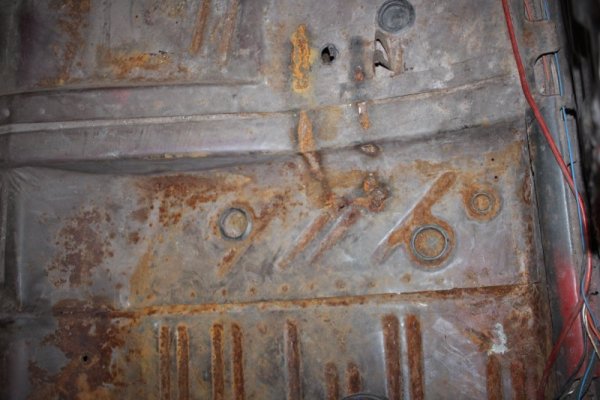
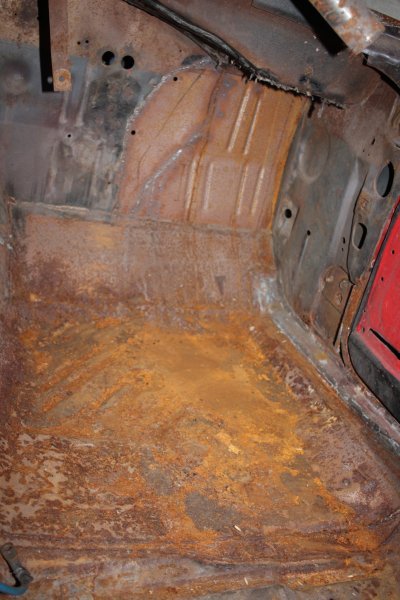
I finally got the car into the workshop, and the first thing I did was clear the interior of parts and debris — which gave me a better look at what had been done… or should I say, attempted. Most of it appears to be surface rust, and overall it’s solid for the most part.

Floorpan clean out 1.JPG


Floorpan clean out -3.JPG

Floorpan clean out 5.JPG
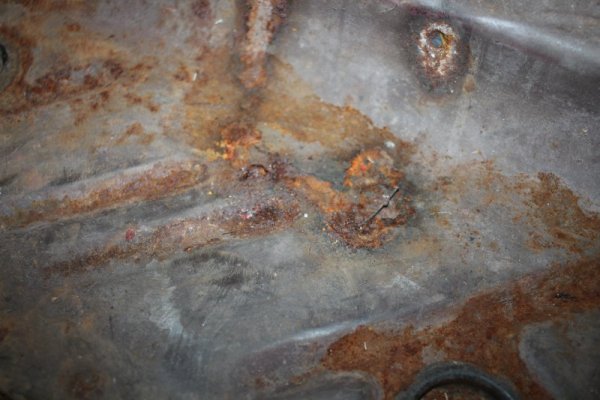
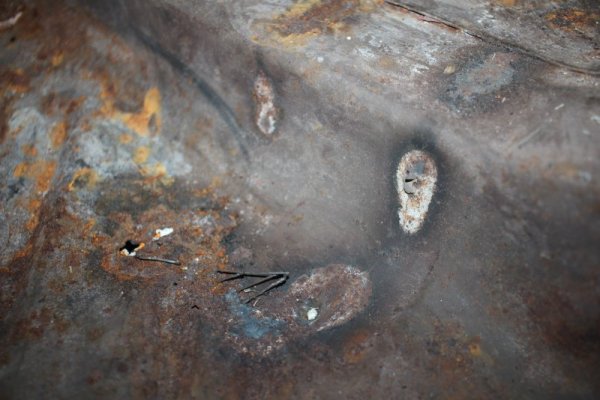
There are holes around the area where the floor support and at times the frame rail has been welded to the floor pan.
Floorpan clean out 4 - bad repair.JPG

I’m not sure what to make of it or how best to proceed. A whole new floor sounds excessive, but a simple patch might not cut the mustard.
Floorpan clean out -7.JPG
Looking toward the firewall, if a new floor pan extends to include the patch panel they’ve added around the door, I might just opt for that.
Floorpan clean out 2.JPG

But I do like to think we had a small victory...
 
Last edited:
The Bristle Blaster my friend lent me is kind of amazing.
Bristle Blaster 1.JPG
I was skeptical about how well it would work, but these bristles are something else.
Bristle Blaster 2.JPG
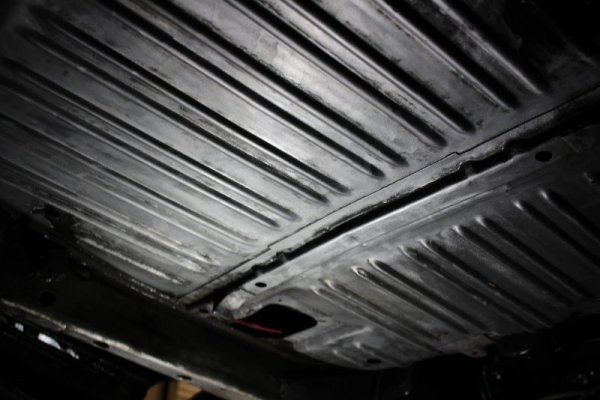
I decided to try it out on the trunk floor pan to see if it would need replacing — safe to say, we’re in good shape.
Under Trunk Pan -1.JPG
It leaves a nice, sandblasted texture, but I’ll probably need to get into some of the crevices with a wire brush.
IMG_9577.JPG
I also worked on a section of the frame rail (no photo) and I’m glad I did, because there was surface corrosion hiding under the underseal. It’s still solid, but it will need to be cleaned out.

I was thinking about blowing compressed air through one of the access holes and putting a shop vac on another. Open to other suggestions.

Rear Quarter Blast -2.JPG
Just for fun, I tackled a rusty patch on the rear quarter. Unfortunately, it has some pinholes, so I’ll probably patch it using a section from the AMD quarter I plan to order.

Unless there’s a better approach I could take?

Thanks for reading and for any advice. Next week, I’m planning to use paint stripper on the car and start taking it down to bare metal, mapping out which panels need what work.
Tactically I'll probably DA it after the stripper then coat with Gibbs oil until I figure out what to do. Might do a Phosphoric coat before the gibbs.

Rear Quarter Blast -1.JPG
 
Last edited:
The Bristle Blaster my friend lent me is kind of amazing.
View attachment 1901341
I was skeptical about how well it would work, but these bristles are something else.
View attachment 1901342
I decided to try it out on the trunk floor pan to see if it would need replacing — safe to say, we’re in good shape.
View attachment 1901344
It leaves a nice, sandblasted texture, but I’ll probably need to get into some of the crevices with a wire brush.
View attachment 1901343
I also worked on a section of the frame rail (no photo) and I’m glad I did, because there was surface corrosion hiding under the underseal. It’s still solid, but it will need to be cleaned out.

I was thinking about blowing compressed air through one of the access holes and putting a shop vac on another. Open to other suggestions.

View attachment 1901347
Just for fun, I tackled a rusty patch on the rear quarter. Unfortunately, it has some pinholes, so I’ll probably patch it using a section from the AMD quarter I plan to order.

Unless there’s a better approach I could take?

Thanks for reading and for any advice. Next week, I’m planning to use paint stripper on the car and start taking it down to bare metal, mapping out which panels need what work.
Tactically I'll probably DA it after the stripper then coat with Gibbs oil until I figure out what to do. Might do a Phosphoric coat before the gibbs.

View attachment 1901346
How much heat is it generating?
 
I would skip the Gibbs and shoot it with a coat of epoxy primer once it's bare and cleaned. Then do your metal work, sand, prep and more epoxy as needed.
Nothing against Gibbs - it's a great product... just not to as inserted into the body work process.

Looks like a good starting point.
 
Looks like the firewall patch was to change the firewall from an air condioning set up to a non A/C set up
 
How much heat is it generating?
Not a scientific answer but not much - I dont think its risking metal warping but I'll keep it to the underside for now as opposed to the exterior sheetmetal.

I would skip the Gibbs and shoot it with a coat of epoxy primer once it's bare and cleaned. Then do your metal work, sand, prep and more epoxy as needed.
Nothing against Gibbs - it's a great product... just not to as inserted into the body work process.

Looks like a good starting point.
Thanks for the advice. This is my first resto, so I’m learning as I go. I’ve been taking it back to bare metal, but my concern with 2K epoxy rattle cans is the short shelf life and waste if I only do small areas. Would it be more practical to invest in a spray gun, even though I’ve never used one?

Looks like the firewall patch was to change the firewall from an air condioning set up to a non A/C set up
Was this something people did? One would think it would be easier just to patch over the inlet and outlet holes.

Continuing to strip it back - mostly good metal.

Undertrunk section 2.2.JPG
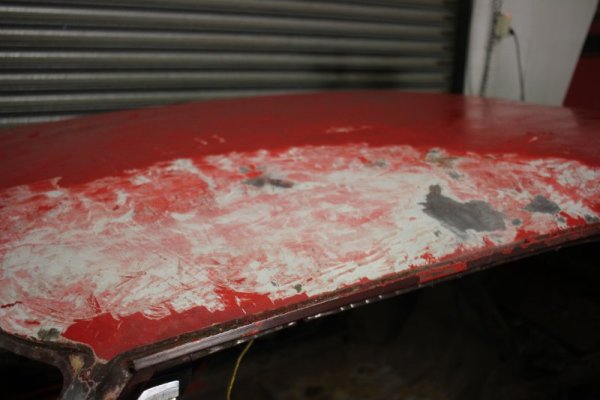
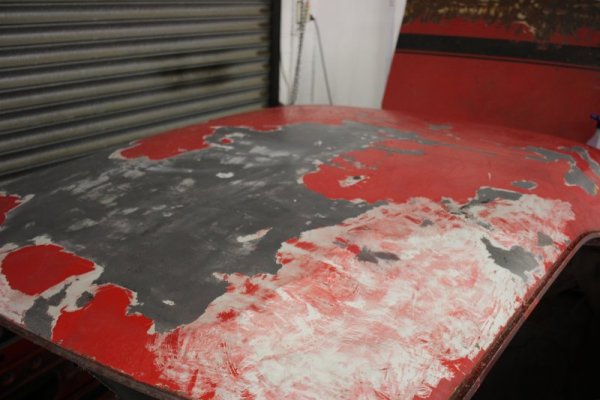
Got some Paint stripper on the roof but wow I think I need some stronger stuff - I'll revisit it with more scoring and some plastic wrap.
Also hit what I assume was epoxy primer. There were several little patches where rust was coming through so I guess it was good to take this all back.
Roof Strip 1.JPG

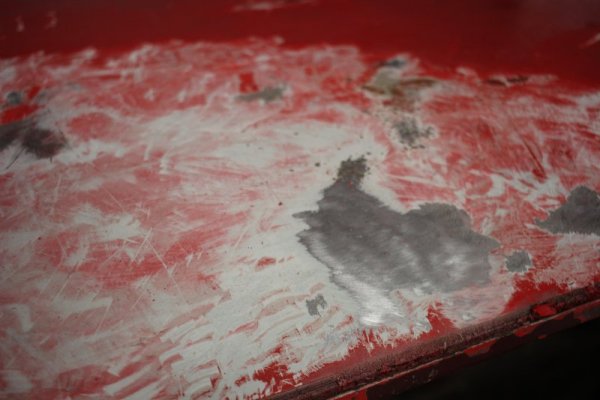
Tested a strip disc and got down to the bare metal.

Roof Strip 2.JPG

Waiting on my compressor to arrive for the workshop and I can get into the nooks and crannies under the car.

Debating getting a bead roller and some 18 gauge (i assume) to do get some patches made for the trunk floor as well as the hood, trunk and drip rails.
 
@Rook Since I didn't paint very much, I went to HF after looking over a very good but well used paint gun that I bought at a pawn shop to see how it was made. Once at HF and pulling one gun apart (junk imo), I pulled everything on the shelf and found all the parts that were machined very well and assembled my own paint guns. One was a touch up gun and the other was a regular size for painting a car gun. Even the employees that walked by didn't say a single word lol It surprised me how good they were after doing that :)
 
Thanks for the advice. This is my first resto, so I’m learning as I go. I’ve been taking it back to bare metal, but my concern with 2K epoxy rattle cans is the short shelf life and waste if I only do small areas. Would it be more practical to invest in a spray gun, even though I’ve never used one?

Yes rattle-can primer is substandard. You want to use 2-part epoxy primer on bare steel, and then a 2-part 2k on that. Wax and grease remover before every shoot. Sand coats for adhesion as directed by the primer.

HVLP guns good enough to shoot primers are very cheap. Get a larger tip size suitable for thick primer. They are easy to use. Of course you need a compressor too that will support the gun.
 
You'll have a hard time getting paint to adhere later if you oil the metal. You're best off to invest in a cheap spray gun now and put real automotive materials on. Any spray can stuff should be stripped off before shooting expensive automotive materials over them. Great looking project BTW, it has a lot going for it.
 
Thanks for the advice guys. I'll be sure to acetone any area that has already had Gibbs oil applied and prioritize getting some epoxy(with a spray gun) on the bare metal.

I also wanted to ask if filling in the holes on the inner front aprons was a common trend at one point with restomods.
@70Sublime's point about the AC holes being filled in the firewall has me thinking maybe all these cuts and patches were part of an effort to do a show car style "clean" engine bay?

IMG_9458.JPG

Would be great to hear your thoughts on whether I should keep them that way with a clean up or get new panels.

Thanks in advance!
 
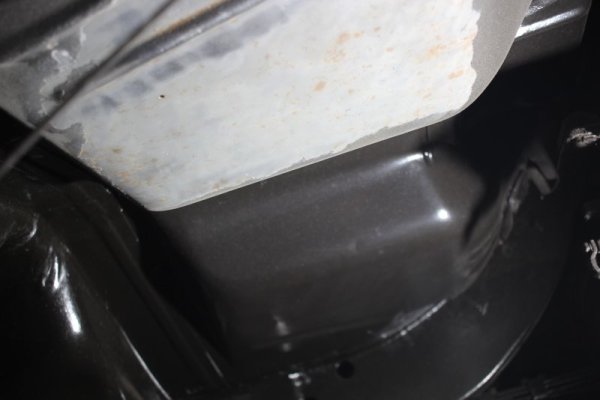
Chipped away at the underseal and the section below the rear seat pans are mint.

SeatPan.JPG
I've noticed light rust residue when I strip back the underseal, same under the epoxy on the roof. Was this a sign that the previous body work wasn't done well?

Need to get some serious paint stripper..
Roof Strip.JPG

I also caught a recent Chris Birdsong video where he did some automotive archeology on a 70 charger. Seems like mine had a "light package" with the blinkers on the hood, trunk and ignition barrel.
Does "Premium" mean anything on the VIN?
Also checked the 8 3/4 and the wheels both spin in the same direction so I assume theres a suregrip in there.
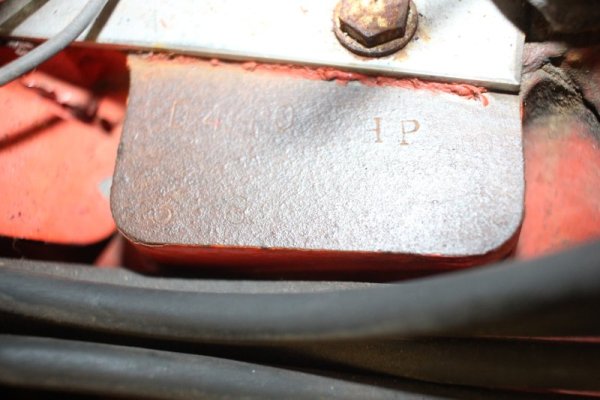
Motor VIN also showed 440 "HP" for what its worth.
Engine Vin.JPG
 
Auto Transport Service
Back
Top