• When you click on links to various merchants on this site and make a purchase, this can result in this site earning a commission. Affiliate programs and affiliations include, but are not limited to, the eBay Partner Network.

1967 Leaf Spring Paint Codes

TX67RT

Well-Known Member
Local time
5:48 PM
Joined
Dec 26, 2013
Messages
116
Reaction score
41
Location
Republic of Texas
I have finished restoring the leaf springs for my 67 R/T, and am wondering if there are factory assembly paint codes that were originally applied. I found none on mine during disassembly, but they were pretty weathered. In the past, I've seen color splotches at the front spring eye location, but can't remember the make where these were applied. It might not have been a Mopar.

Anyway, before I assemble the leaf spring/differential assembly, and install back under the car, I'd like to get some input from the members here. Were there paint ID codes on the rear springs, and if so, is there a color chart somewhere that shows what codes and locations were correct for what applications?

For reference, my car is a 440 Magnum / 727 / 3.23 Sure Grip / St. Louis built car, tag date 03/06/1967.

Thanks!

JD
 
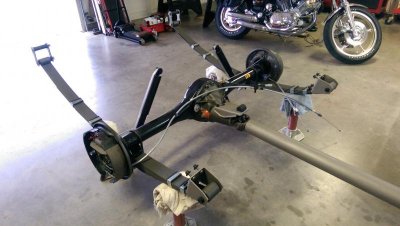
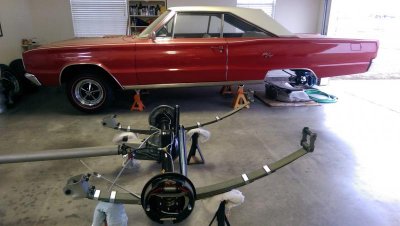
Well, I guess from the number of views, and lack of responses, that would be a "no" on the leaf spring paint codes. Here's a photo of some of my finished work because why not... IMAG0045.jpgIMAG0046.jpgIMAG0219.jpg

IMAG0219.jpg IMAG0045.jpg IMAG0046.jpg
 
That's a sharp R/T you have there! Work looks good - something I'm going to be doing one of these days....
 
That's a sharp R/T you have there! Work looks good - something I'm going to be doing one of these days....

Thanks for your comments, I appreciate it! It's been a fun project, but I'll be glad to get the rear end back under it. Hoping to get her out for a drive sometime this month.

Cheers!

JD
 
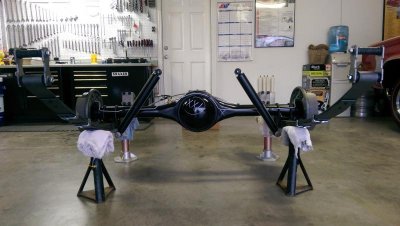
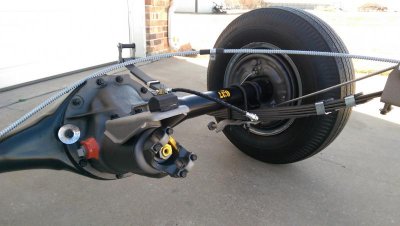
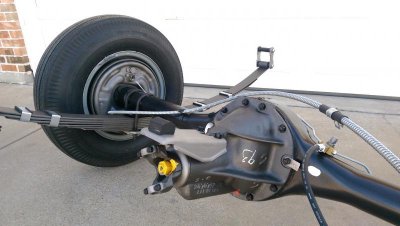
Well, it's been slow going, but I'm getting my rear suspension assembly wrapped up. I pretty much have the differential/spring assembly detailed, finished and assembled, and now working on getting the fuel tank and all new lines and cables installed on the body so I can roll the diff assembly underneath and get it bolted in. Here are a few photos of where I'm at as of today...IMAG0443.jpgIMAG0446.jpgIMAG0449.jpgIMAG0454.jpgIMAG0455.jpgIMAG0458.jpg
 
Wow, This ALL looks sweet bud!!! VERY nice....
 
did you paint or just clean it all up , looks dam good
 
I'm going to be right there with my 68 RR. Looks great!
 
Thanks, guys, for your comments. I debated on whether or not to undertake this project at all, because the car is all original. I knew that pulling any of it apart for restoration/detailing would end my ability to say "all original". However, in the end, I ultimately locked in the decision by doing the car the disservice of letting it set in my shop waaaaay too long (6+ years) without being driven, and the brake hydraulics, as well as the fuel, went south.

Originally, my plans were to pull the master and wheel cylinders for replacement, blow out the lines, and flush/bleed everything. For the fuel system, I was planning to drop the tank, flush (and seal, if necessary), blow out the lines, and put it all back together. This would get her drivable again for weekend driving and cruise nights.

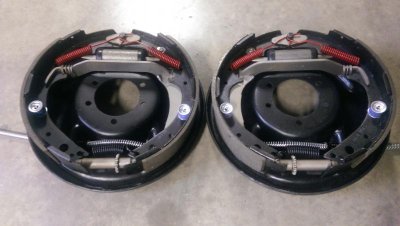
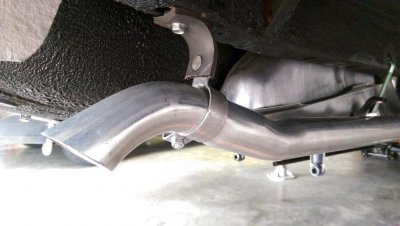
However, as I started digging into the systems, I found myself being uncomfortable with reusing any of the brake or fuel system components. I made the decision to replace everything in the brake system, and almost everything in the fuel system. Everything that brake fluid touches is new; master cylinder, hard lines, flexible hoses, and wheel cylinders. I also replaced the drum brake hardware, friction surfaces, and all the emergency brake cables and hardware just to be thorough. The car now has a new fuel tank, sending unit, fuel lines and fuel pump. Since the tail pipes I had installed in 1982 were rotted, I purchased a new pair.

And, since all this had to come apart, I decided it was much easier to just pull the differential assembly out of the car to do the work. To my detriment (advantage?), I'm sort of a "while I'm at it" kind of guy when it comes to projects, and things always tend to spiral out of control for me, absorbing way more time and money than the original plan. So, I decided that it would be a shame to install all of these new parts without cosmetically restoring all the components involved.

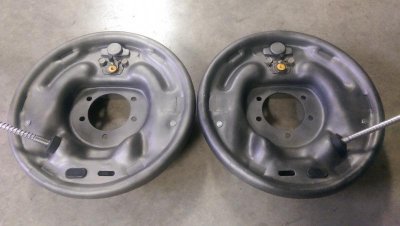
With that decision made, I pulled apart everything on the differential assembly, carefully looking for original finishes, code markings, etc. My blast cabinet was invaluable in getting everything cleaned up to bare metal, and I employed an outside shop to blast parts too large for my cabinet (differential housing, driveshaft, and longer spring leaves). Rather than leave the natural parts natural, or go with clear coating, I employed Eastwood finishes on the "bare" parts, and I am very pleased with the results. For the various black components, I used the closest thing available to replicate the original finishes; industrial gloss black for the diff housing, semi-flat for refinishing the new KYB shocks, flat black to replicate black oxide fasteners. The brake backing plates were originally bare heat treated steel, so I experimented with a combination of Eastwood bare metal and semi-flat black to simulate the darker, mottled steel appearance. I think they turned out passable.

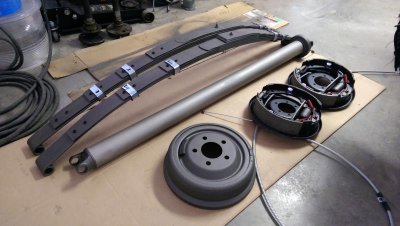
The leaf springs were completely disassembled, blasted, and refinished with Eastwood paint. After refinishing, I completely rebuilt the springs with new interleaves, interliners, leaf clamps and isolators, new front bushing, and shackle kits. The springs were mounted using new, correct-length U-bolts.

After refinishing all the components, I replicated the various assembly line markings using my originals as a guideline, and referencing various sources (Roger Gibson, etc.) on the internet. I believe things are marked as accurately as possible, given the research I conducted. Since I plan to drive the car, I decided against delicate finishes that would be absolutely correct, like bare metal, oxide fasteners, etc. I think the result is a good balance between correctness and real-world usability.

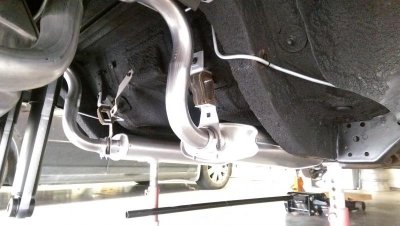
Doing this project was made much easier now that there is such a robust aftermarket available for quality restoration components. I purchased my brake lines, brake cables, and fuel lines from Inline Tube. The fit and appearance is excellent. Accurate Exhaust supplied the tail pipes, although I came up short on the correct tail pipe hangers. Apparently, the one vendor in the world who makes them burned down, and there are none to be had for my application from any vendor I could find. The best answer I can get on when they will be available again is "someday". I had to fabricate replacements that are "correct looking" to fill in until "someday".

Most of the hardware or "generic" components came from RockAuto (their fuel tank is excellent, and cheaper than anywhere else), or O'Reilly's, etc. As noted above, I deviated from original on the shocks by using gas charged KYB's. However, with a scuff and shoot with the correct black, they look correct. It's amazing how much stuff is available from your local parts stores, if you have part numbers to type into their websites.

Overall, I'm glad I decided to go all the way with the rear half of the car, and I'm so happy with the results that I'm planning to drop the K-member, front suspension, and driveline next year for a refresh. I love the details on mechanical components, and coupled with the original paint topside, it should be a great driver that shows well. While it will never win a points competition, I don't plan to use it for that anyway. After 33 years of ownership, I have enough show trophies and dash plaques anyway.

If photos of any components or sub-assemblies would help anyone here, please let me know and I'll shoot some out. I found it surprisingly difficult to find good, clear detail photos online, and am happy to help here where I can.

Cheers!

JD
 
thanks for all that . that was a big help on paint and so on . that's how I like to have my 68 GTX look when I get the differential done ..............Gus.............
 
Looks great JD.

I do have one question for you:

How did you come up with the correct font (size and style) for the date code on the axle tube ?
 
Looks great JD.

I do have one question for you:

How did you come up with the correct font (size and style) for the date code on the axle tube ?

I found a remnant of the stenciled characters in yellow on my differential tube, but it was too far gone to read. Luckily, I found a representative photo on Roger Gibson's web site of a 67 Hemi Charger built one month before my car at the same assembly plant (St. Louis).

I used that photo to replicate the size and font (approximate, really), hand cut a stencil, and painted the tube. And, FYI, it's the last three digits of the axle assembly number, not a date code.

Cheers!

JD
 
Here's the photo I referenced from Roger Gibson's website:

7_67HemiCharger2.8[1].jpg

Note that in the photo, the axle is shown upside down.

- - - Updated - - -

Well, fuel tank and new line went in today along with the restored exhaust hangers, brake line-to-hose bracket, tie-down tabs, and a few other miscellaneous items. This week the brake hard line goes in, and then I can roll the differential assembly underneath and bolt it in. Luckily, I have a few days off this week around Christmas. I'll post some more photos when more goes together.

JD
 
Last edited:
How did you replace the rubber grommets in the leaf springs?
 
How did you replace the rubber grommets in the leaf springs?

I took a drill bit and drilled out the rubber between the inner and outer sleeves. This let me push the inner sleeve out. Then, It was just brutal work with a cold chisel, drift, and heavy hammer on the outer sleeve until I got it cut/pushed out. If I had a hydraulic press, I could have probably used a more civilized approach!

After the outer sleeve was removed, I took a cup-shaped wire brush on my air drill and made sure the spring eye was clean and smooth (I had the main leaves sandblasted before I removed the front bushings). Then I used an appropriately sized socket as a driver to install the new bushing. The new ones went in a lot easier than the old ones came out!

JD
 
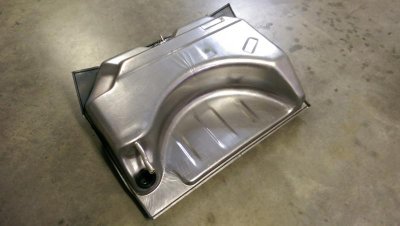
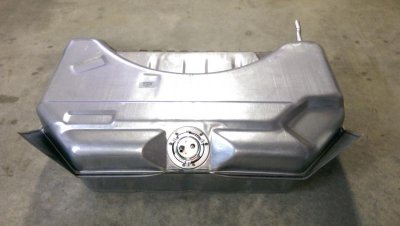
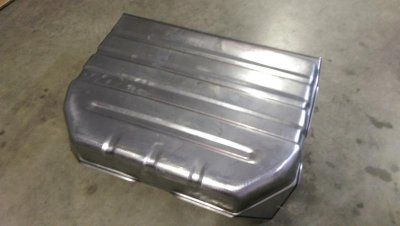
Just an update on the fuel tank. I found and purchased my tank on Rockauto.com. They were the cheapest, by far, that I found, and I am extremely pleased with the quality. It appears to be the exact same tank that other vendors are selling for more than $100 higher. I paid $116.79 for mine (plus shipping), but you can find a 5% discount code many places on line that essentially negates the cost of shipping. Here are a few photos of my tank. Note that I purchased and installed the filler neck grommet and fuel sending unit separately, but the tank came with the fuel sender gasket and locking ring.

IMAG0460.jpgIMAG0462.jpgIMAG0463.jpgIMAG0464.jpg
 
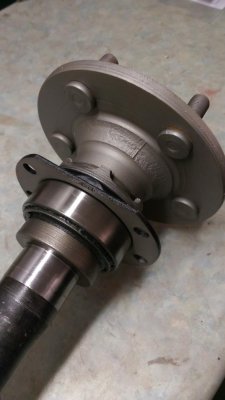
Here are a few progress photos. Bought a hydraulic press so I could install my new axle bearings.
IMAG0661.jpgIMAG0662.jpg

- - - Updated - - -

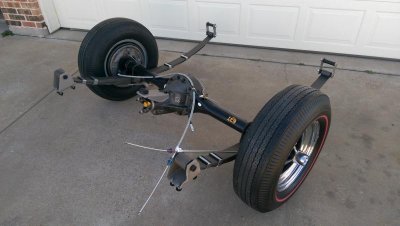
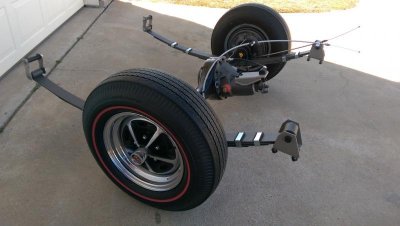
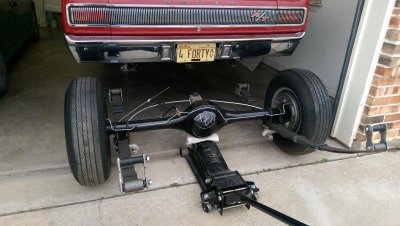
After the bearings went on, I finished the differential assembly, and got it back on the wheels.
IMAG0677.jpgIMAG0679.jpgIMAG0681.jpgIMAG0682.jpg

- - - Updated - - -

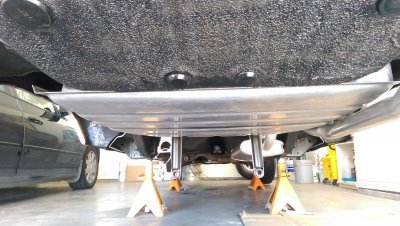
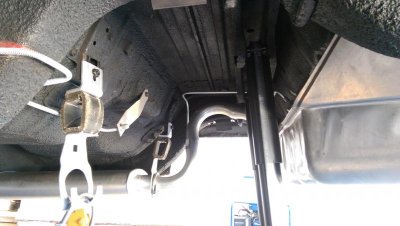
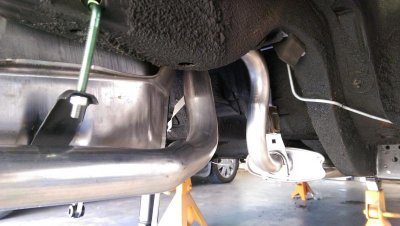
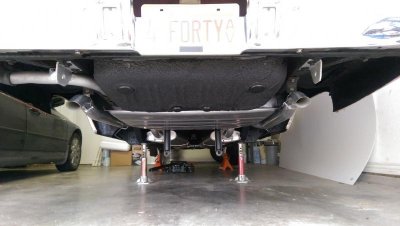
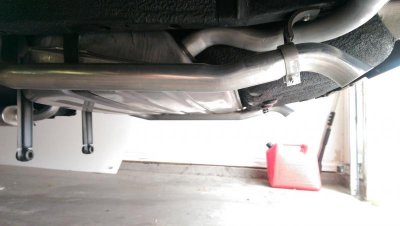
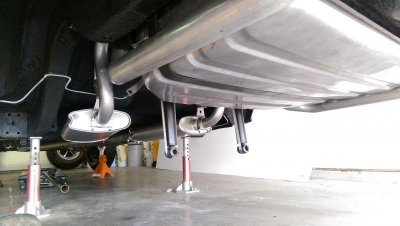
Getting the underbody ready for the differential assembly. New brake and fuel lines, and new exhaust.

IMAG0683.jpgIMAG0684.jpgIMAG0694.jpgIMAG0695.jpg
 
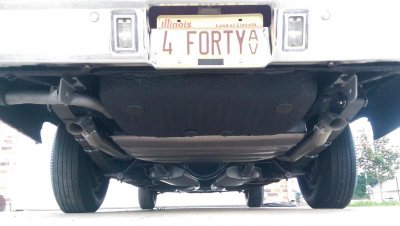
Some update photos. H-Pipe from Waldron Exhaust, mufflers from Classic, tail pipes from Accurate, lines from Inline Tube, fuel tank from RockAuto. Planning to roll the differential under the car today and bolt it in. Back on the wheels for the first time in several months.

IMAG1139.jpgIMAG1145.jpgIMAG1146.jpgIMAG1148.jpgIMAG1150.jpgIMAG1163.jpg
 
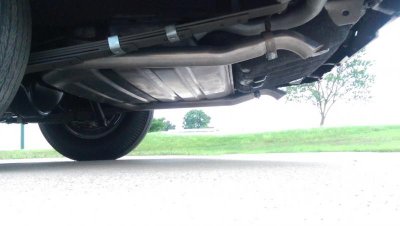
I finally got the rear suspension installed last weekend; she's back on her feet again for the first time in months!

IMAG1295.jpgIMAG1301.jpgIMAG1313.jpg

Not ready to drive yet, but close. I have to install my new front brake lines and hoses, and rebuild the front brakes. A little engine freshening and tune up, and I'll hopefully be ready to go! It might take a month or so, but by then, maybe the #$%@ rain will have stopped here!

Cheers,

JD
 
Auto Transport Service
Back
Top