• When you click on links to various merchants on this site and make a purchase, this can result in this site earning a commission. Affiliate programs and affiliations include, but are not limited to, the eBay Partner Network.

4th generation muscle.....

WP29440SE

Well-Known Member
Local time
4:08 PM
Joined
Dec 7, 2011
Messages
4,093
Reaction score
3,296
Location
Englewood CO
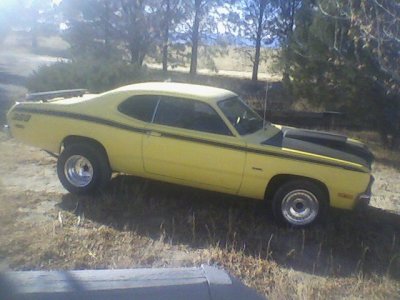
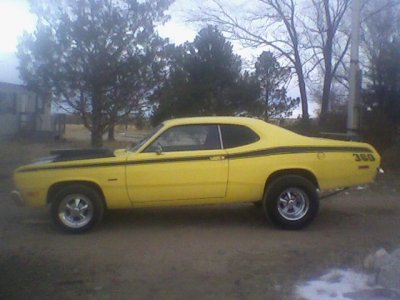
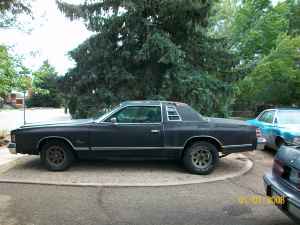
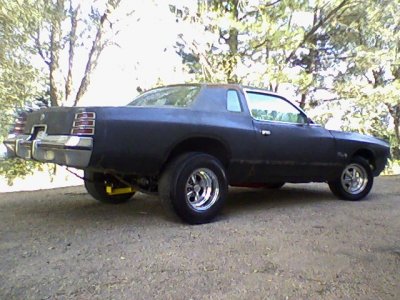
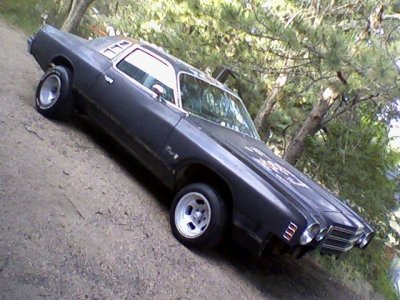
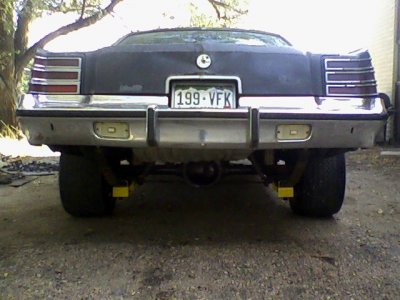
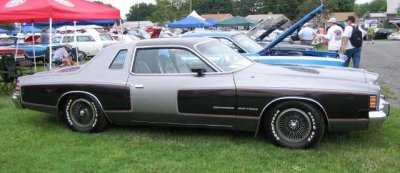
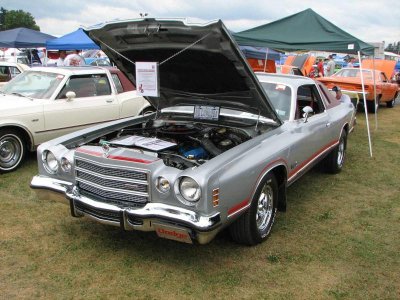
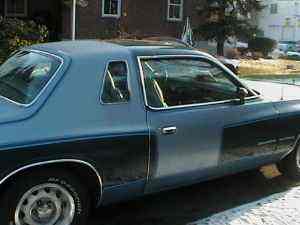
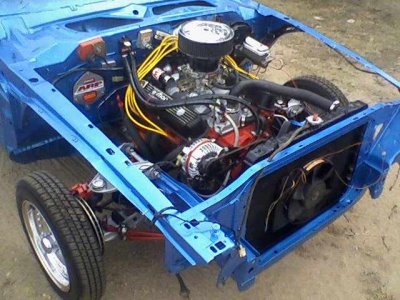
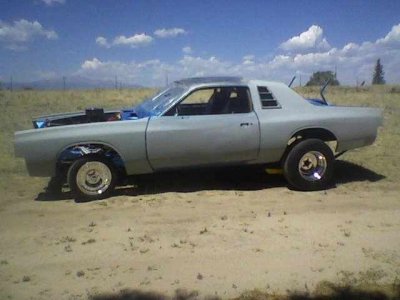
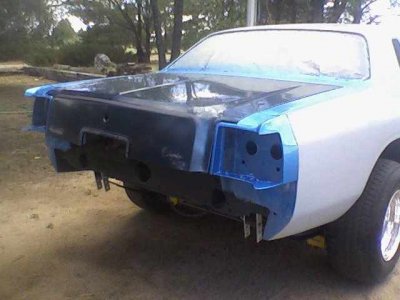
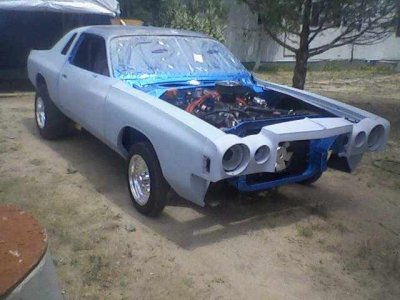
first off,hello to all you B Body owners. i am a die hard B body lover having owned many dodge B Bodies,to name just a few, 1970 plum crazy / white interior / white C stripe 383/727 super bee, 71 charger R/T 440 4 speed car, 66-67-68-69-70 coronets, 68-71-72-73-74 chargers. due to lifes ups and downs,i got out of the hobby for a while ,and to put it simply,got rid of my beloved mopars for (dare i say it) what i thought was the love of my life (i know,huge mistake) but i am somewhat getting back to it and starting over.i am currently an active member over at FABO and have been for a while after my purchase of my first A body, a 73 duster,still wearing its original lemon twist yellow and factory stripe which is 98% rust free and 360/727 powered and a lot of fun to drive. a couple of years ago, i bought a 77 charger se and having owned a number of big block cordobas, i decided, why not, as we just dont see many of them around ,so i decided to share some of my progress with you guys and get some input. i will be adding a lot here,as most of my progress has already been completed,so bear with me ,if you have any interest in the 75-77 B Body chargers, you might find this kind of cool.i welcome any and all input,good or bad, and mind you,this car was put together ENTIRELY by myself,with no outside help except for the parts being delivered to my place by various vendors, and on a serious budget, and given the availability of repopped parts for these cars,replacing pieces has been very challenging.this is not a play by play build thread, but just some insight on the 75-77 cordoba/charger platform. the first two pics are of my duster.
 

Attachments

  • d77.jpg
    d77.jpg
    92.7 KB · Views: 820
  • d81.jpg
    d81.jpg
    83.9 KB · Views: 789
the car is a 1977 XS22 dodge charger SE, 360/904/8.25. factory black/black/black .bucket seats,console,dual chrome sport mirrors,tilt wheel and power windows being just about the only options.front and rear sway bars, disc brakes,11 inch rear drums, pretty basic and run of the mill. it had 68,*** original miles, a little bit of rust,and after sitting for 8 years, a little fuel down the carb, it fired up and drove it home after giving the PO 500 bucks. incidently, it was a craigslist car and she was the 2nd owner and was VERY attached to it,but needed the money.these pics are the actual CL posting pics....
 

Attachments

  • charger.jpg
    charger.jpg
    8.5 KB · Views: 787
  • charger2.jpg
    charger2.jpg
    9.3 KB · Views: 691
i decided that instead of a restoration or restification as every nice 4th gen charger seems to be getting, i was going to shoot for a street machine type of look. i have never seen one of these cars done up in a "hot rod" fashion so why not. getting sort of a "mock up" look , i tried various rim and tire combos and other little things,just to get an idea of what it may look like before tearing into it.here are a couple "ideas".
 

Attachments

  • 445.jpg
    445.jpg
    128.3 KB · Views: 790
  • 0.jpg
    0.jpg
    133.5 KB · Views: 725
--WANNA BE R/T SE--no matter how you slice it , it IS a B Body and if dodge had offered an R/T SE package on their xs22 body style , i can imagine it would have included the R/T options such as cop suspension , 440 magnum , fresh air scoop , front and rear spoilers, stripe kits and all the heavy duty and go fast goodies dodge had to offer during the "muscle car" era . 1977 was the very last year for the B Body CHARGER SE , by 1978 ,the magnum had taken over the charger platform and soon to come to an end in 1979. the 77 xs22 may not be the most desirable body style BUT, WITH A LITTLE CREATIVITY LOL , it can still be an attractive ride and still maintain a certian amount of muscle. as we all know, being a b body, you can bolt in a 440 magnum 4 speed dana 60 as if it were built from the factory , and function very nicely with the already equipped big disc brakes and 11 inch rear drums ,front and rear sway bars ,optional color keyed racing mirrors and high back buckets,console,tuff wheel, and you could still get 15 inch ralley wheels. one thing is for sure though, theres got to be 400 lbs. between the front and rear bumpers lol.you just dont see any one doing anything with the 4th gen chargers and most have been crushed and the other portion havent ran in years and are rusting away as most people are only interested in the 68-74 chargers. production for the 77 charger SE was barely over 23,000 units and of those a handful got the daytona option that consisted of a paint and stripe option and shared everything else with the SE. FYI - this was not a cordoba per-se, yes the platform was the same as was the sheet metal BUT, the rear bumper, fillers,taillights,taillight housings, are completely all charger, as was the front grill and front bumper grill insert ,door panels and the lack of chrome trim on the hood and specific belt moulding and wheel well chrome.
 

Attachments

  • 988.jpg
    988.jpg
    19.4 KB · Views: 719
  • 987.jpg
    987.jpg
    94.7 KB · Views: 748
here are a couple of daytona models that,to me , was truly the end of the great paint treatments and the end of an era...most people hate these body styles and well, they have a look all their own and that is why i chose to at least give one a chance...
 

Attachments

  • 7543.jpg
    7543.jpg
    25.7 KB · Views: 809
  • jiuy65.jpg
    jiuy65.jpg
    9.1 KB · Views: 649
  • IMG_8642.jpg
    IMG_8642.jpg
    97.8 KB · Views: 672
  • bhgt.jpg
    bhgt.jpg
    7.4 KB · Views: 667
too makes things tougher, the grills, tailights and opera window styled trim changed every year,75-77 for the SE. the daytona got only chrome trim around the opera window, and no vent type of rear window trim as all 71-77 charger SEs came standard with . i have seen the 71-74 SE with and without vinyl tops but to my knowledge,they all came with the opera window coverings. i have seen 75-77 SE chargers with and without these. im not sure what dictated the addition of these,whether it was a factory option or if they had just been removed.
 
first order of business was to get this thing torn apart and down to metal to see what i was dealing with. luckily ,it was the original paint ,and it had been hit on the rear left side , "fixed",if you will, and only the quarter had been repainted . lucky for me ,it wasnt a hard hit and the paint came off relatively easy.it definitely had some rust issues and there is not a repopped panel being made for these anywhere.i have a buddy that has a farm of 75-77 cordobas and a couple magnums, so i was able to cut out patch panels and get them welded up . again ,lucky in the fact the rust was minimal and i only needed the lower 4 inches on each side.i didnt get many pics of any of this, i was too focused on getting it out of the way and in primer.
 

Attachments

  • 1977.jpg
    1977.jpg
    17.9 KB · Views: 654
  • a100.jpg
    a100.jpg
    15.6 KB · Views: 664
next was the engine compartment. i took every piece of the front to be cleaned,painted or replaced. every bushing and firewall gaskets were replaced using a gasket set from year one for a 74 charger. in 1975, ma mopar decided to give the b body a smoother ride by adding isolator bushings between the k member and the frame rails, the torsion bar mount and the body, and the rear leaf springs and the mounting perches on the axle.all of which are available along with every bushing and ball joint. front and rear sway bars were standard as were the big brakes and front discs.the engine pic is what i pulled out.
 

Attachments

  • vute.jpg
    vute.jpg
    31.9 KB · Views: 662
  • a25.jpg
    a25.jpg
    35 KB · Views: 673
  • q1.jpg
    q1.jpg
    43.2 KB · Views: 652
this not a rotiseree by any means and like i said a budget ,but with replacing every suspension piece and cleaning and painting, it can still be a looker and function like new. i have seen sooooo many people claiming a restored or great rebuild until you look underneath and pop the hood only to see thousands of miles of nasty,greasy,oily dirty,used up parts,and only a painted body . with limited space ,money and resources, i did not tear the whole thing down,paint and then put it back together.i know this is the correct way to do things ,but sometimes,you do what you gotta do lol. here is the progress of the engine bay.it took many hours of sanding and prep to get this down to metal and primed with y2k primer.
 

Attachments

  • a24.jpg
    a24.jpg
    24.9 KB · Views: 674
  • a23.jpg
    a23.jpg
    26.8 KB · Views: 625
  • a22.jpg
    a22.jpg
    25.2 KB · Views: 665
Last edited:
i had come to the decision,that while i like black, i searched through hundreds of color chips and i found a blue that i had to have. because changing the original color isnt going to hurt the value, and these cars dont really have any "value" unless they are an original 12,000 mile example, i went with a TCP global electric blue metallic, medium ,single stage, high gloss acrylic enamel kit. now for some color....i painted the engine bay and door jams and trunk lip, hood latch support and inside the doors all at the same time....sorry for the crappy cell phone pics..
 

Attachments

  • a121.jpg
    a121.jpg
    27.8 KB · Views: 660
  • a164.jpg
    a164.jpg
    29 KB · Views: 656
  • a8.jpg
    a8.jpg
    30.5 KB · Views: 644
  • a7.jpg
    a7.jpg
    27.2 KB · Views: 660
  • a4.jpg
    a4.jpg
    32.1 KB · Views: 626
these pics dont do any justice, that blue is an AWESOME color and that TCP layed down like glass and i have no regrets with my choice. the entire under neath was completely re undercoated and there were no rust issues what-so-ever. it was time to start with suspension. at this point i had to decide if i was going to hang all the metal and shoot the body.all the body work was done and well, due to other factors ,i decided to go ahead and put the interior together and hang the rear axle and front suspension.if i had my way, i would have painted the outside first,but there is always next time...
 

Attachments

  • a93.jpg
    a93.jpg
    19 KB · Views: 643
  • a97.jpg
    a97.jpg
    20.9 KB · Views: 610
  • a96.jpg
    a96.jpg
    14.5 KB · Views: 639
  • a101.jpg
    a101.jpg
    21.5 KB · Views: 663
Last edited:
now for the front suspension....using all factory pieces, every replacable piece is new and not expensive...
 

Attachments

  • a26.jpg
    a26.jpg
    21.9 KB · Views: 646
  • a13.jpg
    a13.jpg
    24.6 KB · Views: 636
  • a2.jpg
    a2.jpg
    24.2 KB · Views: 651
  • a10.jpg
    a10.jpg
    31.4 KB · Views: 658
  • a9.jpg
    a9.jpg
    32 KB · Views: 643
i couldnt help but give these pieces a color contrast to show the detail of the components and to show it has been completely torn down and rebuilt. me likey..lol
 

Attachments

  • a31.jpg
    a31.jpg
    36.5 KB · Views: 606
  • a30.jpg
    a30.jpg
    29.1 KB · Views: 648
  • a29.jpg
    a29.jpg
    28.1 KB · Views: 644
  • a28.jpg
    a28.jpg
    28.5 KB · Views: 672
  • a27.jpg
    a27.jpg
    28.7 KB · Views: 628
next on my list, was the engine.a tired 360. my first choice was a 440/727/8.75 combo. finding these around here are like hens teeth and very pricy. for now, rebuilding the 360 and keeping the 904/8.25 was the cheapest route.this car will get the big block combo,but later down the road. new bearing and gaskets,rings, cam/lifters and timing chain. the cam is a magnum 340 grind and a ten inch converter. im not being specific as this engine is not to perform but to be reliable for a driver ,until i get the 440.
 

Attachments

  • a43.jpg
    a43.jpg
    36.3 KB · Views: 722
  • a42.jpg
    a42.jpg
    33.8 KB · Views: 622
  • a55.jpg
    a55.jpg
    30.1 KB · Views: 618
  • a56.jpg
    a56.jpg
    31.1 KB · Views: 625
now it is reunited with the car..
 

Attachments

  • a79.jpg
    a79.jpg
    43.4 KB · Views: 621
  • a77.jpg
    a77.jpg
    40.4 KB · Views: 642
  • a75.jpg
    a75.jpg
    41.7 KB · Views: 609
  • a67.jpg
    a67.jpg
    30.5 KB · Views: 603
in keeping with the theme im looking at meats in the back,skinnies in the front.the rear wheel wells on these are huge and i want to fill them without tubbing it or dropping it to the ground. i have decisions,decisions.although the body is not painted yet, my patience with tire and wheel combos has worn out and so i broke down and planted some tires/rims on it.my rollers will go back on when i paint ,but i have to see what it is looking like. the previous owner had the rear leaf springs re-arched,and when i went to unbolt the rear shocks, the body jumped up 2 inches! scared the crap out of me,and i dont know how they got the shocks on in the first place. when i went to bolt on the leaf springs,they would not reach the original hangars no matter how far i lowered the body down on the springs. so ,until i get some real weight on the car ,i had to use some junky shackles to bolt them up. the shackles are only temporary, you will see what i mean...
 
Last edited:
back to the tires/wheels.back in the day, what were most running on their "hot rods?" most every thing had cragar s/s. i have options. i have a pair of ansen 15x10 aluminum slots and two matching 15x6s.i have two 15x10 polished centerline autodrags and two matching 15x4s. i have two 15x10 cragar s/s and two matching 15x6s. for tires,i have 275/60/15s and two old school N50x15 kelly supercharger meats.and two 255/70/15s. various other 195/60/15 and a pair of 145r15 bug tires.i dont have pics of the slots on the car but for now, i went with the 15x10 lines mounted on the n50s and the 15x4s on the skinnies.the 255/70/15 is a 29 1/2 tall tire with a 9 inch wide tread footprint .the 275 is a 28 inch tall tire with a 10 inch wide footprint while the n50 is a meat. 29 inches tall and a 12 inch footprint, all based on a 10 inch wide rim.
 

Attachments

  • a58.jpg
    a58.jpg
    29.3 KB · Views: 697
  • a59.jpg
    a59.jpg
    31.6 KB · Views: 625
  • a60.jpg
    a60.jpg
    26.1 KB · Views: 634
here it is out in the sun at various points in body work and rear tire sizes.excuse the shackles they are hideous but again only temporary.the finished product will not sit quite that high in the rear and i may ditch the skinnies for a wider tire in the front.
 

Attachments

  • a134.jpg
    a134.jpg
    24.5 KB · Views: 686
  • a132.jpg
    a132.jpg
    29.7 KB · Views: 622
  • a88.jpg
    a88.jpg
    36.3 KB · Views: 624
  • a82.jpg
    a82.jpg
    43.7 KB · Views: 629
  • a85.jpg
    a85.jpg
    42 KB · Views: 586
a few more......
 

Attachments

  • a149.jpg
    a149.jpg
    28.6 KB · Views: 637
  • a155.jpg
    a155.jpg
    21 KB · Views: 622
  • a158.jpg
    a158.jpg
    20.3 KB · Views: 624
  • a167.jpg
    a167.jpg
    23.1 KB · Views: 591
  • a170.jpg
    a170.jpg
    28.4 KB · Views: 663
Back
Top