• When you click on links to various merchants on this site and make a purchase, this can result in this site earning a commission. Affiliate programs and affiliations include, but are not limited to, the eBay Partner Network.

66 Charger project

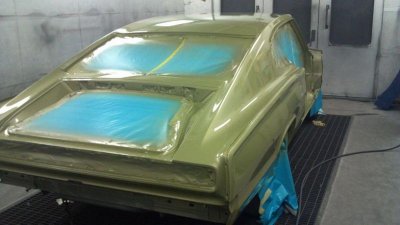
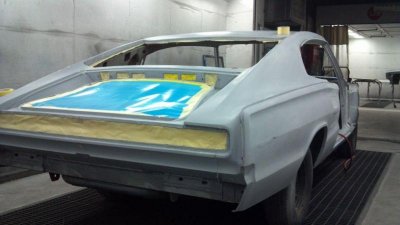
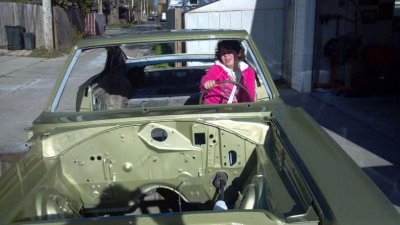
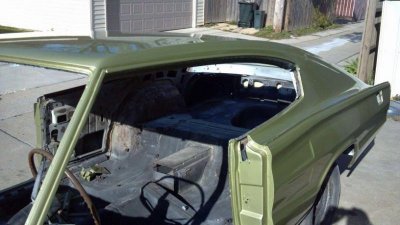
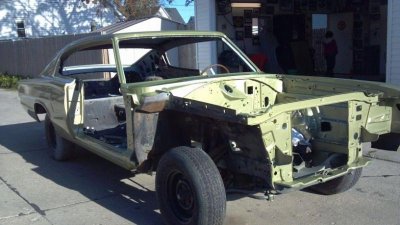
Did you used s D/A for stripping the paint? Let me in on the combo you used, as far as sand paper etc? I am about to embark on that task and could use tips from the pro.

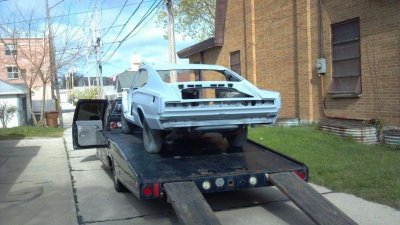
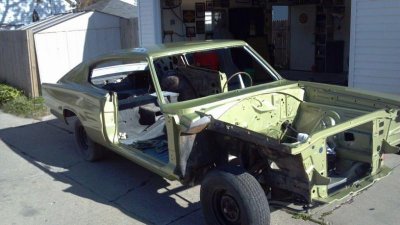
Oh and how the h$%$ do ya get off the undercoating!?
 
On the undercoating I took Props' advise and bought a IR125 air scaler, its loud and dirty but it gets the job done. I tired everyother way and didnt get the results I got with it. Its worth the money if you are doin the entire underside yourself. Just my .02 though.

Here is the link Prop sent me on the scaler:
http://www.tooltopia.com/ingersoll-rand-125.aspx
 
Propane torch to warm it up a little too.

As far as the paint goes, believe it or not I used a grinder with a wire wheel on it. Was actually pretty fast. Sandblasted corners and such where the wheel wouldn't fit. I want to keep the cost of my build down and apply money to the areas that I have to. It also helps that I am a collision tech and have a lot of these tools already.

After the wire wheel I sandblasted any areas that needed it, patched a few problem areas and then used my DA with 80 grit. Next I applied 2 coats of a etch type primer over the bare metal. After that I sanded with 120 grit and did the bodywork. Stepped down the grits and then finished it in 180 grit. 4-5 good coats of primer surfacer and now I'm ready to block the primer before paint
 
On the undercoating I took Props' advise and bought a IR125 air scaler, its loud and dirty but it gets the job done. I tired everyother way and didnt get the results I got with it. Its worth the money if you are doin the entire underside yourself. Just my .02 though.

Here is the link Prop sent me on the scaler:
http://www.tooltopia.com/ingersoll-rand-125.aspx

No one said it had to be pretty....Just as long as it works right..LOL
 
Ive used the wire brush wheel on a grinder many times myself, I at that time was trying to buy body panels for a 66 Chevelle, but it does save money! Cant wait to see this in paint... and sounds like your getting close.. Good luck...
 
Propane torch to warm it up a little too.

As far as the paint goes, believe it or not I used a grinder with a wire wheel on it. Was actually pretty fast. Sandblasted corners and such where the wheel wouldn't fit. I want to keep the cost of my build down and apply money to the areas that I have to. It also helps that I am a collision tech and have a lot of these tools already.

After the wire wheel I sandblasted any areas that needed it, patched a few problem areas and then used my DA with 80 grit. Next I applied 2 coats of a etch type primer over the bare metal. After that I sanded with 120 grit and did the bodywork. Stepped down the grits and then finished it in 180 grit. 4-5 good coats of primer surfacer and now I'm ready to block the primer before paint

Thanks a lot, thats good info right there. I too need to keep costs down, as it is i pretty much have to pay for my build by selling parts. So anything I can do on the cheap is a huge cost savings for me. I still have some metal work to do before I think about stripping the paint off the car and I need to get the trim off of it.

Oh and on that front, front and rear window trim, how do I remove that safely? I have two sets of it, on my 67 and 66 but want to make sure I don't damage any of it.
 
As far as the trim goes, area tool dealers (Matco, Snap-on, etc..) sell trim removal tools. Even your local Napa might carry them. Carefully pry one end up to release the clip. then the other side should slide right off.
 
Picked up my 469 from Kilpatrick Racing on Thursday. Man this thing sure looks nice!

Melling high volume pump, Hemi 1/2" pick up, Eagle crank and rods, JE pistons, solid 540 lift cam, all ARP bolts, etc....
 

Attachments

  • Resampled952012-03-019521-00-0495239.jpg
    Resampled952012-03-019521-00-0495239.jpg
    54 KB · Views: 246
  • Resampled952012-03-019521-00-2095160.jpg
    Resampled952012-03-019521-00-2095160.jpg
    45 KB · Views: 244
Been busy lately... finally finished everything and was able to get my 66 to my shop to spray it!
 

Attachments

  • c18.jpg
    c18.jpg
    52.5 KB · Views: 218
  • c20.jpg
    c20.jpg
    49.6 KB · Views: 215
  • c5.jpg
    c5.jpg
    40.9 KB · Views: 214
  • c3.jpg
    c3.jpg
    41.2 KB · Views: 214
  • c1.jpg
    c1.jpg
    62.5 KB · Views: 220
Your car is looking great. that color will make the white interior stand out great. Are you going back with all the exterior trim? Keep up the great work.
 
your 66 is looking good! Done with metal replacment on my 66 now for the skim coat. got to be perfect- going back with black! and keep the pics coming
how stable is that lift? Keep up the good job
you can check out some of my pics under Restoring my
66 Charger
 
Yea... all the trim is going back on, need to wetsand and buff the car first. About to order up the sail panel and fender emblems.

The lift is very stable. Up to 6000 lbs
 
thumbs.gif
Nice color! come along way since last Oct.. looking great...
 
Hey there, what color is that? Looks like a green / gold color from where I see it. I think my 66 Belvedere was originally the same color and I was thinking of putting it back like that. If you have the mix formula I wouldn't mind getting it. And yes, the car looks great!
 
Auto Transport Service
Back
Top