• When you click on links to various merchants on this site and make a purchase, this can result in this site earning a commission. Affiliate programs and affiliations include, but are not limited to, the eBay Partner Network.

72 Charger SE restoration

cold

Member
Local time
12:02 PM
Joined
Sep 25, 2014
Messages
18
Reaction score
2
Location
Chicago
Howdy folks!

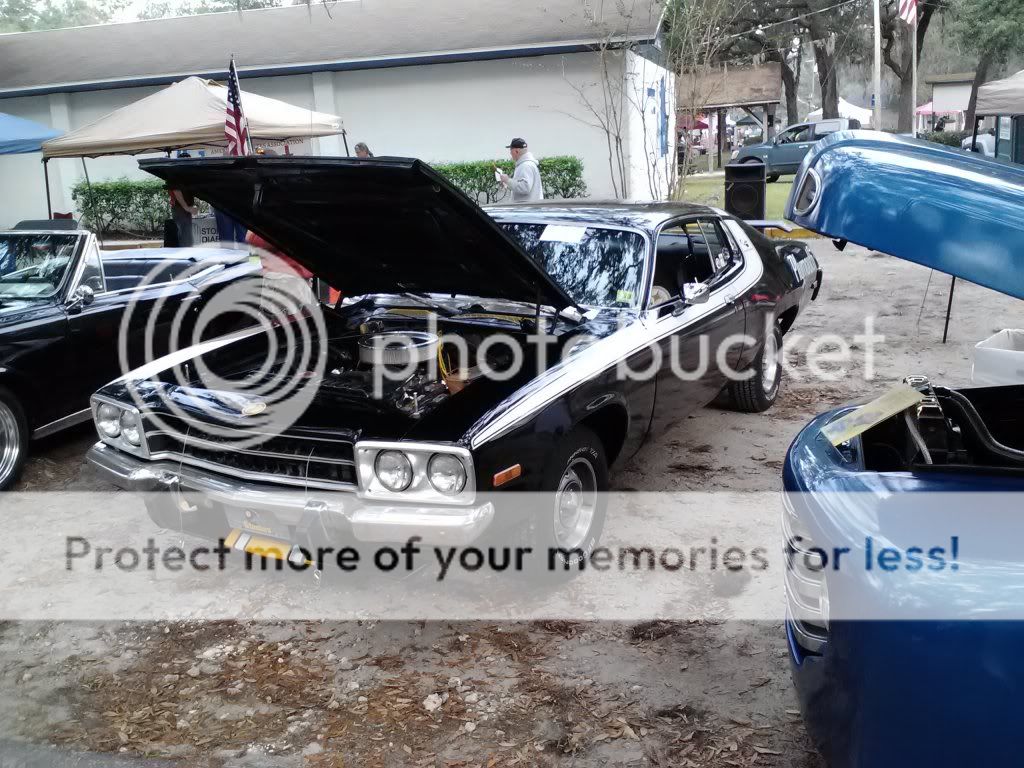
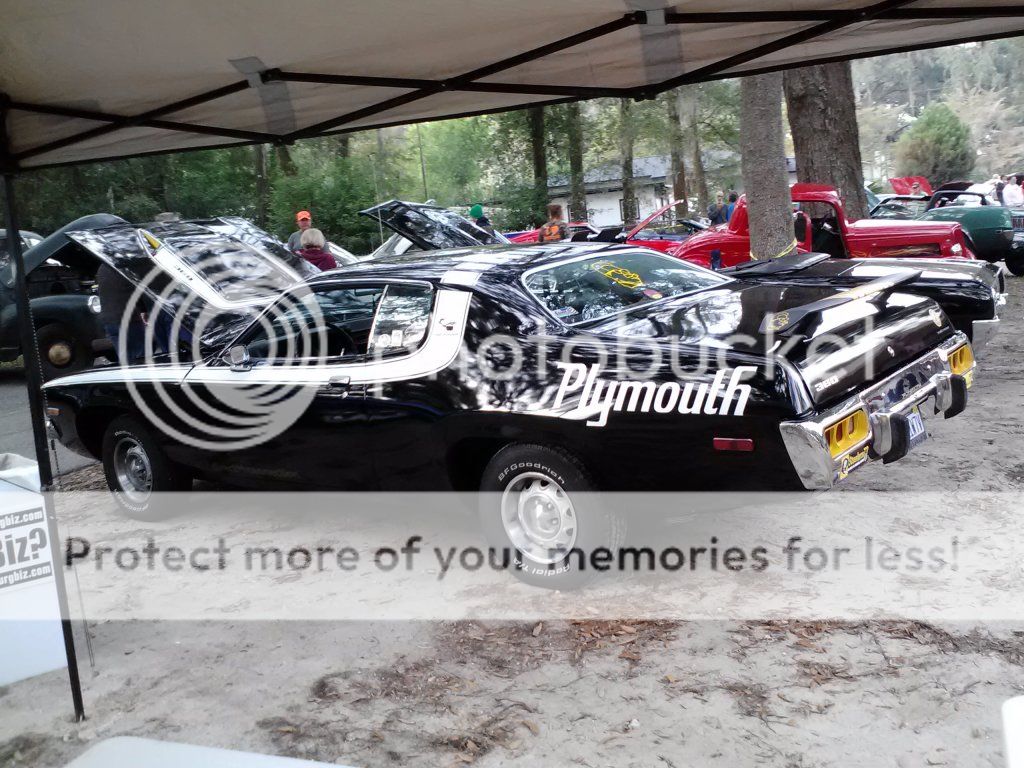
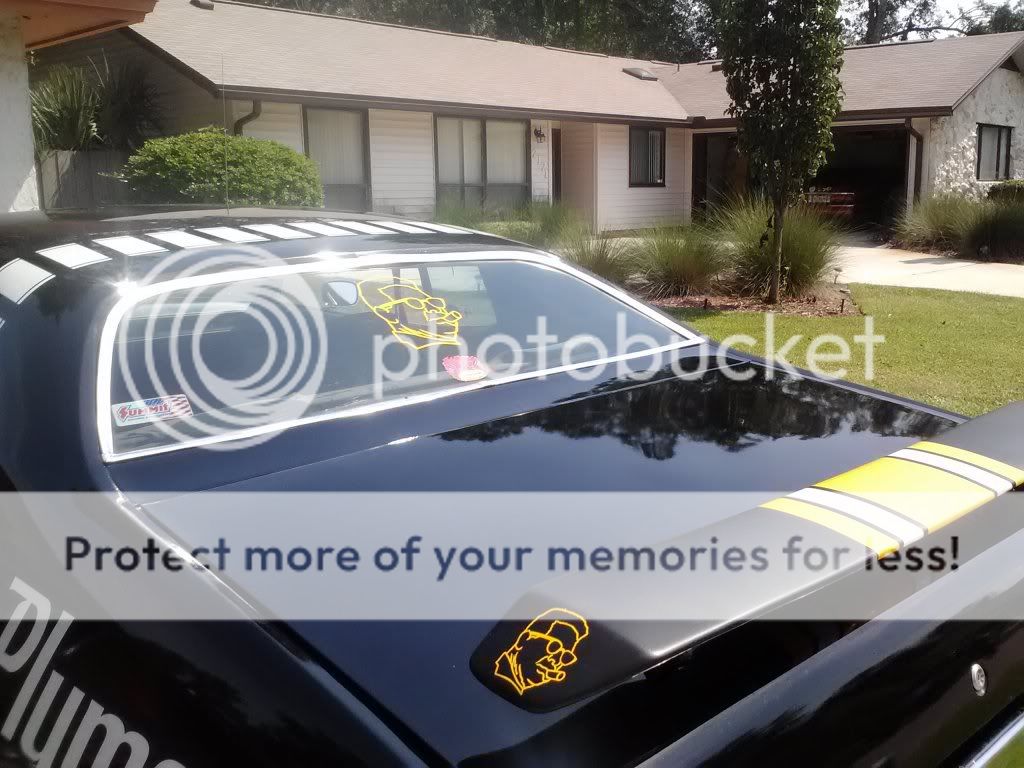
It's been a while since I've checked in. I figured I'd start a new thread in this section to talk about my restoration project. Here's what my car looks like right now [pic1 pic2 pic3 pic4].

My goal this year is to do as much body work on my own as possible. I've been watching body work tutorials on YouTube for the past few months to get an idea of techniques, tools, and things to watch out for (safety, etc).

I'm currently looking for a rust-free trunk/deck lid. If anyone knows a seller I would be most appreciative if you would hook me up. Here's what the edge of my deck lid looks like now [pic5]. Yikes! I'll have to strip the whole thing down just to get out all the rust. Also the underside of my roof is starting to get a lot of rust [pic6]. Any recommendations on how to clean this rust out? I thought I'd start with a wire wheel and then perhaps tape some plastic around the bottom parameter and use a sandblaster to get the rest of the rust out of those nooks.

Love perusing these forums. Keep up the great work!
 
For the roof, I would use a "rust converter" (not a rust remover). They are available at Twilight Zone & O'Smiley's, etc. They look like watery Elmer's glue and you apply them with a cheap paint brush. They react with the rust and turn it black after a day or two.
 
I have an extra trunk lid . I'm not sure witch one I want to let go of though .
One has bent corners the other has a few very small rust spots .
If your interested in seeing pictures and makeiing an offer p.m. me shipping might be prity high though I'm in fl

- - - Updated - - -

By the way cool looking project I've done a bunch of these any ?'s feel free to ask
Here's your pictures
rrVZieU.jpgGT9u43N.jpgnvcvPMX.jpg07Tpkum.jpgfzXv4zU.jpg56ekoRR.jpg
Both of my trunk lids are much better then what you have there
 
72 S.Es with the huge C pillar are very cool cars I imagine the vinyl top trim would be hard to find for that and is the passenger fender on that car a 73 74?
 
72 S.Es with the huge C pillar are very cool cars I imagine the vinyl top trim would be hard to find for that and is the passenger fender on that car a 73 74?

I assumed it was from a '72. I'm also not interested in replacing the vinyl top. I'd like to simply repaint the top the same color as the body. I want to start with a matte black and go from there. Maybe work in some very small graphics or pin-striping. I'm really into ice hockey. I was thinking of working a "hockey jersey" theme into the paint job. Was gonna take some pictures and fool around on Photoshop with some ideas.

I have some rust converter ordered and in the mail. If it arrives this weekend I'll strip down some of the interior and paint the rust converter wherever I can find some rust and treat the affected areas.
 
Hockey theme sounds good, since it's already blue just add some red and white stripes and you'll have a NY Rangers Tribute!!
 
Hockey theme sounds good, since it's already blue just add some red and white stripes and you'll have a NY Rangers Tribute!!

I would if I were a die-hard Rangers fan! I'm a Blackhawks fan, so I was thinking black with red and white stripes similar to this:

sBi45Zn.jpg


Speaking of the Rangers... I was betting on them to make it to the finals this year! I figured, if the Hawks get it, great. If not, Henrik finally gets a cup!
 
I saw you were from Chicago so I couldn't help jabbing you a little. Maybe I'm just a little sore the rangers played so badly in their final game at home. Anyway it looks like your 72 is in about the same or better condition than the 71 SE I completed this spring. Did all the bodywork and painted it myself using the "learn as you go" method. I learned a lot, she came out pretty good and saved a lot of $$$. Get good with a welder and take your time to block and reblock your panels. Mine was done in a single stage urethane.

I'm known as the charger guy who paints cars in his driveway. Being more of a purist I installed a new vinyl roof and returned the car to it's original color. It had three colors over the original gunmetal metallic. Using razor blades followed up with a DA I got most of the old stuff off. If I can be of help just let me know.

Here's a pic of my newly painted 71 during reassembly and before installing the vinyl roof.
IMG_7789.jpg

IMG_7789.jpg
 
I was thinking of working a "hockey jersey" theme into the paint job. Was gonna take some pictures and fool around on Photoshop with some ideas.

I did something similar with my Roadrunner, except I went the Steelers route with mine. I painted the car black with Steelers gold accent items and used the Steelers sleeve stripe pattern to tie the front spoiler to the rear. I also had custom Roadrunner decals with the Steelers helmet, vice white racing helmet, made up.

CAM00123.jpg


CAM00124.jpg


CAM00079.jpg
 
Those are both great looking. Love the stripe on the side and the decals, Bruzilla! I've hit a bit of a snag. My Hurst shifter cable took some heat damage and failed on me. Now the car is stuck outside my apartment. The new cable arrived last night. After getting under the car I discovered the cable is too close to the exhaust headers so I ordered some header wraps to help shield the heat.

*womp womp*
 
I to have a 72 se that I have been restoring now for 2 years now and am getting ready to finish all of the body work and your car is in much better shape than mine is hope it all goes well for you
 
Howdy y'all! I'm posting an update to say that I'm getting my car back up and running after my SNAFU with replacing my transmission shifter. I ended up successfully installing a linkage-type shifter from American Shifter. Once I got that done, the car ended up sitting in my neighbor's garage for a few years while I sorted some other stuff out in my life. Now I'm ready to get back on the horse with a renewed sense of motivation!

Anyway, I followed a few guides from YouTube on how to properly get an engine ready to be started again after a few years. I wend out and bought new oil (and filter), plugs, gas, a cylinder compression tool, and a bunch of other things that would serve handy.

Compression looks great in all 8 cylinders. Each cylinder holds about 150 PSI. Fuel pump sounds a bit "tired" when I turned the ignition switch on. However, this time the ignition switch wasn't engaging the starter solenoid relay. I confirmed the starter was working by shorting out the terminals on the relay, which turned the motor over just fine. However, when I jostled the electrical bulkhead connectors (the wiring harness connectors at the firewall) to make sure I had a good connection, I lost all power to the cab.

I spent the next day or two using a volt meter, trying to trace the source of the problem. The day the issue occurred, I made a mental note that the dash light would partially go out when I turned the ignition switch. I confirmed that the hot wire coming in from the firewall had about 12 volts, all the way up to the ignition switch.

So today I went by an AutoZone and picked up a new ignition switch and a steering wheel puller kit. Once I got the kit off, I realized that my last mechanic had already replaced the ignition switch with a brand new one. So I figured, while I had everything pulled apart - might as well check the voltage at the switch.

1 volt. 1 volt!?

I went back down to the bulkhead connector and tested the "batt" (battery) connector at the bottom of the fuse box: 1 volt. (Where am I getting an 11 volt drop?). I even checked the bulkhead connector lead on the interior side. Still 1 volt.

So I go back under the hood and re-check the connection on the engine side of things. 12 volts. There has to be some kind of issue where the leads are connecting through the bulkhead connectors. Perhaps something got loosened up or some grease got in between some leads. That's the only explanation I can think of that would cause this kind of resistance/drop in voltage.

I fear that I'm going to have to pull the dashboard back out and clean those connectors one by one. Such a chore!

Anyway, that's my story and I'm sticking to it. I hope you all have been doing alright. I'll post progress pics later this week.
 
Welcome back get us just to snuff here anything else done? Pictures?
 
Sounds like BULKHEAD CONNECTOR got another one!! 11volts gone in the wind, yikes!!
:xscuseless:
 
Welcome back get us just to snuff here anything else done? Pictures?

Thanks Bb70charger500! Good to be back into the fray.

I'd say the most notable thing I did was remove the dash to replace the dash pad. While I was there, I figured I'd resurface the metal of the dash, then throw a few coats of black color and clear coat paint to give it a nice finish. I also sanded and painted the gauge cluster because I wasn't a big fan of the faux wood.

Attached are some before/after pics of the dashboard!

DSC00756.jpg
IMG_3491.JPG
IMG_3497.jpg
IMG_3578 copy.JPG
IMG_3579.JPG


I also took out the bench seat, as it has been almost completely ruined from being exposed to the elements for a few years. I bought some aftermarket bucket seats and "constructed" (e.g. cut a 1" square bar of aluminum) to fit in the seat bracket, so it would be level. "Universal floor bracket", my rear end!

I'll take pictures of the new seats when I put them back in. I took them back out today to start taking out the dashboard again. I put the dash back in for a fitment check and didn't bother to reinstall the lower quarter plastic pieces under the A-pillar, which have to go on before the dashboard. Taking out the dash will also make servicing the interior bulkhead connector *much* easier when my cleaner tool arrives!

As for the cleaning tool, I ended up buying the "IPA Terminal Connector Cleaners Kit" from Amazon.
 
Nice! I never cared for the fake wood ether . I always painted mine . The dash looks great .
 
20200401_214807.jpg

Don't like fake wood either. LOOKS GOOD CHICAGO!!! Ya shouldve gone Orange & Black as a hockey theme thou, FLYERS!! :D
 
Auto Transport Service
Back
Top