Once you are done, spray those areas with some rust encapsulator/coatings. Eastwood etc. Seal that stuff off.
You are using an out of date browser. It may not display this or other websites correctly.
You should upgrade or use an alternative browser.
You should upgrade or use an alternative browser.
Cowl Rust Repair
- Thread starter Evan Frucht
- Start date
Evan Frucht
Well-Known Member
ya that's the plan, ive been hitting it with ospho . I plan to use some good urethane seam sealer and primer + single stage urethane to seal it off. also using some of that copper weld thru primer in spots. I also have the panels pieces I'm going to repair and wiper pivot mounts soaking in evapo-rust which is working very well.Once you are done, spray those areas with some rust encapsulator/coatings. Eastwood etc. Seal that stuff off.
I'm lucky on my car, those areas are clean other than basic surface rust in small areas.
hangn0ut
Well-Known Member
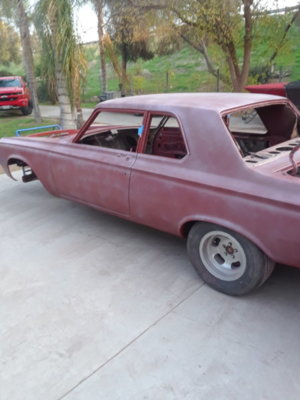
Everytime I got into my 64 I would see the paint lifting in the drip rail. I didnt want to look any closer, afraid what i would find. This car has never been in a garage since 74 at least. I figured the paint was holding it together. We finally got after it. Seems most of the car was covered in bondo! The metal was still in pretty good shape. Seems back in the 60s shops would cover a car in bondo, literally, and then long board it to shape. The quickest way to cherry out a car. Some areas the bondo was 1/2" thick. Between the trunk and rear window was really "well protected".
dvw
Well-Known Member
We still do it that way. Only way to make them flat. However no way is it that thick. Do the basic metal work first. Just had to jack up the 1/4's and Dutchman on the 64 Dodge were doing. Moved it nearly 1/4". Bondo is way more durable than thick primer surfacer.Everytime I got into my 64 I would see the paint lifting in the drip rail. I didnt want to look any closer, afraid what i would find. This car has never been in a garage since 74 at least. I figured the paint was holding it together. We finally got after it. Seems most of the car was covered in bondo! The metal was still in pretty good shape. Seems back in the 60s shops would cover a car in bondo, literally, and then long board it to shape. The quickest way to cherry out a car. Some areas the bondo was 1/2" thick. Between the trunk and rear window was really "well protected".
Doug
hangn0ut
Well-Known Member
Evan Frucht
Well-Known Member
THthis is what it looked like when I first opened it up, clearly shows the design flaw and how it trapped debri

after I got this point a said screw it and took that fender off. it was too deeply pitted in that section

where the fender mounts to the cowl. I drew a line on the old piece and cut it out then flattened it to use as an outline to cut the replacement piece.

decided I'm going to cut the bad sections out of this piece and splice in repairs. apparently the Sherman panels are roughly stamped with the wiper pivot stamping not even being close. luckily the top section was not to bad and I let it soak in evaporust+ hit it with the cheapo hopper fed sandblaster and play sand.

here is the piece I cut bent into the proper curve by hand before I tacked it on, just resting in place

after I got this point a said screw it and took that fender off. it was too deeply pitted in that section
where the fender mounts to the cowl. I drew a line on the old piece and cut it out then flattened it to use as an outline to cut the replacement piece.
decided I'm going to cut the bad sections out of this piece and splice in repairs. apparently the Sherman panels are roughly stamped with the wiper pivot stamping not even being close. luckily the top section was not to bad and I let it soak in evaporust+ hit it with the cheapo hopper fed sandblaster and play sand.
here is the piece I cut bent into the proper curve by hand before I tacked it on, just resting in place
Last edited:
Evan Frucht
Well-Known Member
Last edited:
Evan Frucht
Well-Known Member
outer cowl has been fully welded together at this point. I welded a lot of it from the inside so that I could retain strength by not grinding off most of the seam. instead I simply had to clean up and smooth the exterior.


Last edited:
Evan Frucht
Well-Known Member
the driver side, starting to uncover the damage. moisture got trapped in-between the panels and rusted it out bad.


I've started to beat out the replacement panel. created an armature that uses the fender mount as a guide and will keep the wiper pivot in the correct place and at the correct angle... well in theory anyway (...it ended up working out ok). I'm sure its not the most precise way to do it, but it worked. pics below show the method. this way once I cut it out, ill have a reference to know exactly where it was originally.


I've started to beat out the replacement panel. created an armature that uses the fender mount as a guide and will keep the wiper pivot in the correct place and at the correct angle... well in theory anyway (...it ended up working out ok). I'm sure its not the most precise way to do it, but it worked. pics below show the method. this way once I cut it out, ill have a reference to know exactly where it was originally.
Evan Frucht
Well-Known Member
more pics, cut out wiper pivot mount, and removing the rusty layer of sheet metal that once was the lower cowl.


test fitting the replacement piece, looks/fits better in the picture than in person. still needs work at this point


test fitting the replacement piece, looks/fits better in the picture than in person. still needs work at this point
Evan Frucht
Well-Known Member
some damage to the outer windshield lip. nipped it in the bud


WHOOPS ! gotta get rid of that!


now that feels better!

WHOOPS ! gotta get rid of that!
now that feels better!
Evan Frucht
Well-Known Member
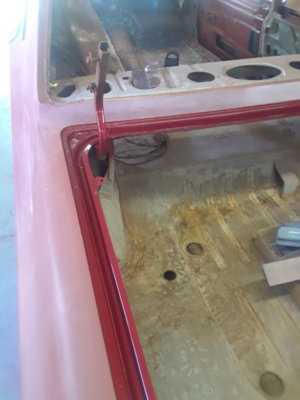
was just barely able to get this little patch welded in from the top. balancing act of trying to removing to all the heavy rust, without cutting up my cowl too much. I was hoping to not even have to cut out this little section but it was too pitted I didn't want to leave it there. last minute decision to cut out and replace.


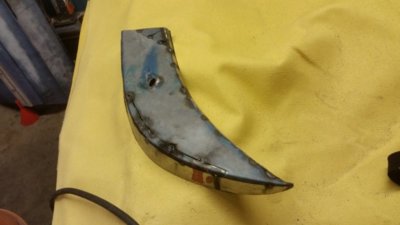
making template for repair panel. then used a vice with two pieces of angle iron + hammer and block of wood to create the shape. decided to go with 16 gauge here because I didn't need to do much forming and I wanted it strong and durable.


trimming/adjusting for a perfect fit


ready to tack on, sitting in there

making template for repair panel. then used a vice with two pieces of angle iron + hammer and block of wood to create the shape. decided to go with 16 gauge here because I didn't need to do much forming and I wanted it strong and durable.
trimming/adjusting for a perfect fit
ready to tack on, sitting in there
Last edited:
Evan Frucht
Well-Known Member
welding that section in place


Glenwood
Well-Known Member
- Local time
- 10:27 PM
- Joined
- Jun 19, 2015
- Messages
- 2,925
- Reaction score
- 2,851
- Location
- Kawartha Lakes, Ontario
Looks good. I wish I could say I enjoyed repairing this part on mine but I'd be lying. Not fun. Keep at it!
You are doing some great work!! I have been fortunate that my two cars had good cowls to start with. A friend is just now digging into his 70 Barracuda and has mucho rust under bondo in his cowl. He had to buy a donor clip which needs some work as well.
Evan Frucht
Well-Known Member
Ya, it can get stressful for sure! Once I forced myself to stop worrying about and got in the zone it was more pleasant. ThanksLooks good. I wish I could say I enjoyed repairing this part on mine but I'd be lying. Not fun. Keep at it!
munger77
Well-Known Member
A+
dvw
Well-Known Member
The skills people have amaze me. You never know what you can do until you try it.
Doug
Doug
Similar threads
- Replies
- 4
- Views
- 588
- Replies
- 0
- Views
- 414
- Replies
- 1
- Views
- 519
- Locked
- Replies
- 6
- Views
- 3K


