• When you click on links to various merchants on this site and make a purchase, this can result in this site earning a commission. Affiliate programs and affiliations include, but are not limited to, the eBay Partner Network.

Dad's 69RR Driver Project(I'm doing the work)

Dad's69RR

Well-Known Member
Local time
4:30 PM
Joined
Mar 13, 2014
Messages
227
Reaction score
86
Location
Powell, Ohio
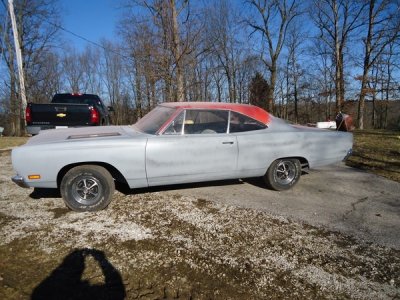
Ok I figured it is about time to post progress on the 69RR. Me and my dad purchased this car back in Feb and I am trying to restore the car to a solid driver on a small budget. It is hard to draw a line how far to go, I personally would like to spend the next couple of years doing a frame off, but The reason I am not is I really want my Dad to get as much enjoyment as possible, since his retirement his health has declined and not going to take any chances. The car is not far away from being a good driver car but I hate knowing all the things that should be fixed. The car is 2dr hardtop, original 383, R4 paint code, wood grain steering wheel, AM Radio, black bucket interior, and only thing not numbers matching is the trans. Someone put in a Hemi 4 speed.
image.jpg
image.jpgimage.jpgimage.jpg
image.jpg
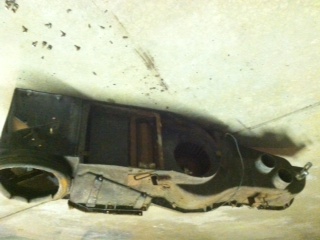
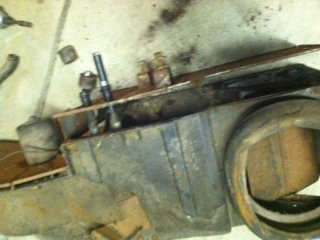
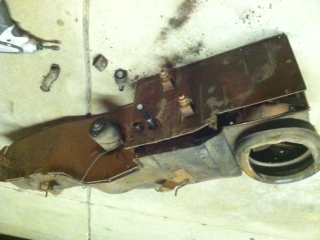
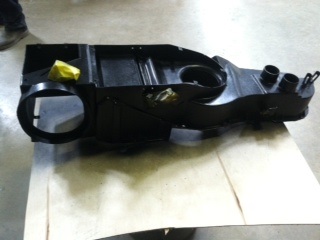
So working on dash, side doors, & heater box. Hope to get aligned and rear end serviced next week. Once that happens the car will be drivable and can tweak timing more.
How hard is it to change heater core?
Will post more later.
 

Attachments

  • image.jpg
    image.jpg
    150 KB · Views: 861
  • image.jpg
    image.jpg
    3 KB · Views: 808
Looks like a solid project and I hope it goes well so you and your Dad are behind the wheel ASAP !! You can do projects as you go after than
 
Good luck on your quest. Noble cause. As far as the heater box, it's pretty easy. Under the dash, unhook the two defrost duct's, unhook the three cables to the heater box (heat door, defrost door and fresh air box door). Unhook the wires to the heater motor resistor & power for motor, and last unhook the one bracket to the heater box. Pop the hood, there is three studs with nuts on them coming through the firewall, take off the nuts. Obviously unhook the 2 in/out lines to the heater box. Walla!
 
Solid looking car. Time wise, do what you want to do to get the car road worthy so you and your dad can enjoy it for awhile. Then maybe thru the week, work on some small things on it and drive it over the weekend again. Repeat previous sentence over and over again. Your dad will be just as excited as you will be.
 
Pulled heater box last night so I can replace the heater core and plan to clean, paint and replace all seals. I have two questions, was there two separate cables for the driver and passenger side fresh air vents? Also the lever for heater controls that is on passenger side is that for temp control? I will post some after pics when I'm finished.

Heater Box.JPGHeater Box1.JPGHeater Box 2.JPG
 

Attachments

  • Heater Box 2.JPG
    Heater Box 2.JPG
    33.5 KB · Views: 729
  • Heater Box1.JPG
    Heater Box1.JPG
    37.8 KB · Views: 768
  • Heater Box.JPG
    Heater Box.JPG
    36.4 KB · Views: 740
Last edited:
How the cables work.....The one to the far right (passenger side) opens and closes the door for the fresh air vent box. The one near the middle is for the heat control. The one to the left by the two ports for the defrost vent tubes is for the defrost/floor heat control.

Heater Box.JPGHeater Box1.JPGHeater Box 2.JPG

If you're using a camera phone, try spinning the phone 180 next time you take pic's. Either that or download a free paint/photo program (like paint.net) so you can modify your pic orientation and images
 
Prop I have a separate vent cable for the driver's side but nothing was hooked to the passenger side. Should there be a cable that opens the passenger side vent?
 
Prop I have a separate vent cable for the driver's side but nothing was hooked to the passenger side. Should there be a cable that opens the passenger side vent?

You bet! There would be a cable that runs from the fresh air vent control and runs across the dash (obviously hidden on the back side) and would controlled by one of the two vent handles that is mounted on the bottom side of the dash in front of the driver.

Heater Box a.jpg
 
Ok pretty upset, while cleaning and sanding the heater box the Heat temp lever broke off at the hole! Anyone have any suggestions how to fix?? I think these are pot metal and cannot weld!
Htr Box prob.JPG PLEASE HELP!
 
Other than trying to find one to replace it, have no idea how you would go about fixing it. If I would have seen this earlier I could have made a quick run up to my mom's and grabbed one off a junk heater box I have from a 70 coronet and just given it to ya.
 
Cool project. I don't think I have ever seen a pot metal heater control before. I could and may very well be wrong though. But I think you can weld that back together.
P.S. If you are going as far as painting the heater box, you are going to be finishing off with a very nice driver! IMO
 
Ok pretty upset, while cleaning and sanding the heater box the Heat temp lever broke off at the hole! Anyone have any suggestions how to fix?? I think these are pot metal and cannot weld!
View attachment 183045 PLEASE HELP!

This same thing happened to me - it is because the door that is controlled by that little lever is stuck in position. You probably need to clean up the operation of that door. I did not fix mine yet, as I bought an aftermarket A/C system so I will be using a new box. I would assume that you can take the door out and weld the control arm back on, but I have never done it.

For a band aid, I would leave it in the defrost position and not worry about it. In the summer, you won't use it anyway as you will use the vents you discussed earlier in the thread. If it gets colder or rainy, you might need to defrost the windshield. This way it will be set in that position and you can concentrate on other more important fixes.

...just a thought...

Hawk
 
Thanks roadrunner man that would be great! I will attempt to fix tomorrow hopefully goes well.

I just have a hard time not doing things the way it should be done, if I do not be careful the $$ will run out and I will not finish by target date. Thanks gdrill

- - - Updated - - -

Good idea Hsorman! Probably won't be driving very much when it's cold. I still want to fix it since I already have the box out getting ready to paint.
 
Got the lever welded and put back in so had a chance to paint the box. Should get the gasket kit on Friday and reassemble starts. Thanks for the help.
 

Attachments

  • Heater Box painted.JPG
    Heater Box painted.JPG
    23.7 KB · Views: 656
Htr Box Finished

Finished up the Heater Box Resto and pretty happy with how it turned out! Got the RR in the shop for rear end service and a much needed alignment. Should be drivable as soon as it's done. One step closer to my Dad taking it to his first cruise in. Here's some pics of the Htr Box finished.
Htr Box Resto.JPGHtr Box Resto1.JPGHtr Box Resto2.JPGHtr Box Resto3.JPG

Htr Box Resto.JPG Htr Box Resto1.JPG Htr Box Resto2.JPG Htr Box Resto3.JPG
 
Heck that looks brand new! Great work you do. Now, the one I'll be sending to you is a bit rougher, but complete! LOL. You two should have a cool time when you hit the road. Keep on "Mopar"ing!!
 
gdrill I am enjoying every minute of it! It being for my Dad is just icing on the cake. My addiction, MUSCLE CARS and everything about them.
 
Auto Transport Service
Back
Top