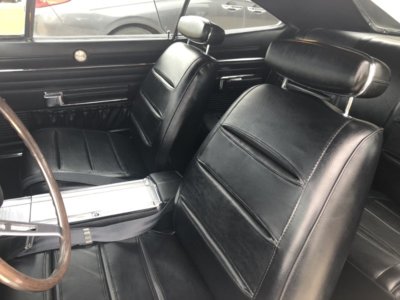
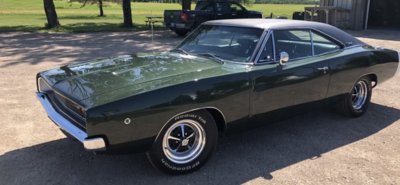
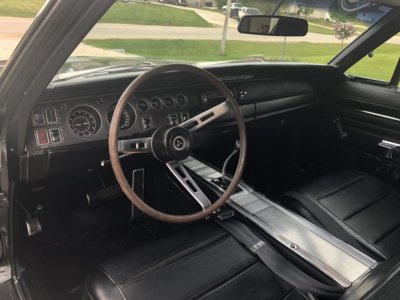
Nice Car Richard! What are you running for rubber?
You are using an out of date browser. It may not display this or other websites correctly.
You should upgrade or use an alternative browser.
You should upgrade or use an alternative browser.
Dodge Charger 68 R/T Engine bay
- Thread starter Gentleman
- Start date
Nice Car Richard! What are you running for rubber?
275-60R15 on 8" rims in the rear & 235-70R15 on 7" rims in the front.
Gentleman
Well-Known Member
Here's my GG1 a/c equipped car. If you need some particular detail pictures, just let me know.
Your car looks beautiful! Those pictures gave me a big push do forward my restauration! I need a ton of detailed pictures... But first of all I need a couple pictures of the engine itself (specialy the intake manifold and carburetor) and engine bay like mountings for the A/C on the fenders, so I know where the original holes are and where the "self drilled" holes have to leave. Firewall would also be nice. Is your car "factory restored"?
Does anybody have a book about all the bolts and nuts? I know there is one a avaiable but dont know where.
Macdon221
Well-Known Member
Your car looks beautiful! Those pictures gave me a big push do forward my restauration! I need a ton of detailed pictures... But first of all I need a couple pictures of the engine itself (specialy the intake manifold and carburetor) and engine bay like mountings for the A/C on the fenders, so I know where the original holes are and where the "self drilled" holes have to leave. Firewall would also be nice. Is your car "factory restored"?
Does anybody have a book about all the bolts and nuts? I know there is one a avaiable but dont know where.
The car was painted when I bought it, but I did a whole bunch of detail work to make it factory appearing as best as I could. I'll take some pictures this weekend and post them up.
Here you go....


Gentleman
Well-Known Member
Oh man, this is awesome! Ok... the voltage regulator is upside down... I was going crazy over that thing... my wiring harness is original and I mounted the VR on the firewall "correct way" but the wiring harness was not very happy with crossing GND and ING... so I turned it up side down and see... fits perfectly... So this problem is solved... 2nd... I bought the wrong screws for the carb... (They were listed for 68 charger) I got the allen screws and nuts... 3rd... I NEED ALL THE A/C PARTS... damn... 4th... I love your car!
Do you have front disk brakes?

Do you have front disk brakes?

Gentleman
Well-Known Member
So...
I am getting closer to finish my engine. I stumbled over the insulation for the intake manifold.
http://www.performancecargraphics.com/Manifold_Insulation.htm
On this picture there is only one intake manifold insulation shield (front), but i found some information about a second one (back)
Some say that the insulation were only installed at A/C cars 383/440. but not on HP.
My question is, does a 68 Charger with a 440 HP engine has the insulation under the intake manifold and if so, just the front shield or front and back shield?
Could not find any on your engine.
I am a little bit confused, maybe you guys can help me out. Thank you
I am getting closer to finish my engine. I stumbled over the insulation for the intake manifold.
http://www.performancecargraphics.com/Manifold_Insulation.htm
On this picture there is only one intake manifold insulation shield (front), but i found some information about a second one (back)
Some say that the insulation were only installed at A/C cars 383/440. but not on HP.
My question is, does a 68 Charger with a 440 HP engine has the insulation under the intake manifold and if so, just the front shield or front and back shield?
Here you go....
Could not find any on your engine.
I am a little bit confused, maybe you guys can help me out. Thank you
I do not believe that the hi-po 440's came with that pad, only the luxo 440s.
Gentleman
Well-Known Member
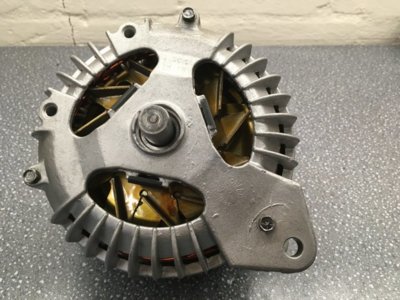
Small update, I found an late 67 alternator that will fit my early 68 Charger. I cleaned the alternator and changed the inside of the alternator. The old was very rusty and wasn’t running. So I took it apart. The results are shown on the pictures. I also ordered an alternator battery cable insulation (already installed) and an alternator wiring retainer clip, but I have no idea where this one is mounted. Any advise?
Thanks!
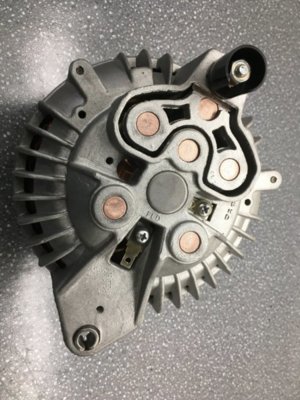
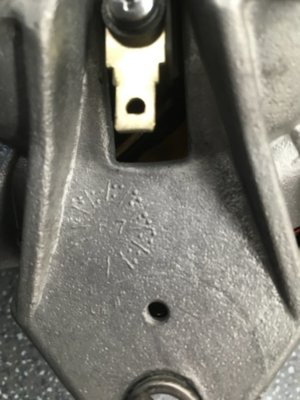
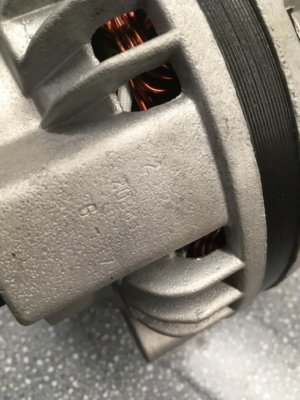
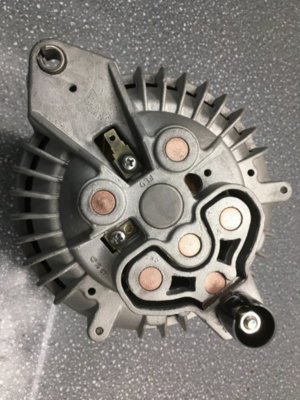
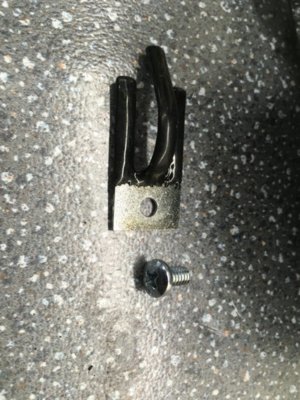
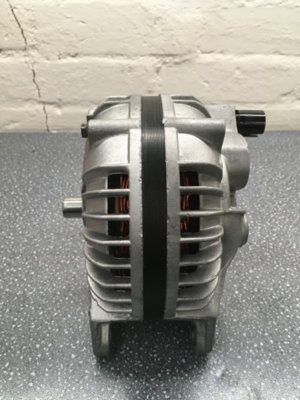
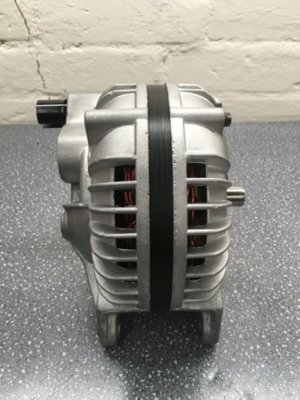
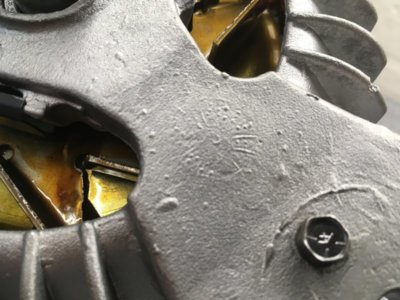
Thanks!


- Local time
- 7:33 AM
- Joined
- Jan 29, 2018
- Messages
- 22,091
- Reaction score
- 71,316
- Location
- Midland Ontario, Canada
Gentleman
Well-Known Member
Awesome! Thank you! There is no on thread on my alternator, so I was a little bit confused.
So...
I am getting closer to finish my engine. I stumbled over the insulation for the intake manifold.
http://www.performancecargraphics.com/Manifold_Insulation.htm
On this picture there is only one intake manifold insulation shield (front), but i found some information about a second one (back)
Some say that the insulation were only installed at A/C cars 383/440. but not on HP.
My question is, does a 68 Charger with a 440 HP engine has the insulation under the intake manifold and if so, just the front shield or front and back shield?
Could not find any on your engine.
I am a little bit confused, maybe you guys can help me out. Thank you
My HP 440 w/A/C had the foil insulation pad. I remember distinctly, cause I was like, "What is this pad of foil doing under the intake?"
Like a dummy, I threw it away during the engine restoration decades ago.
- Local time
- 4:33 AM
- Joined
- Jul 9, 2019
- Messages
- 11,716
- Reaction score
- 30,868
- Location
- Modesto California
Well if you have heavy duty tin foil and fiberglass insulation they aren't hard to reproduce..
Well if you have heavy duty tin foil and fiberglass insulation they aren't hard to reproduce..
Yeah, but there's something very satisfying about having original components. Even if they aren't reused, at least to have as a reference.
Tin foil and insulation, huh? Thanks for the tip.
Gentleman
Well-Known Member
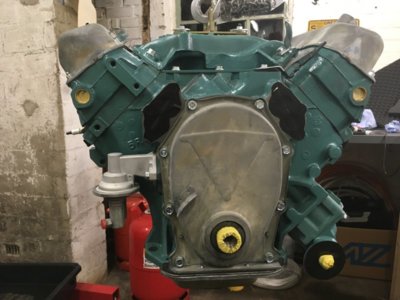
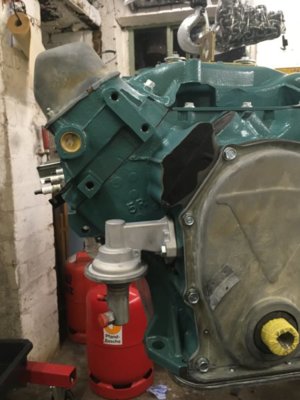
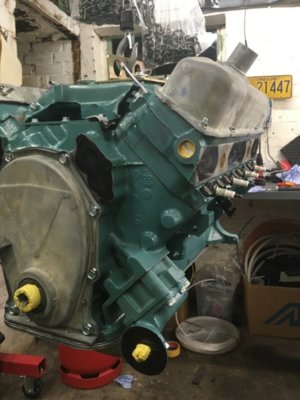
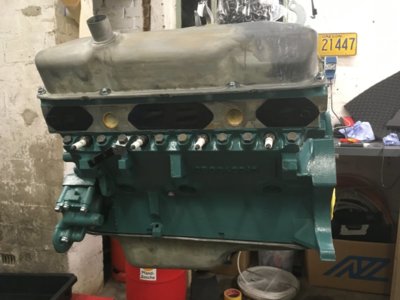
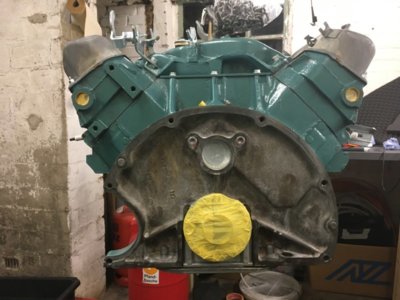
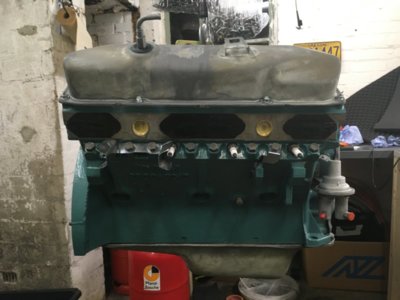
I’m still working on my engine, almost done.
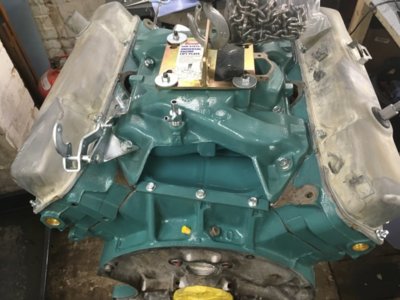
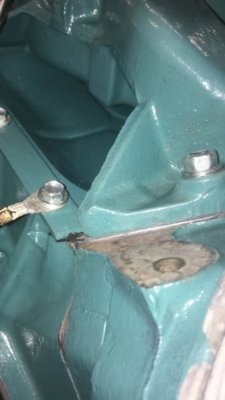
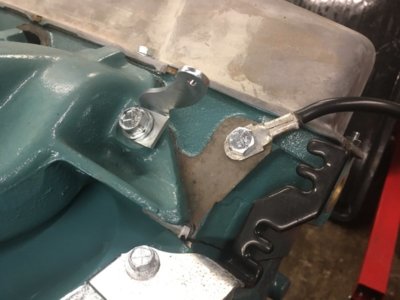
but I need some information about the location of the negative cable from battery and also for the negativ cable to firewall.
The cable to battery ist normally connected to the first intake screw, but I got an A/C car (A/C not mounted jet, will be added later) so where does it go? Is it on the picture correct?
I also attached a picture of the cable to firewall, maybe it’s wrong... maybe you guys know how to mount it correctly to the block. I couldn’t find an answer for that.
and some picture of the engine. If anything is wrong write it down.
The paint job is a little bit strange... my first engine builder had a different vision how to paint the engine. The engine will be painted next week like shown. Dismounted parts will be painted separately. Like water pump, etc


Daves69
Well-Known Member
Tin foil and insulation, huh? Thanks for the tip.
That insulation pad may also help dampen some valley pan flex as well as noise or heat.
….
http://www.performancecargraphics.com/Manifold_Insulation.htm
Similar threads
What's it Worth
1970 Dodge Charger R/T 440 Manual Track Pack Car Barn Find
- Replies
- 73
- Views
- 4K
- Replies
- 0
- Views
- 176

