HT413
Semi Pro Bowler
I recently posted regarding overcharging, voltage regulator and ignition wiring.
My problem - an overcharging issue where it would charge at 12.5V at idle (roughly 800rpm) and gradually increase to 17V at around 2000 rpm. Not sure if it would go higher, as that was quite enough to make me shut 'er down.
I read this link - http://moparforums.com/forums/f84/voltage-regulator-11861/ that said with the car in RUN position, but not started, if you probe from the + Battery terminal and the blue field connection on the VR with a voltmeter, there should be no more than 0.2V voltage drop between the two. Really can't say if the guy was correct, but since I was reading 0.9V :sad5: I figured this might be my problem. OUCH.
My car - 69 Belvedere with a 413, MSD 6AL ignition and MSD blaster SS coil, newer 70 and later transistorized voltage regulator, denso alternator with 2 field terminals and (obviously) the battery terminal, ballast resistor has been eliminated and the ammeter bypassed (all this was done by previous owner). As part of the ammeter bypass, a wire was run directly from the alternator batt terminal to the + terminal on the battery (with a fusible link inline) another wire from + battery terminal to the starter solenoid and a fusible link from starter solenoid to the J terminal on the bulkhead.
STEP 1 - went through the ignition wiring
Replace all the crimp splices connecting the 6AL system to the wiring harness with soldered connections, greased them with Permatex dialectric grease and shrink wrapped them all. Reprobed - 0.7V IMPROVEMENT!
STEP 2 - inspected all bulkhead connections and ignition plug connections and cleaned all the MALE connections with dremel wire wheel. Also noticed a loose prong on the accessory prong of the ignition. Took a moment to tighten it up with just a small bead of solder between the prong and its mounting post. Reprobed - 0.4V to 0.5V. Started it up, 'only' overcharging to 15 to 15.5V. Keep going!
STEP 3 - with the ignition switch out, I jumped from batt terminal to ign1 (run terminal) on the ignition plug on the harness. I then reprobed and still had the 0.4 to 0.5V, which told me there was no excessive voltage drop in the ignition switch itself. A good thing.
STEP 4 - found a cool (and free!) way to clean the female connections in the bulkhead as well as the ignition plug. Mix 1 cup vinegar and 1 tablespoon of salt. THAT'S IT. Ok, they also suggest adding flour to it to form a paste so the mix will stay put in the bulkhead, which I did. I put several tablespoons of flour, adding and mixing one at a time.
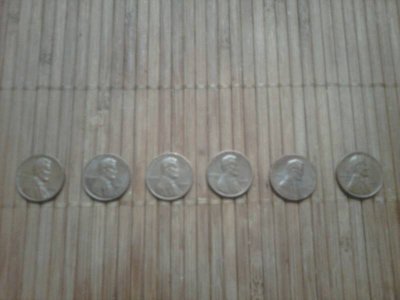
OK, so before actually testing on my cherished wire harness, I did a quick experiment using pennies. Here it goes...
The left penny was untreated, the others pennies were (from left to right) exposed to 30 seconds, 1 minute, 5 minutes and finally 2.5 hours (the time it took me to run a few errands). Picture is abysmal, but the unoxidized patch in the middle of each treated penny is almost as shiney as a new penny.

As you can see, almost all improvement came within the first 30 seconds with no observable improvement until we reached 2.5 hours, but even then it was almost too little to really see. Great news! :hello2:
So I applied the mix to bulkhead female terminals and as well as the female terminals in the ignition switch plug. WARNING- flour mix dries up after a while and you end up with basically pancake batter in your terminals. B**CH to remove. Ask me how I know. :icon_rolleyes:
Reprobed - still 0.4V drop drop from + battery terminal to the blue field connection on the transistorized VR, but when I fired it up, she idled at 12.5V and maintained just a hair over 14V throughout the rpm range (from 1500 to about 3000, which was as high as I went since I didn't feel like warming the car up too thoroughly). My multimeter is a cheapo unit, which I'm guessing is the reason it didn't measure much difference between STEP 3 and STEP 4, because there certainly was a noticeable difference in charging volts.
I'm sure I can find more resistance, but I call this SUCCESS!!!! Of course, tonight I leave for vacation so I can't even drive the dang thing. :eusa_doh:
So there ya go! Hope someone can use this in the future. :VB toast:
Edit: I forgot a couple of things: i cleaned out all the copper cleaner mix with a nice strong shot of WD40. Some of the areas that dried up needed a quick shot of compressed air. I then packed all connections nice and full with Permatex Dialectric Grease and called it done. I plan on following this same process for all high current circuits, such as headlights, hi beams, tail lights and certainly the heater / blower motor. Little at a time.
My problem - an overcharging issue where it would charge at 12.5V at idle (roughly 800rpm) and gradually increase to 17V at around 2000 rpm. Not sure if it would go higher, as that was quite enough to make me shut 'er down.
I read this link - http://moparforums.com/forums/f84/voltage-regulator-11861/ that said with the car in RUN position, but not started, if you probe from the + Battery terminal and the blue field connection on the VR with a voltmeter, there should be no more than 0.2V voltage drop between the two. Really can't say if the guy was correct, but since I was reading 0.9V :sad5: I figured this might be my problem. OUCH.
My car - 69 Belvedere with a 413, MSD 6AL ignition and MSD blaster SS coil, newer 70 and later transistorized voltage regulator, denso alternator with 2 field terminals and (obviously) the battery terminal, ballast resistor has been eliminated and the ammeter bypassed (all this was done by previous owner). As part of the ammeter bypass, a wire was run directly from the alternator batt terminal to the + terminal on the battery (with a fusible link inline) another wire from + battery terminal to the starter solenoid and a fusible link from starter solenoid to the J terminal on the bulkhead.
STEP 1 - went through the ignition wiring
Replace all the crimp splices connecting the 6AL system to the wiring harness with soldered connections, greased them with Permatex dialectric grease and shrink wrapped them all. Reprobed - 0.7V IMPROVEMENT!
STEP 2 - inspected all bulkhead connections and ignition plug connections and cleaned all the MALE connections with dremel wire wheel. Also noticed a loose prong on the accessory prong of the ignition. Took a moment to tighten it up with just a small bead of solder between the prong and its mounting post. Reprobed - 0.4V to 0.5V. Started it up, 'only' overcharging to 15 to 15.5V. Keep going!
STEP 3 - with the ignition switch out, I jumped from batt terminal to ign1 (run terminal) on the ignition plug on the harness. I then reprobed and still had the 0.4 to 0.5V, which told me there was no excessive voltage drop in the ignition switch itself. A good thing.
STEP 4 - found a cool (and free!) way to clean the female connections in the bulkhead as well as the ignition plug. Mix 1 cup vinegar and 1 tablespoon of salt. THAT'S IT. Ok, they also suggest adding flour to it to form a paste so the mix will stay put in the bulkhead, which I did. I put several tablespoons of flour, adding and mixing one at a time.
OK, so before actually testing on my cherished wire harness, I did a quick experiment using pennies. Here it goes...
The left penny was untreated, the others pennies were (from left to right) exposed to 30 seconds, 1 minute, 5 minutes and finally 2.5 hours (the time it took me to run a few errands). Picture is abysmal, but the unoxidized patch in the middle of each treated penny is almost as shiney as a new penny.
As you can see, almost all improvement came within the first 30 seconds with no observable improvement until we reached 2.5 hours, but even then it was almost too little to really see. Great news! :hello2:
So I applied the mix to bulkhead female terminals and as well as the female terminals in the ignition switch plug. WARNING- flour mix dries up after a while and you end up with basically pancake batter in your terminals. B**CH to remove. Ask me how I know. :icon_rolleyes:
Reprobed - still 0.4V drop drop from + battery terminal to the blue field connection on the transistorized VR, but when I fired it up, she idled at 12.5V and maintained just a hair over 14V throughout the rpm range (from 1500 to about 3000, which was as high as I went since I didn't feel like warming the car up too thoroughly). My multimeter is a cheapo unit, which I'm guessing is the reason it didn't measure much difference between STEP 3 and STEP 4, because there certainly was a noticeable difference in charging volts.
I'm sure I can find more resistance, but I call this SUCCESS!!!! Of course, tonight I leave for vacation so I can't even drive the dang thing. :eusa_doh:
So there ya go! Hope someone can use this in the future. :VB toast:
Edit: I forgot a couple of things: i cleaned out all the copper cleaner mix with a nice strong shot of WD40. Some of the areas that dried up needed a quick shot of compressed air. I then packed all connections nice and full with Permatex Dialectric Grease and called it done. I plan on following this same process for all high current circuits, such as headlights, hi beams, tail lights and certainly the heater / blower motor. Little at a time.
Attachments
Last edited by a moderator:


