• When you click on links to various merchants on this site and make a purchase, this can result in this site earning a commission. Affiliate programs and affiliations include, but are not limited to, the eBay Partner Network.

Monroe's 70 GTX

Getting back to it.

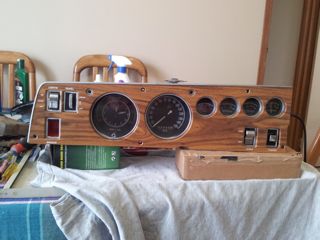
Haven't been feeling the best for a while now hence the lack of progress. Been following a couple of other build threads on the site and getting a bit toey. So time to get back into it.
I bought a tic toc tach and put a new tachboard in it and added it to the guage cluster.
Tic toc 1.jpg Tic toc 2.jpg
Old board has the yellow wiring which you can see neatly routed so as not to cause any interference. The new board has the green wire. Even though I wrapped it around the same way and tested for interference, once I placed it back into the case it obviously had moved a bit, because it caused the tach needle to hold up in the upper rev range. In hindsight I should have taken more care to bend it the same as the original but I didn't realise the importance of it at the time. I took it out again and held it down low toward the board and placed a bit of glue there to hold it. All fixed. The photo is before I glued it.
Tic toc 3.jpg Tic toc 4.jpg Tic toc 5.jpg
Put new indicator lenses on and a new brake system decal and gaskets. Cleaned up the plastic and chrome switches and put it back together again. I would have had the bezel placed back on as well but I realised that one of the bezel mounts was broken. I glued it back on and I'll let it sit overnight. Tomorrow I'll melt some plastic around it to hopefully strengthen it up before screwing the cluster back to it. The new indicator lenses are a darker green than the old ones. Not sure if the old ones were original or not so I'll see what it lights up like when its all back on the car.
Guage Cluster 1.jpg Guage cluster 2.jpg Mounting pin.jpg
 
Nice upgrade Monroe. :headbang:
Try and test run the tacho before you refit the cluster to the dash....might save some grief down the track.
 
Yes sir, Looks good.. I had one broke on my 73 and i used JB-weld, Longer drying but i think its held good! Good luck to you :)
 
The bezel screw post came up nice and strong, so I attached the cluster back to the bezel and all looks cool again.
Guage cluster.jpg
 

Attachments

  • Guage cluster.jpg
    Guage cluster.jpg
    17.5 KB · Views: 499
That looks like it would be a great car memorable item sitting on a shelf in a den as well as your car, great work!
 
Thanks for the kind words fellas.

That looks like it would be a great car memorable item sitting on a shelf in a den as well as your car, great work!

I totally agree Ron, would look great over the bar behind the pool table. Wish I had one lol.
 
Me to.. The pool table and the console going into the same car that's mine! lol.. Good luck with your progress!!!
 
Coming good gradually thanks PEIwoman. Just been doing some tinkering at the table to stay interested. Cleaning up my centre and side ac vents, to get them ready to go back in shortly. There are so many bits and pieces you forget about until you're ready to put them back on again.
 
I didn't do a full restoration on my 73 and yet had so many things torn apart, off the car that i almost by cleaning out my garage throwed out my courtesy lights for the fenders, Thats when i decided to take inventory on everything else for the outside and ALL interior parts that was out.. Bumpers aren't likely to be thrown accidentally away, But chrome strips could have went that way, Thats when i really learned the lesson of "bag and tag".. Yep, there is a lot of pieces you can forget about, even if you've learned the bag n tag, lots to be cleaned, painted and buffed! Your headed to the end of all this and hope your excited as much as im betting you are! :)
 
You're exactly right Ron. About bag and tag and about being excited. My biggest problem is that I tend to jump from one thing to another without finishing the first. Many a time I've found something on the bench or dining room table that I had been working on, and then left because I had to order a new piece or something like that. Then I stand around scratching my head and asking myself, "now what did I do with the thing that went with that". Another afternoon wasted searching for misplaced parts. Luckily I do find most of them.
I pulled apart the ac vents and cleaned them up. The old plastic door had warped over time so I glued a bit of thin rubber to it. Seemed to do the trick, only time will tell how the glue stands up to the heat and cold coming through the vent. The metal pieces had a bit of rust, but it all freed up fairly well. I didn't take the actual swivel vent off as the pins looked a bit fragile. Since it moves ok I thought better to leave it. The only thing I couldn't replace was a couple of clips that went under the swivel vent. Seemed like a tension spring clip to keep tension on the vent when you move it left or right. The clips were rusted out and just fell apart. A:C vent 1.jpg A:C vent 2.jpg A:C vent 3.jpg A:C vent 5.jpg A:C vent 6.jpg A:C vent 7.jpg
 
Bit of trim

Put the radio in the dash and got all the wiring and ac ducts tucked away as best I could. Sure is hard to work around those ducts and keep them out of the way. Still couldn't get my 8 track working properly. Still sounded like the chipmunks and then the motor seemed to stop working at all. I can't afford it at the moment, but I think later on down the track I'll take it out again and send to Barry's 8 track for a full repair. At least the radio still works at the moment. Put the instrument cluster back in hooked up all the loose ends. Starting to take shape again. I think I'll leave the glovebox out for the moment so I can still get in if I need to.

ac hose 1.jpg ac hose 2.jpg Dash radio.jpg Trim 1.jpg Trim 2.jpg Trim 3.jpg
 
Finally got around to putting on the front calipers. Have had them sitting around for awhile now so finally pulled my finger out and put em on. Wasn't sure about the anti rattle spring placement. Could'nt find any decent pics of it as original. Have I got it sitting on the right way, or should the bar go across the top of the caliper?
disc 1.jpg disc 2.jpg disc 3.jpg
 
again looking very good nice job :headbang:
 
Auto Transport Service
Back
Top