BEAUTIFUL! nice job.
You are using an out of date browser. It may not display this or other websites correctly.
You should upgrade or use an alternative browser.
You should upgrade or use an alternative browser.
Motor is out - now under hood resto can begin
- Thread starter 43tutor
- Start date
43tutor
Well-Known Member
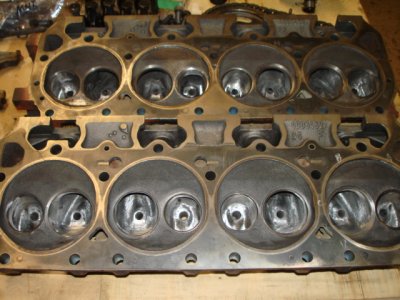
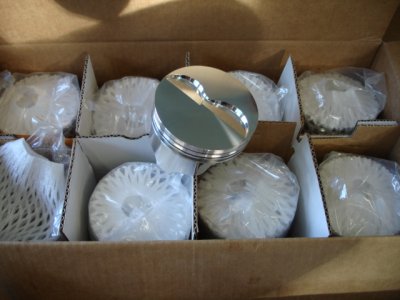
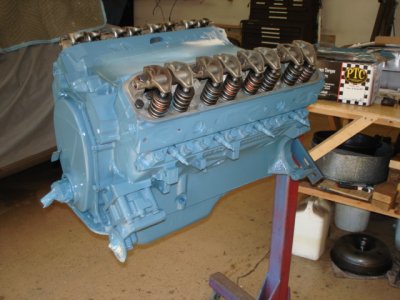
Work has begun on the engine. I finished porting the heads this weekend, the porting templates worked great. I'm going to use my 452 heads on the 400 motor. I'm still planning to build a 451 stroker. The original 400 is completely taken apart and everything looks great, no issues with the block from what I can see. I'm still checking out some local machine shops this week and my goal is to have a block work started ASAP. Once the engine is out at the machine shop and friend and I will do a complete rebuild of the 727.
Attachments

43tutor
Well-Known Member
It has been a while since my last post. Sorry the delay in keeping up with this post.
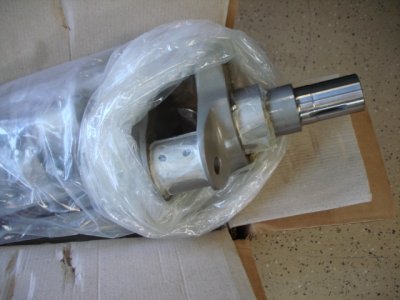
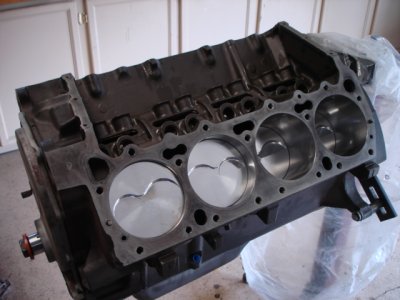
I finally found a local machine shop that I was comfortable with. A couple of shops that I visited I wouldn't have taken my lawn mower engine to those guys. Anyway, the block work has begun and the stroker kit is ordered from 440 Source and should be here next week. Instead of the 451 kit I decided to go with the 470 stroker kit. The 470 kit only requires a .020" oversized bore while the 451 kit needs a .035" oversized bore. I wanted to keep as much material in the bores as I could for future rework if needed since it is the original block. Once cleaned up the block looked really good. No issues there...
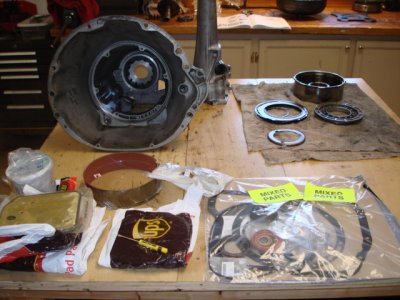
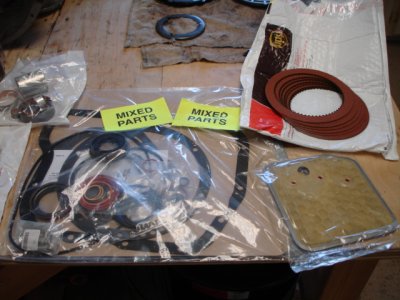
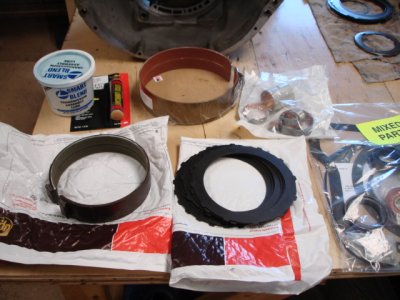
I have started the complete rebuild on the 727. Rebuild kit arrived this week and now the task of reassembly. I ordered the complete overhaul kit from TSR Racing and I'm using the TF Handbook written by Carl Munroe. Great information in that book. This is my first 727 rebuild in all my years of messing around with cars. I thought it was finally time to learn this part of the car. I will also install a Transgo TF2 kit while I'm at it.
I finally found a local machine shop that I was comfortable with. A couple of shops that I visited I wouldn't have taken my lawn mower engine to those guys. Anyway, the block work has begun and the stroker kit is ordered from 440 Source and should be here next week. Instead of the 451 kit I decided to go with the 470 stroker kit. The 470 kit only requires a .020" oversized bore while the 451 kit needs a .035" oversized bore. I wanted to keep as much material in the bores as I could for future rework if needed since it is the original block. Once cleaned up the block looked really good. No issues there...
I have started the complete rebuild on the 727. Rebuild kit arrived this week and now the task of reassembly. I ordered the complete overhaul kit from TSR Racing and I'm using the TF Handbook written by Carl Munroe. Great information in that book. This is my first 727 rebuild in all my years of messing around with cars. I thought it was finally time to learn this part of the car. I will also install a Transgo TF2 kit while I'm at it.
Attachments
Photon440
Well-Known Member
- Local time
- 2:22 PM
- Joined
- Mar 14, 2012
- Messages
- 18,598
- Reaction score
- 34,476
- Location
- Surrey, B.C. Canada
Nice, neat and orderly. Good choice with the block machining, not only for future consideration but also for now. Every bit you DON'T bore out helps keep the bores stiffer. I know a couple of guys who bore everything to the max just to gain six cubic inches, not realizing that the extra wall flexing won't let the rings do their job and the net power is less.
What heads are you using for 470 cid?
-=Photon440=-
What heads are you using for 470 cid?
-=Photon440=-
43tutor
Well-Known Member

43tutor
Well-Known Member
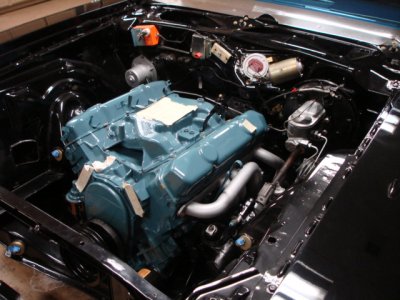
Latest progress on my car.
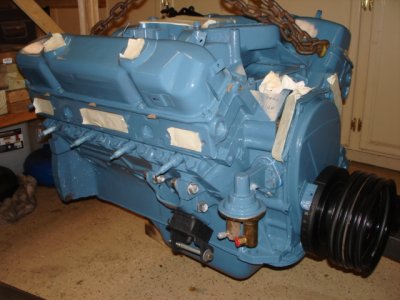
Motor is now assembled and painted.
Transmission is now assembled and ready to be installed.
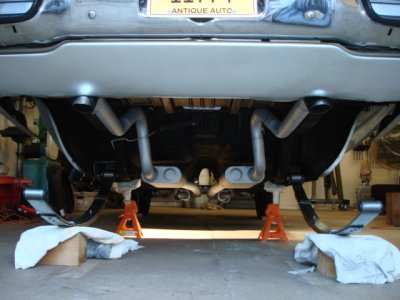
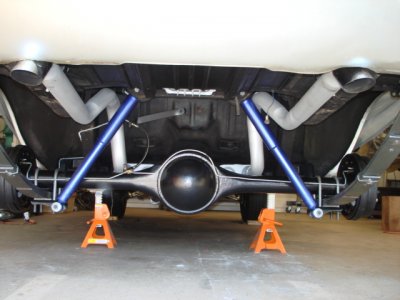
We finished the bottom side of the car.
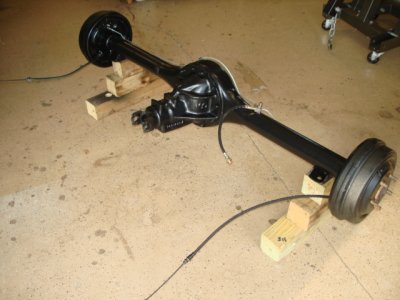
We switched from an 8 1/4 over to a 8 3/4 with a 3.55 sure-grip.
Wow, this has been a lot of work. Every gasket, seal, bearing, bushing, etc... has been replaced on all of the mechanicals. All of the remainder of the parts have been stripped and repainted. Now we are on the road to final assembly.
Motor is now assembled and painted.
Transmission is now assembled and ready to be installed.
We finished the bottom side of the car.
We switched from an 8 1/4 over to a 8 3/4 with a 3.55 sure-grip.
Wow, this has been a lot of work. Every gasket, seal, bearing, bushing, etc... has been replaced on all of the mechanicals. All of the remainder of the parts have been stripped and repainted. Now we are on the road to final assembly.
Attachments

CoronetDarter
Well-Known Member
Nice build! You and your son are doing an incredible job.
Any issues with the 727 rebuild?
Any issues with the 727 rebuild?
43tutor
Well-Known Member
43tutor
Well-Known Member
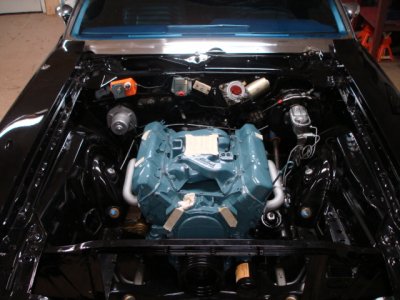
Latest update....
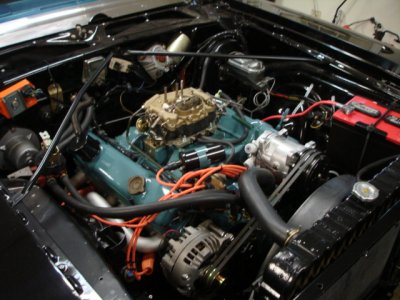
New A/C compressor installed along with finishing the front of the motor. My friend completed the rebuild of the Thermoquad and I'm wrapping up the installation of the throttle linkage.
Bottom side of car is now complete.
New A/C compressor installed along with finishing the front of the motor. My friend completed the rebuild of the Thermoquad and I'm wrapping up the installation of the throttle linkage.
Bottom side of car is now complete.
RJS
Well-Known Member
.jpg") Looking great Thomas!!! Your only about a year ahead of me:argue: I should have my car back home in about a week.
Looking great Thomas!!! Your only about a year ahead of me:argue: I should have my car back home in about a week.Ron
43tutor
Well-Known Member
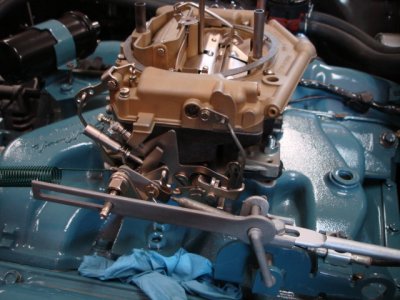
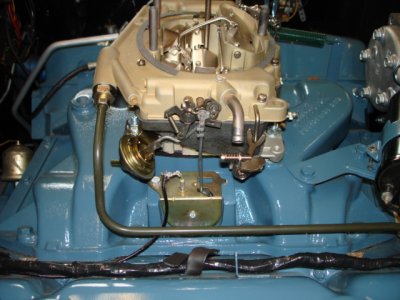
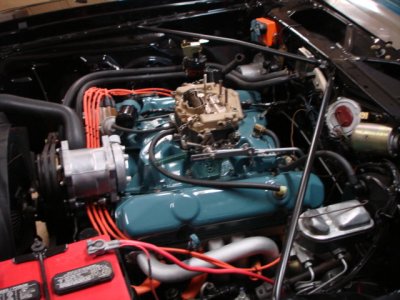
Completed the rebuild of the TQ today and finalized all the adjustments on the carb. Bolted it down and installed throttle linkage. Next I will finish the remainder of the vacuum lines, prime the motor and drop in distributor. Can't wait to turn the key, it has been over 2 years.
Attachments
43tutor
Well-Known Member
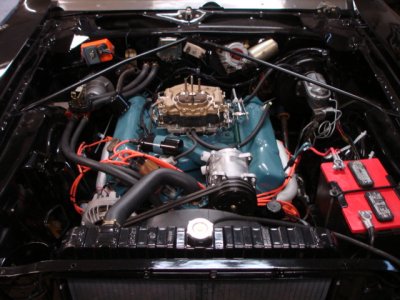
The day has final come that we were able to fire up the 470 cubic inches. What a great feeling that was after 2 years. My son was inside the car and I wish I could have had the camera on his face when this thing roared to life. Sorry about the quality of the video, I have an old camera that isn't that great. I cut down a 10 minute video to about 50 seconds. Hope you enjoy.
By the way....yes I plan to paint the oil fill cap. Out of all the work we've done how I forgot to paint that one part is beyond me.
https://youtu.be/dueBjHI-gHU
By the way....yes I plan to paint the oil fill cap. Out of all the work we've done how I forgot to paint that one part is beyond me.
https://youtu.be/dueBjHI-gHU
Attachments
")
jamesvoodoo
Well-Known Member
great build thread. Car sounds great
73runner
Well-Known Member
Nice progress! Almost there. Great work and I really appreciate your attention to detail like the way you wired up the ignition.
43tutor
Well-Known Member
Thanks for the compliments and noticing the level of detail we are trying to put into the build. I will keep the pictures coming.
43tutor
Well-Known Member
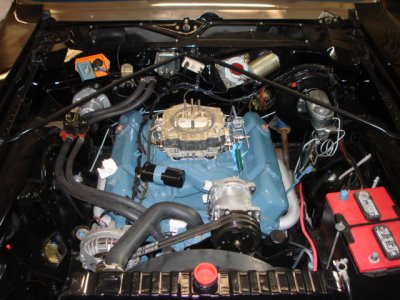
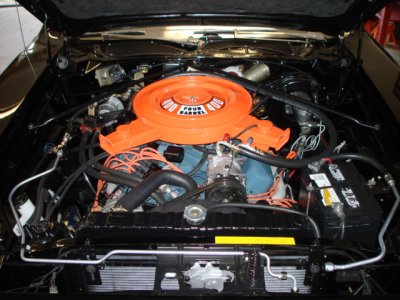
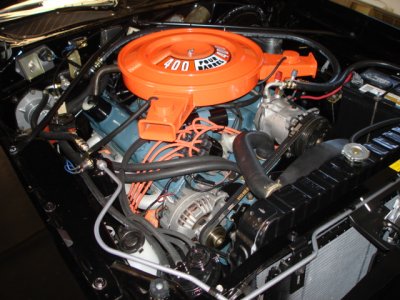
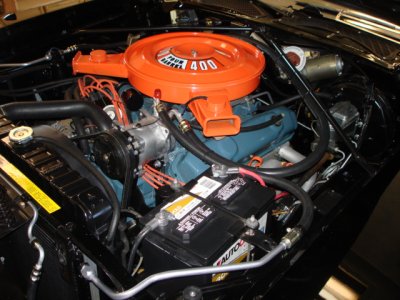
Here is the final result of the under hood restoration. I'm still sorting out a few little details but for the most part the project is complete. The AC conversion kit was the last part to come together. I was able to use part of the original lines and mounting positions for the lines, trying to stay close to original where I could with the AC. It is nice to cruise with the AC going and blowing ice cold.
Attachments
That looks great! How does the kid like it??
MT_Mopar
Well-Known Member
Very nice job, bet it really feels good at this stage, better get some summer driving in before its over!
Similar threads
- Replies
- 8
- Views
- 1K
- Replies
- 0
- Views
- 152
- Replies
- 24
- Views
- 616


