• When you click on links to various merchants on this site and make a purchase, this can result in this site earning a commission. Affiliate programs and affiliations include, but are not limited to, the eBay Partner Network.

Mushy Spongy Brake Pedal but no apparent vacuum leak

Those rear brakes actually sound a little tight. If they are dragging cold imagine what it will be like after 30 miles. They are what is called a self energizing brake that "winds" the shoes into contact with the drum when the brake is applied. If adjusted up too much this is happening under normal driving conditions.
When they are adjusted right the front shoe should just lightly kiss the drum.
I remembered a car I worked on years ago that had a brake problem. It came out after investigation that a shop had fitted standard size shoes into drums that had been turned out.
However that was years ago and I cannot remember the exact symptoms or reason I got involved - other than to say it had some sort of weird problem that other shops had tried to fix and the owner was getting pissed off it was not getting sorted out.
 
[1] Pinhole [ or any hole ] in a booster diaphragm causes a hard pedal, not a mushy pedal because brake assist is lost.
[2] Vac canister caused more mushy feel because the stored vacuum allowed greater braking force, pedal goes further.
[3] Your problem is hydraulic. Either air in the system or problem with m/c [ internal ]. Cast iron m/c rusts inside. You bleed the brakes, seals travel over rust lumps, seals get cut, now internal leakage.
 
If you do bleed the calipers off the car make sure you wedge something between the brake pads.
 
thanks everyone.

Just for info to summarize -
the cast iron MC is new as of mid-2022 and less than 500 miles now driven. Raybestos blue 1-1/8".
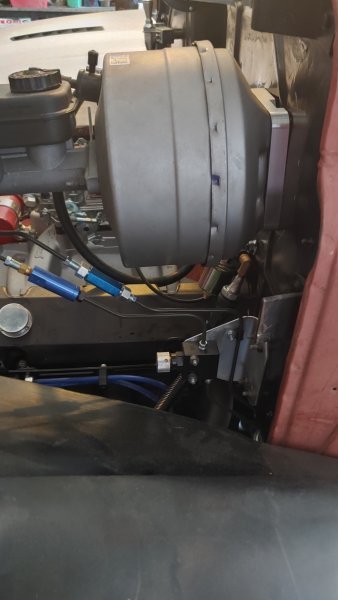
Booster is 8" dual diaphragm aftermarket (Master Power Brakes).
Rear brakes are stock with new small wheel cylinders and new pads.
Front brakes are aftermarket Wilwood 4-piston Forged Dynalite with Stainless braided caliper hoses.

Time for more bleeding and making sure air isn't getting trapped or back in somewhere.
 
You sure, if it is air, that it's not trapped in the nose of the master? I had to lift the rear of my car to cure mine....
 
Last edited:
Another thing that will do that is if the drums were cut like most are the shoes need to be arched to fit them or just the outer edge rides against the drum. Old school there.
 
thanks everyone.

Just for info to summarize -
the cast iron MC is new as of mid-2022 and less than 500 miles now driven. Raybestos blue 1-1/8".
Booster is 8" dual diaphragm aftermarket (Master Power Brakes).
Rear brakes are stock with new small wheel cylinders and new pads.
Front brakes are aftermarket Wilwood 4-piston Forged Dynalite with Stainless braided caliper hoses.

Time for more bleeding and making sure air isn't getting trapped or back in somewhere.
Just an FYI....
Dual diaphram boosters are typically
used for 4 disc systems. If you do
get the spongy pedal figured out, you
may find the pedal to be too touchy.
 
Just an FYI....
Dual diaphram boosters are typically
used for 4 disc systems. If you do
get the spongy pedal figured out, you
may find the pedal to be too touchy.
If that's true, I hadn't heard that before, so thanks, good to know.
 
Just an FYI....
Dual diaphram boosters are typically
used for 4 disc systems. If you do
get the spongy pedal figured out, you
may find the pedal to be too touchy.
In the other thread you talk about your 4 disc system and say you installed 2-lb residual valves.
I have front disc, rear drum and it got me to thinking. I found this info on the Summit Racing website talking about residual valves. I have 2 questions -

1. I need to confirm if my Raybestos Blue Master Cylinder has a 10-lb residual valve in line with the drum side port and no residual valve in line on the disc side port.
2. I'm wondering if I add a 2-lb residual valve at the front disc side if it could allow more pressure build up at the front 4-piston Wilwood calipers and get rid of the sponginess? But, below it says :
When converting from drum to disc brakes, remove the 10-psi valve. The constant line pressure causes the brakes to drag.

It also says: In some vehicles, the master cylinder is relocated to a lower position. This could be under the floor or on the frame rail. In this design, a residual valve is required to prevent fluid back-flow. Without a residual valve, the pedal could feel “spongy.” It would also take more pedal travel to move enough fluid to engage the brakes.

My MC is firewall mounted above the calipers. Could an added 2-psi residual valve provide any benefit? I need sooner pad engagement with no spongy feel a bit after the start of pedal travel. Right now its engaging 2/3 of the way down and feels spongy.

https://help.summitracing.com/app/answers/detail/a_id/5297/~/what-is-a-residual-valve%3F
In OEM applications, the residual pressure valve is usually built-in to the master cylinder. In this case, an external valve is not required.

A 10-psi Residual Valve is used with drum brakes. The valve holds 10 psi in the brake lines going to the wheel cylinders. This keeps pressure against the return springs inside the drum. This means the brakes engage faster with less pedal travel.

Most disc brake systems do not require a residual valve. However, a 2-psi Residual Valve is used when the master cylinder is lower than the calipers.

When the master cylinder is mounted on the firewall, it is usually higher than the calipers. Gravity keeps the fluid from flowing backwards. In this case, a residual valve is not required.

In some vehicles, the master cylinder is relocated to a lower position. This could be under the floor or on the frame rail. In this design, a residual valve is required to prevent fluid back-flow. Without a residual valve, the pedal could feel “spongy.” It would also take more pedal travel to move enough fluid to engage the brakes.

Notes

  • When converting from drum to disc brakes, remove the 10-psi valve.
    • The constant line pressure causes the brakes to drag.
    • This will cause overheating and premature wear.
 
Now here's an interesting info tidbit (way back from 2006) -

the new style calipers require a different "quick take up" master cyl. with a stepped bore.

Could this be the real issue??

Front residual valves? Nahhh
The Bendix rep. that conducted the seminar for the shops that buy their products, explained that the grooves in the new calipers are milled differently than the older ones we are familliar with. The walls in the seal groove of the caliper are not parallel. The wall of the groove closest to the pads actually slants out towards the pads. That lets the seal lean when the brakes are applied. When you let up on the pedal the seal springs back pulling the piston with it. In the old calipers with parallel walls, the seal could not lean so the piston moved inside the seal. When the pedal is let up the seal stays put. As the pads wear the piston will move inside the seal but it will always have the spring back space to reduce drag and improve gas milage which is the reason for the change.

Bendix conducted the seminar to alert the shops that the new style calipers require a different "quick take up" master cyl. with a stepped bore. The problem occurs in the daily drivers too if the parts get mis-matched.


Here's another one along the same lines. Man, if this solves it, oh man. Now to find a stepped bore MC that will work and try it. Apologies for a blue oval post, but sometimes good info isn't always found in mopar land...
Vintage Mustang Tech Questions and Answers
 
Did some reading on stepped bore MC's. Seems like it's not a slam dunk. Some have tried this and also had a spongy pedal. Don't think it's the smoking gun to my problem.

Plans for now:
-Check and re-Teflon tape seal threads for front caliper braided Stainless lines. Confirm no swelling of lines.
-Re-grease front caliper slide pins
-Re-bleed brakes both bleeders on each caliper with front calipers off adapters and facing straight up at 12 o'clock.
(looking at possibly installing Russel speed bleeders in place of stock Wilwoods, but can't find one to fit the required 1/8-27 NPT thread size. My front calipers are Wilwood Dynalite 4-piston part # 120-6815)
-Possibly add 2psi residual pressure valve for front discs.

Also found this handy trouble-shooting guide on the Wilwood site:
CAUSESOLUTION
SPONGY PEDAL OR BOTTOMS OUT
Air in brake systemRe-bleed the system.
Calipers not bled with bleed screws straight upUnbolt calipers and hold with bleed screws in the vertical position.
Wrong size master cylinder (too small)Refer to the master cylinder web pages to select the correct size for your application.
Faulty master cylinderReplace master cylinder.
Calipers not mounted square to the rotorRe-align brackets parallel to rotor, or shim caliper.
Calipers mounted equal to, or higher than master cylinderInstall 2 pound in-line residual pressure valve.
Calipers flex excessivelyCheck pressure. Do not exceed 1,200 P.S.I.
Pedal ratio too greatReduce pedal ratio.
Excessive spindle deflection in corners causing piston knock-backInstall 2 pound in-line residual pressure valve. Check spindles for warpage.
 
I had great results with front disc, rear drum setups that mimicked the factory setup. It was when I deviated to a piecemeal 4 wheel disc arrangement that my plans went awry.
I am not an expert by any means but I have stumbled my way through and accidentally discovered a few things. I’d like to take credit for my successes but many times, that happens simply by accident.
The power bleeder tank I bought sure makes bleeding the brakes easier and faster.
I’ve read of stepped bore and quick-take-up master cylinders but never tried them.
Currently I am satisfied with mine.
I have a stock (1975 vintage) single diaphragm booster from an A body and an aluminum 15/16” master cylinder. The big cam necessitated a vacuum pump so I added that. I’d outrun the pump during repeated braking so I added a reserve can.
Now mine feel great. Not new car great but damn good. Pad compound is an area that I’m still curious about.
A member here has a thread about brake troubles he has had with the same booster as the OP. Maybe the reproduction dual diaphragm boosters really are the problem and people are looking at everything else to blame.
 
KD - what's the diameter of that '75 A-body booster? Got a spare laying around in your shop?
 
Perhaps just take it back to the shop and tell them about the problem after you picked it up, and have them redo it properly.
 
Last edited:
I have a few spares.
KD - what's the diameter of that '75 A-body booster? Got a spare laying around in your shop?
To use them, longer brake lines are needed since the A body setup stands up and off the firewall. I make my own lines anyway.
The problem with changes like this is that some things inadvertently affect other things. The A body setup requires the firewall stiffening plate meant for 4 wheel non power drums.
If you can find one of those, I may be able to help.
 
In the other thread you talk about your 4 disc system and say you installed 2-lb residual valves.
I have front disc, rear drum and it got me to thinking. I found this info on the Summit Racing website talking about residual valves. I have 2 questions -

1. I need to confirm if my Raybestos Blue Master Cylinder has a 10-lb residual valve in line with the drum side port and no residual valve in line on the disc side port.
2. I'm wondering if I add a 2-lb residual valve at the front disc side if it could allow more pressure build up at the front 4-piston Wilwood calipers and get rid of the sponginess? But, below it says :
When converting from drum to disc brakes, remove the 10-psi valve. The constant line pressure causes the brakes to drag.

It also says: In some vehicles, the master cylinder is relocated to a lower position. This could be under the floor or on the frame rail. In this design, a residual valve is required to prevent fluid back-flow. Without a residual valve, the pedal could feel “spongy.” It would also take more pedal travel to move enough fluid to engage the brakes.

My MC is firewall mounted above the calipers. Could an added 2-psi residual valve provide any benefit? I need sooner pad engagement with no spongy feel a bit after the start of pedal travel. Right now its engaging 2/3 of the way down and feels spongy.

https://help.summitracing.com/app/answers/detail/a_id/5297/~/what-is-a-residual-valve%3F
In OEM applications, the residual pressure valve is usually built-in to the master cylinder. In this case, an external valve is not required.

A 10-psi Residual Valve is used with drum brakes. The valve holds 10 psi in the brake lines going to the wheel cylinders. This keeps pressure against the return springs inside the drum. This means the brakes engage faster with less pedal travel.

Most disc brake systems do not require a residual valve. However, a 2-psi Residual Valve is used when the master cylinder is lower than the calipers.

When the master cylinder is mounted on the firewall, it is usually higher than the calipers. Gravity keeps the fluid from flowing backwards. In this case, a residual valve is not required.

In some vehicles, the master cylinder is relocated to a lower position. This could be under the floor or on the frame rail. In this design, a residual valve is required to prevent fluid back-flow. Without a residual valve, the pedal could feel “spongy.” It would also take more pedal travel to move enough fluid to engage the brakes.

Notes


  • When converting from drum to disc brakes, remove the 10-psi valve.
    • The constant line pressure causes the brakes to drag.
    • This will cause overheating and premature wear.
My front calipers and rotors are
from a 1980's Ford Granada. Not
new. (got them for free). They hooked
up to the Mustang II R&P easily.
The spindles are 70's Pinto.
(super strong).
The 2lb check valves do not cause
the pads to excessively drag on the
rotors, but in some cases will give
the brake pedal a firmer feel. After
initially installing my brake system
(it's more or less custom and pieced
together), I did not have the check
valves installed. Tight footwell in
the cab required modification of the
pedal arm to move it closer to the
gas pedal, and lower it. This changed
the pedal ratio. After the mods the
pedal had a spongy feel, so I
installed the check valves. Pedal
is now firm, and the brakes work well.
20180423_164902.jpg
20211027_165036.jpg
20211227_151541_HDR.jpg
 
I have a few spares.

To use them, longer brake lines are needed since the A body setup stands up and off the firewall. I make my own lines anyway.
The problem with changes like this is that some things inadvertently affect other things. The A body setup requires the firewall stiffening plate meant for 4 wheel non power drums.
If you can find one of those, I may be able to help.
I see. So this stiffening plate pushes the booster off the firewall more towards the front of the car? If my brake lines have loops at the MC, would that be enough extra to use without running new lines?

And this works for using an A-body booster on a B-body? Is it like this one?
'70-'74 Mopar B/E body manual brake firewall stiffening plate
thing2.jpg

'70-'74 Mopar B/E Body Firewall Stiffening Plate​

$40.00

DoctorDiff reproduction '71-'74 Mopar B/E body manual brake firewall stiffening plate is made from heavy duty powder-coated aluminum.
This stiffening plate fits manual master cylinders and HEMI power-brake assemblies ONLY.
 
I see. So this stiffening plate pushes the booster off the firewall more towards the front of the car? And this works for using an A-body booster on a B-body? Is it like this one?
'70-'74 Mopar B/E body manual brake firewall stiffening plate
View attachment 1422725

'70-'74 Mopar B/E Body Firewall Stiffening Plate​

$40.00

DoctorDiff reproduction '71-'74 Mopar B/E body manual brake firewall stiffening plate is made from heavy duty powder-coated aluminum.
This stiffening plate fits manual master cylinders and HEMI power-brake assemblies ONLY.
Those plates are just there to reinforce the firewall to reduce deflection.
 
Those plates are just there to reinforce the firewall to reduce deflection.
I have a firewall stiffening plate already installed for that purpose. The footprint on mine looks longer in the vertical direction than the one in the photo above. Would I be able to use mine or do I need a different one? I'm not sure I understand your original comment about using one for 4-wheel non-power drums.
 
Auto Transport Service
Back
Top