• When you click on links to various merchants on this site and make a purchase, this can result in this site earning a commission. Affiliate programs and affiliations include, but are not limited to, the eBay Partner Network.

Rebuilt my heater box

vintage chromoly

Well-Known Member
Local time
1:00 AM
Joined
Nov 13, 2010
Messages
2,185
Reaction score
4,068
Location
ohio
hello all.
Last year, just before the Nats, my heater core began to leak.
I pulled the box and plugged the heater hoses for the summer.
I dropped the heater core off with glen ray at the Nats and he shipped it back a month later.
Bob is a genuinely great guy and delivered as promised.

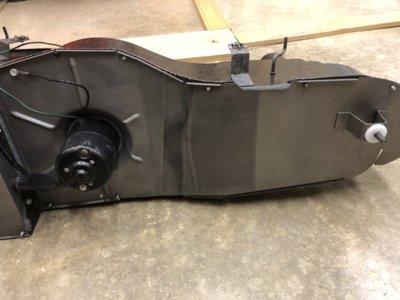
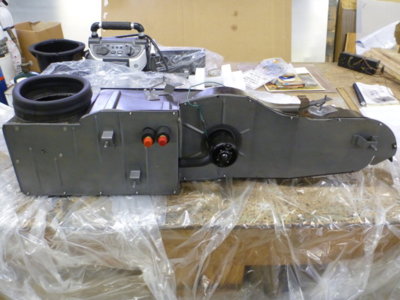
I bought a kit from dmt and cleaned and resealed the box.

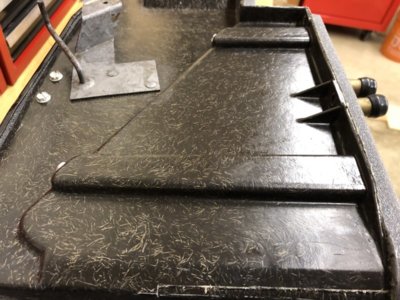
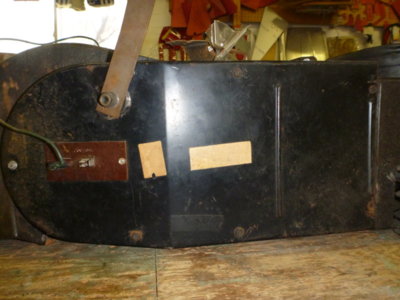
My box was in great shape, having never been molested.
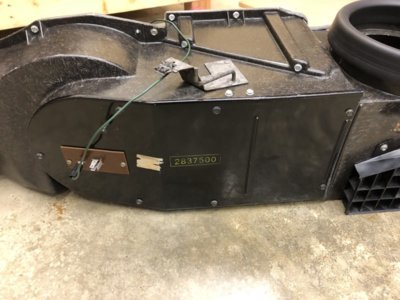
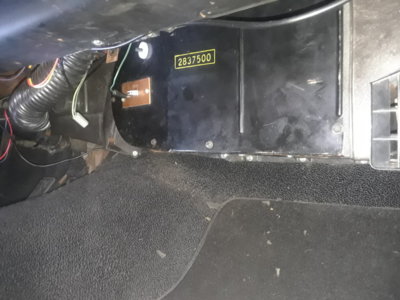
The front cover was I great shape and still has the yellow paint stamping on the front.

I soaked the bare metal pieces in evapo-rust and used RPM by ECS to protect them.

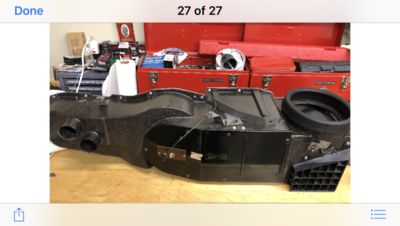
Overall, I’m pleased with the results.
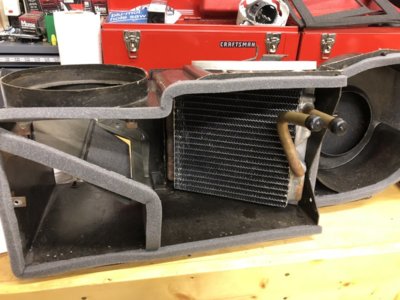
E07DC179-FFB2-4EF0-A833-93D8B95ADC26.jpeg 4127C2BB-28FC-4BB4-B2D4-9B8B7F40217D.jpeg CFC66ADF-6DE4-4406-88DC-6E3B3354FDAE.jpeg 2C70A50B-1094-4FE1-A9D0-1C3FC215491C.jpeg 29ACC6BD-C675-434E-9F44-604DC3BEEF17.jpeg 28933562-A22A-428B-A209-5D05B7C8EC39.png
 
Very nice work!
Mine needs it desperately. That little arm on top that's connected to the flapper thingy inside on mine
had decided to un-moor itself from the bottom of the box, apparently. Rotten.
How hard is it for an older, not so flexible guy to take the box out?
 
My car is a bucket seat, no console, non air car.
The box was out in 15 minutes.
Didn’t even remove the passenger seat.
I’ll probably remove the passenger seat when I put it back in to make it a bit easier.
 
Just got my heater box back in the road runner yesterday. Also used Glen Ray and the DMT kit, but did not paint anything. Used steel wool and rubbing alcohol to remove light rust and old glue. Drilled rivets and replaced with 6-32 and nylocks for the heat door.

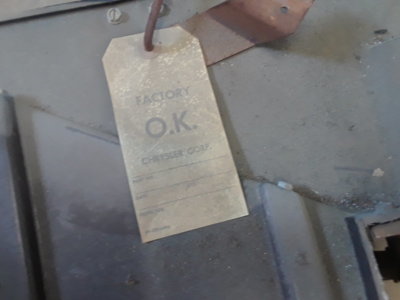
My heater box had never been out of the car (still had Chrysler tag dated April 68), and I was amazed that only a few pine needles were inside the box. No other debris, and it was even really clean inside only requiring a damp cloth with simple green to wipe out.

I pulled the passenger seat which made the job easier.

Removal was a quick and easy job. Installation took some patience and my wife helping (tip: glue the cowl seal back on with PLIOBOND-it won't come off as you wrestle that box back under the dash). The box kept jamming itself between the hump and dash. Had to contort myself and take half a bottle of ibuprofen to get that box back in, but it is doable.

20181117_103938.jpg
 
Forgot to mention mine is also no console, no AC.

20181221_140250.jpg
 
Nice to see a box done right!.....I would suggest to coat over the RPM with Boeshield or WD40......

Looks like your box was in very nice shape....Love the original fiber look....

The stamping is in stellar shape can you make out anything on the sticker to the left of it? Looks like an inspectors sticker....
 
Unfortunately, the sticker was completely dried out and brittle.
I left the remnants as I thought it was a cool piece of originality.

I will say, these boxes are brittle and fragile. It wouldn’t take much to break one.
 
Unfortunately, the sticker was completely dried out and brittle.
I left the remnants as I thought it was a cool piece of originality.

I will say, these boxes are brittle and fragile. It wouldn’t take much to break one.
On recommendation of my mechanical engineer friend, I used a nylon washer on every screw that touched the fiber case and only finger tight.
 
Just got my heater box back in the road runner yesterday. Also used Glen Ray and the DMT kit, but did not paint anything. Used steel wool and rubbing alcohol to remove light rust and old glue. Drilled rivets and replaced with 6-32 and nylocks for the heat door.

My heater box had never been out of the car (still had Chrysler tag dated April 68), and I was amazed that only a few pine needles were inside the box. No other debris, and it was even really clean inside only requiring a damp cloth with simple green to wipe out.

I pulled the passenger seat which made the job easier.

Removal was a quick and easy job. Installation took some patience and my wife helping (tip: glue the cowl seal back on with PLIOBOND-it won't come off as you wrestle that box back under the dash). The box kept jamming itself between the hump and dash. Had to contort myself and take half a bottle of ibuprofen to get that box back in, but it is doable.

View attachment 695058
Thanks for posting an image of the inspector tag.........Here is the one that was on mine....

They were placed on every box on the line and were supposed to be removed when installed....but some made it through...


DSC03489.jpg
 
Unfortunately, the sticker was completely dried out and brittle.
I left the remnants as I thought it was a cool piece of originality.

I will say, these boxes are brittle and fragile. It wouldn’t take much to break one.
Glad you left it there because it was a factory tag of some sort......They are very brittle. I always keep an eye out for a spare....The parts guys know it and when they have a nice one it has a nice price to follow....It is very hard to find one not cracked/broken...
 
Thanks for posting an image of the inspector tag.........Here is the one that was on mine....

They were placed on every box on the line and were supposed to be removed when installed....but some made it through...


View attachment 695073
Mine is in a ziploc bag now with other historic documents from the car. Very brittle. Did yours have a date? Mine was ballpoint blue ink scribbled on the back of the tag and faded to almost not legible.
 
Mine is in a ziploc bag now with other historic documents from the car. Very brittle. Did yours have a date? Mine was ballpoint blue ink scribbled on the back of the tag and faded to almost not legible.
Mine is on the box in the car and they way the car is stored it will never deteriorate as long as I'm alive, lol.....There were no markings on the tag.....
 
hello all.
Last year, just before the Nats, my heater core began to leak.
I pulled the box and plugged the heater hoses for the summer.
I dropped the heater core off with glen ray at the Nats and he shipped it back a month later.
Bob is a genuinely great guy and delivered as promised.

I bought a kit from dmt and cleaned and resealed the box.

My box was in great shape, having never been molested.
The front cover was I great shape and still has the yellow paint stamping on the front.

I soaked the bare metal pieces in evapo-rust and used RPM by ECS to protect them.

Overall, I’m pleased with the results.
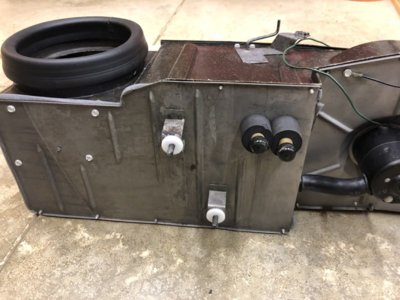
View attachment 695044 View attachment 695045 View attachment 695046 View attachment 695047 View attachment 695048 View attachment 695049
Your cowl seal looks 2X the height of mine (and my DMT seal was shorter than what I took off?). I wonder if DMT uses different suppliers, or if I got the wrong one? I bought mine through Mancini on their Black Friday sale (with other stuff I needed).
My original cowl seal was not glued on, hence I didn't glue the replacement. Well that lasted about two minutes as I wrestled that box back under the dash. I PLIOBOND that seal on and 15minutes later it was cured and continued the job. The seal is good enough in height that it is a tight seal, but in pictures your looks taller?
 
Not sure about the cowl seal.
I will say that the DMT fit well circumference wise and it looks similar in size to the crushed original I removed.
I would imagine it will crush and take a set over time
 
DANG... everyone told me my stickers weren't factory when I asked a couple years back! I had two stickers and no evidence of a part # stamp. Oh well, couldn't read anything on them.

NICE work! And as Justin points out I'd retouch the RPM stuff. Thankfully I did my heater box parts with gun oil.

beerestoration2015-2016 482.JPG beerestoration2015-2016 715.JPG
 
DANG... everyone told me my stickers weren't factory when I asked a couple years back! I had two stickers and no evidence of a part # stamp. Oh well, couldn't read anything on them.

NICE work! And as Justin points out I'd retouch the RPM stuff. Thankfully I did my heater box parts with gun oil.

View attachment 695081
Thanks Wayne....

I know that was not me that made note of your stickers.......Notice the one sticker is similar to Robs.....
 
Are you guys oiling all the bare metal parts after the RPM?
 
Thanks Wayne....

I know that was not me that made note of your stickers.......Notice the one sticker is similar to Robs.....
Yep, looks exactly like his sticker.. and I bet the long one was the part number on paper as they'd lost their ink stamper! LOL
 
Are you guys oiling all the bare metal parts after the RPM?
I don't use RPM.....but you better top coat it with what was mentioned above......Then your next bare parts just use the Boeshield. If you touch the Boeshield just reapply it. If water gets on it just clean with thinner and reapply it....

I did a test of many choices and Boeshield T9 was the ultimate winner......Previously, I used clear cosmoline, which was OK. If you plan on driving the car a lot than on the underside bare parts coat with regular cosmoline. You can buy it in a quart can and apply it. Or just paint them to mimic the finishes....
 
Auto Transport Service
Back
Top