• When you click on links to various merchants on this site and make a purchase, this can result in this site earning a commission. Affiliate programs and affiliations include, but are not limited to, the eBay Partner Network.

Replacing turn signal switch with Tuff Steering Wheel?

Dibbons

Well-Known Member
Local time
4:18 PM
Joined
Nov 29, 2014
Messages
5,016
Reaction score
6,033
Location
La Paz, B.C.S., Mexico
My brakes lights work, then don't work ('72 SSP). When I turn on the headlights, the right fender mounted turn signal turns on AND the green light for the right turn signal on the dash turns on. i have checked for grounding problems and other stuff, now I'm just going to dive in and replace the turn signal switch inside the steering column.

My question pertains to pulling the steering wheel to gain access to the turn signal switch. Is that large black adapter used with the tuff steering wheel going to make it more difficult? I can't remember how that stuff all went together. Thank you.
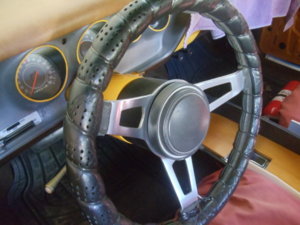
DSC04178.JPG DSC04179.JPG
 
POP the cover off there are three nuts holding the wheel to the can. The can is mounted to the column with a single nut just like a regular steering wheel. You will need a puller with long bolts to pull off the can.
 
As a side note, I believe I was reading somewhere that with the aftermarket replacement turn signal switches there was some kind of compatibility problem with the new switch and the old emergency flasher button or switch. Anyone know what I am referring to?
 
1... same procedure than any regular steering wheel
2... 2 friends of mine got same replacement switch ( one on a 74 Dart and one on a 73 Charger ) everything came out perfect when assembling... JUST that the one went to the Charger got couple of crossed wires that was making not to work propperly. We track wire by wire untill find that was the reason. It was the blue and white wires on the aftermarket piece the ones crossed out
 
Last edited:
and the mistake on wires was on the switch side ( rivets ), not on the plug side!
 
I replaced my switch and wiring and I have a TUF wheel. No problems, easy to do.
 
I haven't seen an aftermarket switch that worked properly or lasted. Good Luck with that, better to buy NOS.
Ron
 
and the mistake on wires was on the switch side ( rivets ), not on the plug side!
I bought a switch from either Y-1 or Classic and had the same problem. Never again. I've used several switches from these guys for 71-4B and E body and have been very happy with them.
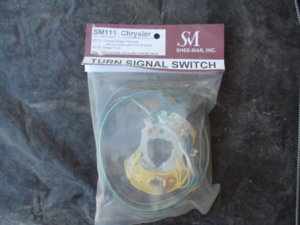
http://sheemar.com/
The SM111 that Dibbons shows is the one I use.
 
Last edited:
Since we got it DIRTY cheap locally we didn't care that mistake easy to save. It was just about either change the terminal cavity or cut and splice correctly on switch side. My friend went with the 2nd option, because wires were shaped to the plug cavity location and the wires were to get some unnecesary tension there, able to break internally
 
Update: The new turn signal switch did not solve the grounding problem with the right front turn/parking signal (I should have known better). I did verify the location of the problem again by disconnecting the plug to that same front lamp, and after doing so the green signal light on the dash wasn't coming on any longer when I pulled the headlamp switch out.

So i brought out my jumper cables (some great copper ones I purchased back decades ago at Sears) and make some connections while the parking lights were on:

First from the outside of the pot metal front turn signal housing to the negative battery terminal/cable. No change.

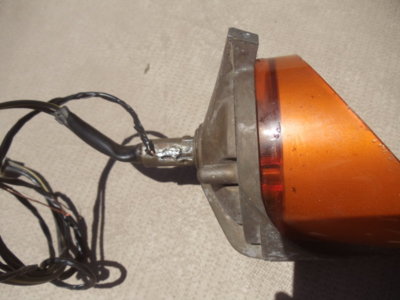
Second, from the metal crimped "cover" that comes out the back of the pot metal turn signal housing (that contains the two wire leads that exit the back) to the negative battery terminal/cable. Bingo! Lamp shines very bright and green right side (passenger side) turn signal lamp on the dash goes out. This metal crimped "thing" was kind of permanently attached to the pot metal turn signal housing (at the factory) and does not readily come off (the #1157 lamp is changed from the front, not the rear, by removing the plastic lens cover). Now just need to find a way to establish a good ground with the crimped "thing", which in effect, serves as the base for the bulb.
 
Yes, not uncommon to lose socket continuity to the pot metal housing. Try slightly rotating the socket back and forth to clean the connection, not a permanent fix however. I have added ground leads to housings to insure ground path and avoid having to over tighten the housing screws to valance, to preserve paint. Clamp a lead to the outside of the socket run it to the third connection in the forward lighting harness for the lamp, it’s grounded in the harness to the core support.


20180405_113228.jpg
 
Last edited:
Auto Transport Service
Back
Top