• When you click on links to various merchants on this site and make a purchase, this can result in this site earning a commission. Affiliate programs and affiliations include, but are not limited to, the eBay Partner Network.

Rocky's Red Road Runner Restoration

RJ Squirrel

FBBO Gold Member
FBBO Gold Member
Local time
5:58 AM
Joined
Sep 7, 2021
Messages
93
Reaction score
262
Location
Cheney, WA
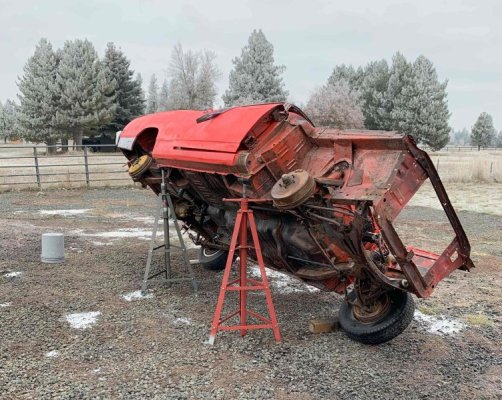
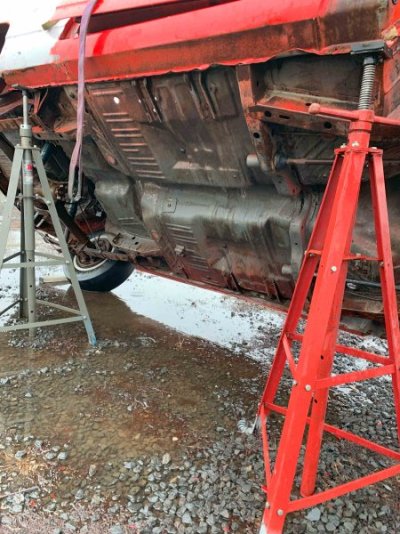
Hello all I thought I should just start a restore thread instead of random posts here and there. My thanksgiving day was spent stripping out the doors, rear quarters, drip and belt line molding. Then the last three days blasting off the entire shell with my hot water pressure washer. The thick parts of the undercoating popped off pretty easy when the car was frozen the next morning after first day of washing. I used a small rotohammer with a chisel bit. Dont think I will bother with a rotisserie now. I will just build a cart for the shell to do the sheet metal work. Does not need much, rockers, rear lower quarters, some patches here and there. Needs a new hood. The passenger side frame rail is also tweaked a little. Heres a couple pictures, no before pic of the undercoating, you all know how ugly that **** is
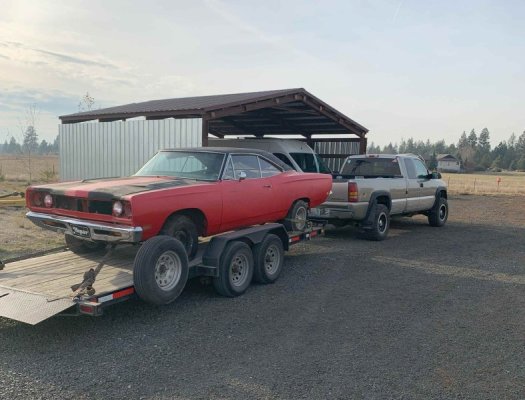
stand2.jpgunder clean.jpgtrailer.jpg
 
Nice project to start with. Your improvising reminds me of times when I used tractors to lift up vehicles one end at a time for cleaning.
 
Necessity is the Mother of invention! You got it Man! You have the drive. Good luck with the project.
 
Hello all I thought I should just start a restore thread instead of random posts here and there. My thanksgiving day was spent stripping out the doors, rear quarters, drip and belt line molding. Then the last three days blasting off the entire shell with my hot water pressure washer. The thick parts of the undercoating popped off pretty easy when the car was frozen the next morning after first day of washing. I used a small rotohammer with a chisel bit. Dont think I will bother with a rotisserie now. I will just build a cart for the shell to do the sheet metal work. Does not need much, rockers, rear lower quarters, some patches here and there. Needs a new hood. The passenger side frame rail is also tweaked a little. Heres a couple pictures, no before pic of the undercoating, you all know how ugly that **** is


View attachment 1564590View attachment 1564591View attachment 1564589
I gotta ask, how in the heck did you get it lifted to put the stands under the side?
 
Man that is thinking outside the box. I'm with 440plus above. How the hell did you do that? Nice. :thumbsup:
 
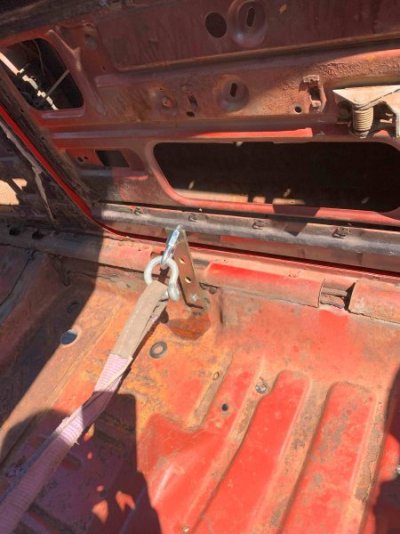
ckessel nailed it, I used the seat belt anchor bolt and picked it with my tractor. These shells are reasonably light when they are all stripped down.


pick.jpg
 
The old repaint job from years ago came completely off down to the primer, lots of old bondo areas on it that will need to be fixed. The first thing I wanted to fix was the right side frame rail which was almost an inch higher than the left side. I rigged up this fixture using an old powerline crossarm beam and a piece of acme rod. Wiley would be proud.
I drilled out all the spot welds on the gusset at the firewall where the cowboy clamp is, loosened the K frame bolts, cranked it down and welded it back up. The K frame is twisted slightly and will need some rework later on.

clean.jpg


straighten.jpg


inside.jpg
 
You made up your own frame pulling unit. Cool. Using what you have available already.
 
Been plugging away, welded in patch panels lower front and rear quarters, back window channel and some misc small floor patches. Made a huge mess on the shop sanding off all the old paint and bondo revealing all the work I need to do now. She was dinged up pretty bad, fenders especially I dont think they can be saved so I am looking for new fenders now. 2400 for new ones! ouch.

naked2.jpg


gouge.jpg


window patch.jpg


dust.jpg
 
The good news is the front clip fits on nice now that the frame rail has been straightened. Got the new hood delivered too, it looks so good that it is real tempting to take a deep breath and just get two new fenders coming too.
 
Happy holidays to all! It just seemed appropriate to get a finish coat on the undercarriage yesterday since I did all the pressure washing on Thanksgiving. So all told getting the bottom cleaned up and painted was two days hot water pressure washer and chipping off heavy stuff in the mornings while it was still frozen, a day hand scraping the rest off, two days wet sanding with 180 and degreaser water, a day washing it all off, a day wiping it down and primering it, and yesterday putting on a coat of black Rustoleum farm and implement enamel with hardener added. I think it turned out great. I am going to use the same paint on the rest of the suspension parts.

bottomprep.jpg


bottomprime.jpg


bottompaint.jpg
 
After all that work I got good and stoned and had a relaxing evening with my favorite dog watching The Royal Scottish Orchestra perform the Mouse King and the Nutcracker
 
Nice work so far ....must be very satisfying to see that clean underbelly after a few hard days of cleaning and scrubbing.

Looks like you have a few skills. :thumbsup:
 
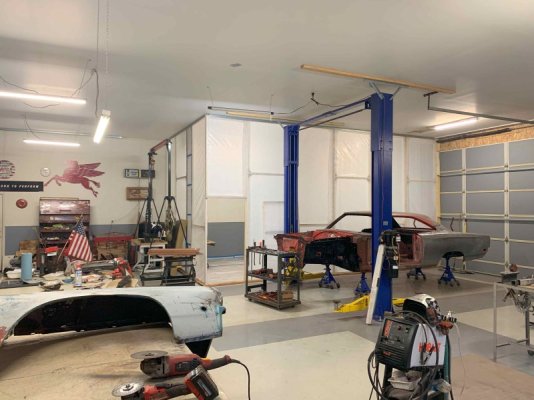
Spent a few days building a spray booth, the panels are 4' x 12' framed with 2 x 2's and wrapped with 6 mil poly. They slide into a metal channel on top and sit on a 2 x 6 on the bottom. A few screws hold it together. Pull them off of the 2 x 6 bottom plate and they drop down out of the channel on top.booth.jpg
 
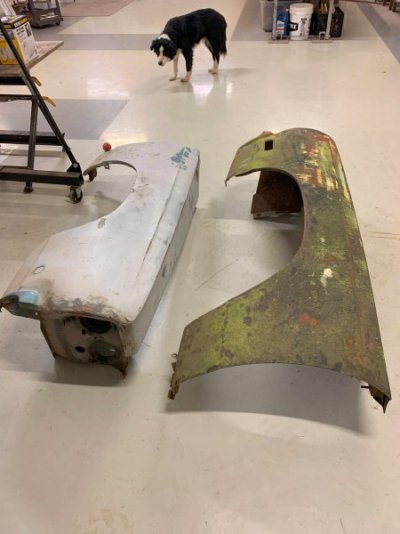
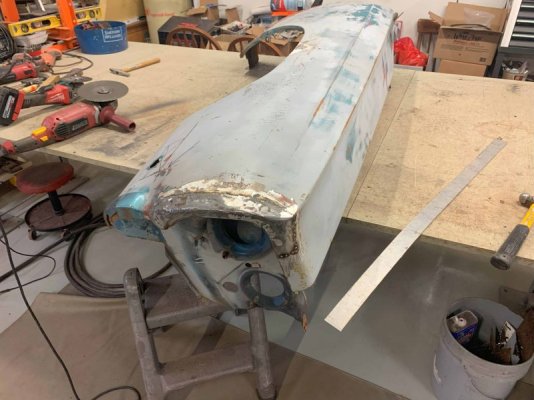
Found these fenders and drug em home. The left side is pretty straight under the mold, the right one is a 68. I am converting it to a 69 and fixing the damage. The headlight brow was crushed and was just a big chunk of bondo. Hit it with a hammer and the whole side fell off. I cut the brow off my old one, straightened it up and trying to make it work on the new one.
The steps needing to change itfenders.jpgfenderbrow.jpg

to a 69 are the marker light, core support bracket and the mount clip for the headlight bezel.
 
Hello all I thought I should just start a restore thread instead of random posts here and there. My thanksgiving day was spent stripping out the doors, rear quarters, drip and belt line molding. Then the last three days blasting off the entire shell with my hot water pressure washer. The thick parts of the undercoating popped off pretty easy when the car was frozen the next morning after first day of washing. I used a small rotohammer with a chisel bit. Dont think I will bother with a rotisserie now. I will just build a cart for the shell to do the sheet metal work. Does not need much, rockers, rear lower quarters, some patches here and there. Needs a new hood. The passenger side frame rail is also tweaked a little. Heres a couple pictures, no before pic of the undercoating, you all know how ugly that **** is


View attachment 1564590View attachment 1564591View attachment 1564589
Nice project to start with. Your improvising reminds me of times when I used tractors to lift up vehicles one end at a time for cleaning.
I've done similar stuff with a heavy duty A frame but raised the front end up until back end landed on tires and then went up just a bit more then reverse the car and stood up the back end. Did you have anything for a safety just in case the car decided to roll over? My luck would be a good wind came in and pushed it on over lol
 
Auto Transport Service
Back
Top