• When you click on links to various merchants on this site and make a purchase, this can result in this site earning a commission. Affiliate programs and affiliations include, but are not limited to, the eBay Partner Network.

Vent window division channel guides

Funny seeing this as a top post coming here for first time in a while - I can't wait for the new better repros (that are apparently in the works). The straight ones offered right now are not so good. I have them on my 68 440 Sedan and the windows are not easy to roll up and down, especially at the top. These things are largely the cause. The replacement rubbbers were also modified (tucked where the glass was rubbing) to help when the door is closed. Closed the combination fo those 2 replacement peices (soft rubber seals + straight channel guides) made rolling the window a bitch.
But even with door open the windows are not great. It has these repros which are the best option we could find. Sadly as mentioned the originals have dried up. I now wish I bought the set we saw about may be ~2 years ago or more. They were 300.00 at the time and at this point would have been well worth it. We went back to the site when ready for them and none were left.

I got $ waiting on pre-curved reproductions. Just say when.
 
All very valid points listed above. I was involved directly with the manufacturing of the reproduction pieces and they are made here in the states. As with any manufacturing process, plastics are very prone to small fluctuations due to temps and pressure. So keeping all of the controlling variables constant, you can see still see variations in one product run to another. I wish there was a better solution, but the reproductions have been out now for close to 10 years now as even back in the day, Chrysler would allow inventory to completely go dry and they would make another run of the product. But the originals have not been available for approximately four years now. You can sometimes luck into finding one laying loose at a swap meet. Be very careful in purchasing these items listed as factory original parts. Unless it is still inside the blister pack, I would be hesitant.

If you use the supplied pins with the reproductions or the later issued OE runs, slightly sand the sharp edges down to duplicate the factory pins. This is a primary cause of the pins fitting too tight to the stainless channel.

From talking to various people on the installation, one suggestion that has worked well is lightly coat the lips of the mylar runs with a light sprinkle of dry graphite. A bit messy at first, but it will dust off and the guides are less likely to bind up.
 
Thanks for all the input guys. I will get a pair of reproductions from Richard for now. If they don't work out the best, I will buy another set of the yet to be released curved ones later....
 
What I have are in brown and clear package, with a Chrysler part number. Have had them for years, put a set in our son’s Charger 2 years ago. Used the old pins.
When I relocate the ones I need for my car, I will take note of the part number.
When I said straight, I was talking about the channel run side to side. I am confused. Would like to have some clarification if someone is willing to do so. Thanks
 
Correct "felts/ mylars" are formed curved. Packaging sounds correct, but they would be OEM replacements / reproductions, not NOS. Or the term I like NOSR's (NewOldStockReproductions). Even the Chrysler OEM replacements from days of old, that's supply has dried up, come with slider guides that aren't correct.
beerestoration2019 2792.JPG
 
Thank you! The old original worn out ones in the drawer have straightened out.
I thought if they came with a Chrysler part number they would be NOS. Now I understand.
 
The mylar pieces have been in use from 1966 up through 1993. As with any part, slight deviations may have been added to the part for the sake of using the product in more than just a year or two of production runs. The part has used the same part number, 2932 230, through all of these years and has never been superceded to a different number.

For whatever reason, many parts back through the ages were superceded a number of times, even though the part was the same for all practical purposes. That is the catch you get yourself into in claiming that the part is a NOS piece and assembly line correct is a whole different story.

I have these pieces dating from 1981 to the last ones that were produced probably in 2016. Laying them side to side to each other, you will not notice a difference in the two. Even the H-pins are the thicker style.

I personally do not see them having a defined curve to them. I cannot say that the same ones if purchased for example in 1969 would have a more defined curve to them to say the ones that were being sold up to a couple of years ago. The only reason that Chrysler still had them in production was that they were being used on the Dodge trucks and vans up through 1993. So minor tweaking may have occurred as in the H-pin or whatever.

Likewise, the same piece was used on the A and B-Body sedan / post applications with the pop out windows. For those applications, it is the same material using the same "H" pins. These pieces were just a shorter length and they do not have any noticeable curvature to them. And the same part number was used in this application as well.

Like any part, especially weatherstripping, it is hard to beat a factory piece. I do not care if it is a 1970 model or a 2020 model, factory weatherstripping has always fit and functioned better than any of the aftermarket pieces. You have to figure that even back 50 years ago, OE suppliers were having to meet very stringent engineering guidelines to meet the demands of the automotive companies for a quality product. Back in the day, they were possibly spending the equivalent of hundreds of thousands of dollars to develop and manufacture these pieces.

I know from our position within the industry, we could still purchase stock material from some of the original vendors to the OE and their manufactures. The largest supplier was sold out approximately three years ago. The new parent corporation has no desire to maintain equipment that in some cases is approaching 70 years old. So they have told us that they can no longer provide the material. As a result, you seek out a comparable product or develop a new piece.

That is the trick box that any manufacture encounters. The original vendor told us that they would make new tooling to do the same piece, but the cost per piece would be approximately 400% greater in cost. Needless to say, we had to find a new vendor.

As I continue to stress with these old cars, it is still much easier to restore one of our cars than it was 20 years ago. It is just frustrating that we cannot produce a comparable product, but like I tell others, we are a very small fish swimming in a large pond for the automotive industry. Sorry for rambling on, but just wanted to offer some insight into this issue. Other than the fuel sending units, these are the most discussed restoration pieces from the reproduction stand point in my opinion.
 
Found them.
They are in brown and clear package packages.
I-02932230.
One package has 5-95, one is 1991, one is December 1999. Said made in the USA.
I bought them on 23-11-01.
Exactly what are they?
 
Found them.
They are in brown and clear package packages.
I-02932230.
One package has 5-95, one is 1991, one is December 1999. Said made in the USA.
I bought them on 23-11-01.
Exactly what are they?
How about posting pictures of what you have?
 
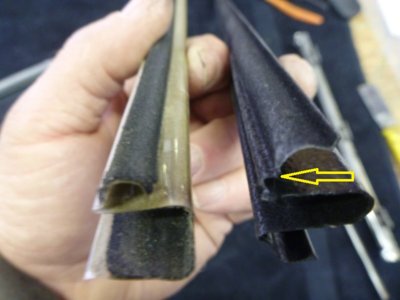
Anybody know of a source for these? Thin plastic with a felt like material about 16.5" long. Car is a 69 Bee, but I believe they are all the same from 68-74's.

View attachment 873863 View attachment 873864
I can help with this a little as I just installed the one on the passengers side of my 70 super bee today... first off I got mine from a place called Detroit Muscle for 75 bucks, there the same cheap ones that everyone sells and apparently is about all that's out there for us to buy....

being the owner of THE INCREDIBLE HULK CUDA, I have got to go to a lot of places and meet a lot of people with this car, one being David Rae from the tv show graveyard cars, now owner of his own business DB Restorations, he and I have made friends and after tearing a 100 set of these up from classic industries from installing them wrong I called David and he told me how he does it.

David said he cuts the outside flaps off, places the channel on the door glass and uses a straight point soldering iron to melt the hole through the channel instead of trying to poke a hole in it and break the channel and or ruin it. I used an awe (like an icepick without a handle and my small torch) Be sure once melted through the channel, cut any excess melted plastic off the channel before installing the H clips and pins through the channel and window.

and on the H clips.... everyone says there thicker, this is the 2nd set I've had and I have an old original H clip and pin that came off the coronet and I don't see any difference when comparing them.
I'm gonna install the drivers side tomorrow, I'll take pictures of this comparison and some of how I did it and post them here.

after installing my new vent window rubber and new vent window, I installed the vent window frame in the door, then when ready to install the glass, I removed the screw from the top of the vent window, this allows the vent window frame to be pulled apart enough to slide the door glass down from the top, into the channel and the H clips down in the channel where they slide. Let it slide down part of the way, then install the rear window track and the 2 bolts that hold the window in place and my window works as good as new !!!

Now, I'm not saying this is the only way to do it, its just the way I did it....David even said, he puts the door glass in from the bottom of the vent window channel once the plastic track is installed and he puts the door glass and vent window frame in the door at the same time, so theres more than one way to accomplish this install.

But I am saying for me, cutting the outside flaps off the plastic track sure worked for me and installed in the passengers side, looks and works great.

20191130_082314.jpg 20191130_082248.jpg
 
Last edited:
Yep.. who would have thought, if the folks reproducing them don't care what they make you have to take matters into your own hands. And I didn't know anyone "famous" lol
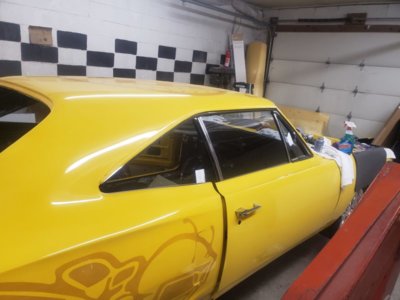
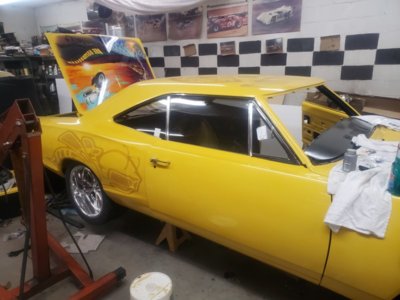
beerestoration2019 2305.JPG
beerestoration2019 2380.JPG
beerestoration2019 2381.JPG
 
I can help with this a little as I just installed the one on the passengers side of my 70 super bee today... first off I got mine from a place called Detroit Muscle for 75 bucks, there the same cheap ones that everyone sells and apparently is about all that's out there for us to buy....

being the owner of THE INCREDIBLE HULK CUDA, I have got to go to a lot of places and meet a lot of people with this car, one being David Rae from the tv show graveyard cars, now owner of his own business DB Restorations, he and I have made friends and after tearing a 100 set of these up from classic industries from installing them wrong I called David and he told me how he does it.

David said he cuts the outside flaps off, places the channel on the door glass and uses a straight point soldering iron to melt the hole through the channel instead of trying to poke a hole in it and break the channel and or ruin it. I used an awe (like an icepick without a handle and my small torch) Be sure once melted through the channel, cut any excess melted plastic off the channel before installing the H clips and pins through the channel and window.

and on the H clips.... everyone says there thicker, this is the 2nd set I've had and I have an old original H clip and pin that came off the coronet and I don't see any difference when comparing them.
I'm gonna install the drivers side tomorrow, I'll take pictures of this comparison and some of how I did it and post them here.

after installing my new vent window rubber and new vent window, I installed the vent window frame in the door, then when ready to install the glass, I removed the screw from the top of the vent window, this allows the vent window frame to be pulled apart enough to slide the door glass down from the top, into the channel and the H clips down in the channel where they slide. Let it slide down part of the way, then install the rear window track and the 2 bolts that hold the window in place and my window works as good as new !!!

Now, I'm not saying this is the only way to do it, its just the way I did it....David even said, he puts the door glass in from the bottom of the vent window channel once the plastic track is installed and he puts the door glass and vent window frame in the door at the same time, so theres more than one way to accomplish this install.

But I am saying for me, cutting the outside flaps off the plastic track sure worked for me and installed in the passengers side, looks and works great.
David was the only one over there that had sense and knows how to install these parts....I am happy he broke free and is doing his own gig.....

All good points here and thanks for sharing.....

I cant compare DMT's set because eI have never used them.....So in reference to those clips the majority including me are comparing the later Mopar NOS version to the original clip.....Just as the OP posted them here and you can see a clear difference.....So good to know that the DMT clips based on your experience are close to if not the same as the originals....

You are correct as to several ways to install the door glass on 68-70 B's....I did it your way once and then changed to installing it as one unit as the factory original did.....I have used that technique for over almost 25 years......

Never heard of the Incredible Hulk Cuda....Lets see a pic of that beast...
 
the small edge you cut off didn't save me from killing mine and making the window super hard to roll up and down... I cut the entire edge off to here using your picture.... and knowing someone "famous" as you called him, I just called my friend and as he's worked on 100's of mopars, he's a book of knowledge and I'll take his advise over my guess anytime....

beerestoration2019 2305.JPG
 
If you cut off that entire "flap" you have nothing covering the H sliders at all, nor enough "felt" left to keep it (the mylar/felt) retained in the vent channel.
 
I wouldn't cut that much off....Even if it sounds ok....The only thing riding in the channel are the plastic holders......Thats defeats the purpose of the channel seal......
 
David was the only one over there that had sense and knows how to install these parts....I am happy he broke free and is doing his own gig.....

All good points here and thanks for sharing.....

I cant compare DMT's set because eI have never used them.....So in reference to those clips the majority including me are comparing the later Mopar NOS version to the original clip.....Just as the OP posted them here and you can see a clear difference.....So good to know that the DMT clips based on your experience are close to if not the same as the originals....

You are correct as to several ways to install the door glass on 68-70 B's....I did it your way once and then changed to installing it as one unit as the factory original did.....I have used that technique for over almost 25 years......

Never heard of the Incredible Hulk Cuda....Lets see a pic of that beast...

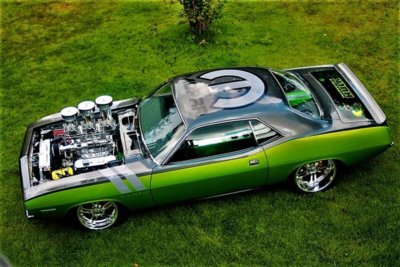
Thank you for the reply and just trying to be helpful and heres a couple of shots of my cuda, you can google incredible hulk cuda and see more if you'd like.

best pic1.jpg chrysley power magazine.jpg
 
I wouldn't cut that much off....Even if it sounds ok....The only thing riding in the channel are the plastic holders......Thats defeats the purpose of the channel seal......
I have an old roadrunner door to kinda go by to put this back together and all you can see in it is the H clips.... but I bet the channel is wore slap out and fell out of there is why I cant see anything else in there..... good point and thank you !!! I was afraid to mess us another 100 dollar set and it isn't everyone whos restoring mopars that you can just ask questions on "how to" until I found this place !!! Thank you guys again
 
Very cool car....A real life hot wheels ...Do I spy 3 four barrels? Thats a first.......
lol.... yes sir you do !!!! three 840cfm Bigs performance racing 4 barrels !!!! and a first ? how about six 500cfm 2 barrels on this coronet !!!!!
 
I have an old roadrunner door to kinda go by to put this back together and all you can see in it is the H clips.... but I bet the channel is wore slap out and fell out of there is why I cant see anything else in there..... good point and thank you !!! I was afraid to mess us another 100 dollar set and it isn't everyone whos restoring mopars that you can just ask questions on "how to" until I found this place !!! Thank you guys again
Understood and agree...

Well you now know me and Wayne aka dads bee.....you can pm us anytime and we all can help one another....

BTW, when was that cuda featured in CP? The late Roland Osbourne was a good friend of mine.....
 
Last edited:
Auto Transport Service
Back
Top