• When you click on links to various merchants on this site and make a purchase, this can result in this site earning a commission. Affiliate programs and affiliations include, but are not limited to, the eBay Partner Network.

A helpful guide to quarter window installation. 66/67 Chargers

Speedbird

Bird of Pray
FBBO Gold Member
Local time
10:21 AM
Joined
Jun 24, 2013
Messages
3,240
Reaction score
3,179
Location
Status Quo
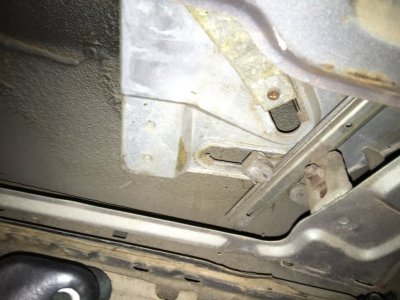
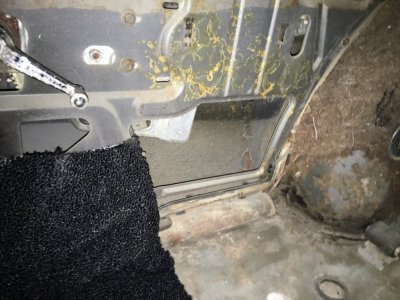
There are few typos in the pictures.
Hope this is of assistance to the next poor soul that attempts this.
I'll answer questions if needed and I can.
In the first picture when I said "....put the window in first......"
I meant that the glass is in the hole but not really attached to anything.
This stuff has to move around to get it hooked up.
And test fit the rollers in the slots first.
Some were binding. You might need to dress down the metal with sand paper.


20170415_100958 (Large).jpg
20170415_101007 (Large).jpg
20170415_101046 (Large).jpg
20170415_101115 (Large).jpg
20170415_101133 (Large).jpg
20170415_101151 (Large).jpg
20170415_101503 (Large).jpg
20170415_101525 (Large).jpg
20170415_102025 (Large).jpg


20170415_101115 (Large).jpg
 
Last edited:
Anyone want to rotate the pictures.
I'm tired of tying.:BangHead:
Sometimes they do sometimes they don't.
There I got one.

20170415_165031 (Large).jpg
 
Last edited:
many thanks for your time and efforts for the tutorial.
just benchmarked it for my efforts this summer.
 
many thanks for your time and efforts for the tutorial.
just benchmarked it for my efforts this summer.
Is a great help, suspect I am a yr or so away from reinstalling mine, luckily all mine are still nearly new, only 29,000 miles on it...............Hope this tutorial can be found then :).................After cleaning lubricating etc., I put all up completely assembled............wish it were that easy in the car
 
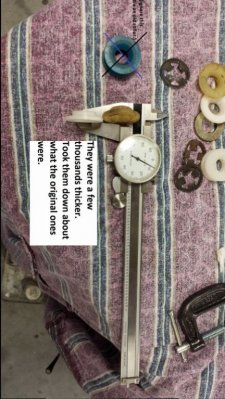
Pressing those rollers on the long track "followers" is tricky. (Yellow notes in first picture)
I had to break the old ones off and then back the assembly up at the swivel point to press the new ones one.
 
Last edited:
Im one of the poor bastards that's done this a few times now. I use counter sunk Phillips head screws like the chrome quarter moulding uses when the cat whiskers don't want to stay put. They are flush and don't scrape the windows
 
Im one of the poor bastards that's done this a few times now. I use counter sunk Phillips head screws like the chrome quarter moulding uses when the cat whiskers don't want to stay put. They are flush and don't scrape

You probably saw this but I'll link it here as related.
http://www.forbbodiesonly.com/moparforum/threads/66-67-charger-quarter-window-trim-fasteners.127721/
I gave up and used stainless machine screws, fender washers and nuts.
Even thought about these, but couldn't find them deep enough.
http://www.skygeek.com/boeing-bacn10yd1-clip-on-nut-10-32.html

Regarding the fuzzies, do you install them prior to putting the glass window in the hole then?
To be able to get a screw driver on them?
I've used Locktite PL S30 on lots of things like windshield gaskets.
It stick real good.
I'm thinking just a dab here and there on the long pieces.
Like on the clips that are too short.
The short piece I put a line of sealant on it.
On the glass the leading edge chrome had come loose.
I took it off, clean out the old rubber and filled it with that.

PL30.jpg
PL30.jpg
 
Last edited:
No I drop the rear window limit stop in the lower corners and the window drops down far enough to access. Same for 66-67 chargers and 68-70 by the way.
 
Also be careful once the fuzzies are in. They want to catch on the chrome frame that is on the quarter window. Right where the fuzzy ends at the door pillar. What I do is file them lightly. When you take them out of the package, especially top cat, they are sharp from being machine cut. I bend them back very slightly away from the window frame direction and then file lightly.


Don't use any power tools to file it because it will catch the tiny little metal strip in gack it up....trust me I hammered a set doing that
 
Update.
Installed the drivers side quarter window. this weekend.
I spent all day on that one troublesome clip on the drivers side. (RED)
I had all the other bushings in and then moved the regulator and things came apart and I had to redo stuff.
At first I could only get two of the four ears on the clip to lock.
I had to take more off of the two piece bushing's width and try different "adapters" on my clamp.
I finally bent the 4 ears on the clip toward the recess in the roller to get them all locked.
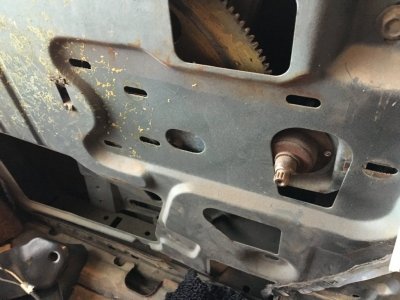
(There is a recess on the regulator stud bushings. You can see it in the pictures above.)
I was about to give up and use and "E" clip.
I finally used a little piece of stainless tubing that fit in the nut to push the ears into the stud's grove.
The ID of the metal tubing was that same as the OD of the stud.
Chrysler must have had a pneumatic tool with a precision fitting face to do this on a production line.
To just push on the clip's ears some way.
That's all I can figure.
That "wobble" roller is not to hard because the stud length lets you get it started on one ear and work it over the stud.
The wobble roller stud is longer than the regulator studs.
 
Last edited:
Also be careful once the fuzzies are in. They want to catch on the chrome frame that is on the quarter window. Right where the fuzzy ends at the door pillar. What I do is file them lightly. When you take them out of the package, especially top cat, they are sharp from being machine cut. I bend them back very slightly away from the window frame direction and then file lightly.


Don't use any power tools to file it because it will catch the tiny little metal strip in gack it up....trust me I hammered a set doing that

Do you or anyone have a picture of what a down stop looks like?
My car apparently didn't have any from the factory.
I can make something.

quarger window.jpg


20150807_092811 (Large).jpg
20170426_100038 (Large).jpg
20170426_100250 (Large).jpg
20170426_100317 (Large).jpg
20170426_100344 (Large).jpg
20170426_100405 (Large).jpg
View attachment 417978
20170426_094546 (Large).jpg

quarger window.jpg
20150807_092811 (Large).jpg
20170426_100038 (Large).jpg
20170426_100250 (Large).jpg
20170426_100317 (Large).jpg
20170426_100344 (Large).jpg
20170426_100405 (Large).jpg
20170426_094546 (Large).jpg
quarger window.jpg
 
Last edited:
Well now I'm an a hole because I went out to my car and sure as hell no limit stops. I know they are on 68-70 cuz I did one three days ago. Been about 6 months since I did the cooper 67s and a year since my blue 67.

It was a bastard anyway. Now I can't get my window down to get fuzzies on my personal 66.
 
Ok it came back to me. No down stop because the rear regulator up down track is self limiting. Drop the regulator out and window comes down to get to fuzzies.

IMG_0407.JPG IMG_0408.JPG
 
Ok it came back to me. No down stop because the rear regulator up down track is self limiting. Drop the regulator out and window comes down to get to fuzzies.

View attachment 418007 View attachment 418008

WHAT?
:eek:
Oh. I see after posting that your regulator isn't attached ?
But I wouldn't want to even try and get the glass in with the fuzzy in place.
I don't think I would anyway.

Even with out stops this is as far as mine goes down and getting screws in straight would seem challenge.
(I'll quadruple check in the morning.)

This may explain why the rear windows get messed up.
Don't they?
Mine were when I took them apart.
The wobble rollers were broken.
But it may have been age.
IDK.

20170421_131607 (Large).jpg
 
What I'm trying to say is clear as mud.

Take the window fuzzies out and since 90% of the time you'll be replacing them.

Replace the typical rear broken or bent roller.

Put it all back together and then to get the new fuzzies back in, drop the window regulator (3 7/16 head bolts) back out and the window will drop down enough like mine in the pic, to replace the fuzzy on the outside edge.

Inside fuzzy is easy.

Tee :lol: Hee :lol: Hee :lol:

The inside fuzzies ARE easy in a relative way.
To paraphrase Pink Floyd : Everything is the same in a relative way, except I'm older.
Shorter of breath and one day closer to.......
I always thought Time was the better song while Money got all the airplay
Post 7 has pictures of my tedious staple work.
Note my "jig" to drill the holes.
(For everyone's benefit. Here's the link I refer to.)
http://www.forbbodiesonly.com/moparforum/threads/66-67-charger-quarter-window-trim-fasteners.127721/
 
Last edited:
Auto Transport Service
Back
Top