• When you click on links to various merchants on this site and make a purchase, this can result in this site earning a commission. Affiliate programs and affiliations include, but are not limited to, the eBay Partner Network.

More model train stuff- super cool engineering

YY1

Well-Known Member
Local time
6:13 AM
Joined
Jun 26, 2010
Messages
28,386
Reaction score
25,709
Location
FL
http://model-railroad-hobbyist.com/node/30200

This is a guy building a 1:48 scale Australian coal mine operation where the prototype used a propelled steel cable to drag mine cars up and down a hill.

Some of the engineering is awesome, and so is the history.

The good stuff starts about page 6, but all is worth reading.
 
yup saw that it very interesting and what a craftsman thanks :thumbsup:
 
There's a 7 1/2" gauge live steam club about 10 miles from me.

I used to work with the guy who owns the adjoining property, is the club president and facilitated the land purchase.

That's some pretty cool, but very expensive stuff.

The cheapest "entry level" option is a semi-prototypical box cab that runs on a car battery at about $750 IIRC.
 
4D663DC3-25FE-420A-AEAD-8C3DD75556AF.jpeg https://www.republiclocomotiveworks.com/instructions/RM1000.pdf

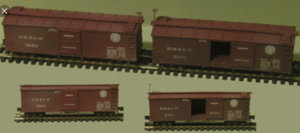
Cool stuff. This link is the 1:160 kit that I designed and built the master patterns and molds for. Wish I had more time for trains!
 
Nice.

N scale with opening doors is not easy to do.

My wife just go into molds for her polymer/resin/silicone dolls.

She bought a vacuum chamber and pump (which I can also use for A/C work), and I just bought her a pressure pot for x-mas.

I'm looking forward to being able to make resin copies of some HO scale and 1/25 scale stuff.

I've also noticed that Dremel is mass marketing consumer grade 3D printers at Home Depot.

Intriguing.
 
Yeah I still have my vac pump and chamber and pressure pot. The vac will come in handy as I plan on some carbon fiber work this summer. The 3D printers will really change the game as the resolution improved. A few N scalers were using some of the 3D printing services a few years ago. Cool stuff!!
 
View attachment 549474 https://www.republiclocomotiveworks.com/instructions/RM1000.pdf

Cool stuff. This link is the 1:160 kit that I designed and built the master patterns and molds for. Wish I had more time for trains!
You designed this? What an incredible amount of detail. I remember cars like this when I started on the railroad in the 70's, they weren't common but you still saw them. Nice memories of old fashioned mechanical lever slack adjusters and friction bearing trucks. Ah, the old days of clambering up a ladder to walk the running board. Can't do that these days - you'd need fall arrest gear just to get up there. :) That's why modern box cars have the hand brake down low, and no ladders or running boards.

Some terms in there...I had no clue. Never heard of "queen posts and needle beams" for instance. Terminology from a bygone era!

I read the whole PDF, very nice work and history of the series.
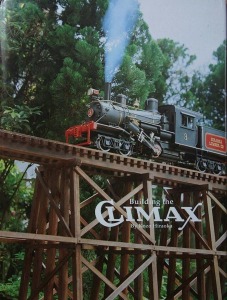
I designed the kit, made the master patterns and built the models used in the kit photos and instructions. Marshall, the owner of RLW, expounded on my instructions and added the historical information. The masters were extemely tediuos to build using styrene and MEK all under a lighted magnifier. I drew out styrene rivot stock using model car sprues and a candle then sliced them to thickness with a new razor blade. Applied them with the tip of a #1 exacto blade. My eyes aren’t what they used to be so I work with 1:1 scale now lol. Oh, I also designed and modeled everything for the climax loco conversion kit. Fun times.
 
Auto Transport Service
Back
Top