• When you click on links to various merchants on this site and make a purchase, this can result in this site earning a commission. Affiliate programs and affiliations include, but are not limited to, the eBay Partner Network.

1969 Dodge Super Bee Coupe Restoration

Justin the required rivets, to be correct, will be 1/8" diameter x 1/2" Semi-tubular Truss Heads.. Steel/CR6 Zinc or similar material.
Do you use a particular tool to attach them?
 
Do you use a particular tool to attach them?
Not sure if I can use the same tool I used on the air box or not (you know what those rivet shop heads look like)... I'll have to look at my spare pump and see if the rivets have the "seperated" tabish looking shop heads like the airbox or a smooth roll over. If smooth I'll have to see if my brake rivet tool will get in that tight or make up some kind of squeezer... or use some of the million aircraft rivets I have around instead.. LOL Gotta find a seal first.. and then I'll decide on just putting it back together with rivets I have or waiting for a bag of 100 semi tubulars to get just TWO !
 
A little bit of dental work to clean up a bit of bleed out

A little polish and touch up on the "Argent".

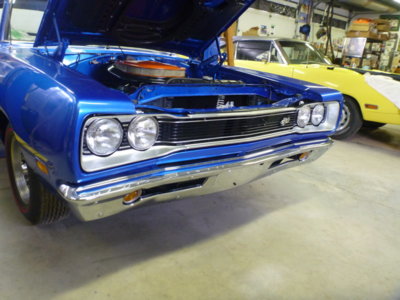
Headlight eyebrows installed to the car.

Looks pretty spiffy..

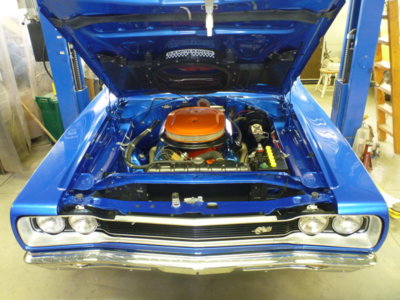
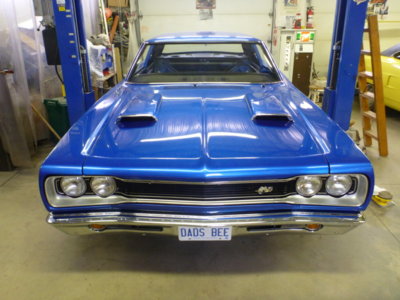
Front end of the car all done, other than alignment, adjuster hole shield install and undercoating in the wheel wells. Oh and wiper arms and blades, I have some nice NOS ones for that!

Yep.. DADS BEE ! Couldn't believe that plate was available when I ordered it 2 years back.

beerestoration2019 2184.JPG beerestoration2019 2187.JPG beerestoration2019 2188.JPG beerestoration2019 2193.JPG beerestoration2019 2216.JPG beerestoration2019 2233.JPG
 
Last edited:
A little bit of dental work to clean up a bit of bleed out

A little polish and touch up on the "Argent".

Headlight eyebrows installed to the car.

Looks pretty spiffy..

Front end of the car all done, other than alignment, adjuster hole shield install and undercoating in the wheel wells. Oh and wiper arms and blades, I have some nice NOS ones for that!

Yep.. DADS BEE ! Couldn't believe that plate was available when I ordered it 2 years back.

View attachment 737867 View attachment 737868 View attachment 737870 View attachment 737871 View attachment 737872 View attachment 737873
What a flipping beauty that is!

Car looks amazing Wyane!
 
Thought I should tackle the rear flip out windows first. I didn't pull any of the glass, other than the windshield, so been a tad apprehensive as to how this is going to go. Why I wanted to remove all the glass and trim, but the paint shop moved the car pickup forward by a month and wanted the glass left in. Wish I'd said "no I'm taking it out so I know where everything goes and can take pictures".. but I didn't want to miss my chance since I'd jumped their wait line by over a year.

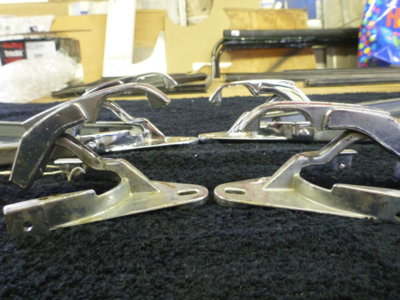
Something I've always hated, the passenger side latch has never gone over center to lock. So I bought a spare set for parts and guess what ! I wonder how many thousand were done wrong before anyone noticed.. or if they ever did.

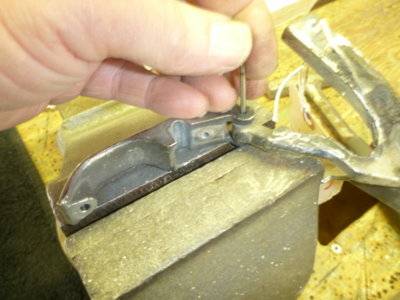
Knocked the pivot pin out on both spare latches to see how far off they have the pivot pin hole.

Yah.. that might do it. NFG location on the left.. good on the right.

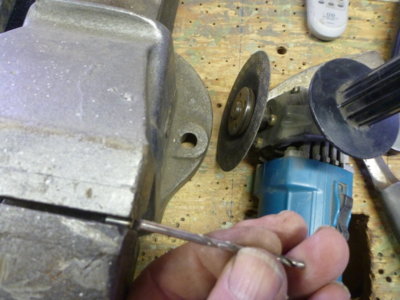
Cut a piece of 1/8" drill bit shank to fill the hole.

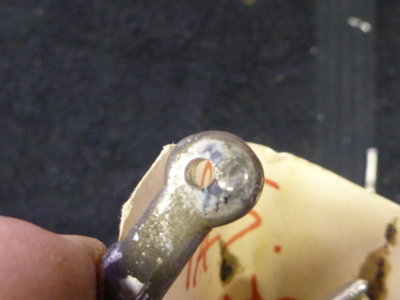
Put the filler pin in place and drilled a new 1/8" hole beside it to move the pivot point.

Worked good on the spare, time to do it on something expensive in fresh chrome.

Success, other than some dumb *** with a grinder just had to lick the filler pin.

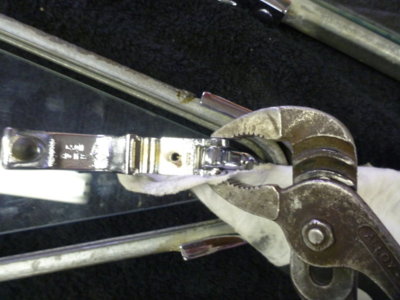
Didn't want to pound on the good one, pin pressed into place with channel locks.

Now both Preying Mantis' sit the same height and will actually lock the window.

beerestoration2019 2256.JPG beerestoration2019 2255.JPG beerestoration2019 2261.JPG beerestoration2019 2265.JPG beerestoration2019 2266.JPG beerestoration2019 2271.JPG beerestoration2019 2273.JPG beerestoration2019 2277.JPG beerestoration2019 2278.JPG beerestoration2019 2279.JPG
 
Last edited:
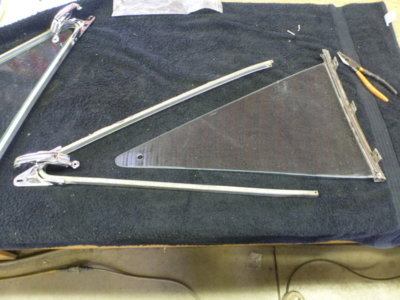
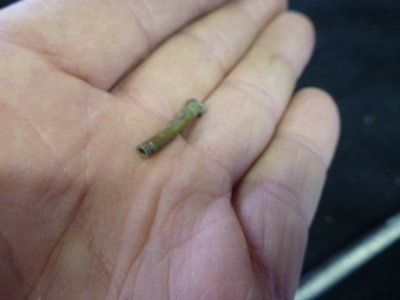
Drivers window assembly apart by removing the tubular rivet at each end of the hinge channel.

Removed rivet.

The "hinge" is just the same mylar type seal and slider pins that are used on the door glass on the front edge. I had hoped a single strip would be just cut in half, so I'd have a spare, but nope gotta use a set as they're a few inches too short to get two from one.

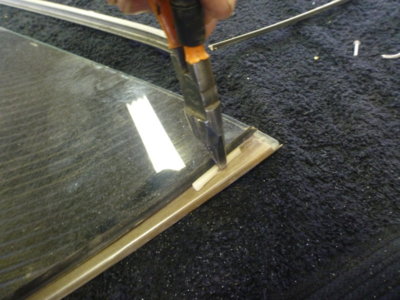
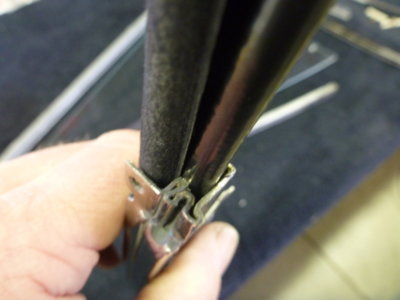
Carefully seperating the two sides of the OE guide sliders ( glass retainer in this case) so I can use them in the front door glass vs reproductions. Repros are good enough for these windows as they don't slide, but are too thick for the door glass to work correctly.

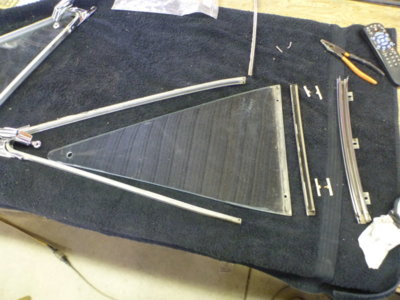
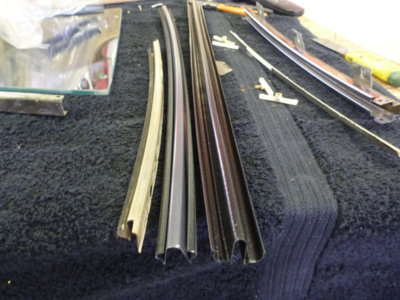
All the parts laid out.

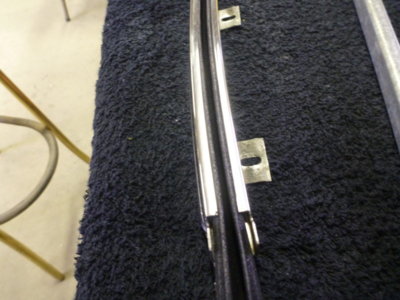
OE hinge / seal with one side torn off, showing the punched hole top and slot bottom that the slider pins go through and then the holes in the glass.

OE left, properly shaped and curved Chrysler OEM middle and reproduction right. Both expensive as hell and getting worse. As much or more than $300US a pair now I hear for the OEM, if you can find a set. The Repro is no where near correct and over $100 for two pieces of mylar, but will be used in the flip out windows. The OEM on the door glass.

Testing the repro seal in the hinge channel.

Doesn't fit too bad, but needs that incorrect edge trimmed off the curl to sit correctly.

beerestoration2019 2286.JPG beerestoration2019 2288.JPG beerestoration2019 2289.JPG beerestoration2019 2293.JPG beerestoration2019 2294.JPG beerestoration2019 2302.JPG beerestoration2019 2311.JPG beerestoration2019 2312.JPG beerestoration2019 2313.JPG
 
Wayne, thanks for starting me to worry about mine! I “think” one of mine broke yrs ago, so I got lucky that dealer still had them back then. Maybe ur new w/strip has an effect on the latching fully?
 
Nothing to do with new strip Jeff, I haven't put it together yet. It has NEVER latched since day one,, 1969. As shown the spare set I bought have the hinge point in the EXACT same wrong location and I corrected both of them. It's passenger side only, the drivers sides are good as mfg.

Yours probably broke back then as someone forced it to try and latch it.. it won't go with the pivot pin in the wrong location.
 
Wow looks like a tedious job, but at least you got her done!
 
Wow looks like a tedious job, but at least you got her done!
wayne i am putting together my ramcharger air box,where did you find that cord seal to add to both sides of box to seal those sides? thanks
 
wayne i am putting together my ramcharger air box,where did you find that cord seal to add to both sides of box to seal those sides? thanks
Out of the box with my door panel vapour barriers... David supplies a box of it with same!! LOL... available at most hardware stores at "crack seal" weatherstrip.. easy to apply putty strips in white or brown. Ma used white..
 
Awesome job Wayne, everything is really coming together nicely. I will be paging through your thread quite a bit as my build progresses. When is that rump stripe getting put on? That will be the icing on the cake.
 
Awesome job Wayne, everything is really coming together nicely. I will be paging through your thread quite a bit as my build progresses. When is that rump stripe getting put on? That will be the icing on the cake.
Ha.. working up the nerve buddy... working up the nerve!!
 
Ha.. working up the nerve buddy... working up the nerve!!
wayne,what did you use for the round outer edges for the airgrabber in pic below around where the tape is to fasten it on center section. thanks
1980-01-01 00.00.25.jpg
 
I have no idea what you are asking Johnny... but hope you are going to add some reinforcement to that crack repair.
 
I have no idea what you are asking Johnny... but hope you are going to add some reinforcement to that crack repair.
i will clean crack up, what i am asking is the center section has the four screws to attach outside of box,on the bottom side of center section,but on top side of center box how do you fasten it to the center section.if that is clearer?
 
i will clean crack up, what i am asking is the center section has the four screws to attach outside of box,on the bottom side of center section,but on top side of center box how do you fasten it to the center section.if that is clearer?
maybe this is clearer, the four holes have the screws to attach to center,but flip that side over the rounded side what do you do to fasten it to the center section?
aitgrabber.JPG
 
You don't.. that's where the cord seal goes, between the center and the outer boxes. Those holes are only for the rubber air filter seal to attach too.

I was gonna say Man that box is in nice shape.. but it's mine!! :D

Here's a few pictures going onto the hood. Center gets riveted in place, cord seal affixed to the outers so it will sit between it and were it overlaps onto the center section. Then the outers get riveted and bolted in place. Make sure before you start that you have TIGHT holes where the rivets go. Fix them now if not, not after the fact like I had to do!
beerestorationfall2018 722.JPG
beerestorationfall2018 724.JPG
beerestorationfall2018 728.JPG
beerestorationfall2018 740.JPG
 
Auto Transport Service
Back
Top