- Local time
- 4:11 PM
- Joined
- Dec 4, 2009
- Messages
- 38,599
- Reaction score
- 54,094
- Location
- Pasadena, Texas
It just doesn't seem or feel like I'm going about it right lol. It sure isn't laying in place like I think it should. First time to do something like this. There's also have a 2x2" frame connector that's under it and that seems to be part of the problem but the part that meets with the drive shaft hump is the part that has me wondering. Thinking that once I screw it down in a few places and make sure of it's location, I'll cut the front edge and go from there. Does that sound like a plan in the right direction?What part is wrong about what you're doing?
The original hump material goes down about 2 1/2" past the seat belt mount. I did cut out the old mount because it actually had rust around the reinforcement plate and that area is squared off. That's one of the reasons that I left the 'new' metal long in that area.I wouldn't cut into the hump unless necessary, leave as much original as you can.
Pics of what it looks like under the patch panel?
That's what I'm thinking...What is the issue? The metal not laying down properly?
Not at the moment. I'm about to do some mowing and well, not sure if I can get more pics within the next few days....You have more pictures Cranky?
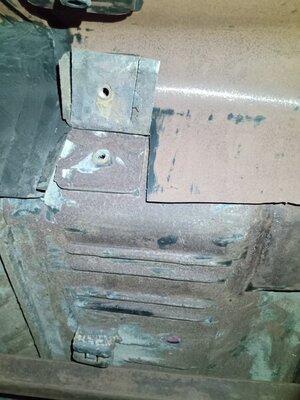
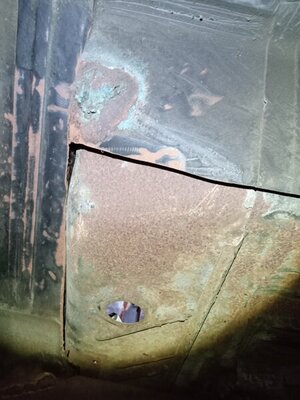
There is supposed to be a floor brace that's not in there yet plus I see a couple of places where the pan is resting on...one being the frame tie. Decided I had time to crawl under it and take a couple of pics and saw the spots that need trimming. Maybe I got this more that I thought!? Pics below....Is there a brace underneath the pan holding the rest of the floor?
There's a 'booger' weld that looks like it has some epoxy in it too that I'd like to get rid of and that's another reason to cut higher on the tunnel. It's at the end of the tunnel before the transition to where the back seat bottom sits.I wouldn't cut into the hump unless necessary, leave as much original as you can.
Pics of what it looks like under the patch panel?


Slimt's way or the way I was planning?My attempt at putting a floor section in that way was a total failure.
If it's the rest driver side pan you are replacing, remove the old pan but leave at least 2" on all sides. It removes enough so the new pan can fit down tight and you can scribe a mark where it needs to be cut for a butt weld.What part is wrong about what you're doing?
Slimt's way or the way I was planning?
Thinking it's the best way too. This is too much work for some out of shape 70 year old lol but from what I'm seeing, I'm not that out of shape!Concave and corners you may have to pie cut / slice to lay them in the recess.
Myself I'm with slim and prefer a small overlap.
Hell I'm sitting here with a ice bag on my knee , lol.Thinking it's the best way too. This is too much work for some out of shape 70 year old lol but from what I'm seeing, I'm not that out of shape!
