• When you click on links to various merchants on this site and make a purchase, this can result in this site earning a commission. Affiliate programs and affiliations include, but are not limited to, the eBay Partner Network.

69 Coronet 500 rusty floor board splicing

BigBlockBilly

Member
Local time
2:00 AM
Joined
Dec 14, 2014
Messages
9
Reaction score
4
Location
Tucson, AZ
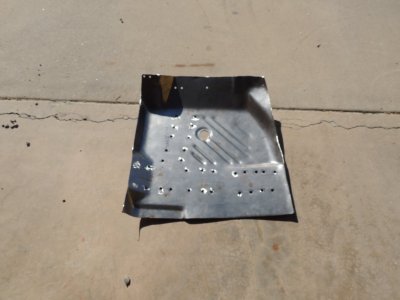
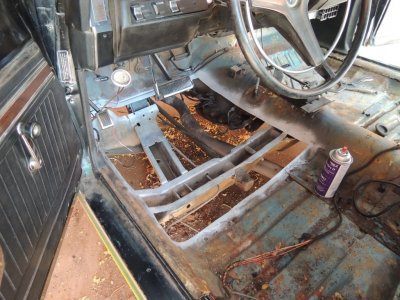
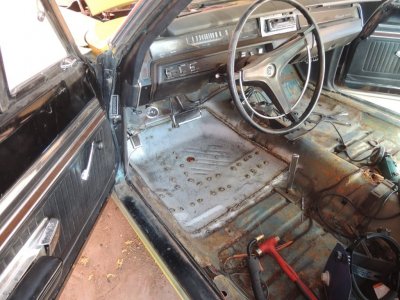
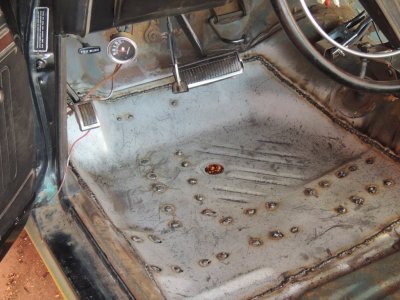
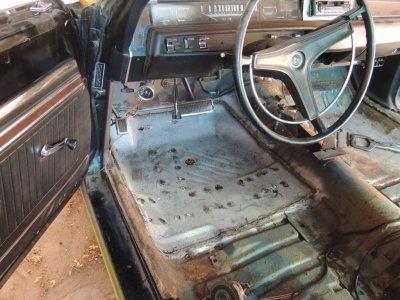
Finally got around to cutting out my floor board (drivers side) and replacing the rust through.
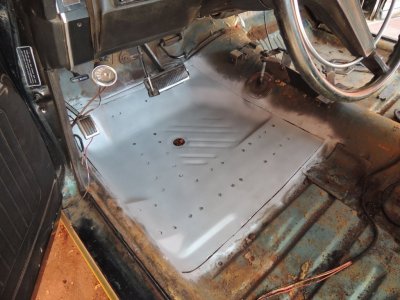
I only had to replace the center section. The rest was in good shape. I see what everyones talking about. It takes a lot of time and patience to spot weld all those holes and the flush seams. No over laid sheet metal here. Butt spliced together and seam welded. I'm planning to bondo the seams. I just ground down the welds tonight.
 
DSCN3411.JPG
DSCN3410.JPG
DSCN3412.JPG DSCN3413.JPG DSCN3415.JPG DSCN3416.JPG DSCN3417.JPG DSCN3418.JPG DSCN3419.JPG

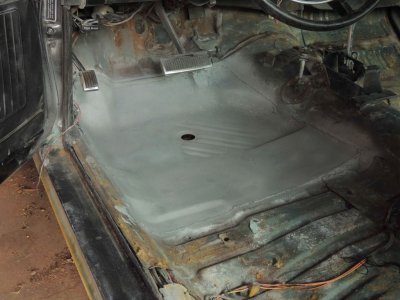
I used a weld etching primer for the bare pan and plan on Por15 for the surface rust in the rear area. I bought the cutting grinder from Eastwood just for doing floorboards and trunk pans. It was great!
 
Last edited:
looks good! I just did the whole front pan on mine so I can appreciate how much work is involved. Must have been fun installing the pan with the pedals, dash, exhaust pipe and transmission still in there!
 
looks good! I just did the whole front pan on mine so I can appreciate how much work is involved. Must have been fun installing the pan with the pedals, dash, exhaust pipe and transmission still in there!
Yes, It was fun. Just had rust in that area no other so it wasn't necessary to remove the whole enchilada. I still have the center of the trunk to do yet! I'm trying to save as much original metal as I can the car is not that bad rust wise. I started out using a spot weld drill bit and quickly switched to an air chisel. The bit wore my arm out! Had the undercoating catch fire a few times. Made it easy to fix the transmission linkage though..
 
I'm about to be in the same boat with my wagon, but I get to do it twice as I have a 4D donor car to cut the patches from first.

I was interested in not spending a bunch of time drilling/grinding all the factory welds at the hard to get at seams like the firewall especially since the floor pan metal is not rusted in that area.

Seemed like butt welding would be a lot easier to just patch where needed.

Plus, I get to work on my butt welding skills in an area that won't be right up in people's faces.

You've encouraged me.
 
I practiced on two pieces of the sheet metal left over after the cuts. Only I used a pre-cut floorboard aftermarket chunk. The spot welding was a bitch as it raised the sheet metal off the beams as you went along it became harder to fill. I smoothed it over with bondo when I was done and this helped cover any small holes there may have been in the spot welds. The primer is a weld capable etching primer so it was easy to weld. But even though running a bead on the mig was easy at #2 setting when you spot you need to bump it up along with the wire speed. If your removing an old one you'll need to drill every spot weld which is hard on the arms. I became teed off and used my arm hammer which got the job done much faster an all but destroyed the salvaged piece. Maybe since it's a donor car just spot cut the welds with a torch? Or a Plasma cutter? In any case have someone near by with a garden hose or fire extinguisher as the undercoating will catch fire!

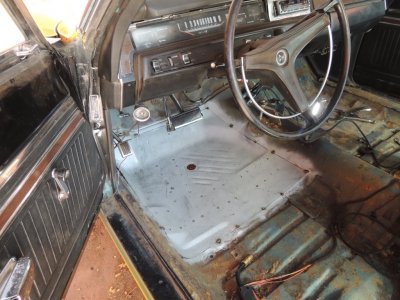
Here's the end product now some paint and a new hush mat then carpet and it's done!

Next Job: Center Trunk Pan.

DSCN3420.JPG
 
Last edited:
I practiced on two pieces of the sheet metal left over after the cuts. Only I used a pre-cut floorboard aftermarket chunk. The spot welding was a bitch as it raised the sheet metal off the beams as you went along it became harder to fill. I smoothed it over with bondo when I was done and this helped cover any small holes there may have been in the spot welds. The primer is a weld capable etching primer so it was easy to weld. But even though running a bead on the mig was easy at #2 setting when you spot you need to bump it up along with the wire speed. If your removing an old one you'll need to drill every spot weld which is hard on the arms. I became teed off and used my arm hammer which got the job done much faster an all but destroyed the salvaged piece. Maybe since it's a donor car just spot cut the welds with a torch? Or a Plasma cutter? In any case have someone near by with a garden hose or fire extinguisher as the undercoating will catch fire!

Here's the end product now some paint and a new hush mat then carpet and it's done!

Next Job: Center Trunk Pan.

View attachment 373685


Nice work i have the exact same job to do very soon!
 
Auto Transport Service
Back
Top