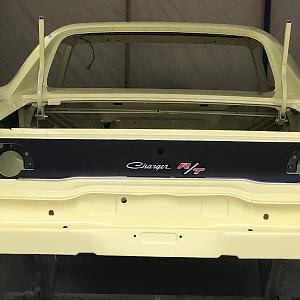
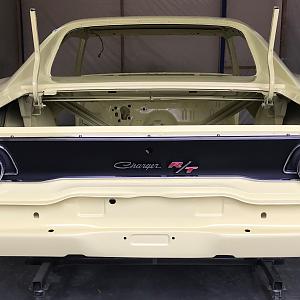
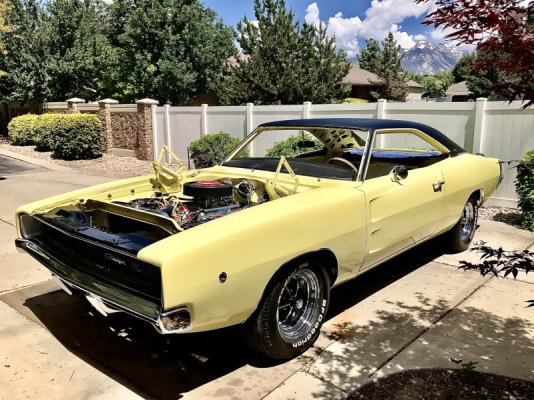
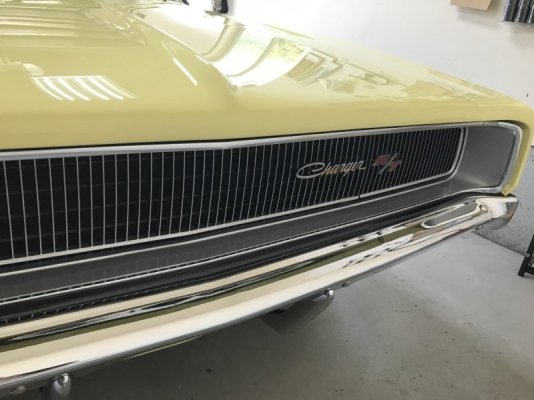
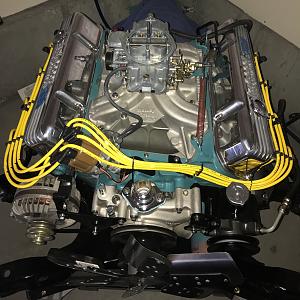
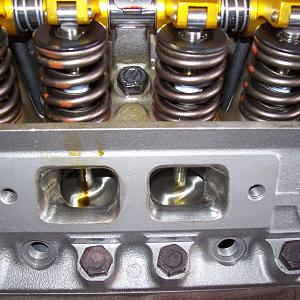
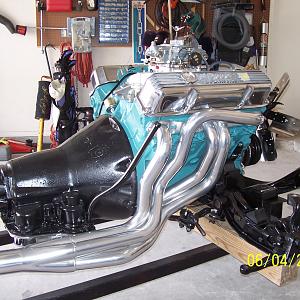
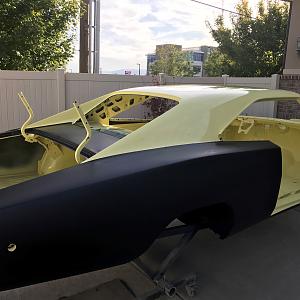
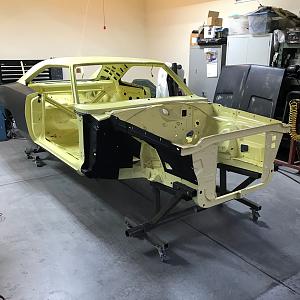
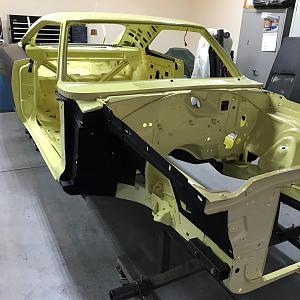
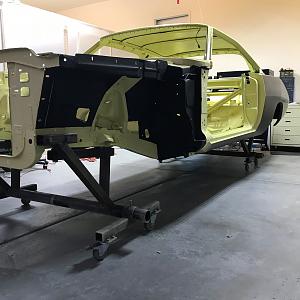
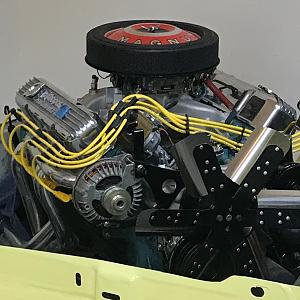
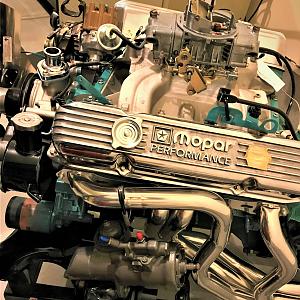
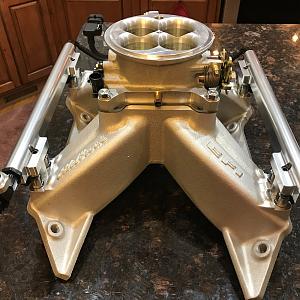
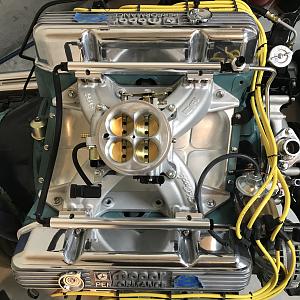
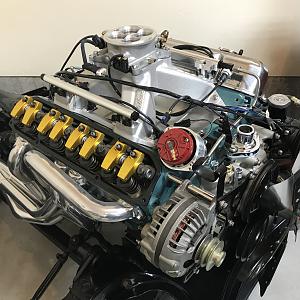
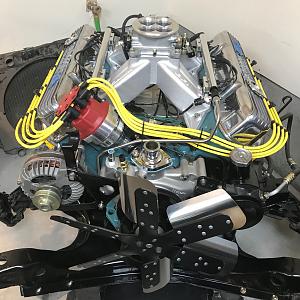
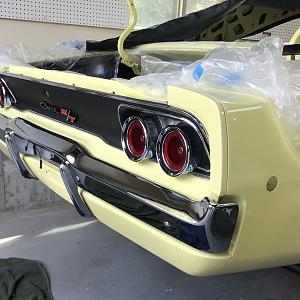
Charger project, fuel injected 440 magnum, .030 over, balanced, 915's port matched, 2.14/1.81 inch int/exh valves, 727 TF. pwr steering, pwr brakes....Whats not to like??
About this Mopar:
- Next page: Shake down
-
 18.jpg616.9 KB · Views: 2,410
 -
 29.jpg905.8 KB · Views: 1,658
 -
 33.jpg482.4 KB · Views: 1,466
 -
 34.jpg533.4 KB · Views: 1,306
 -
 35.jpg526.3 KB · Views: 1,332
 -
 36.jpg500.4 KB · Views: 1,336
 -
 heater box 2.jpg1,000.6 KB · Views: 1,379
 -
 photo.JPG179.1 KB · Views: 1,378
 -
 Pictures_diskcopy 549.jpg305.3 KB · Views: 1,326
 -
 Pictures_diskcopy 560.jpg349.5 KB · Views: 1,360
 -
 38.jpg655.1 KB · Views: 1,391
 -
 100_1025.jpg363 KB · Views: 1,476
 -
 DS ep.jpg534.8 KB · Views: 1,352
 -
 22.jpg1,011.9 KB · Views: 1,247
 -
 3.jpg1.2 MB · Views: 1,340
 -
 50.jpg805.2 KB · Views: 1,289
 -
 51.jpg779.9 KB · Views: 1,290
 -
 53.jpg864.5 KB · Views: 1,247
 -
 54.jpg793.2 KB · Views: 1,054
 -
 55.jpg1,016.5 KB · Views: 1,112
 -
 56.jpg259.5 KB · Views: 1,043
 -
 57.jpg1.8 MB · Views: 1,333
 -
 Bagged Charger 1.jpg629.4 KB · Views: 1,006
 -
 Bagged Charger 2.jpg650.3 KB · Views: 940
 -
 High build on.jpg616 KB · Views: 983
 -
 21.jpg626.3 KB · Views: 956
 -
 58.jpg590.7 KB · Views: 905
 -
 62.jpg1 MB · Views: 889
 -
 63.jpg781.6 KB · Views: 960
 -
 70.jpg931 KB · Views: 844
 -
 71.jpg817.7 KB · Views: 906
 -
 72.jpg718.8 KB · Views: 905
 -
 74.jpg366.3 KB · Views: 918
 -
 77.jpg372.8 KB · Views: 951
 -
 heaater box1.jpg761.5 KB · Views: 898
 -
 heater box 3.jpg955.6 KB · Views: 885
 -
 nice.jpg1.1 MB · Views: 938
 -
 111.jpg1.2 MB · Views: 893
 -
 112.jpg987.1 KB · Views: 935
 -
 73.jpg715.9 KB · Views: 847
 -
 514033E6-71A3-481E-AF76-C71F73A1307E.jpeg759 KB · Views: 739
 -
 A6DCC4AB-2058-4A5C-9600-D594A76A60C6.jpeg1.1 MB · Views: 726
 -
 A2A966C0-08DE-4091-BD21-97A0432745A5.jpeg1 MB · Views: 793
 -
 0F644954-36E0-4A03-A0E1-C1ADA160B2C4.jpeg807.7 KB · Views: 752
 -
 9218C594-207C-4F5A-A834-CC09F2AD6D81.jpeg1.2 MB · Views: 757
 -
 CAA6D4DF-E417-4967-9ACB-0946A9E1F4BD.jpeg297 KB · Views: 703
 -
 16A28BE0-F116-4457-9B9C-B92CA7C36834.jpeg1.1 MB · Views: 697
 -
 74941C19-DA37-43DE-BB29-9D90D3724875.jpeg1,019.8 KB · Views: 694
 -
 120.jpg124.9 KB · Views: 762
 -
 121.jpg465.9 KB · Views: 773
 -
 123.jpg520.1 KB · Views: 703
 -
 126.jpg749.6 KB · Views: 670
 -
 127.jpg1.2 MB · Views: 719
 -
 130.jpg587.2 KB · Views: 711
 -
 131.jpg537.2 KB · Views: 684
 -
 200.jpg790 KB · Views: 664
 -
 A6657323-11D1-42E9-8550-45631533C2EE.jpeg911.9 KB · Views: 609
 -
 F9C54FBD-8957-4E9B-967C-8C9AFB9E9754.jpeg1 MB · Views: 603
 -
 E0BBB814-5B9C-4136-919B-E37BF6ABA549.jpeg807.4 KB · Views: 610
 -
 207.jpg922.1 KB · Views: 635
 -
 2021.jpg842 KB · Views: 645
 -
 60.jpg669.9 KB · Views: 624
 -
 80.jpg318 KB · Views: 657
 -
 B5EFC469-6DB2-4F2F-9987-038AF24F812B.jpeg910.3 KB · Views: 526
 -
 E5BACACB-A055-40A2-AB33-8768394A122D.jpeg928.4 KB · Views: 538
 -
 6A7CB0CA-3763-4080-903A-FB1262A3B0F4.jpeg373.5 KB · Views: 559
 -
 A409FB65-9438-406F-896C-8D20C826DB33.jpeg928.6 KB · Views: 507
 -
 76FD6C0C-2A3E-46A1-A8C0-66396C8900C4.jpeg541 KB · Views: 501
 -
 210.jpg636.7 KB · Views: 573
 -
 213.jpg742.8 KB · Views: 577
 -
 B11C862C-190F-45B9-8DE4-7FA862DC6BEF.jpeg1.2 MB · Views: 490
 -
 75A482FB-7ABC-440C-8D68-231DE1348394.jpeg694.4 KB · Views: 477
 -
 543C8EC3-3CCC-4133-BC87-3B426D19FFA3.jpeg761 KB · Views: 499
 -
 2AF7BE87-0926-4694-A648-78B26342E312.jpeg858.7 KB · Views: 485
 -
 219.jpg961.6 KB · Views: 555
 -
 220.jpg495.3 KB · Views: 555
 -
 221.jpg178.1 KB · Views: 578
 -
 218.jpg527.3 KB · Views: 564
 -
 BF975E17-4A31-4796-A91F-89F496513761.jpeg976.1 KB · Views: 484
 -
 224.jpg832 KB · Views: 466
 -
 225.jpg648.5 KB · Views: 509
 -
 226.jpg600.3 KB · Views: 503
 -
 227.jpg657.8 KB · Views: 461
 -
 228.jpg768.6 KB · Views: 458
 -
 229.jpg2 MB · Views: 478
 -
 232.jpg1.2 MB · Views: 436
 -
 230.jpg1.5 MB · Views: 495
 -
 231.jpg1.4 MB · Views: 558
 -
 233.jpg502.5 KB · Views: 417
 -
 234.jpg350.3 KB · Views: 406
 -
 235.jpg296.6 KB · Views: 410
 -
 236.jpg1.1 MB · Views: 431
 -
 237.jpg294.3 KB · Views: 3,642
 -
 238.jpg504.9 KB · Views: 415
 -
 239.jpg783.4 KB · Views: 454
 -
 240.jpg593.9 KB · Views: 409
 -
 243.jpg686.2 KB · Views: 402
 -
 244.jpg481.9 KB · Views: 409
 -
 245.jpg778.4 KB · Views: 404
 -
 246.jpg1.1 MB · Views: 420
 -
 247.jpg1.1 MB · Views: 457
 -
 248.jpg1.5 MB · Views: 1,350
 -
 249.jpg1.3 MB · Views: 635
 -
 250.jpg1.3 MB · Views: 377
 -
 251.jpg1.1 MB · Views: 393
 -
 252.jpg911.5 KB · Views: 379
 -
 253.jpg1.2 MB · Views: 402
 -
 254.jpg686.7 KB · Views: 361
 -
 256.jpg853.1 KB · Views: 358
 -
 257.jpg1 MB · Views: 394
 -
 259.jpg725.5 KB · Views: 347
 -
 260.jpg910.2 KB · Views: 354
 -
 261.jpg1.3 MB · Views: 369
 -
 262.jpg1.3 MB · Views: 399
 -
 263.jpg618.1 KB · Views: 359
 -
 266.jpg1.4 MB · Views: 530
 -
 267.jpg274.9 KB · Views: 325
 -
 268.jpg460.4 KB · Views: 311
 -
 275.jpg69 KB · Views: 313
 -
 277.jpg71.3 KB · Views: 337
 -
 294.jpg59.3 KB · Views: 292
 -
 295.jpg41.6 KB · Views: 289
 -
 296.jpg84.8 KB · Views: 305