• When you click on links to various merchants on this site and make a purchase, this can result in this site earning a commission. Affiliate programs and affiliations include, but are not limited to, the eBay Partner Network.

1950 Dodge Panel Van (My Long-Term project that needs to be completed!!!)

Ditto of the last update... Just making sure I don't lose this build thread to the abyss again.
 
Finally! I have an update more than "no real update!!" Wahoo!!! (semi-excited ;) )

I was able to get into the garage for a while yesterday (and hope to be able to do the same later today). I continued work on the steering column, steering shaft, steering rack & pinion, brake master cylinder and firewall yesterday.


GOPR6932.jpg


GOPR6934.jpg


GOPR6939.jpg


GOPR6940.jpg


GOPR6927.jpg


GOPR6925.jpg


GOPR6923.jpg


GOPR6919.jpg
 
More progress to report... Hoping to develop a trend of progress here. We'll see how long it lasts.


The driver side floorboard and firewall is in. It's not perfect, but it's in. I'm waiting to dress the welds until I pull the engine again since everything will be easier to get to at that point. I also need to add some more metal to different areas to close the engine compartment off from the wheel well and to dress up the area where the "frame" meets the firewall. It needs something. I'll get some metal tacked in now, but the finish welds will happen when the engine is out. You can also see that the steering shaft grommet is in. Round holes are easy enough, but when you don't know exactly where the hole needs to be and when that hole is actually teardrop shaped, then it gets a little interesting. It's working out though and will clean up nicely.

Driver_Inside_Firewall.jpg


Driver_Firewall_Outside.jpg


In the Charger, the brake master cylinder and pedal assembly are mounted further outboard than in the panel van. So, the pedal has been cut off the pedal assembly arm and moved over as far as possible. It feels good with about an inch of clearance between the two pedals.

Brake_Pedal_Relocation.jpg


What to tackle next... The way I see it, I can go two directions from here. I want so badly to get the fenders mounted, but I think I need to tackle the passenger side firewall first. It needs to be re-worked to work with the Charger heater & A/C unit. I really want to get away without having to fit and plumb that minivan heater & A/C unit way in the back corner of the panel van. So, I'm thinking I'll get the other side of the firewall looking like the driver side and then work on the fenders. Delay the gratification, right? It will be good to get the heater & A/C unit crossed off the list. I've been able to successfully avoid it far too long now. ;)
 
My intention, from the point when I decided to melt the Charger with the Panel Van, has been to have a nearly complete 2006 Charger under this '50 Panel shell. So, I have stubbornly resisted the idea of getting an after-market ecu, tcu, etc. I still say I'm going to git-er-done with all stock computers. But the reality is that there are better ways than to use the stock computers.

Right now, my recipe (though it could change if I happen to win the lottery or someone hands me proceeds from a go-fund-me page
icon_wink.gif
) is pretty tried and true. Allow the stock Hemi breathe and see what she'll do while using all stock computers (with a custom tune to compensate for the cam and exhaust, etc.). That's pretty much it. So, I've got good-flowing headers and the start of a full 3" dual exhaust with an X-pipe setup and electric cutouts that'll be hooked to the switches that would have controlled the rear windows in the '06 Charger.

On the other hand... (If anyone has any of the following parts they'd like to donate -HA wouldn't this be nice!) Here's a running list of the parts I've already purchased along with a wish list of parts for the Panel Van:

Panel_Truck_Parts_List02282018.jpg
 
Front fenders...


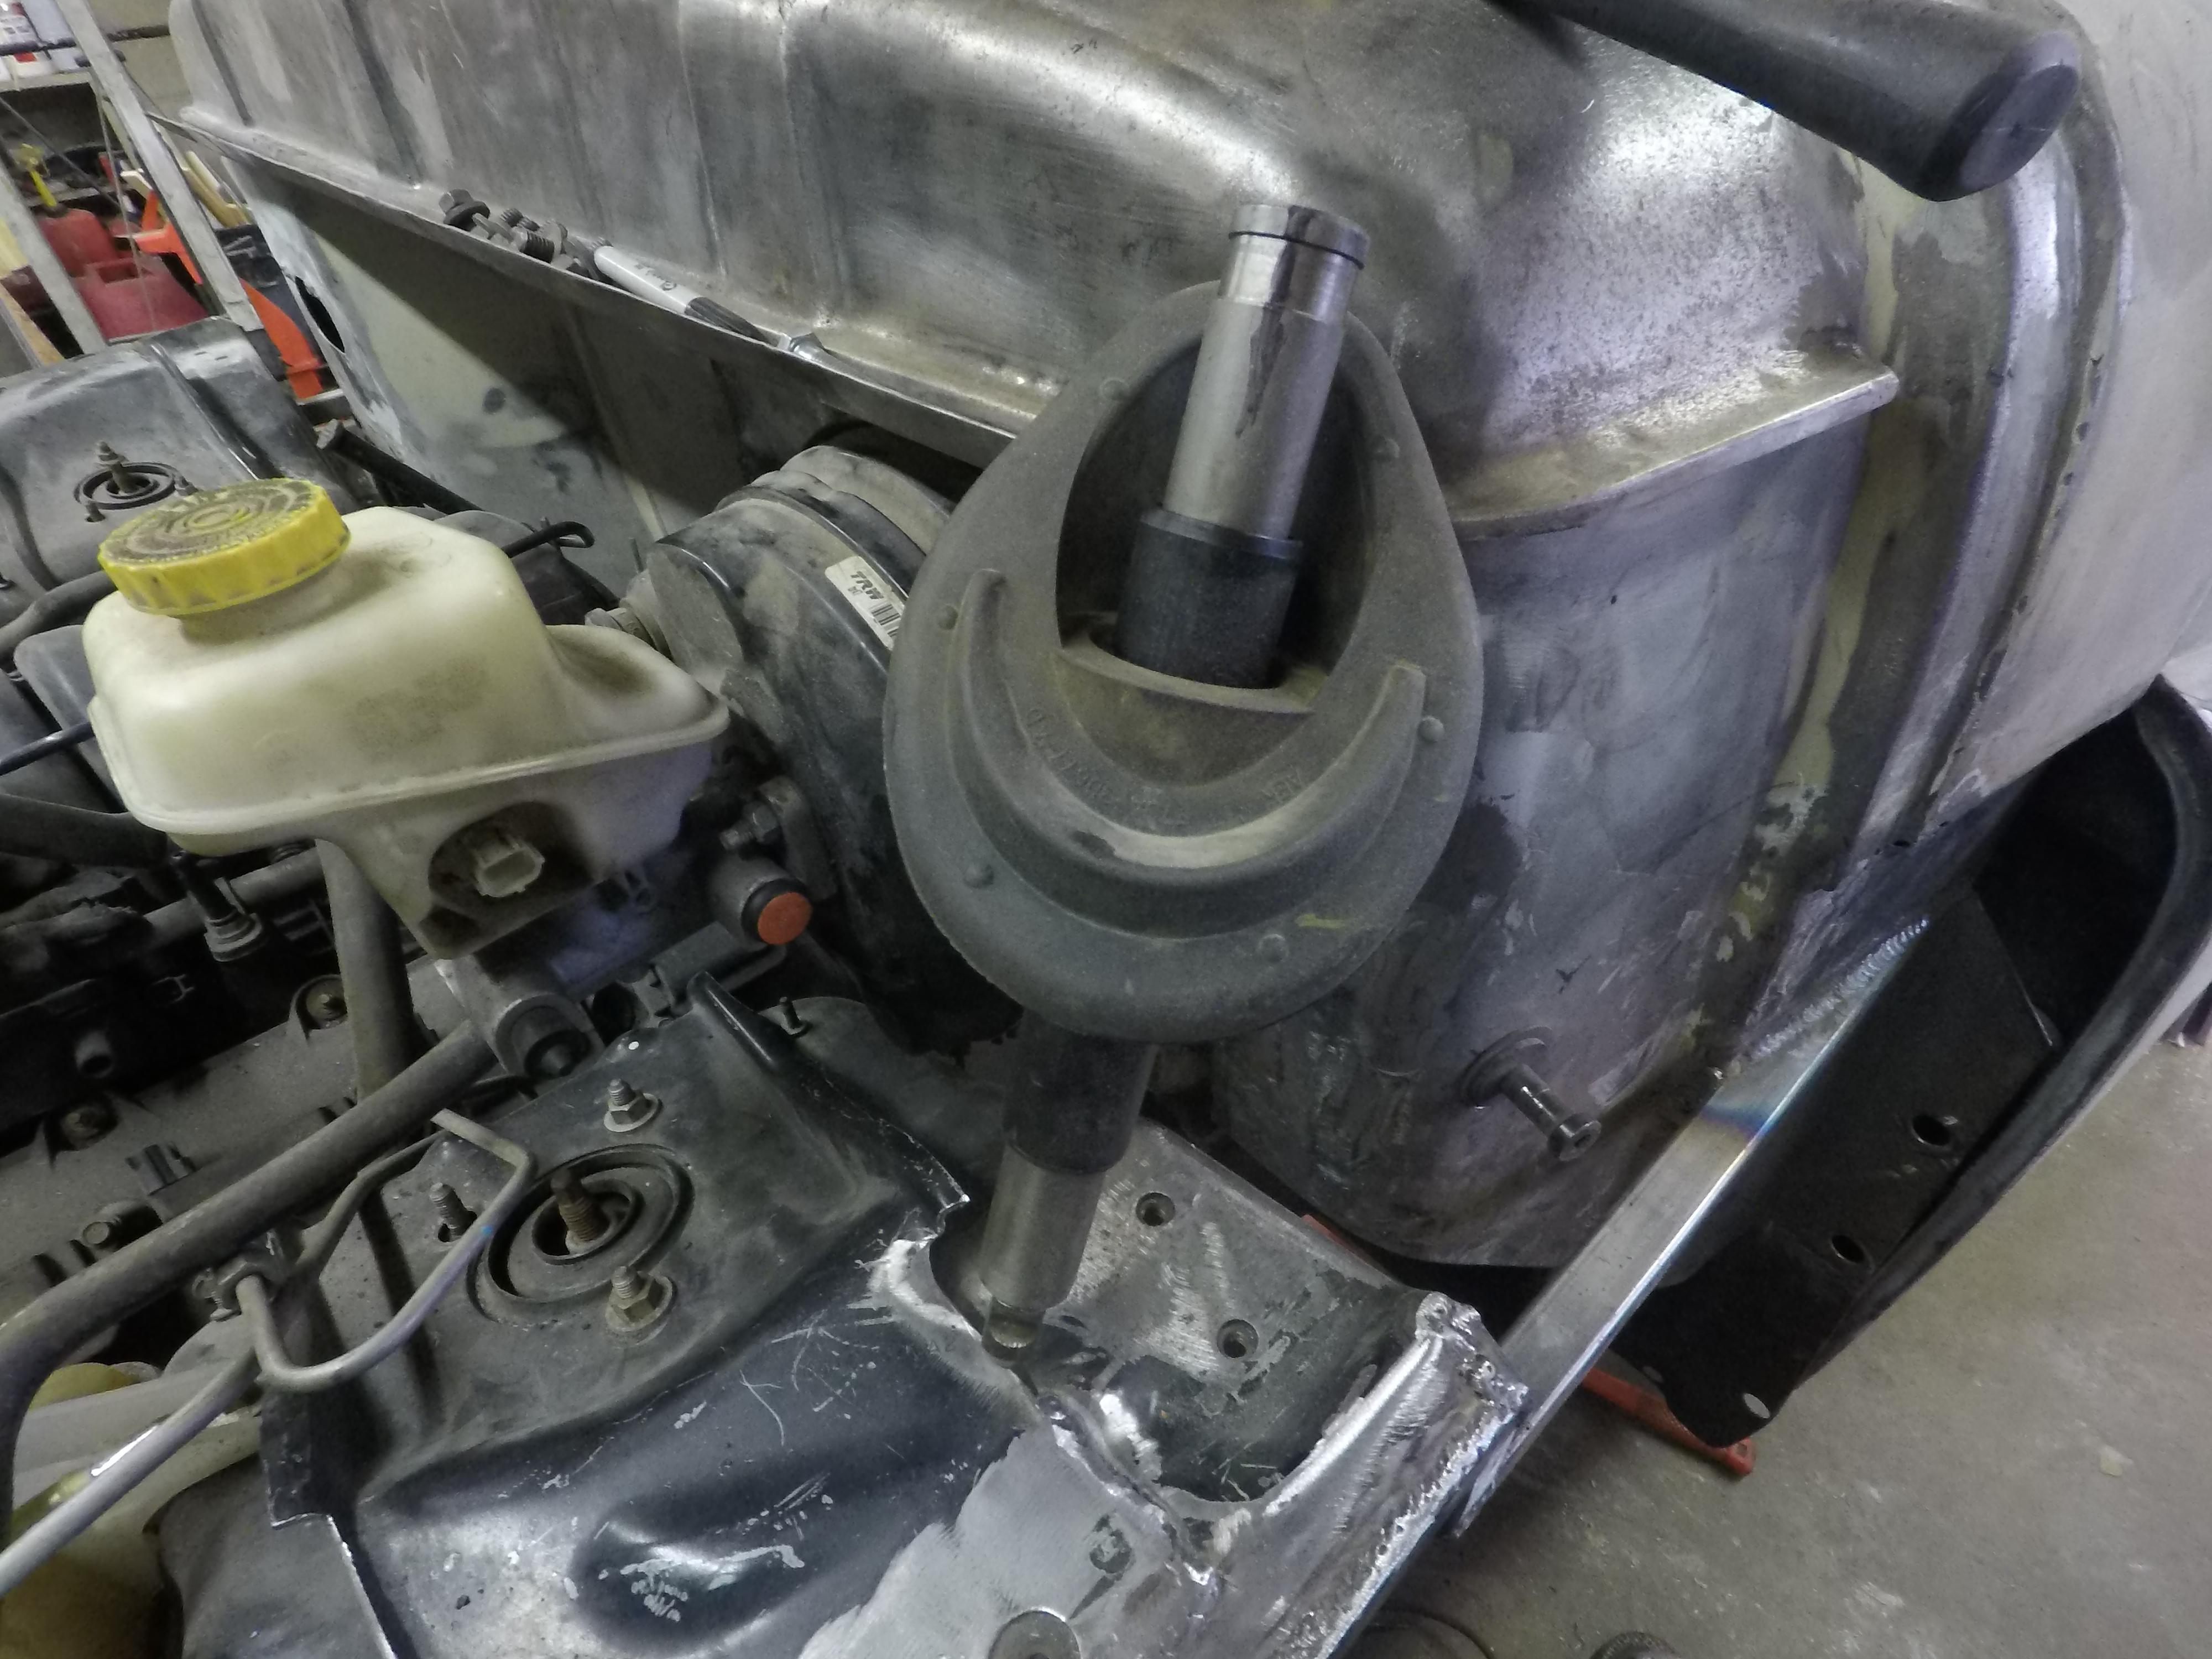
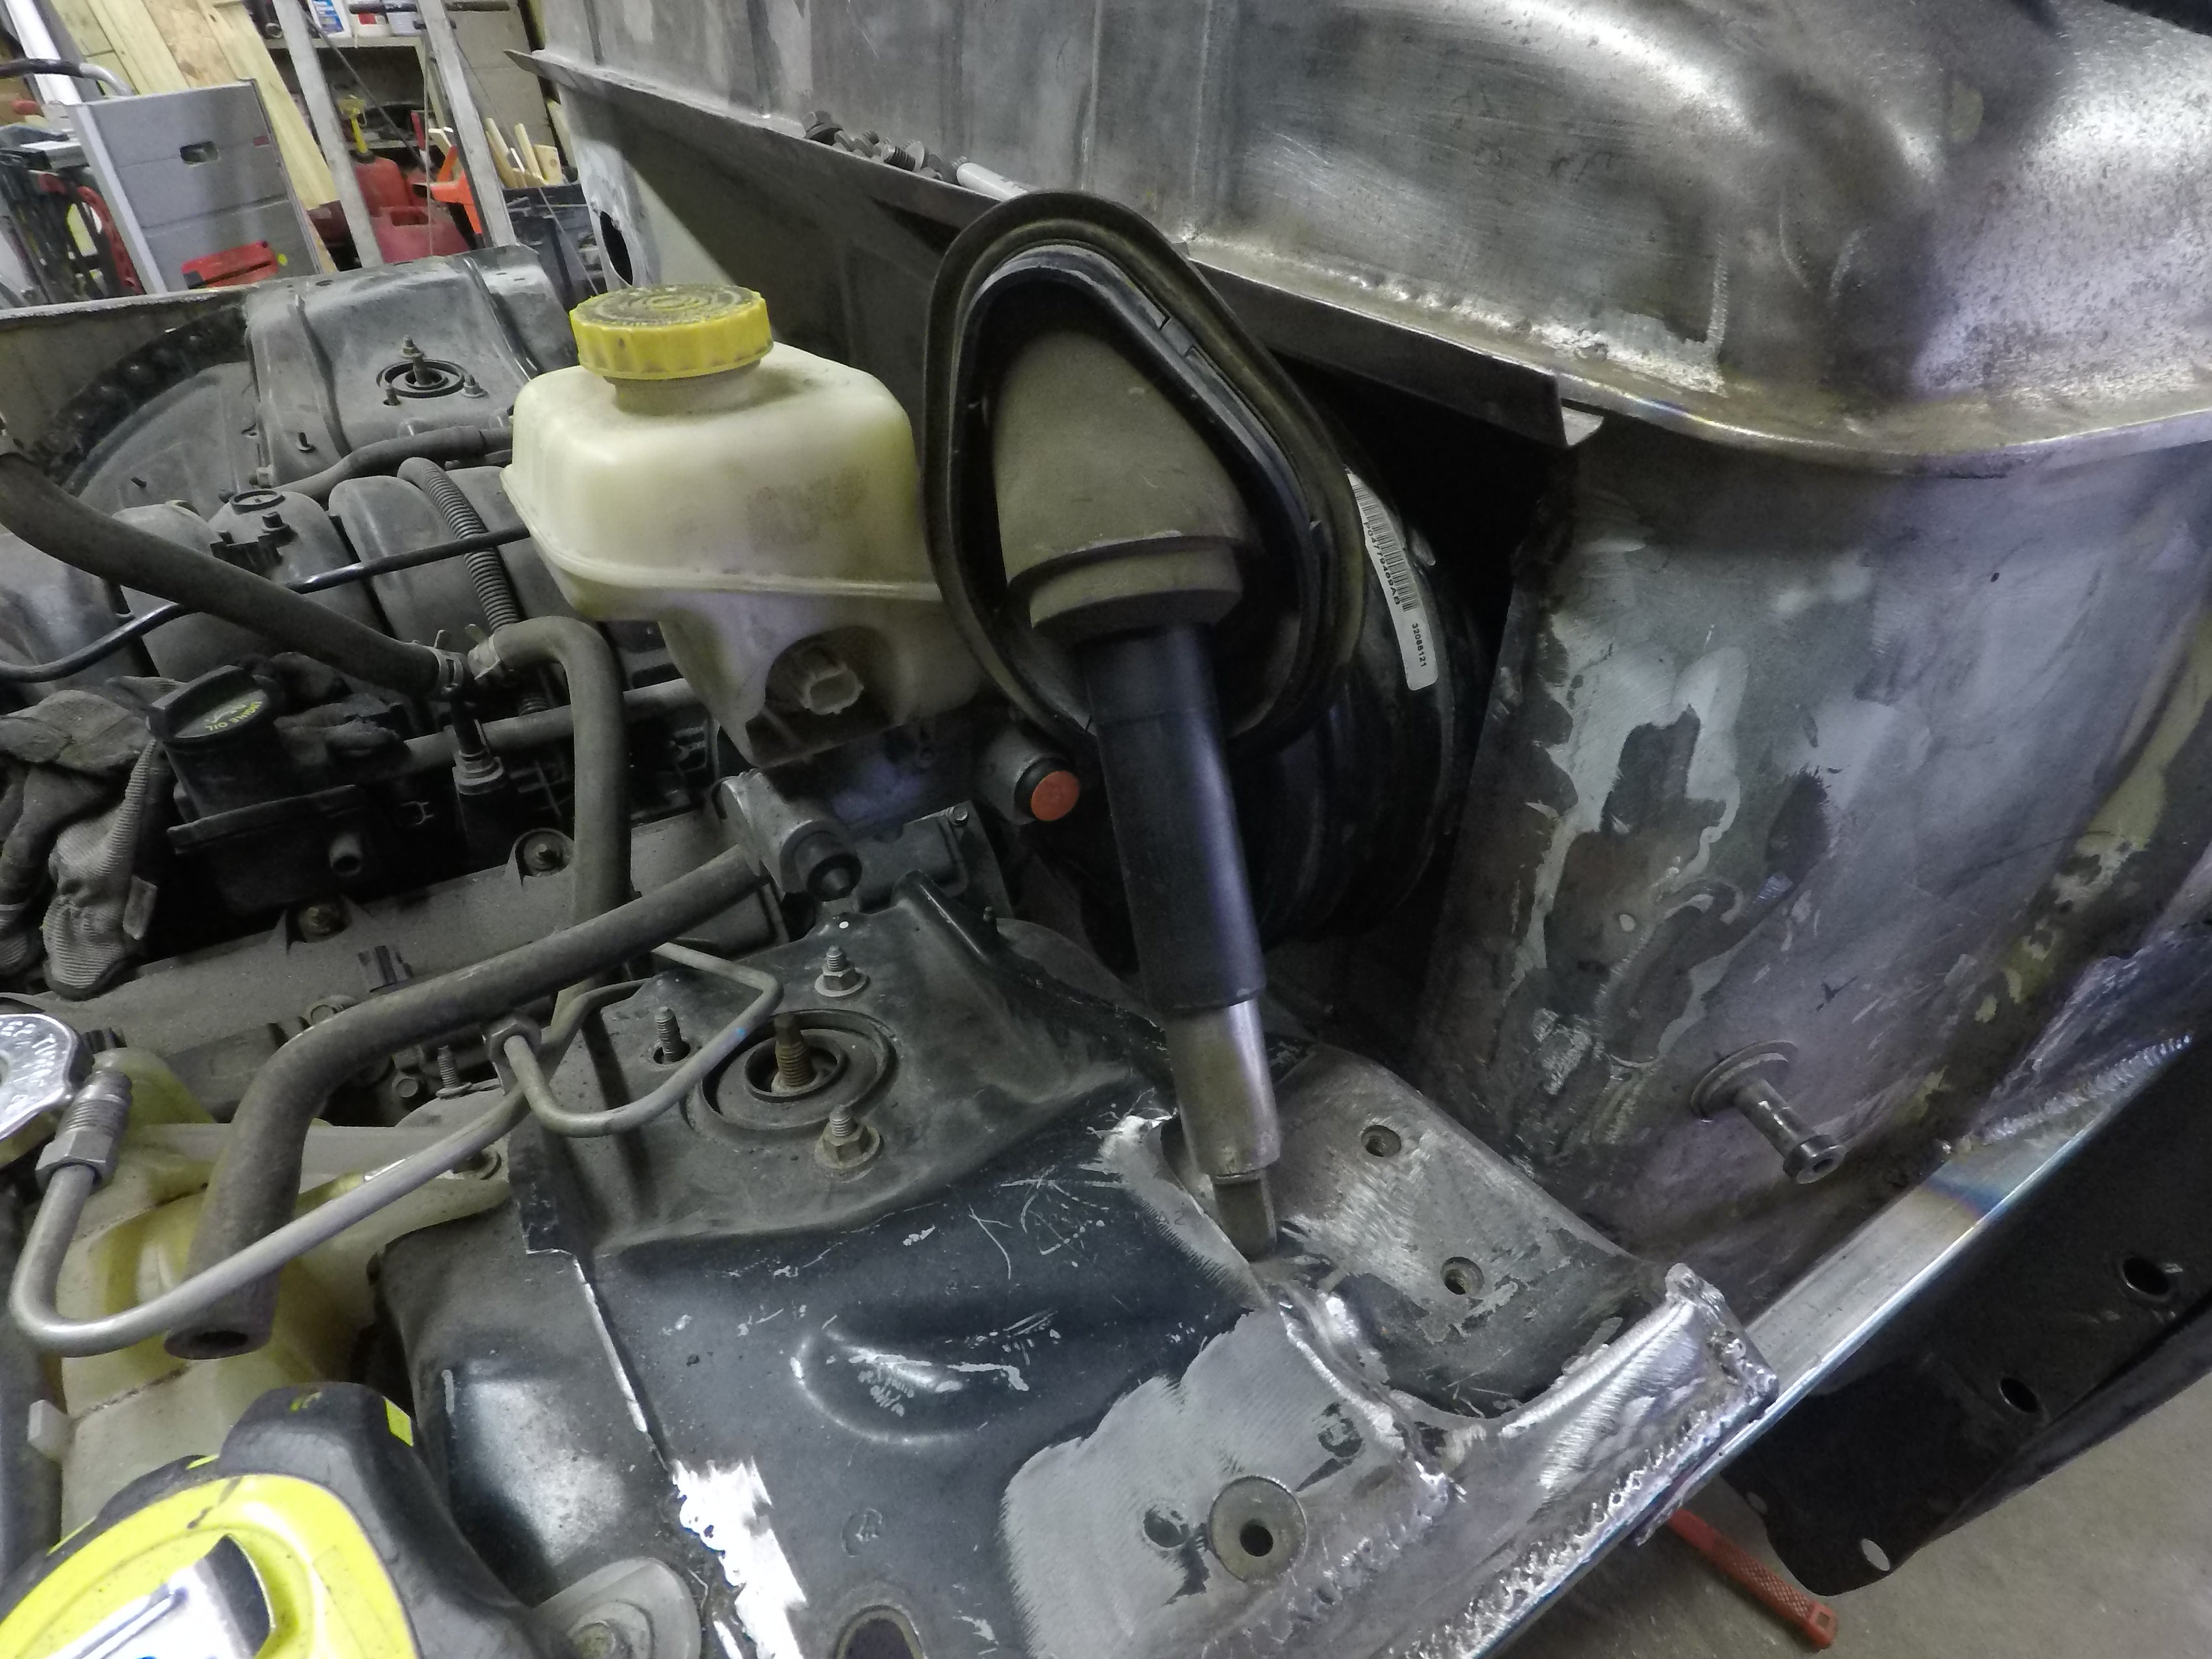
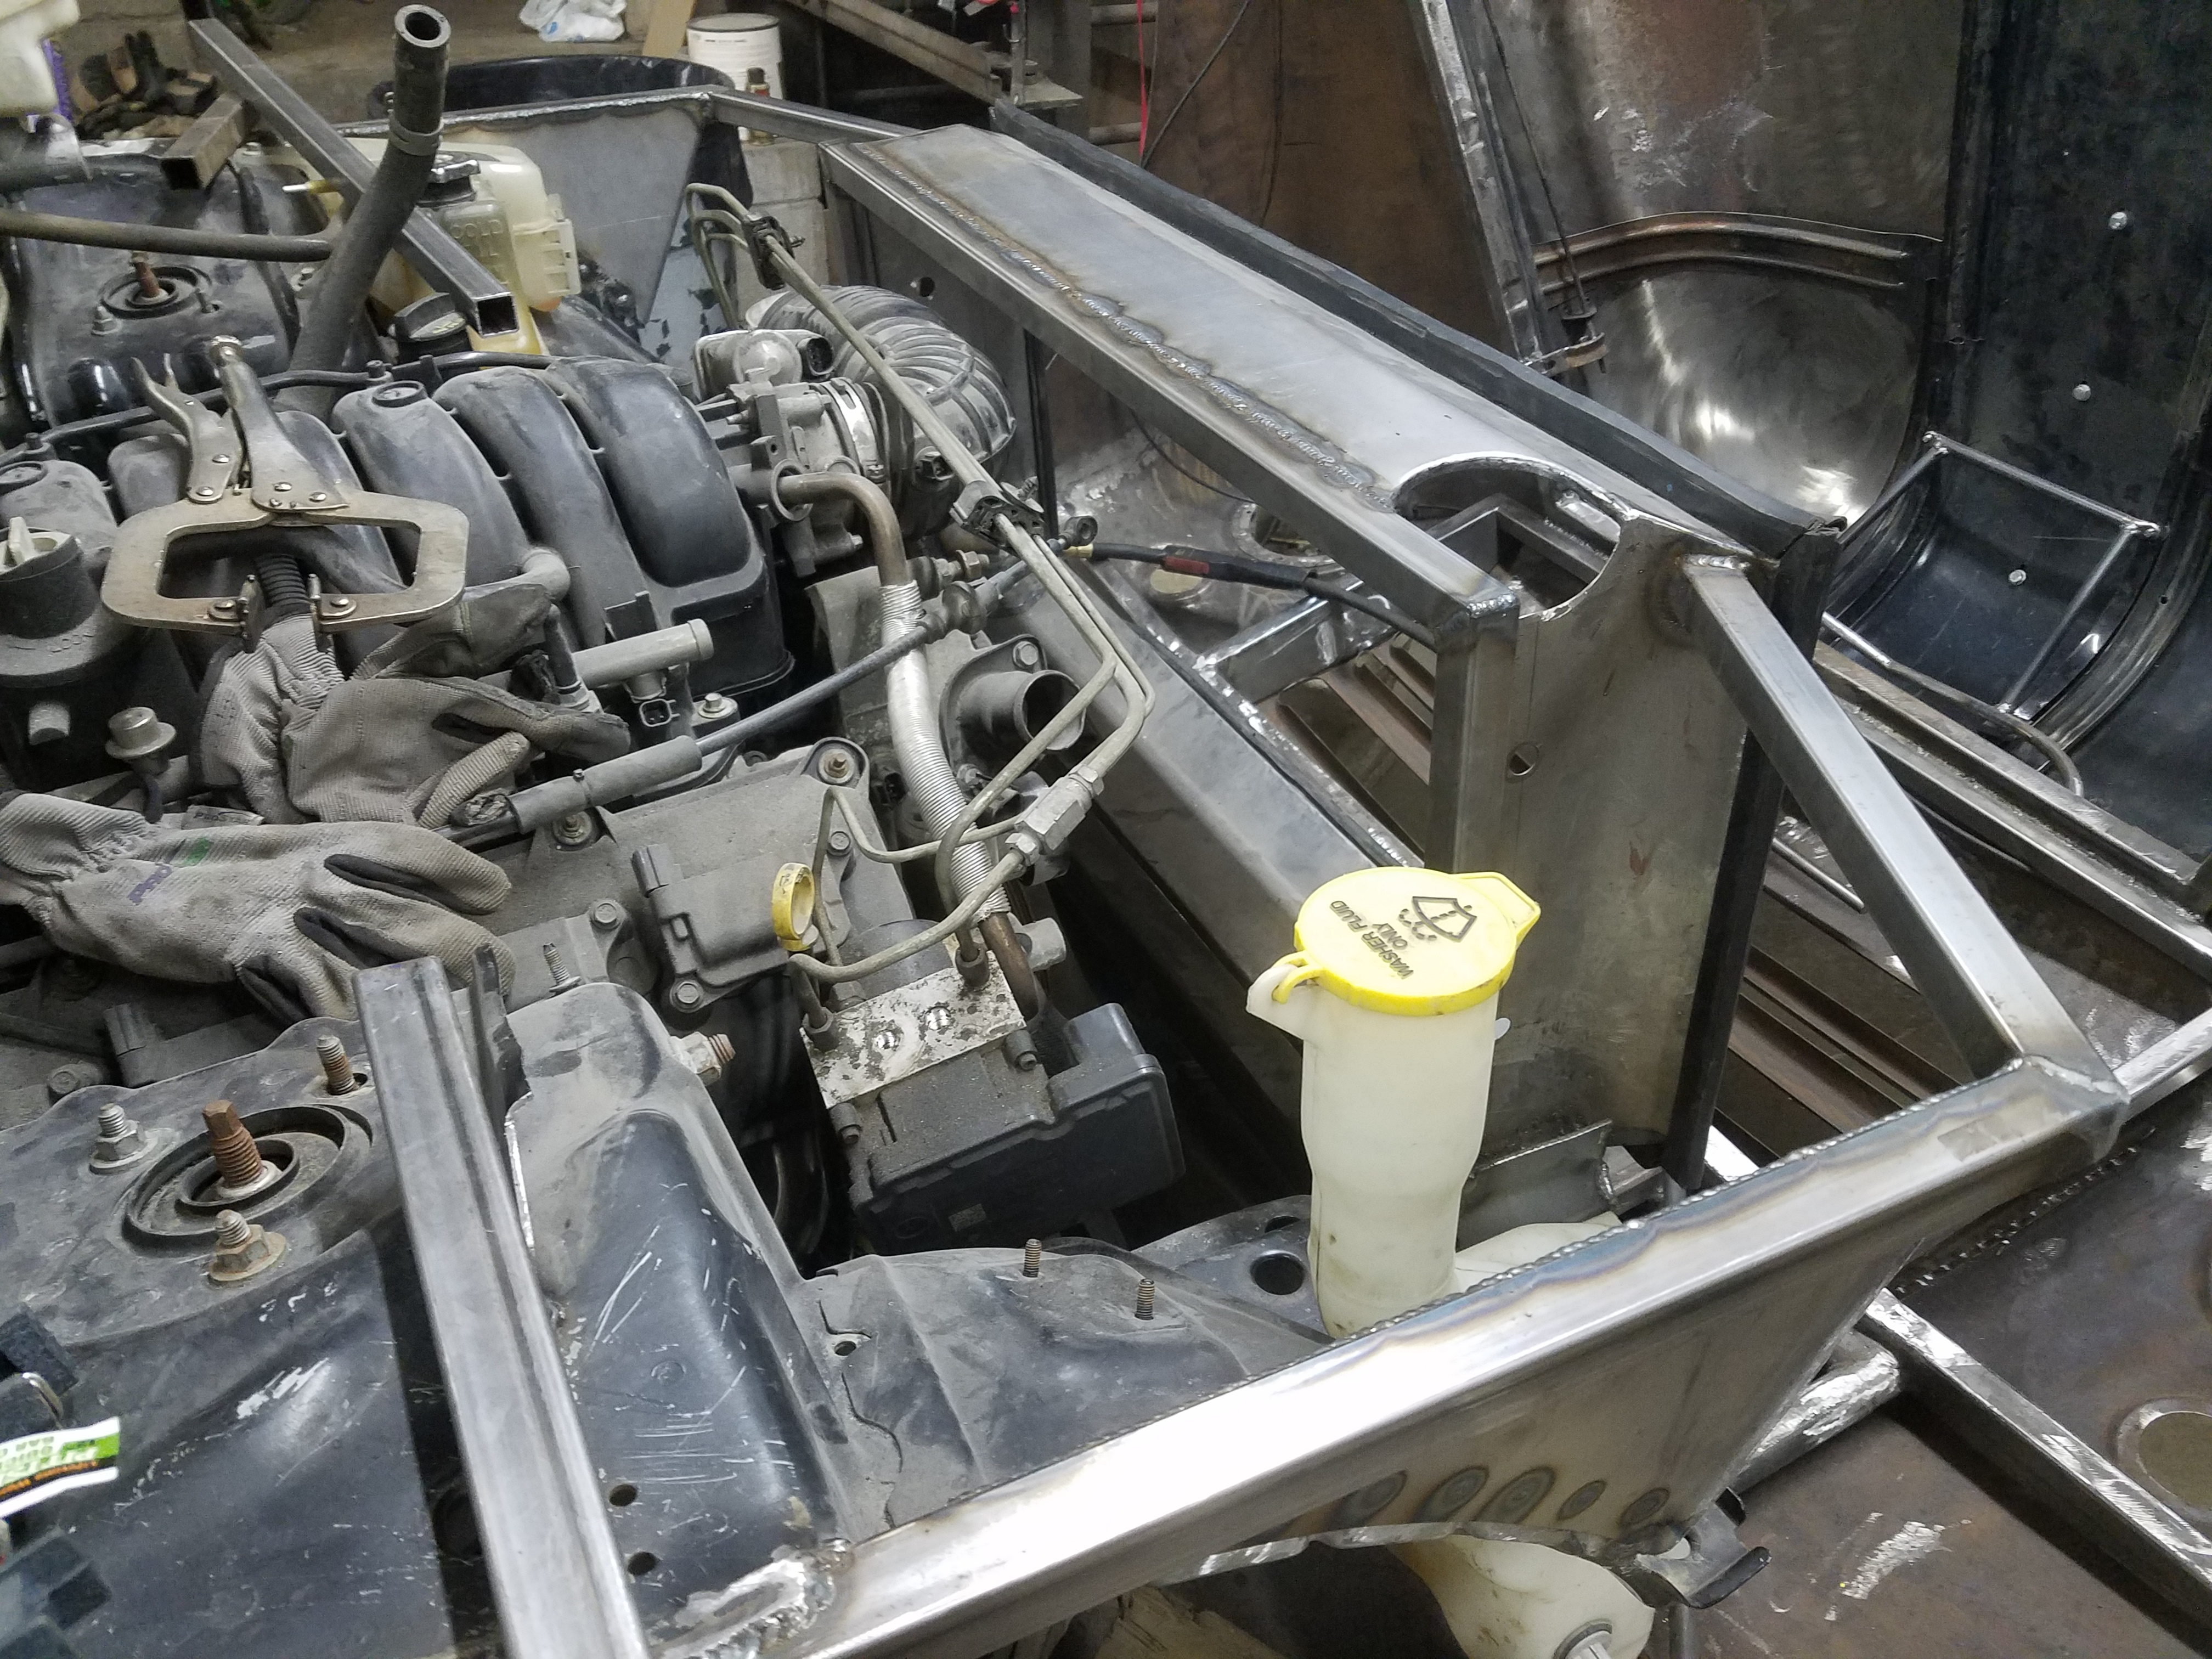
Apparently, I cannot delay the gratification ;) Actually, I had every intention of massaging the passenger side firewall, but ran into a space issue that my mind has to chew on for a while. There are so many options when it comes to heater boxes. On one hand, I would really like to use the Charger heat/ac unit because the controls would simply plug in and work. But, then, the PT Cruiser unit fits so much better in the truck. But, the PT Cruiser heat/ac unit is physically smaller (with a physically smaller A/C condenser and a smaller inlet/outlet on the small heater core)... So, it won't produce as much cold air (nor will it produce as much heat, but that's of little concern). But the PT Cruiser unit will interface more easily with the dash vents and has completely mechanical controls. There is still the option of going with a minivan unit at the back of the panel van. But... But... But... You understand why my mind is churning.

Yup... Front fenders.

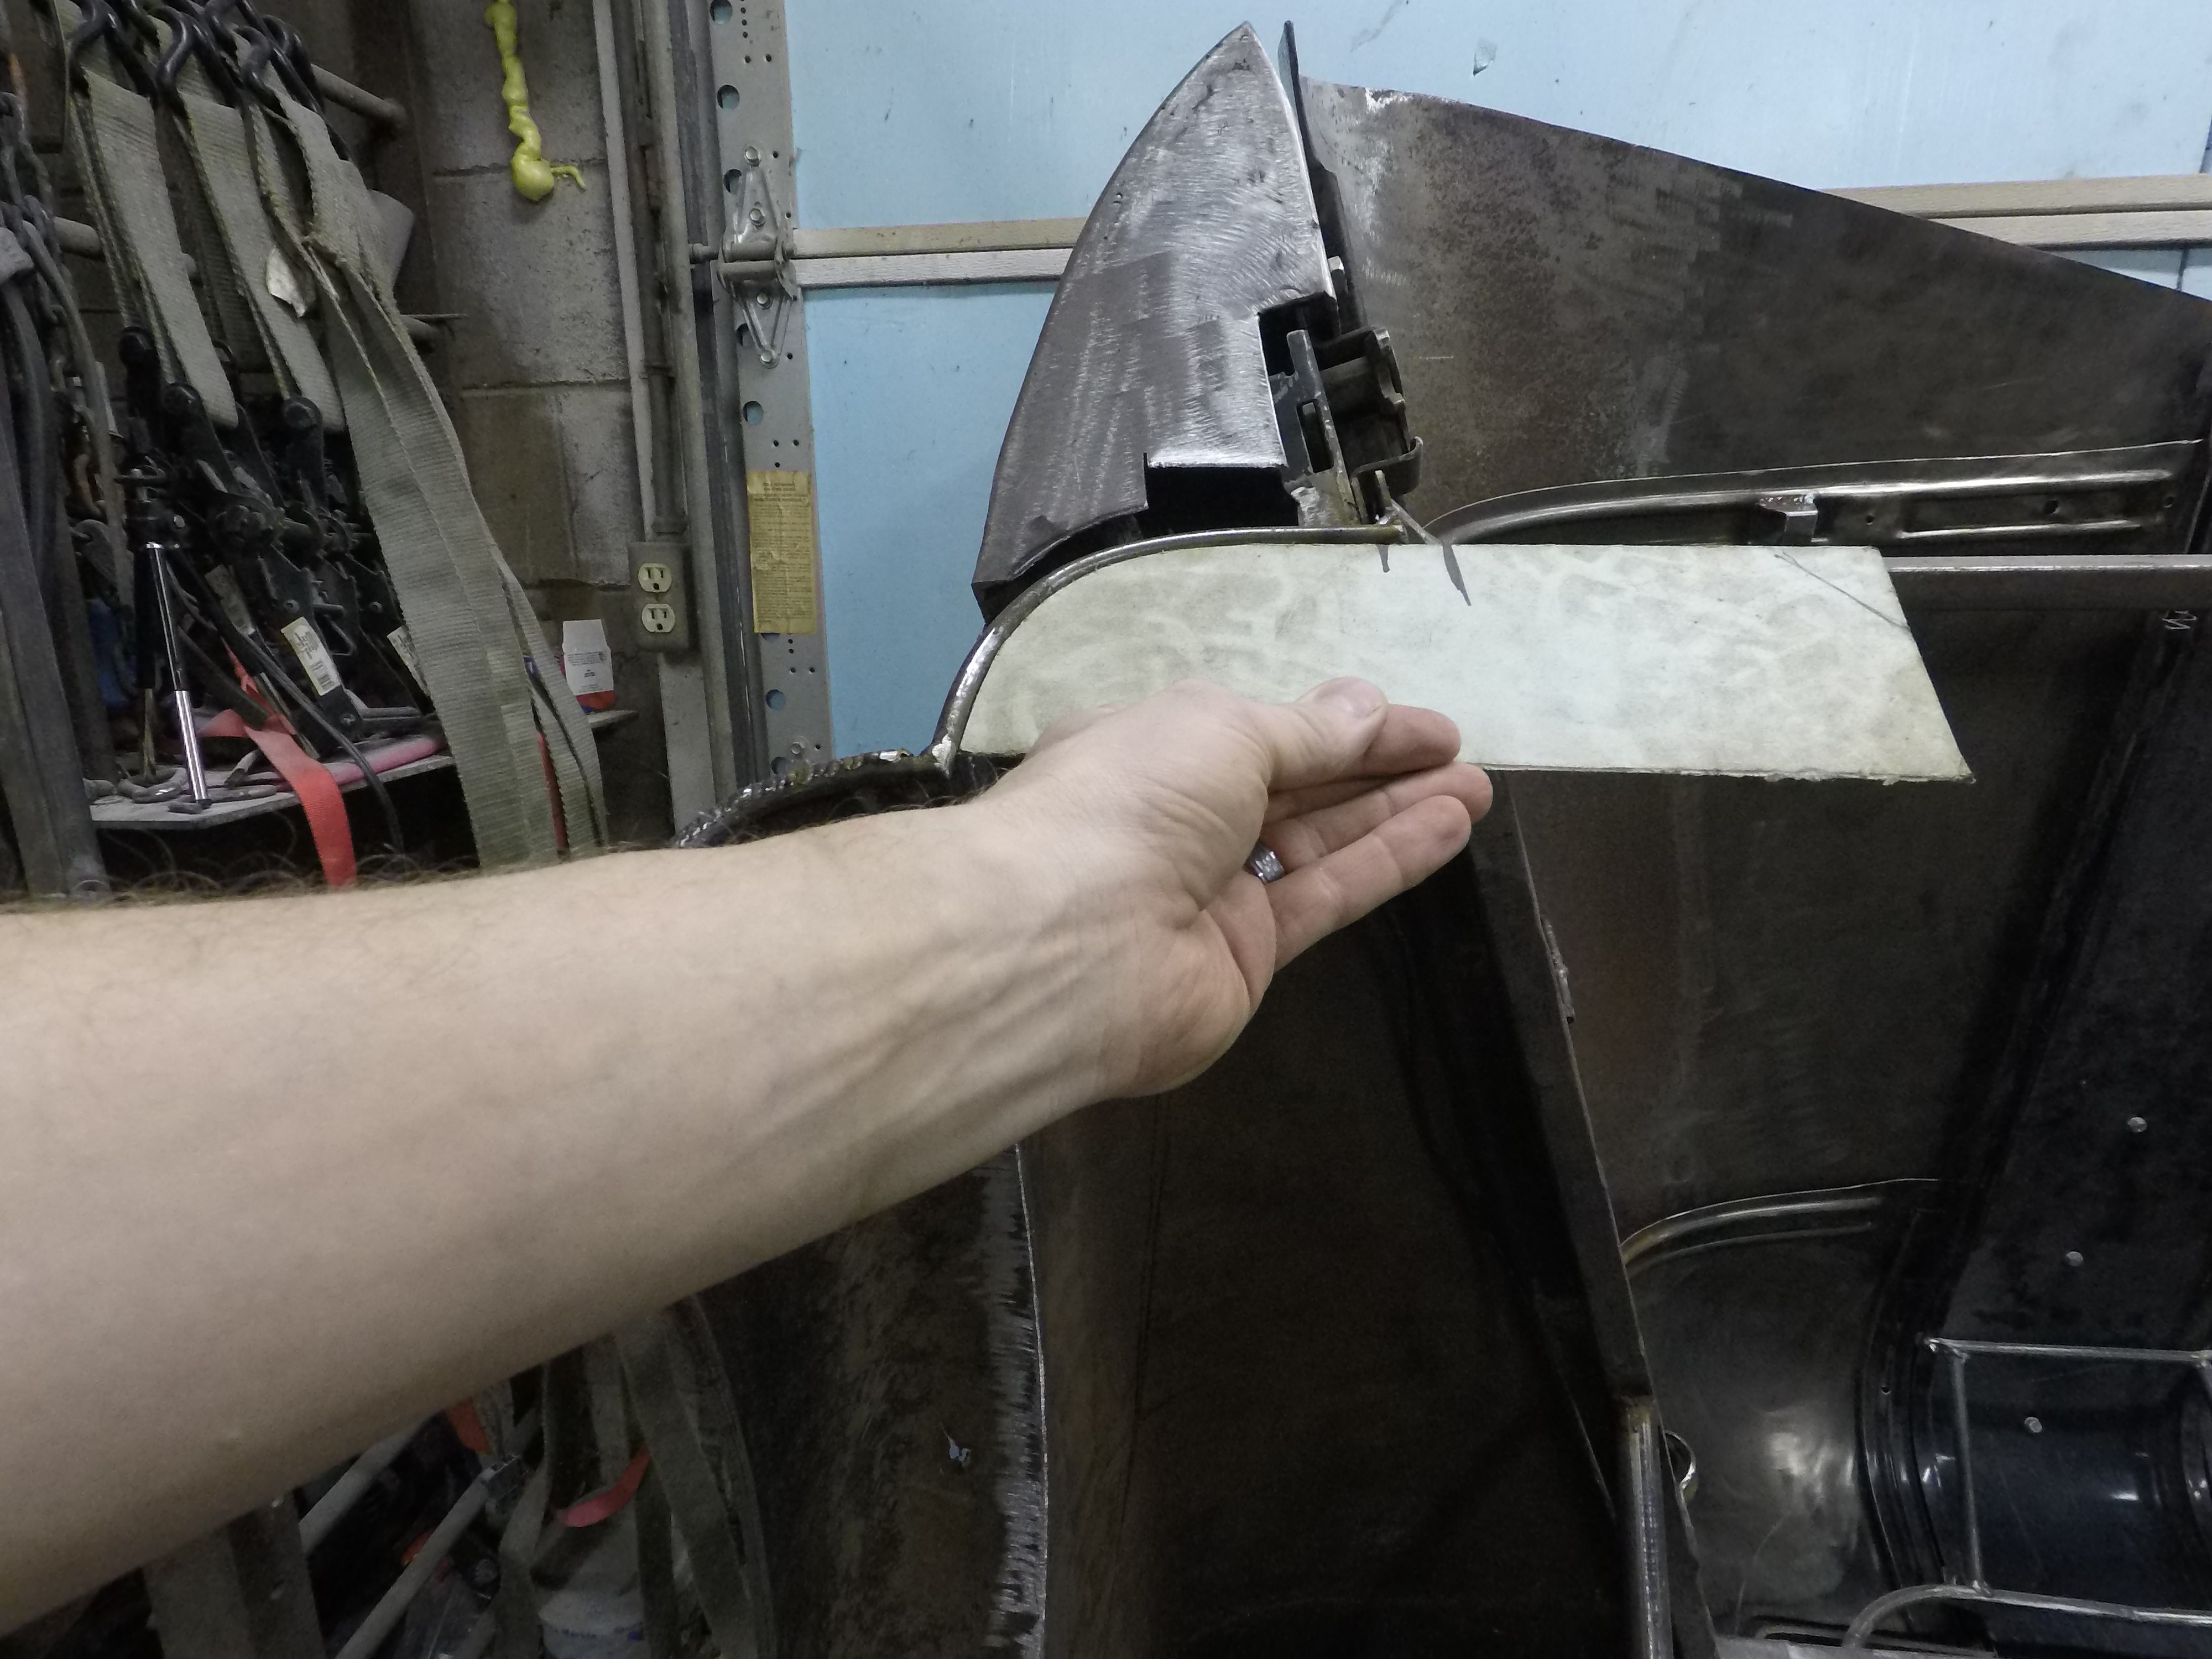
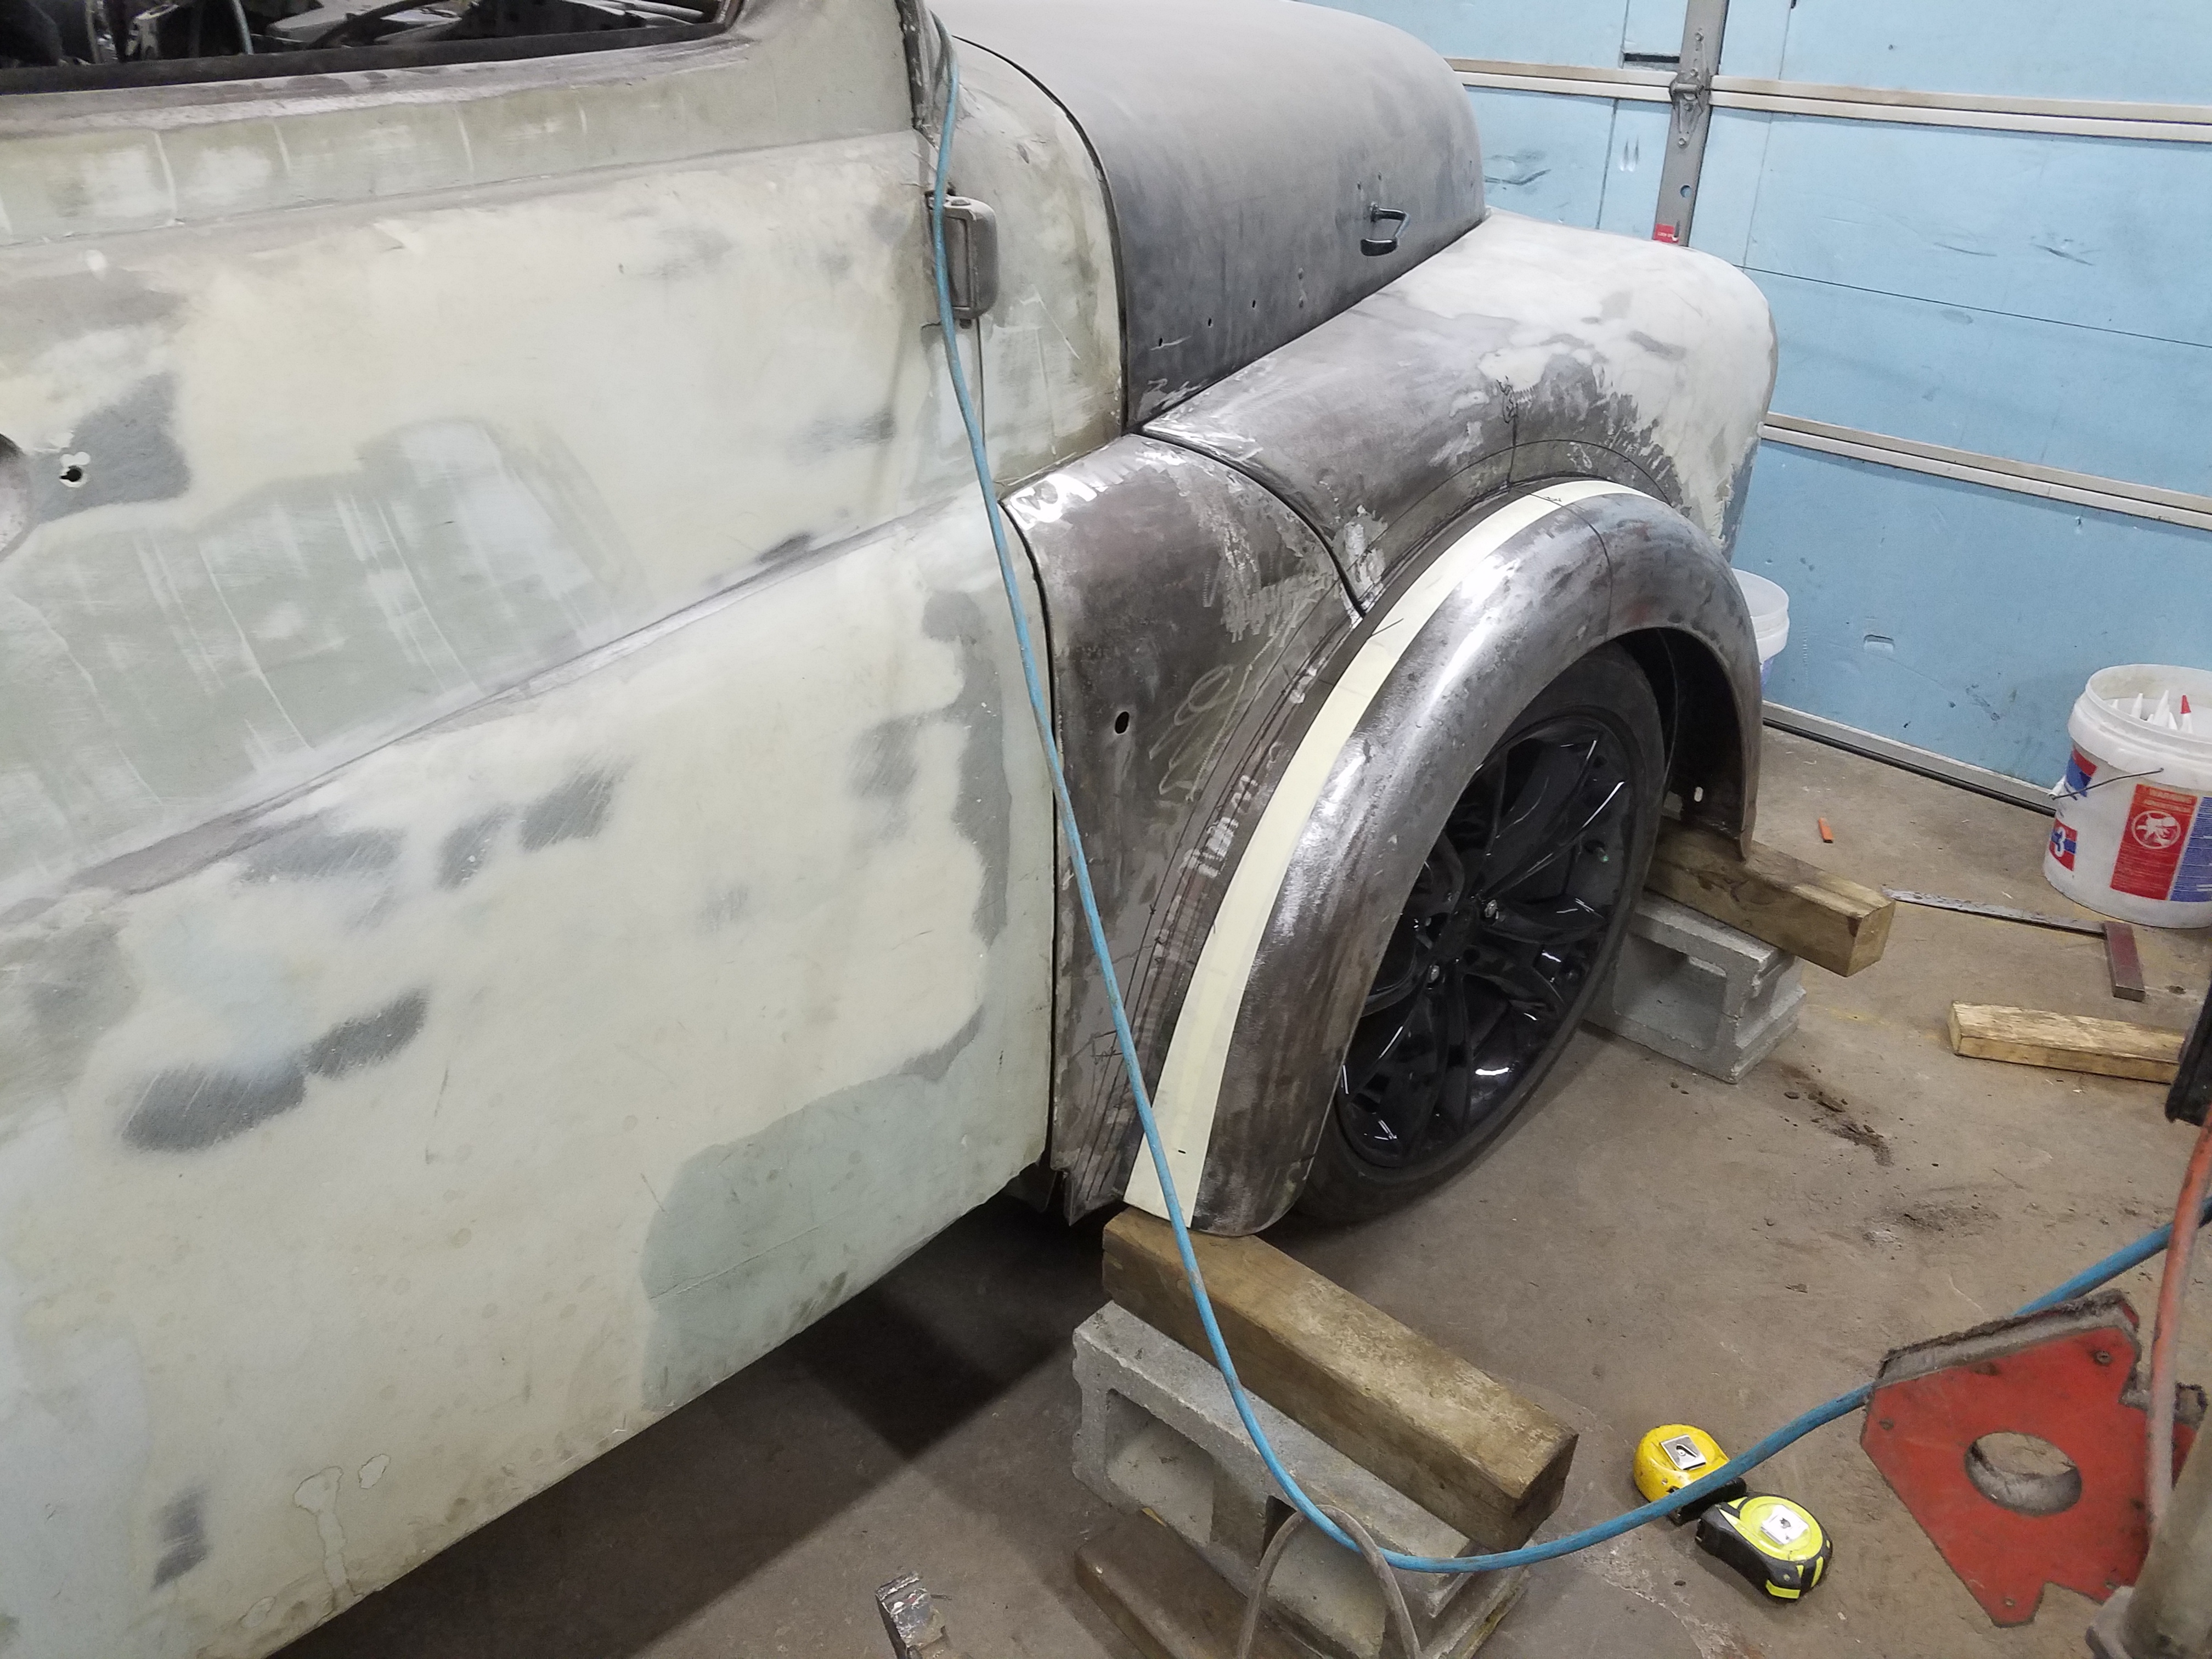
I started off by stripping most of the paint and ancient Bondo off the donor fenders. I picked these rear fenders up from a guy who had them left over from his 1950 (or so) Dodge Pickup build. Paid a pretty penny for them, in my mind, but I was still happy to have them and not have to pay shipping. Once I had them sufficiently stripped, I began to measure and lay down some tape where I might cut them apart. The fenders were 11 1/4" wide... I needed 4" reveal... So cut about 7" off... But not here, only there... Oh... Follow the body... Lots and lots of reckoning, figuring and head scratching happened here.

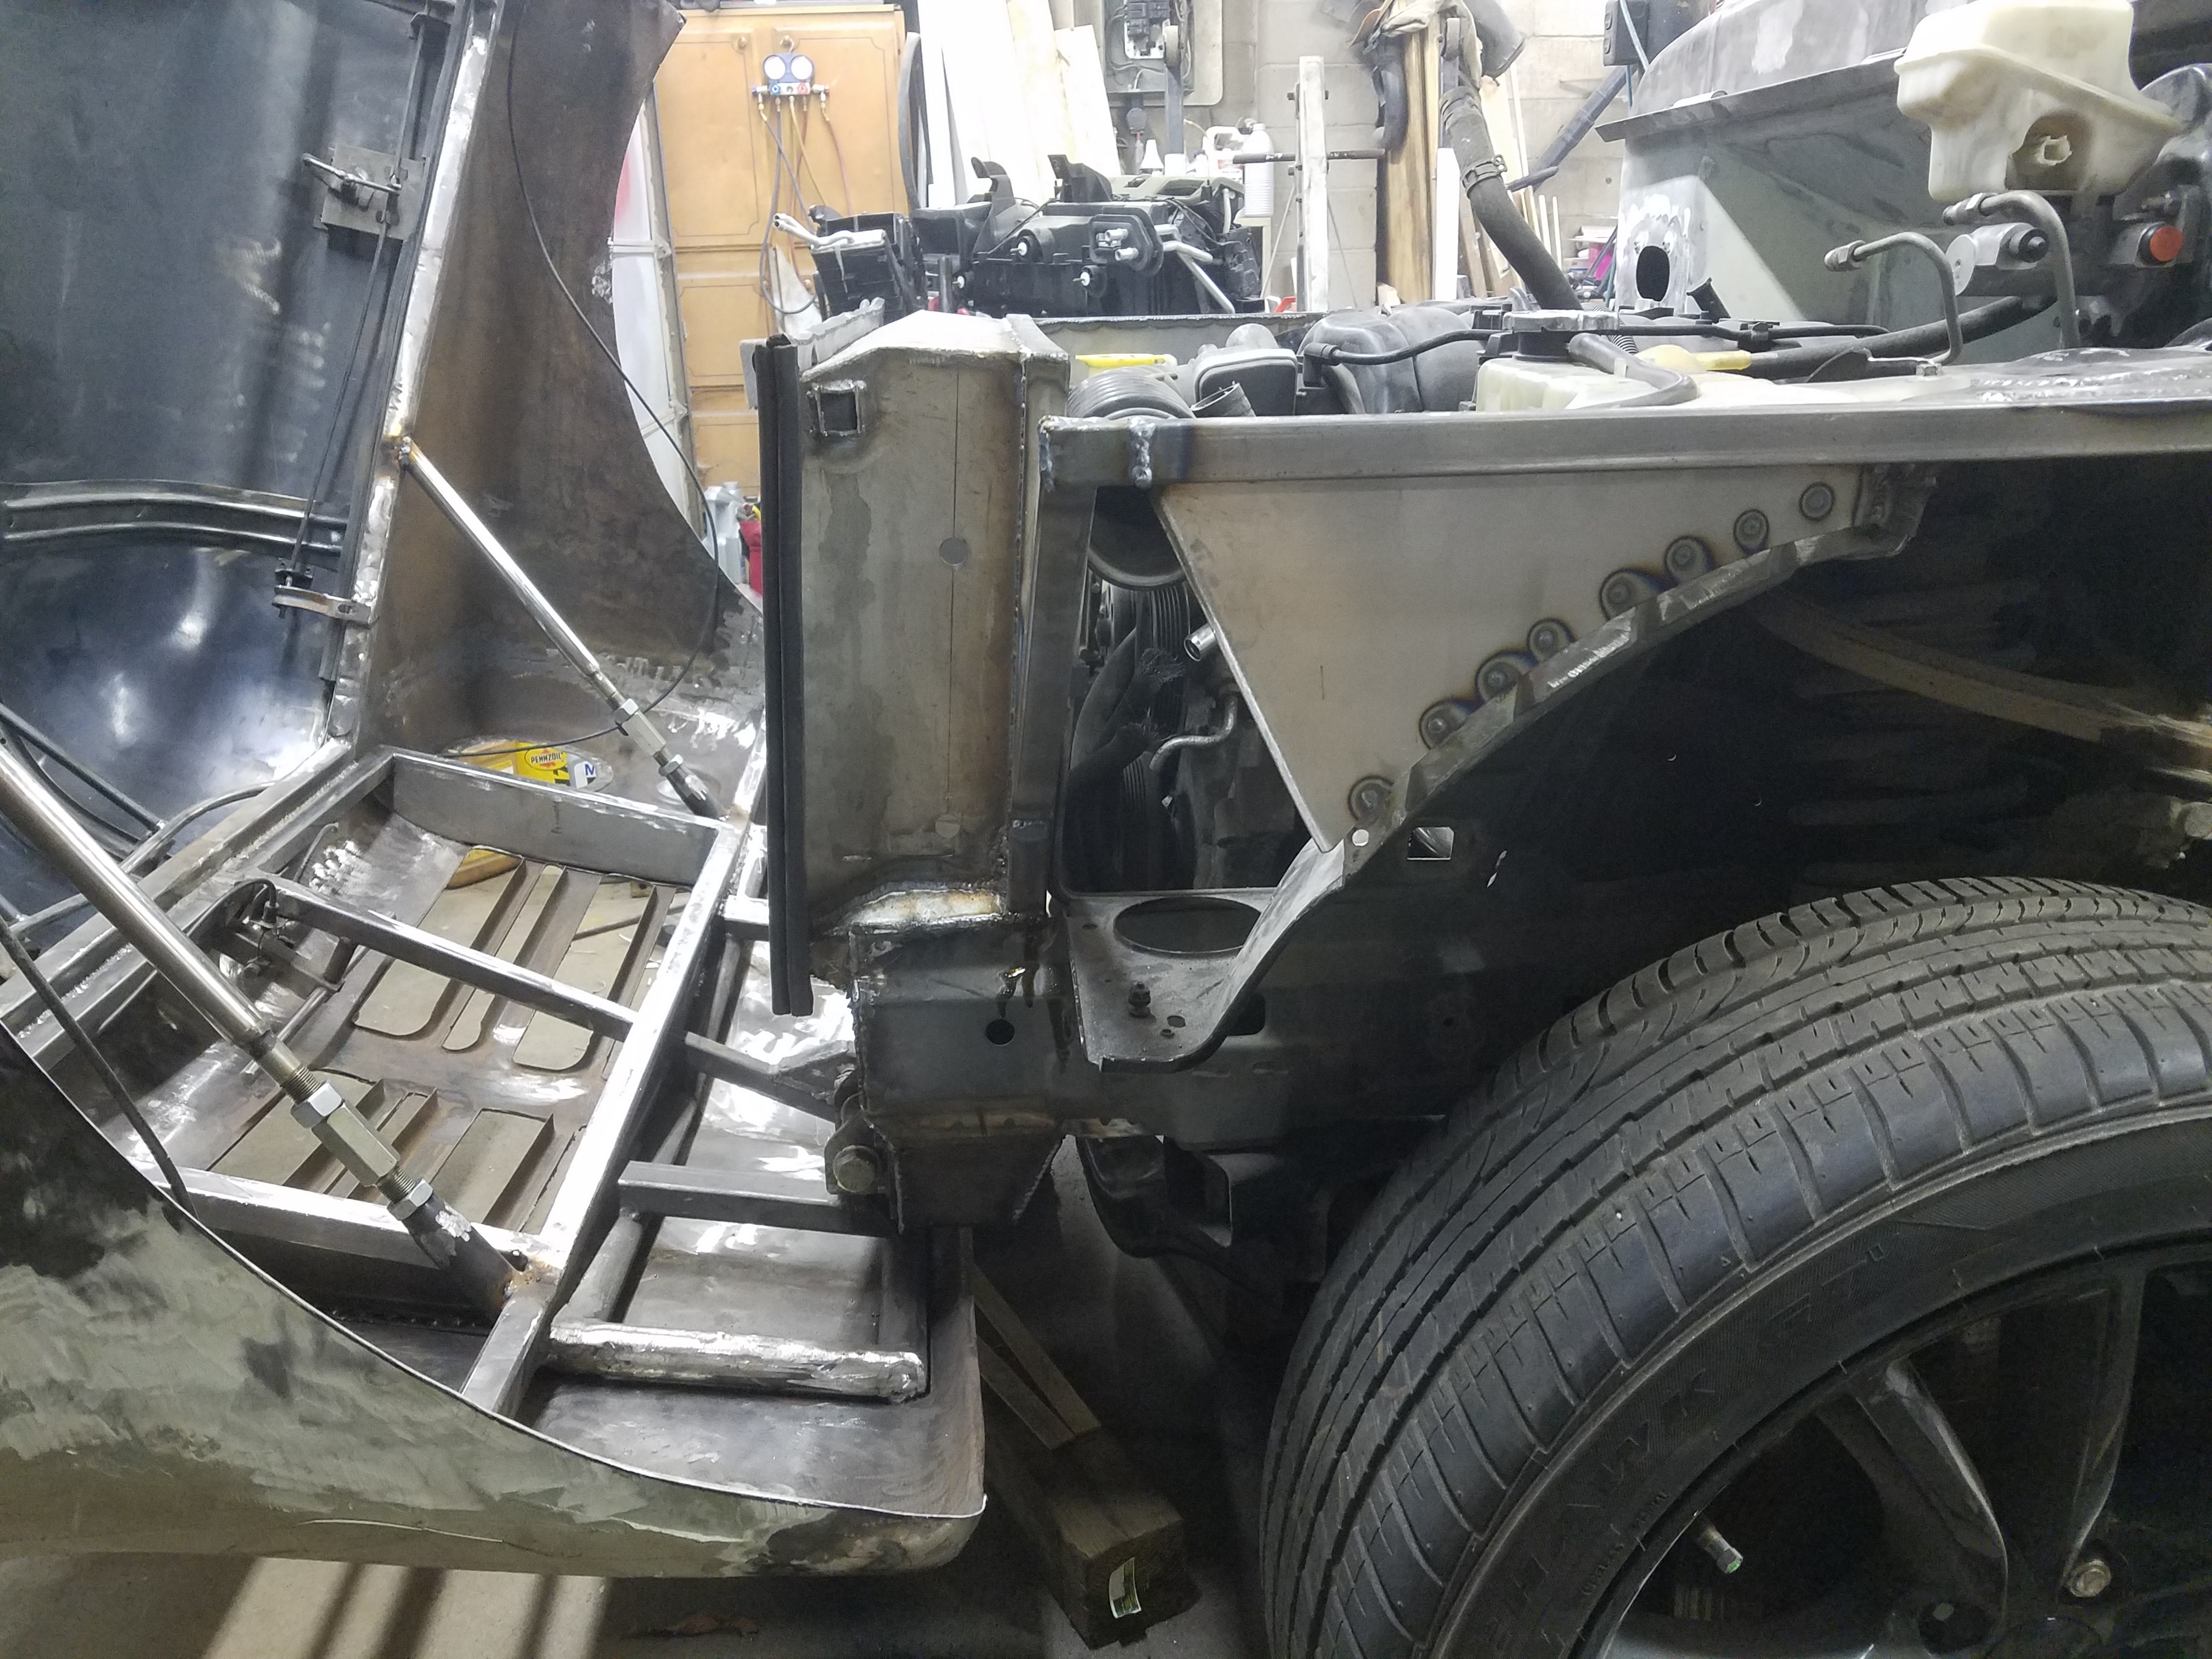
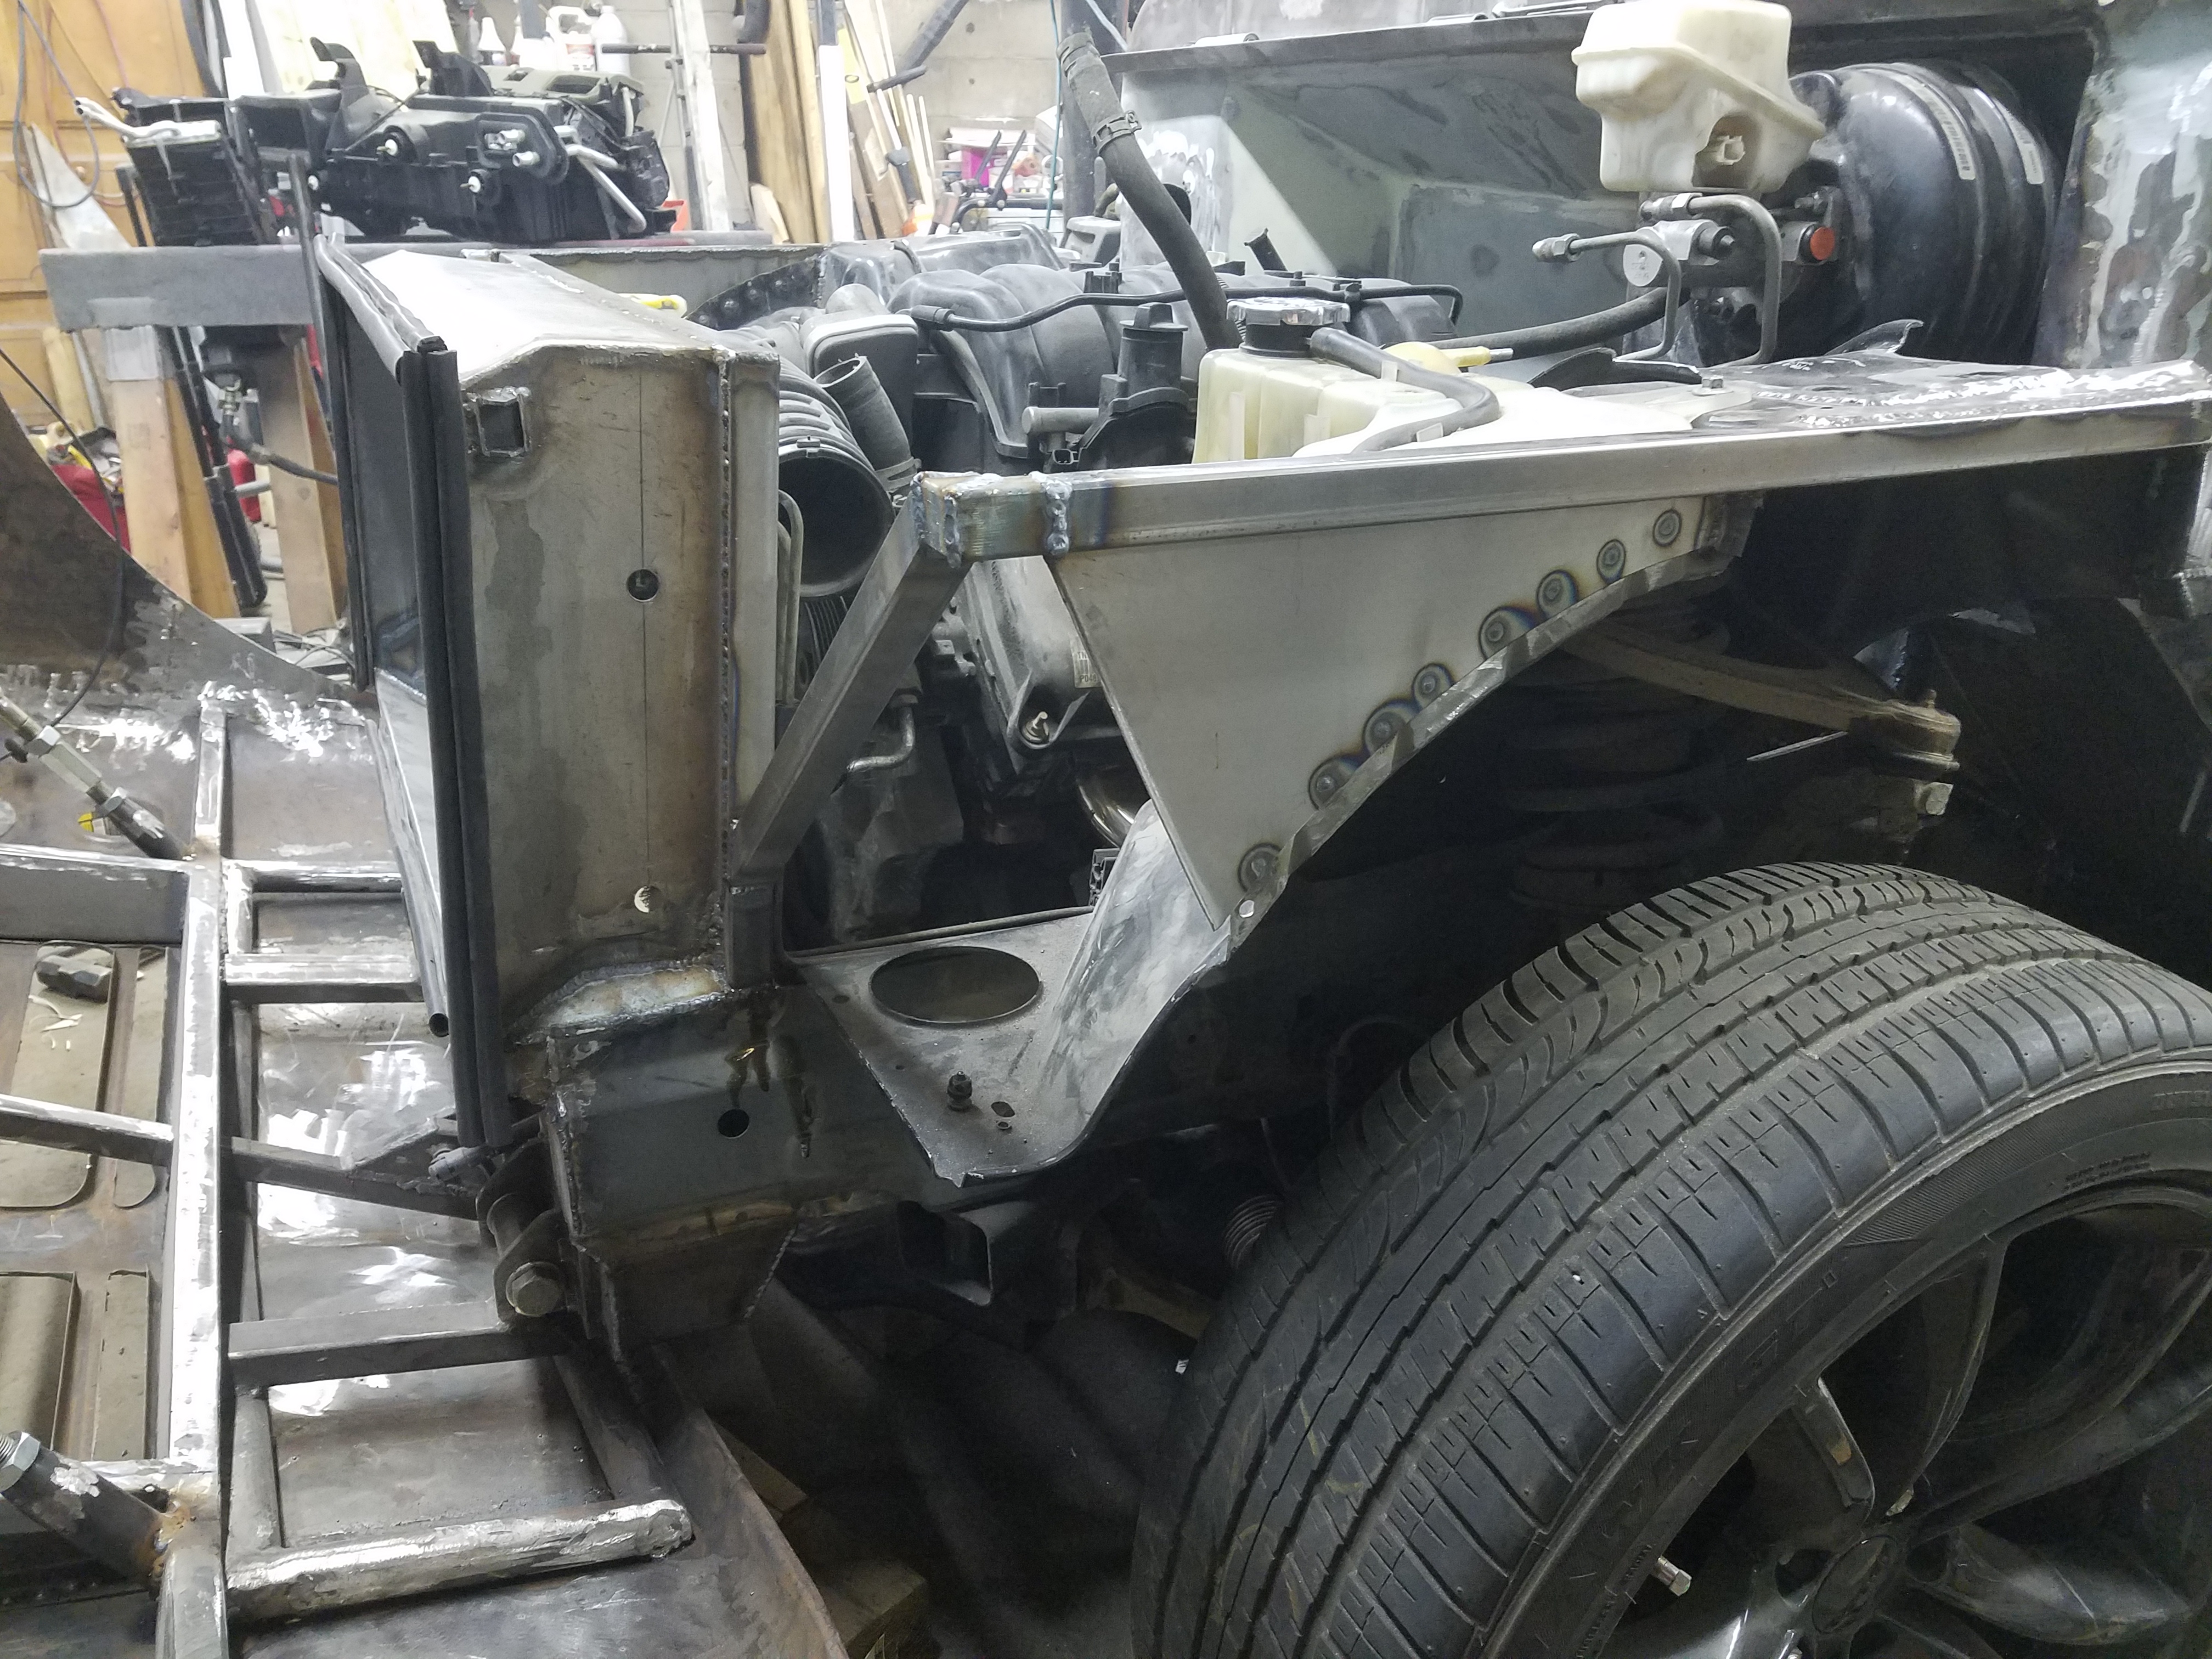
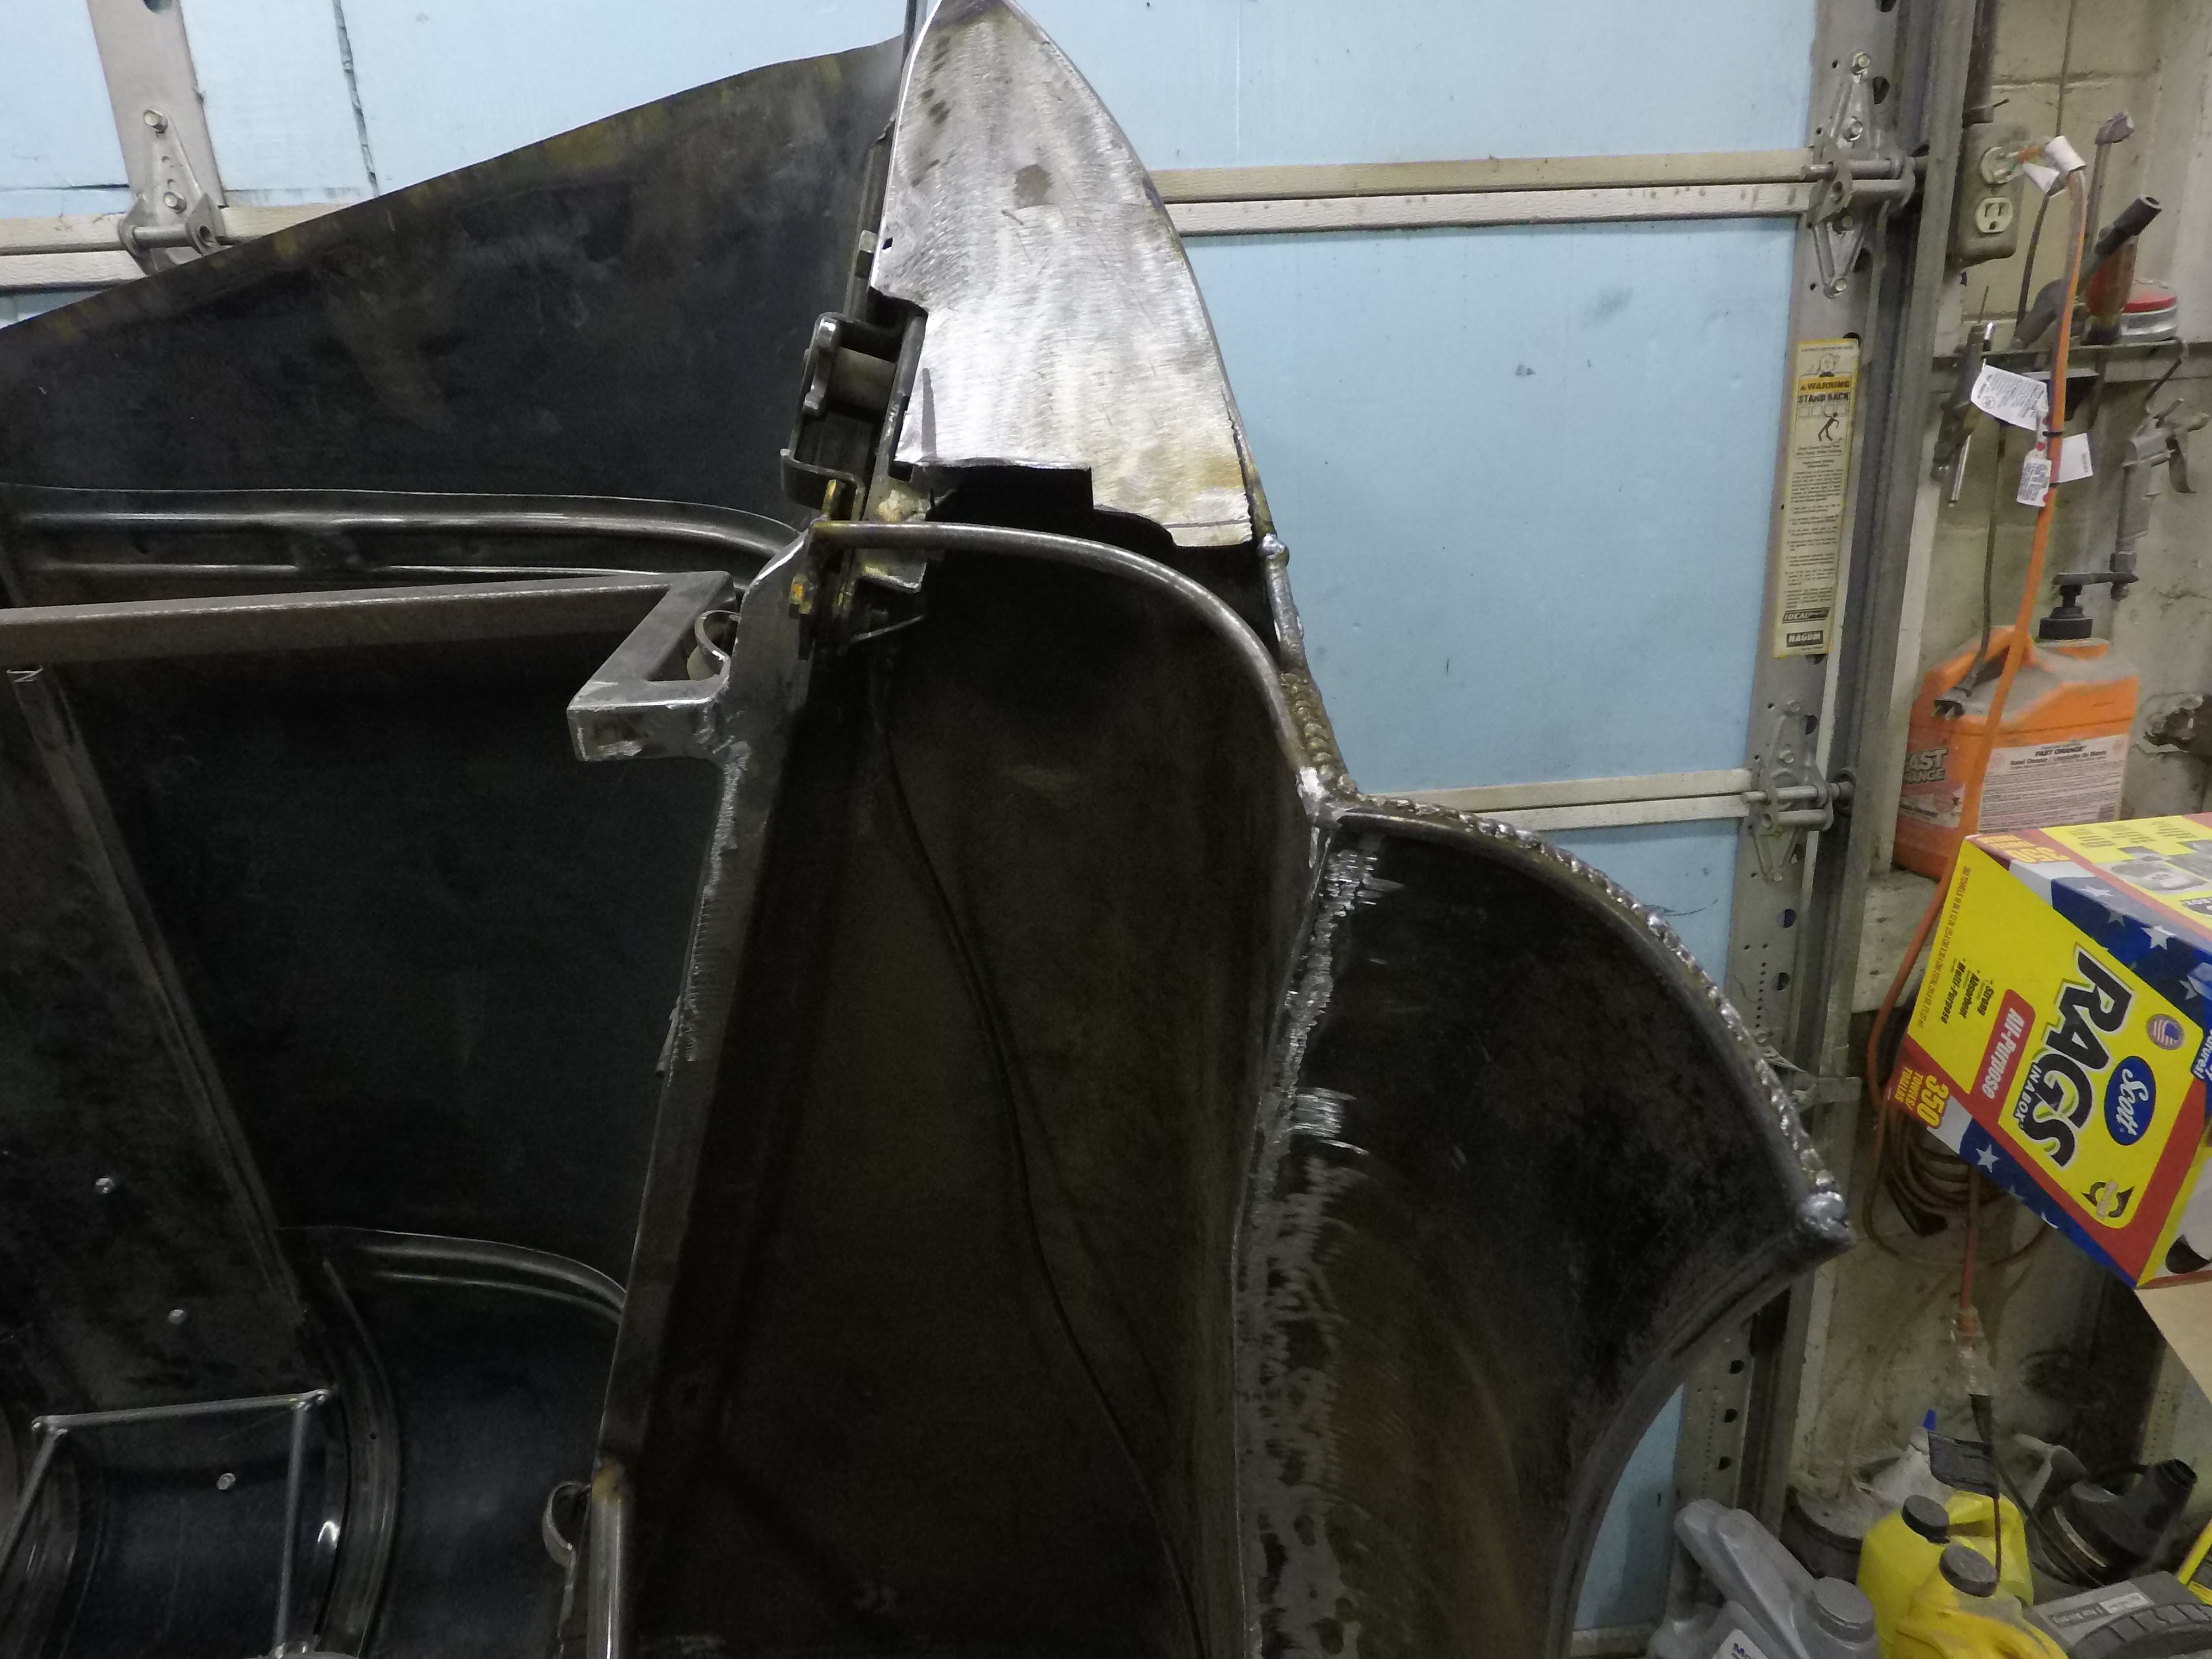
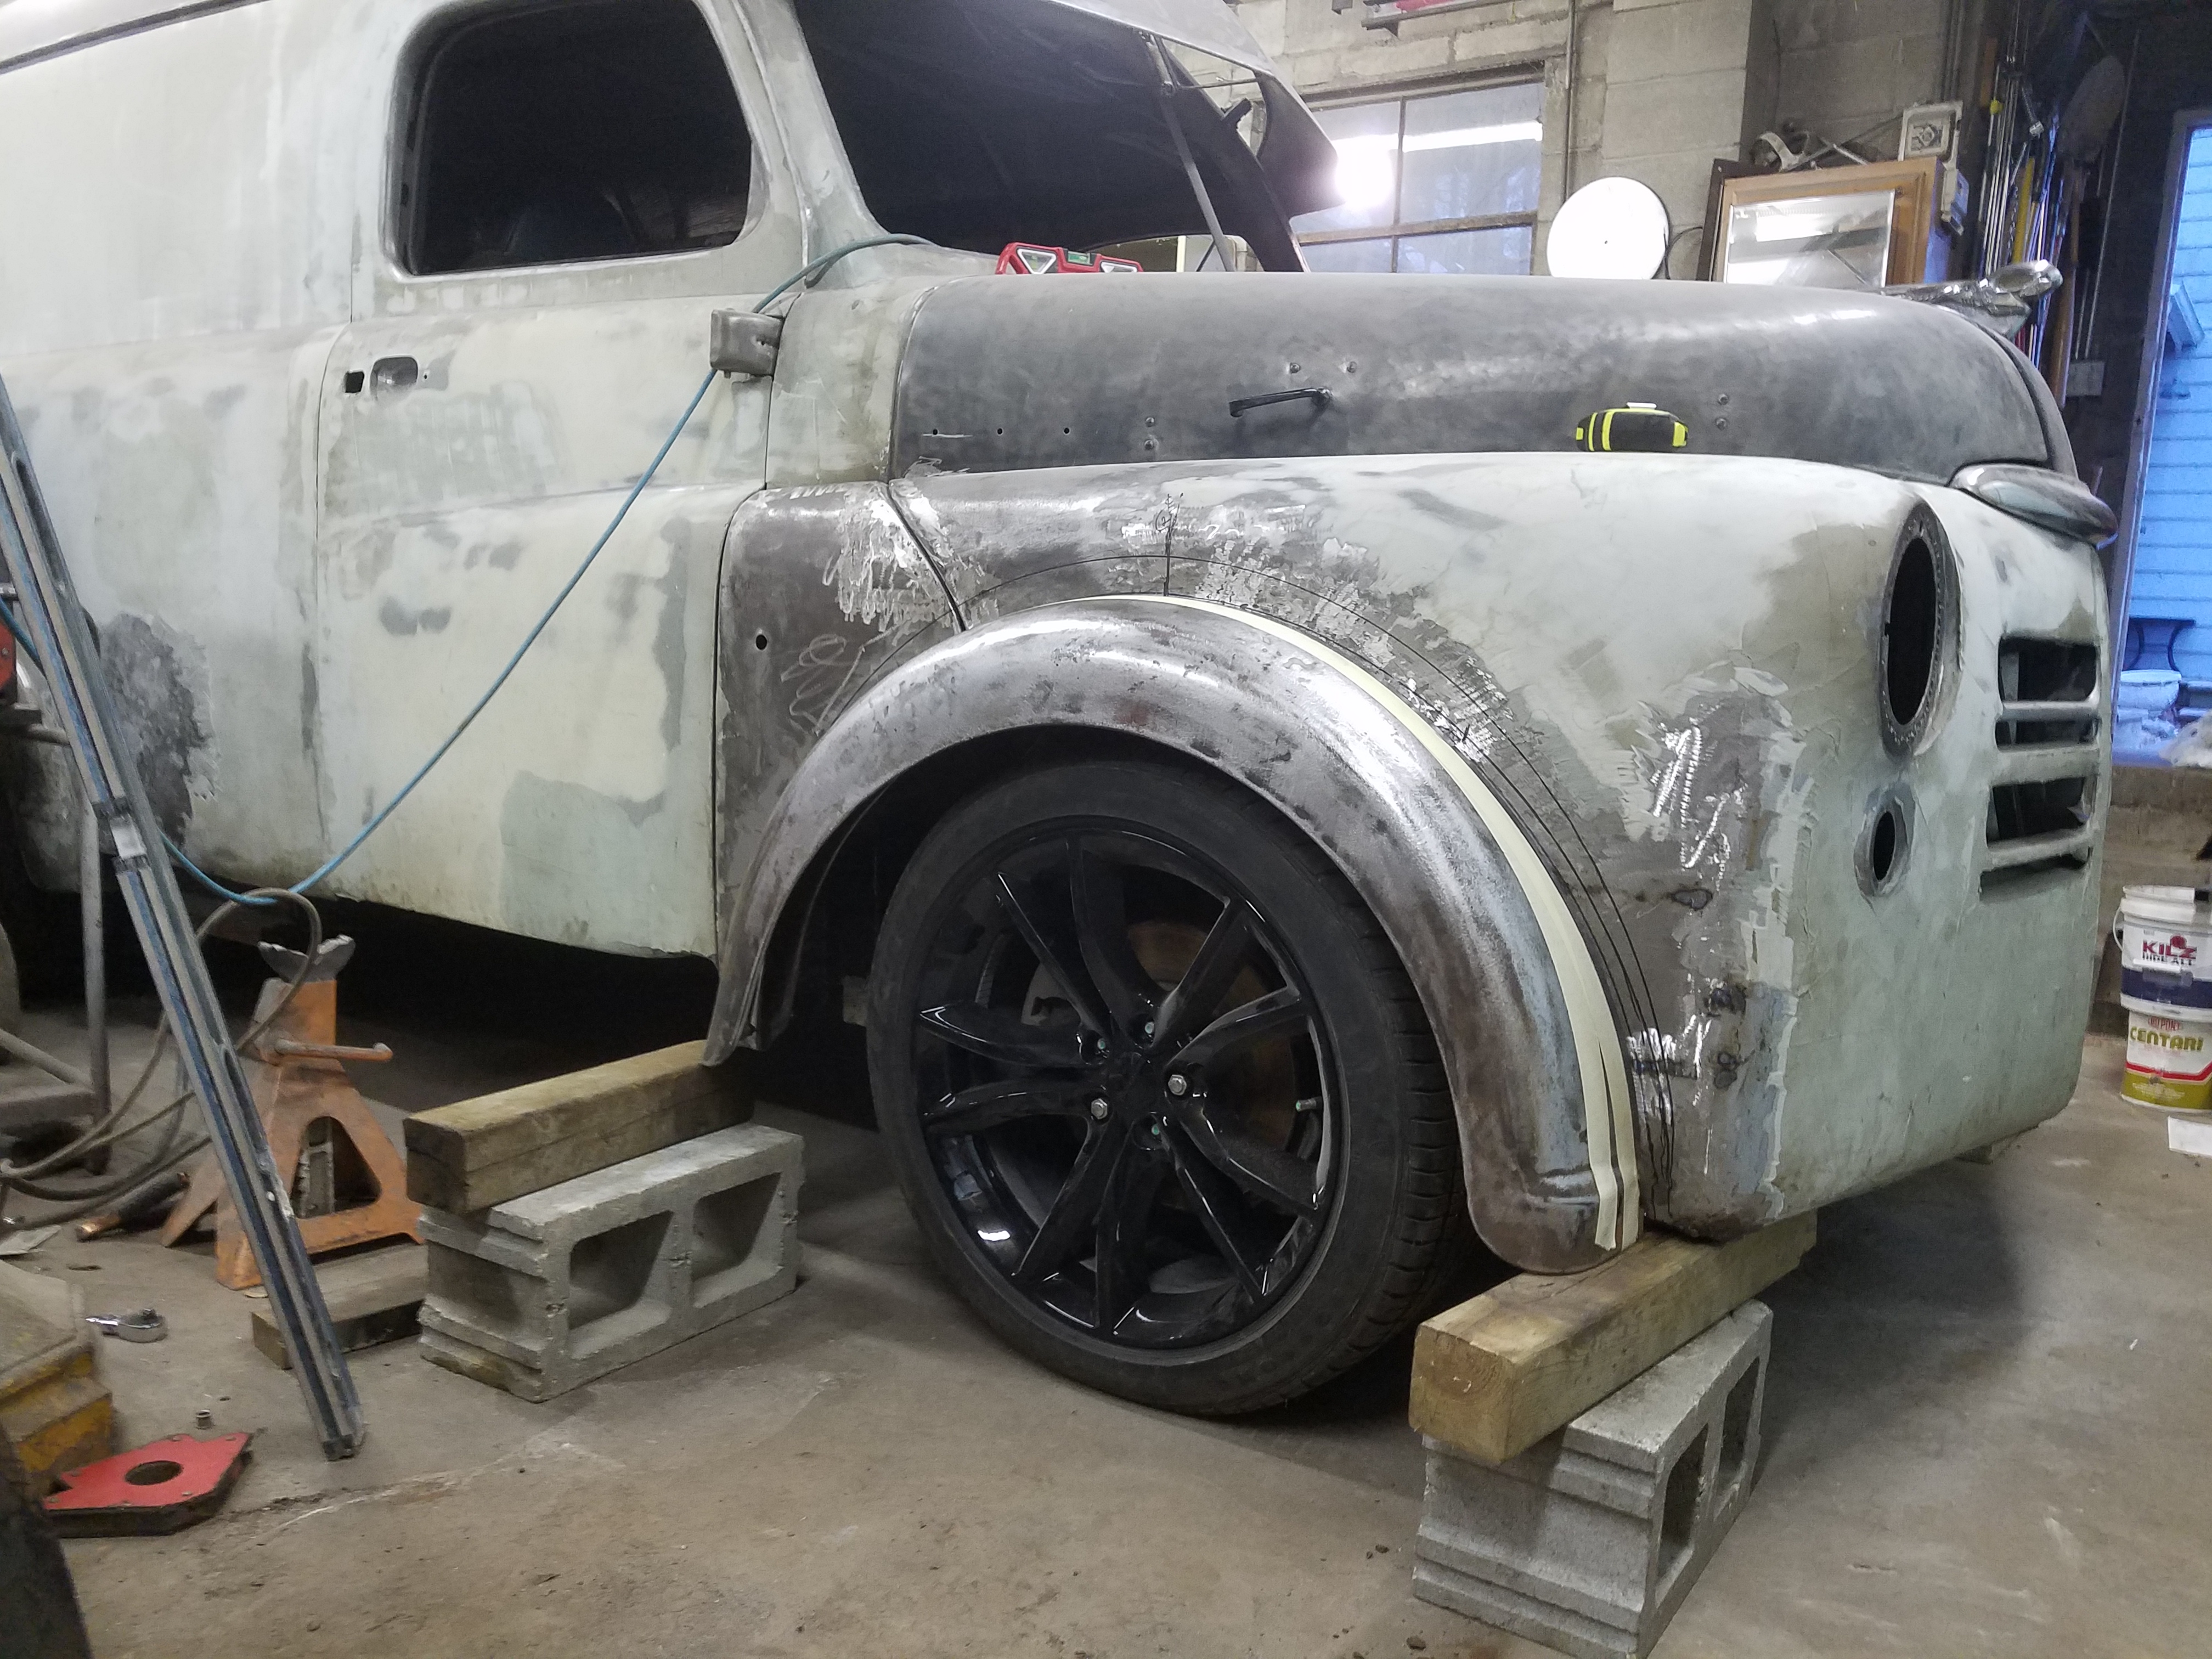
Actually, I mocked the fenders up in place more than a few times before I had them taped up (not that it really matters at this point). When I really started to look at things, I realized the wheels needed to go on the front end and the truck needed to sit on the ground. So, I spent the next hour or so getting all the stuff out from under the truck and setting her on the ground (Man it's nice to see her on the ground!). After checking the level a few times (and measuring, measuring, measuring), I finally found a happy place for the new fender flares. You may see all the marker lines where I planned to cut it the original fenders. The fender flares ended up about an inch forward of where the openings were in the original fenders. That centered them on the new location for the wheels (hmmmm... I may have just realized why the rear wheels were off by about an inch. I must have placed the entire chassis about an inch forward. Eh... Stuff happens.) Once I had the fenders cut for the flares, I placed the flares and rotated them a bit so the leading and trailing edges line up with the body. I like the placement, but I decided to hold off on welding them in for a day. I figure it may be better to come back with fresh eyes in case I missed something obvious that would need to be taken care of before everything is welded.

The truck is finally taking on the look I wanted! Kind of like a road-racing Panel-Van!

Here are a few pics...

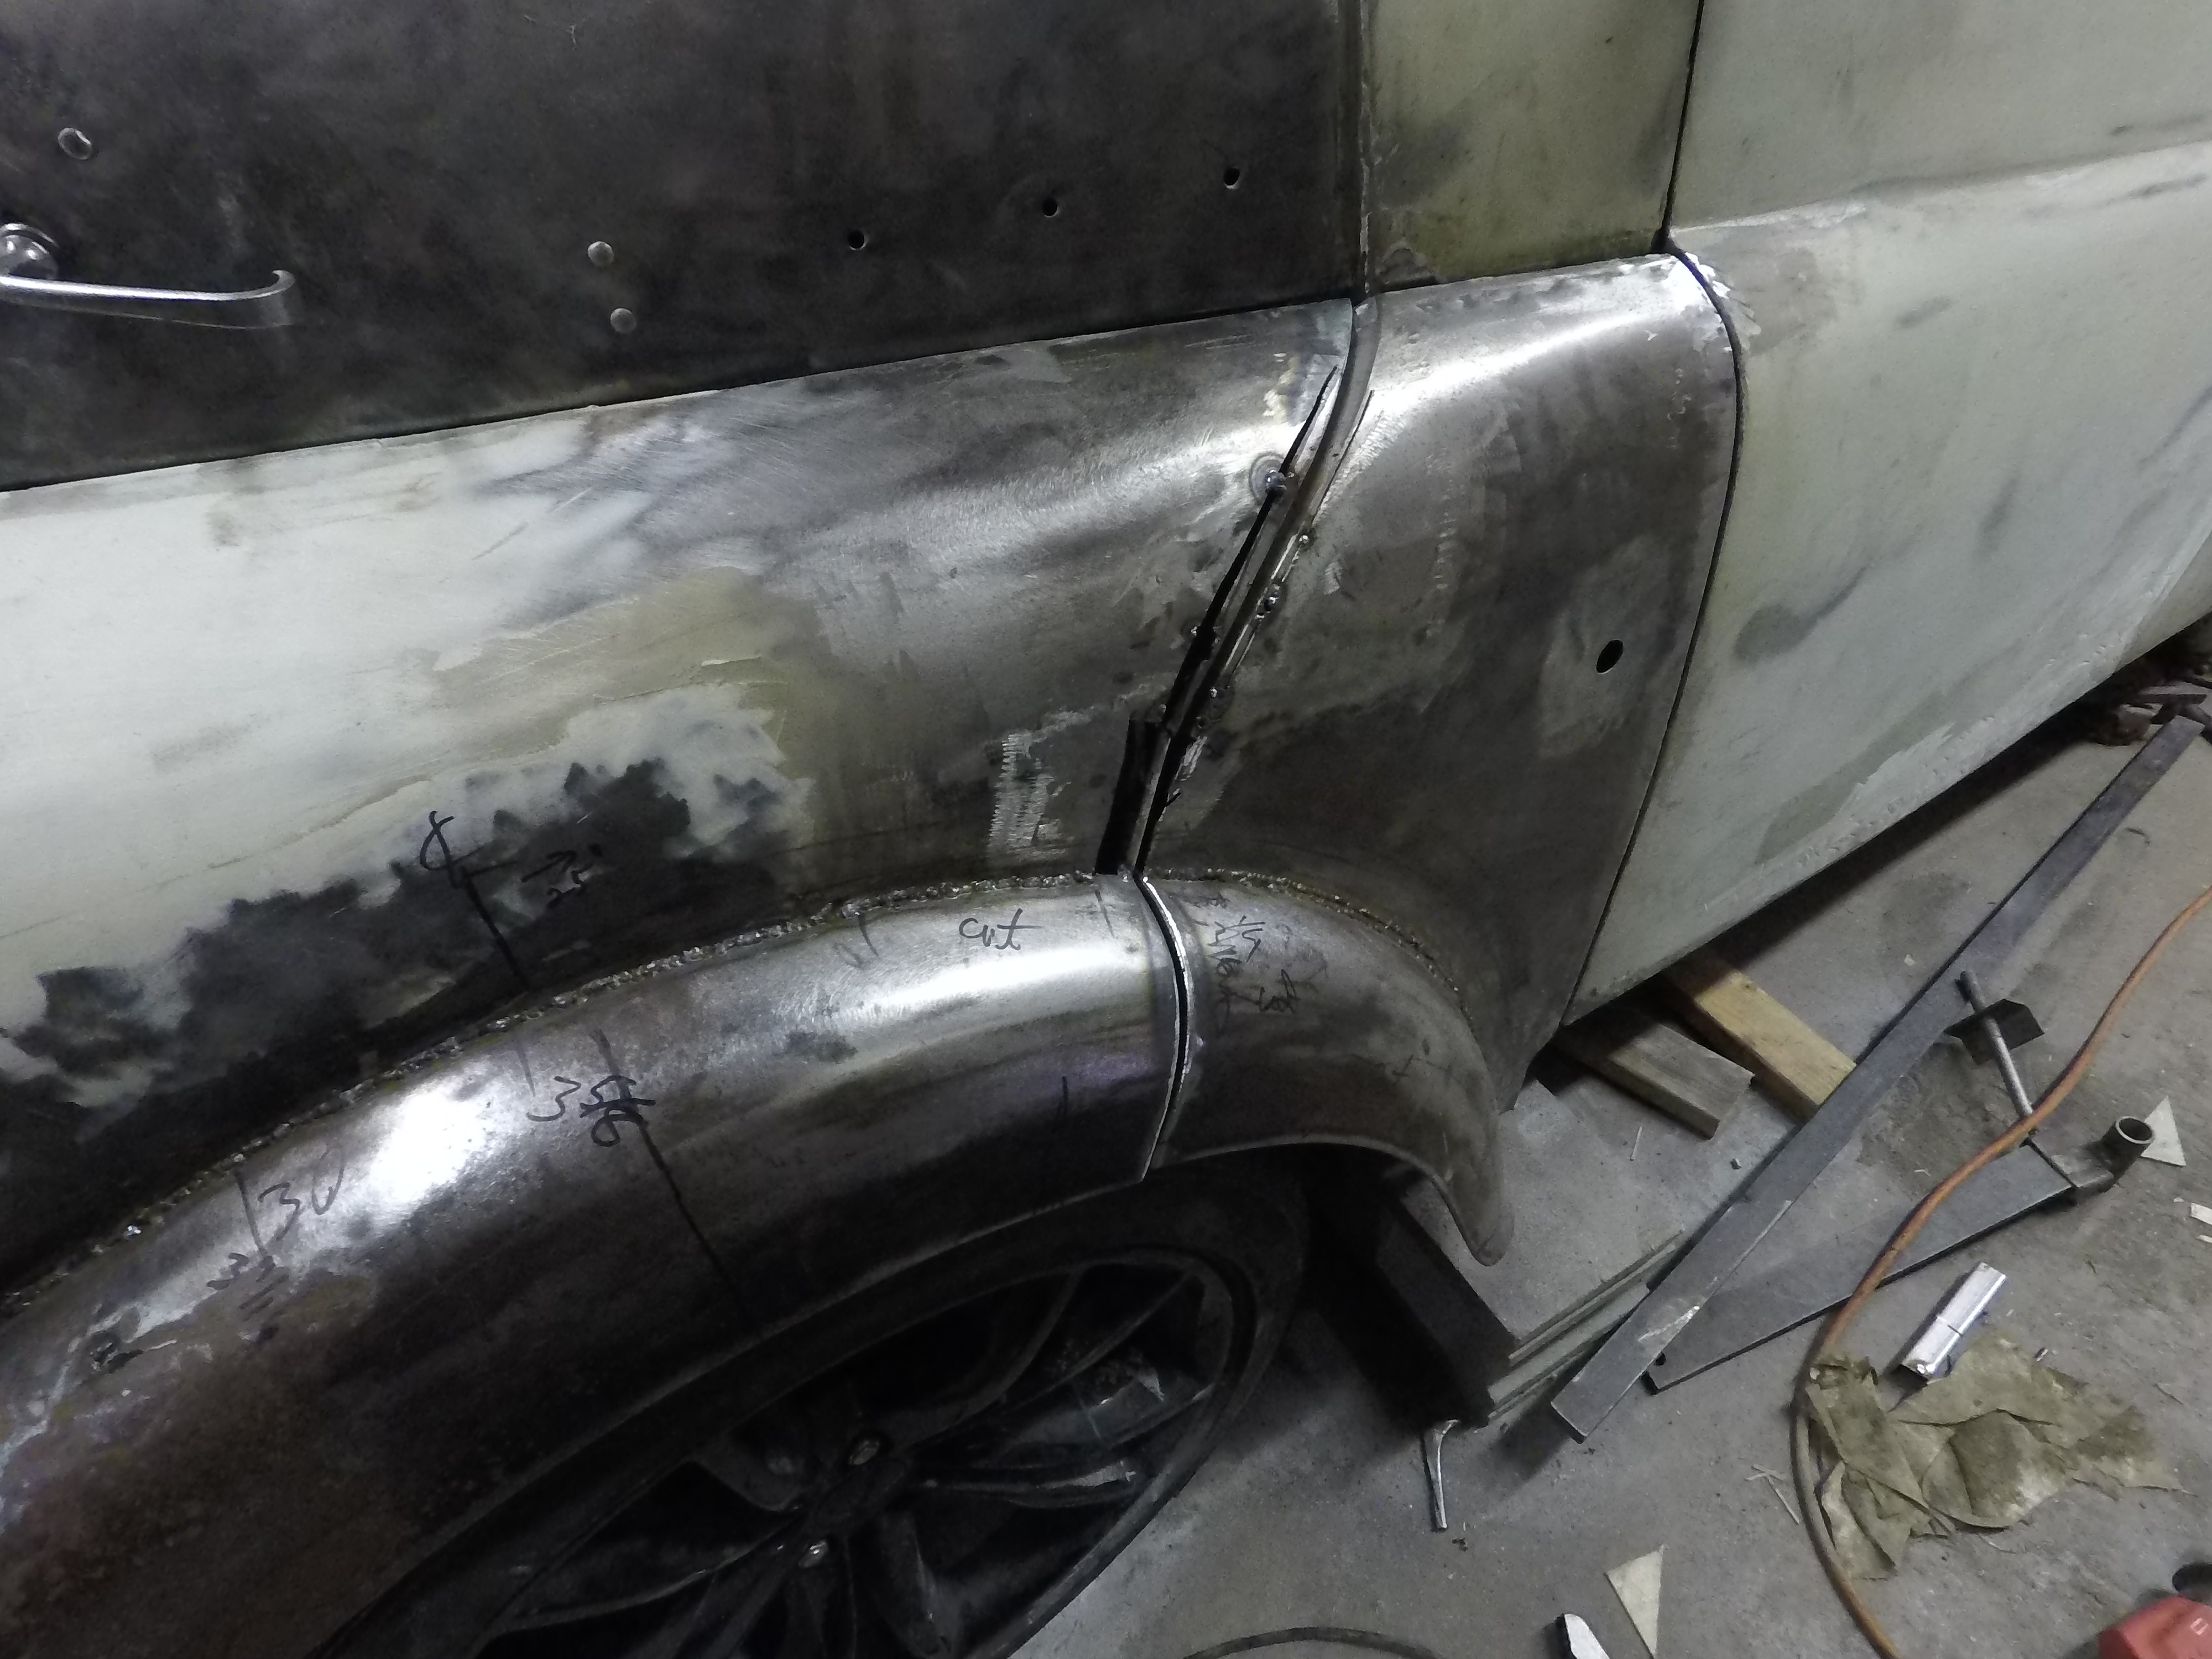
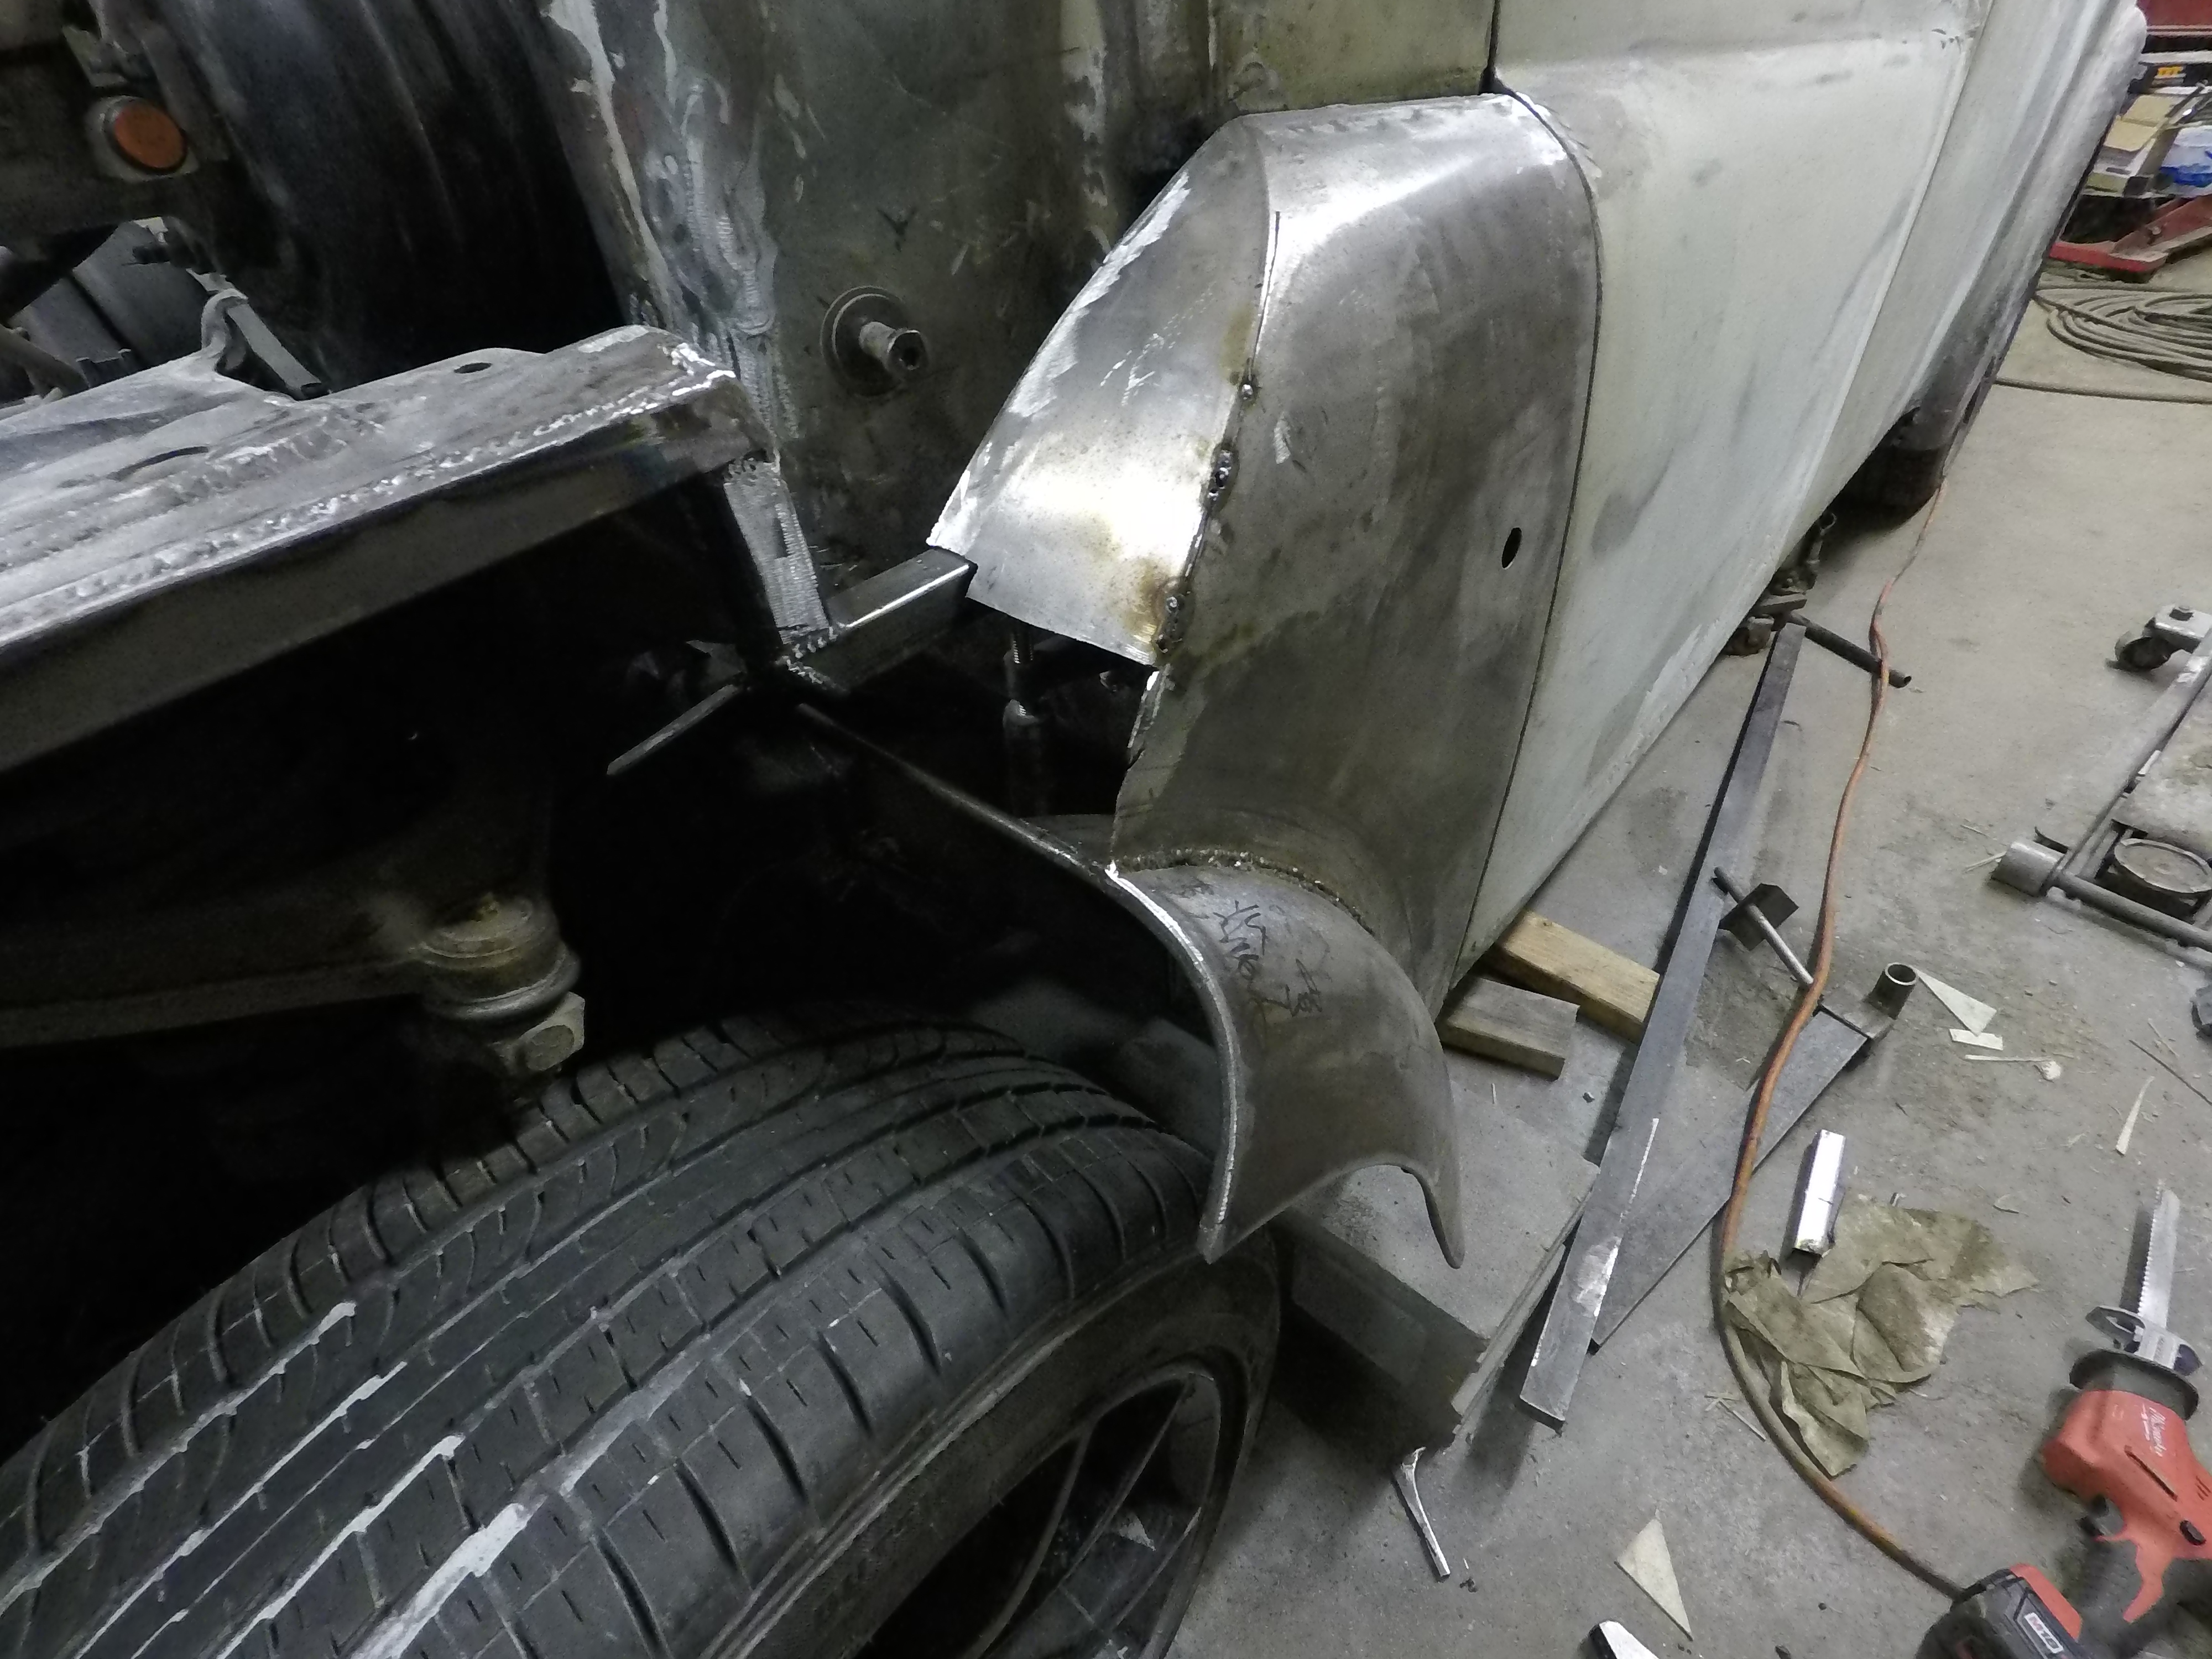
After cutting the new flares, but before committing to a place to cut the old flares off.
20180304_184324.jpg

20180304_184313.jpg

20180304_175016.jpg

20180304_184254.jpg


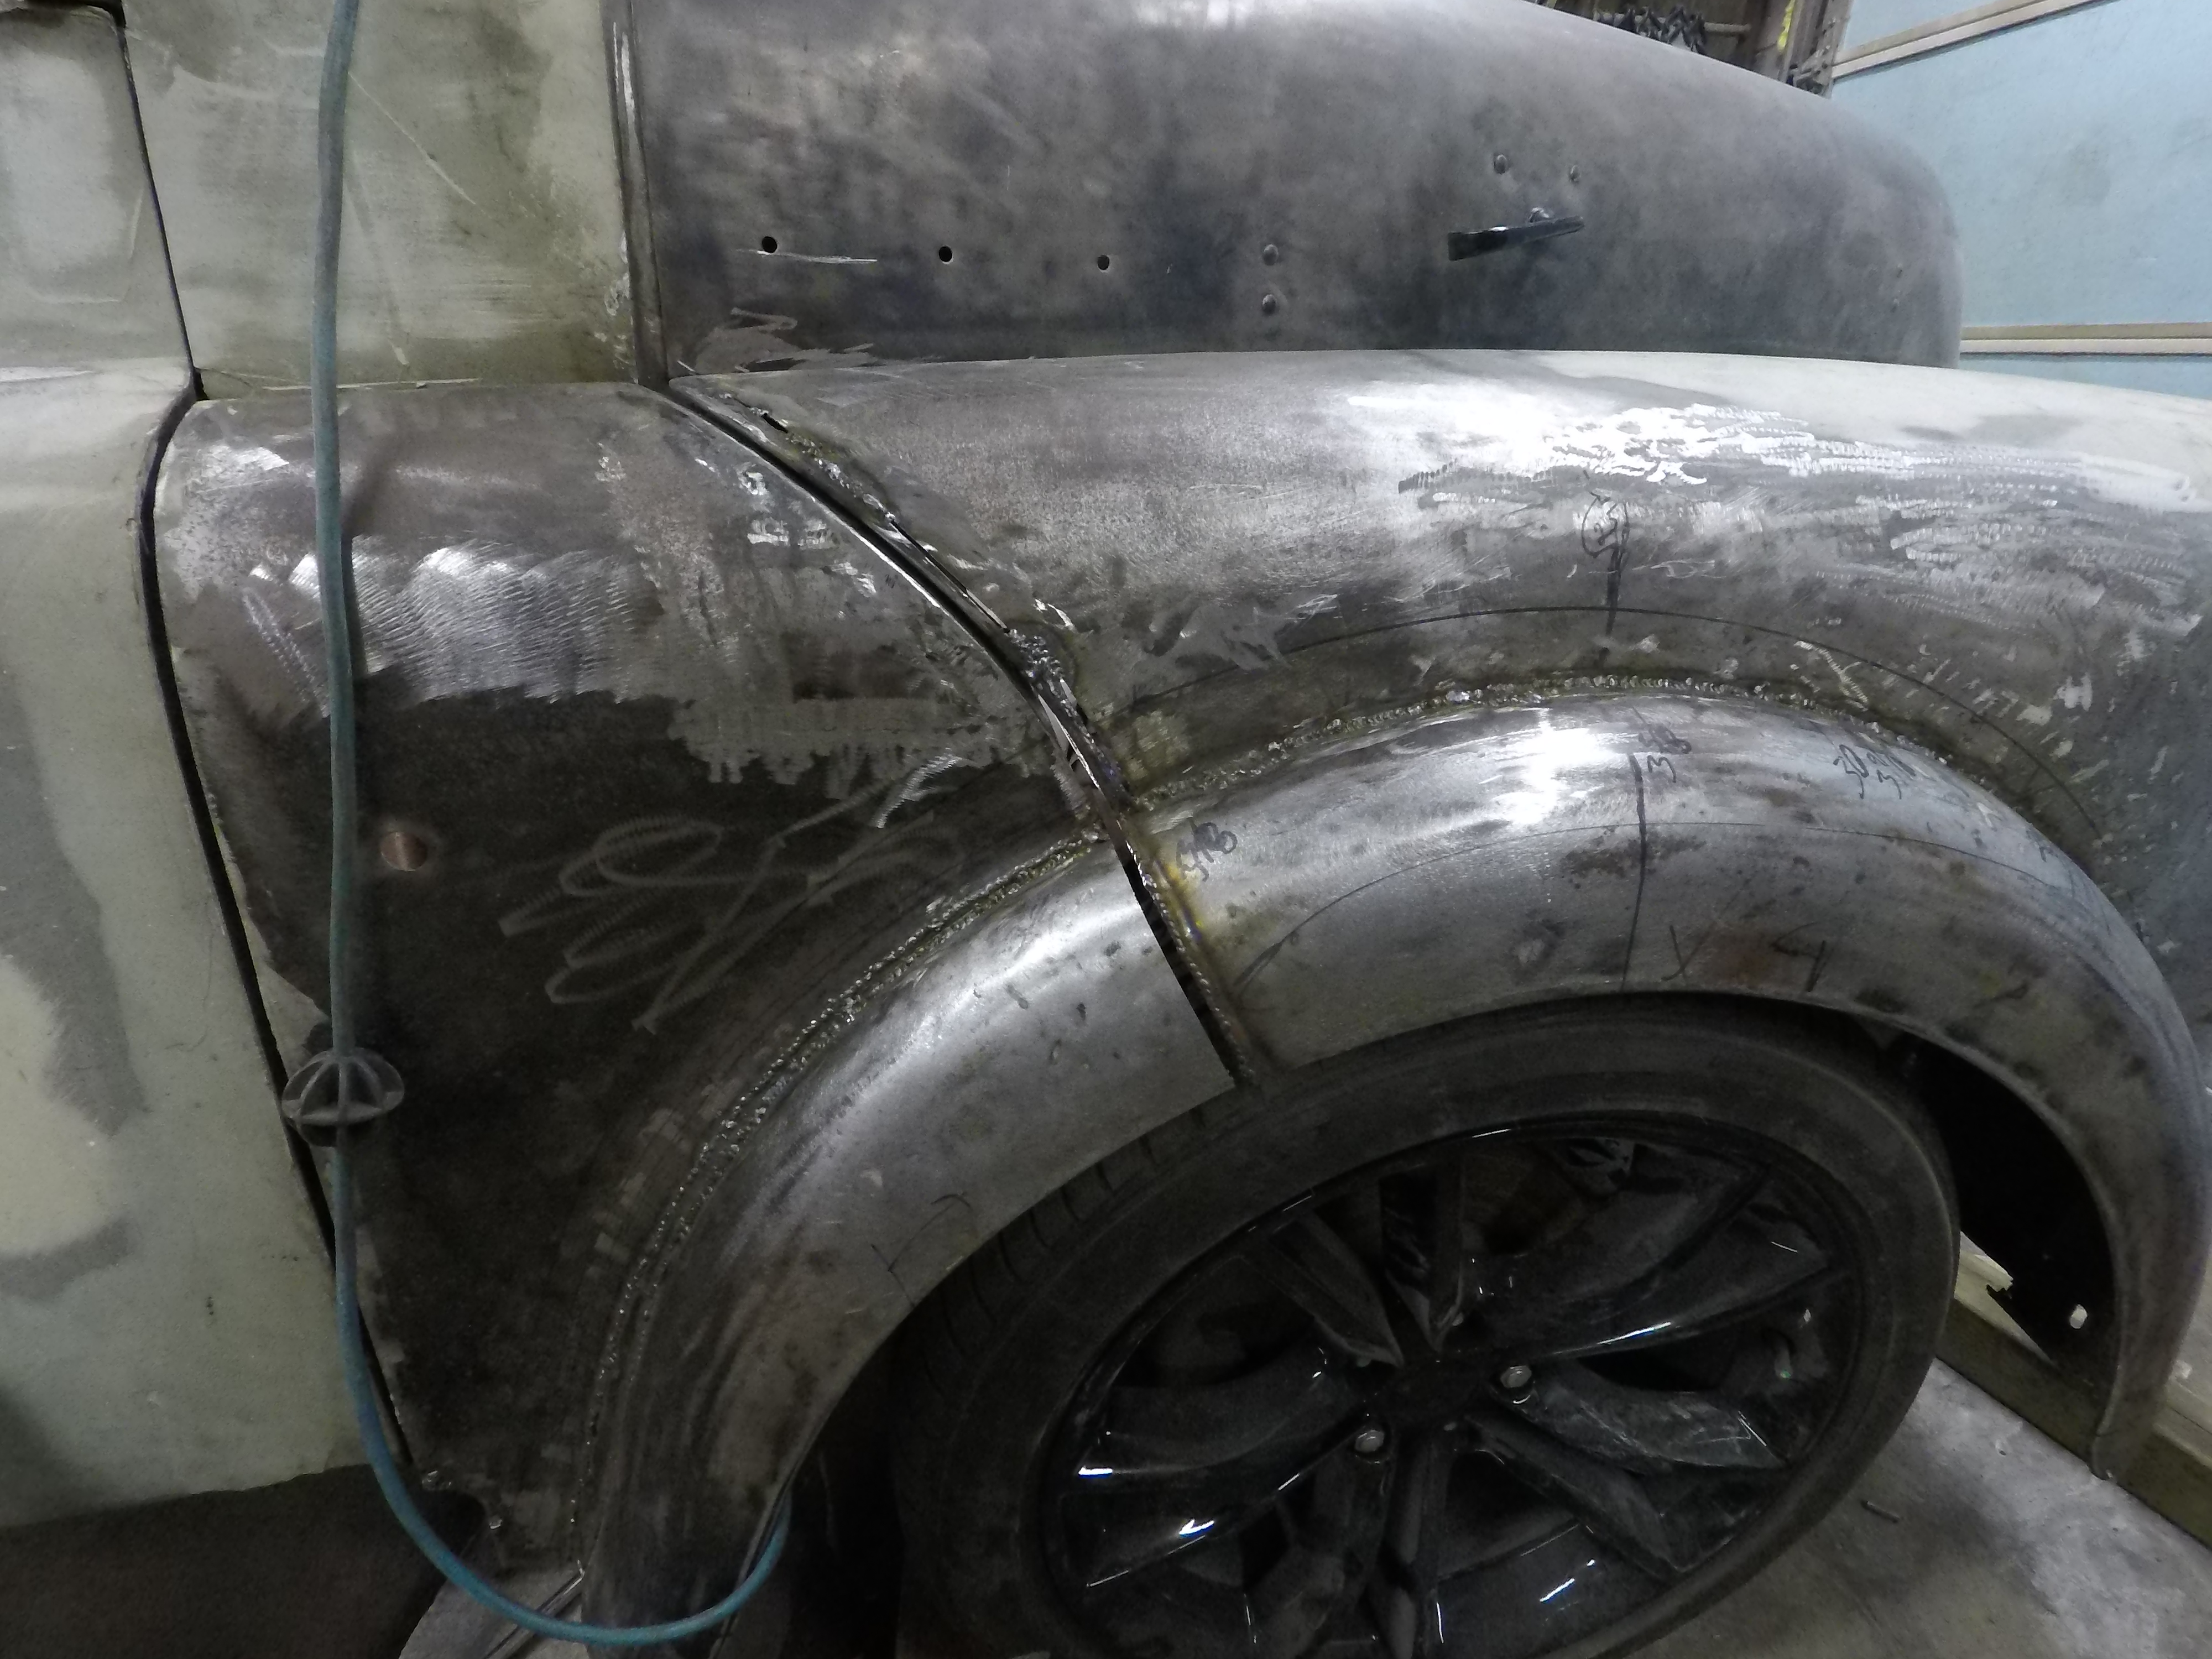
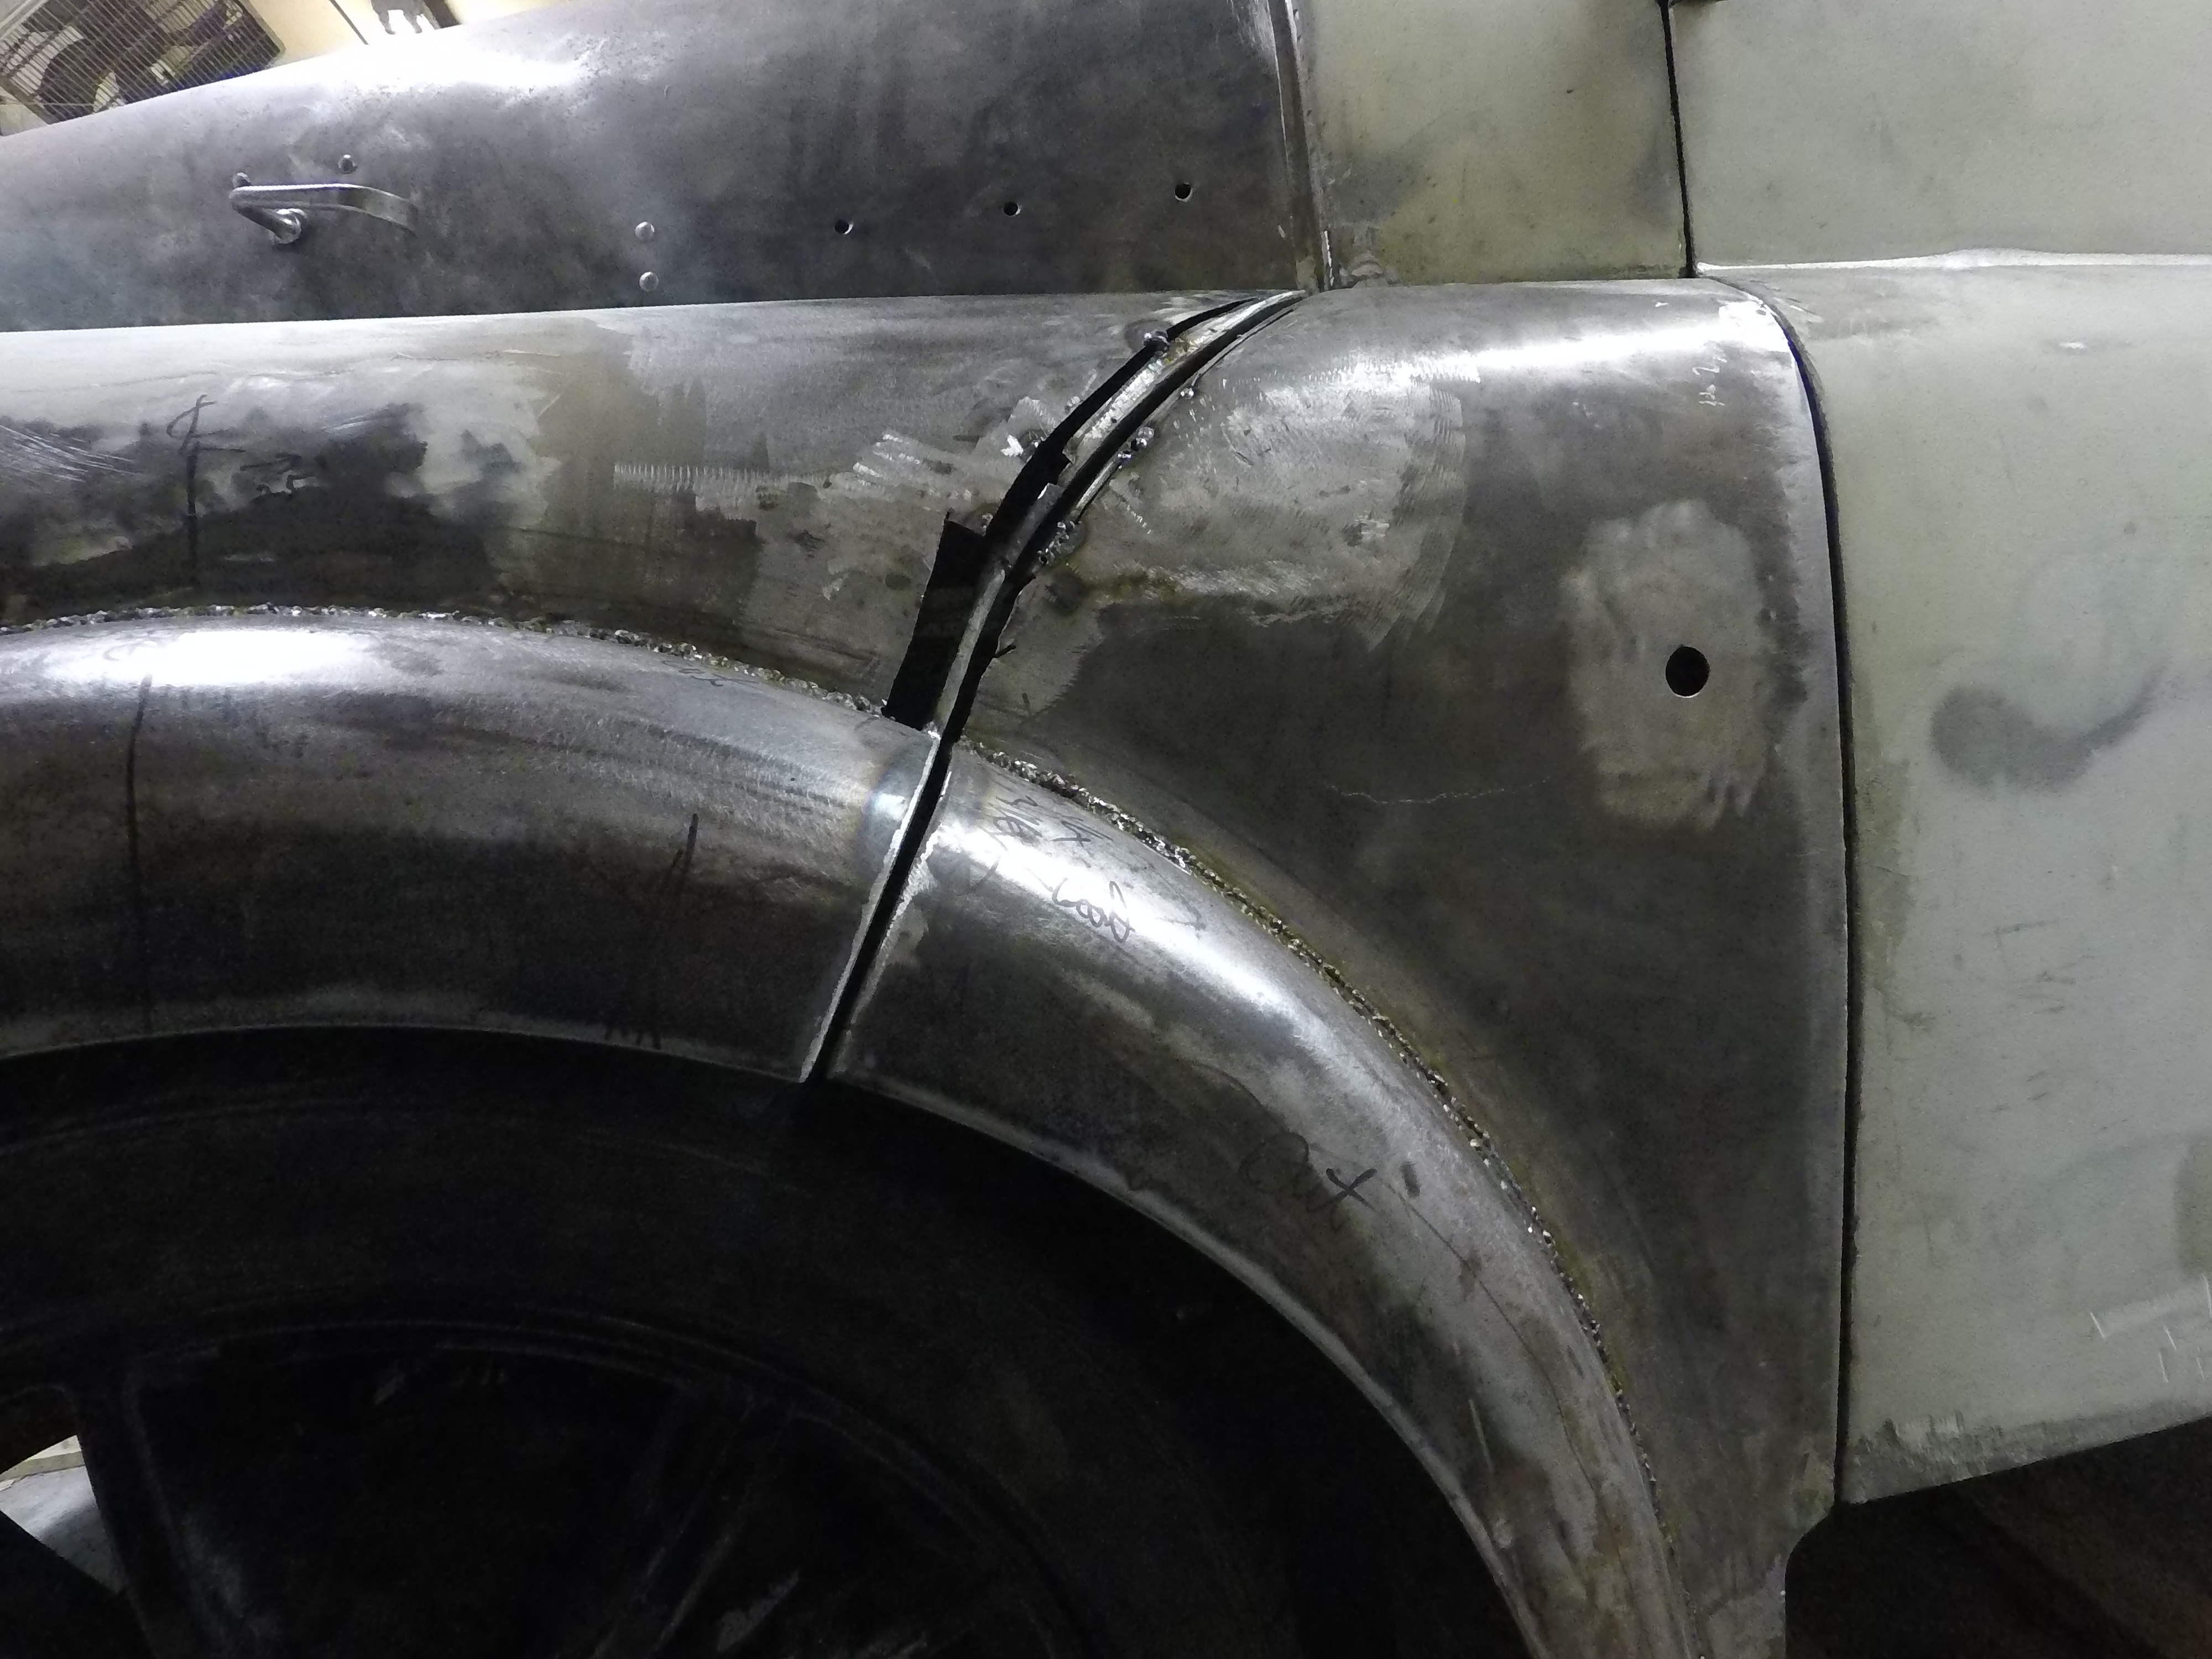
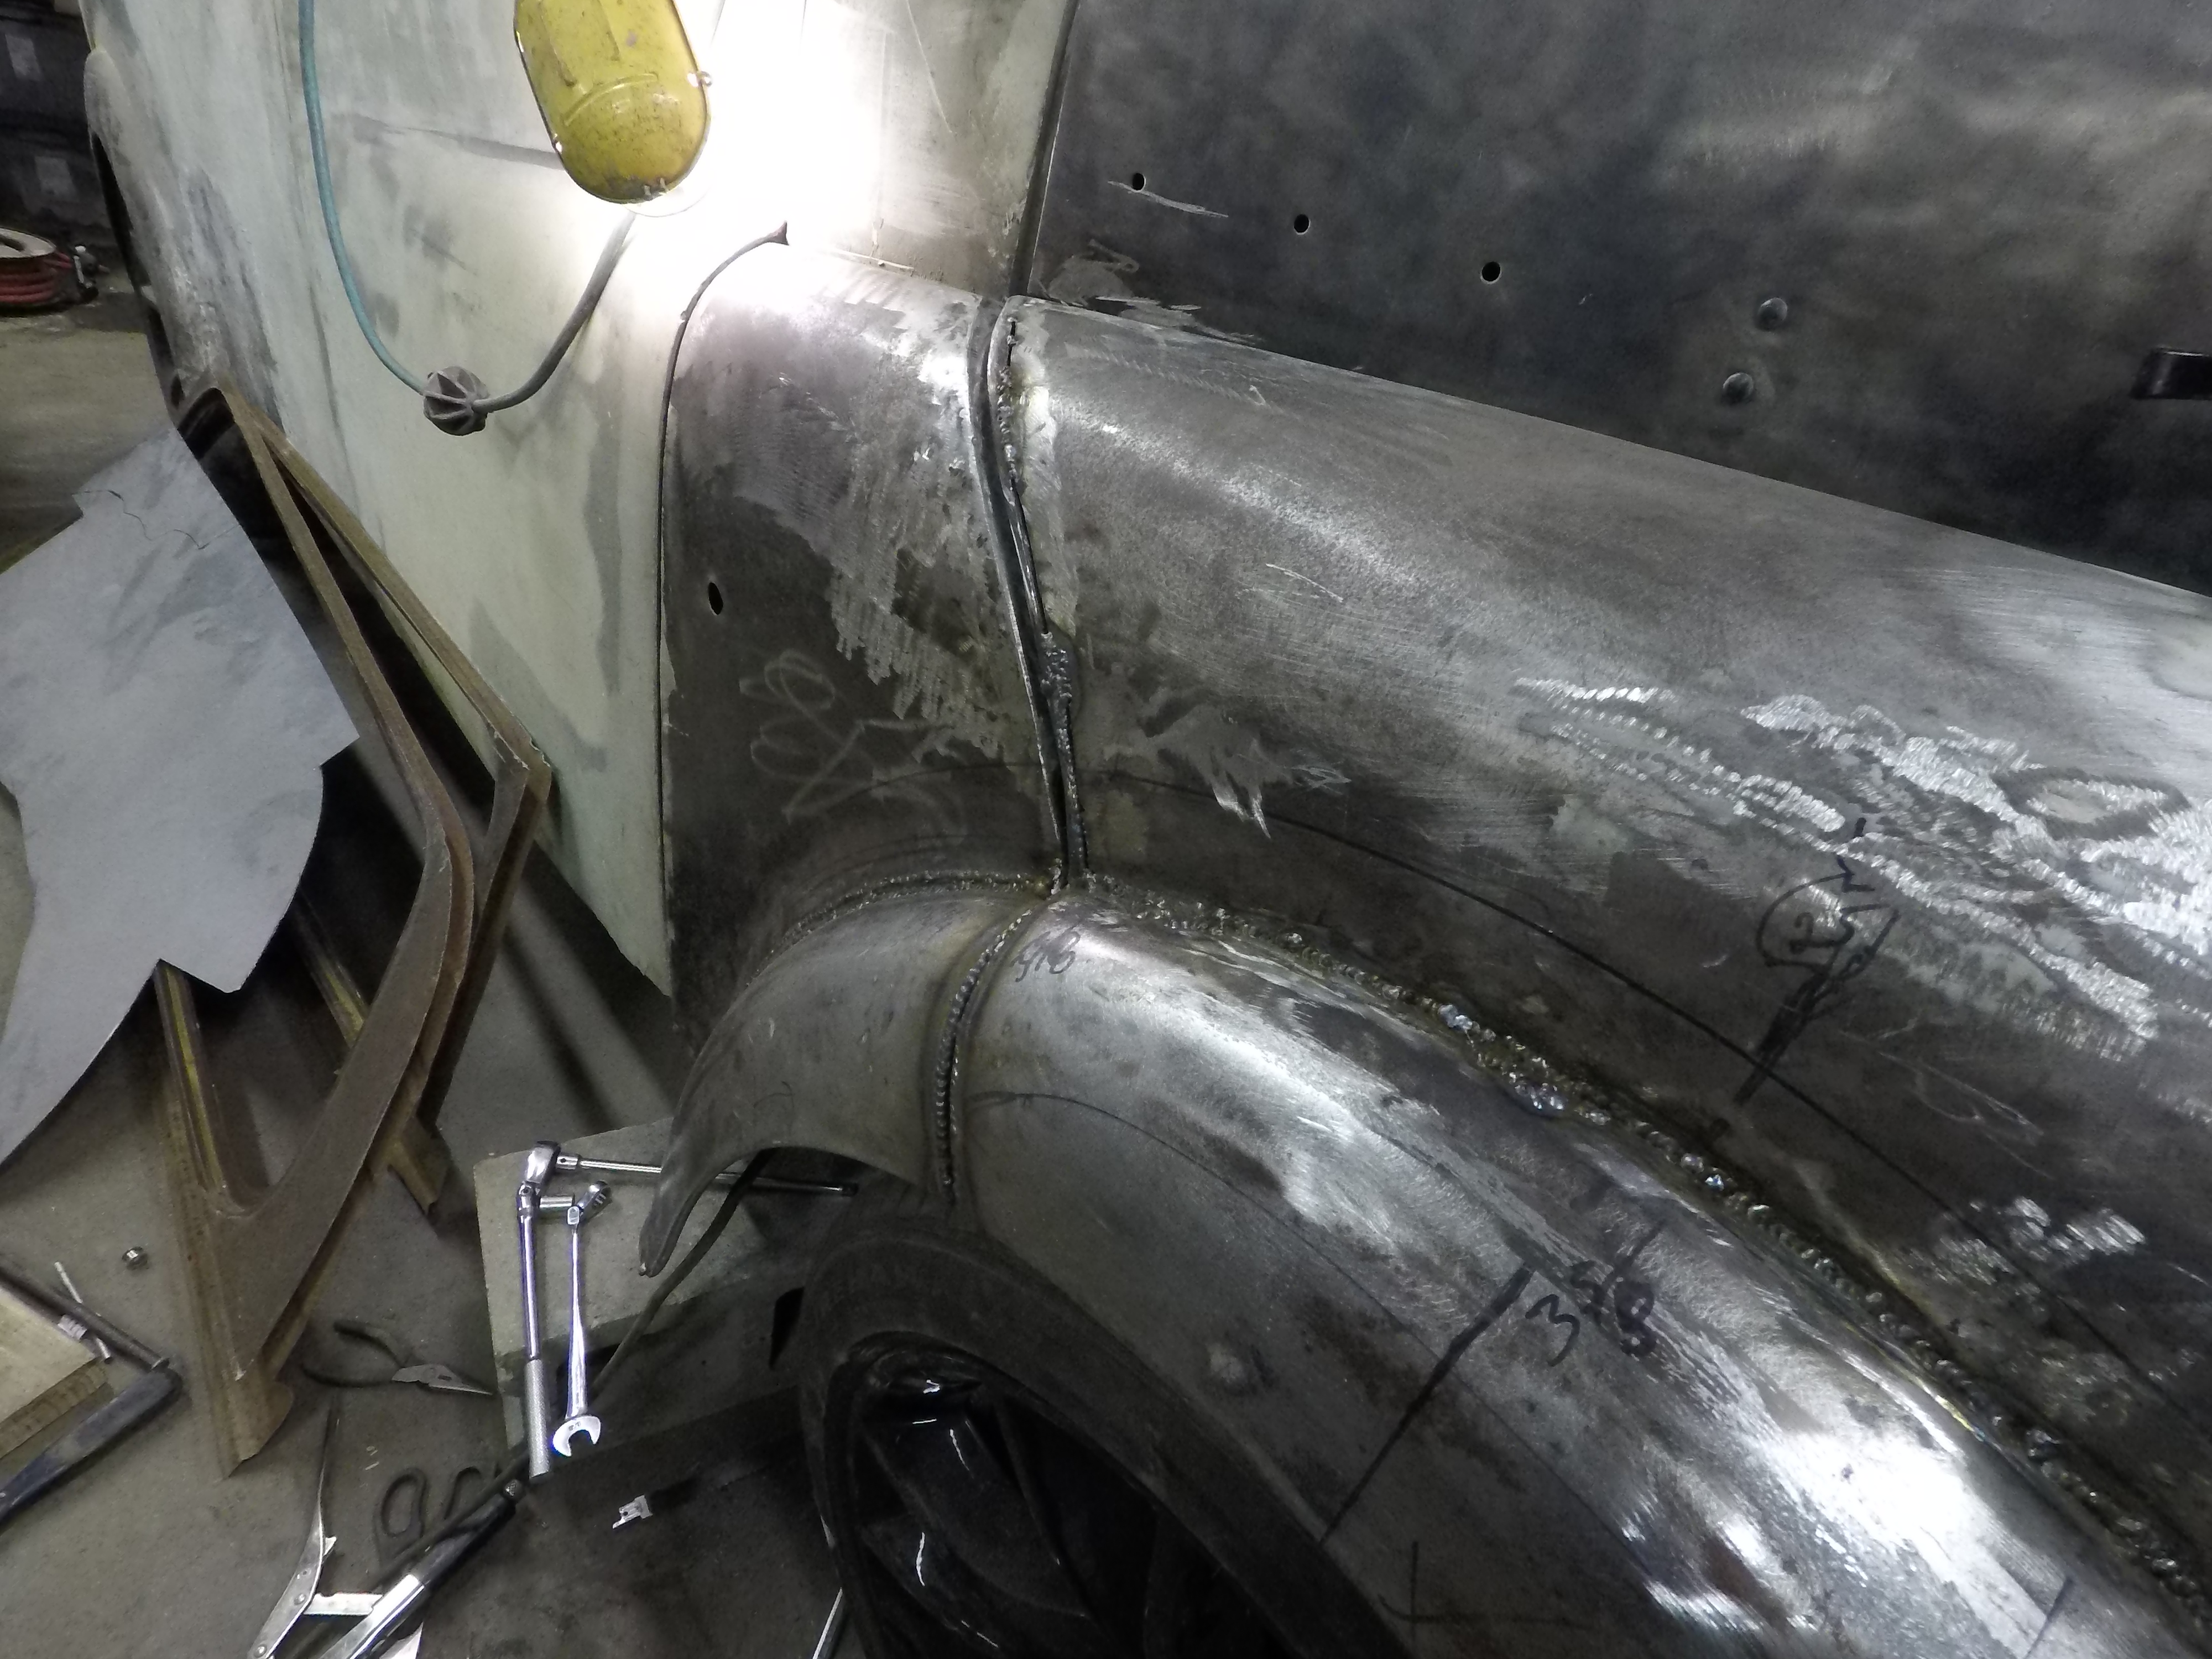
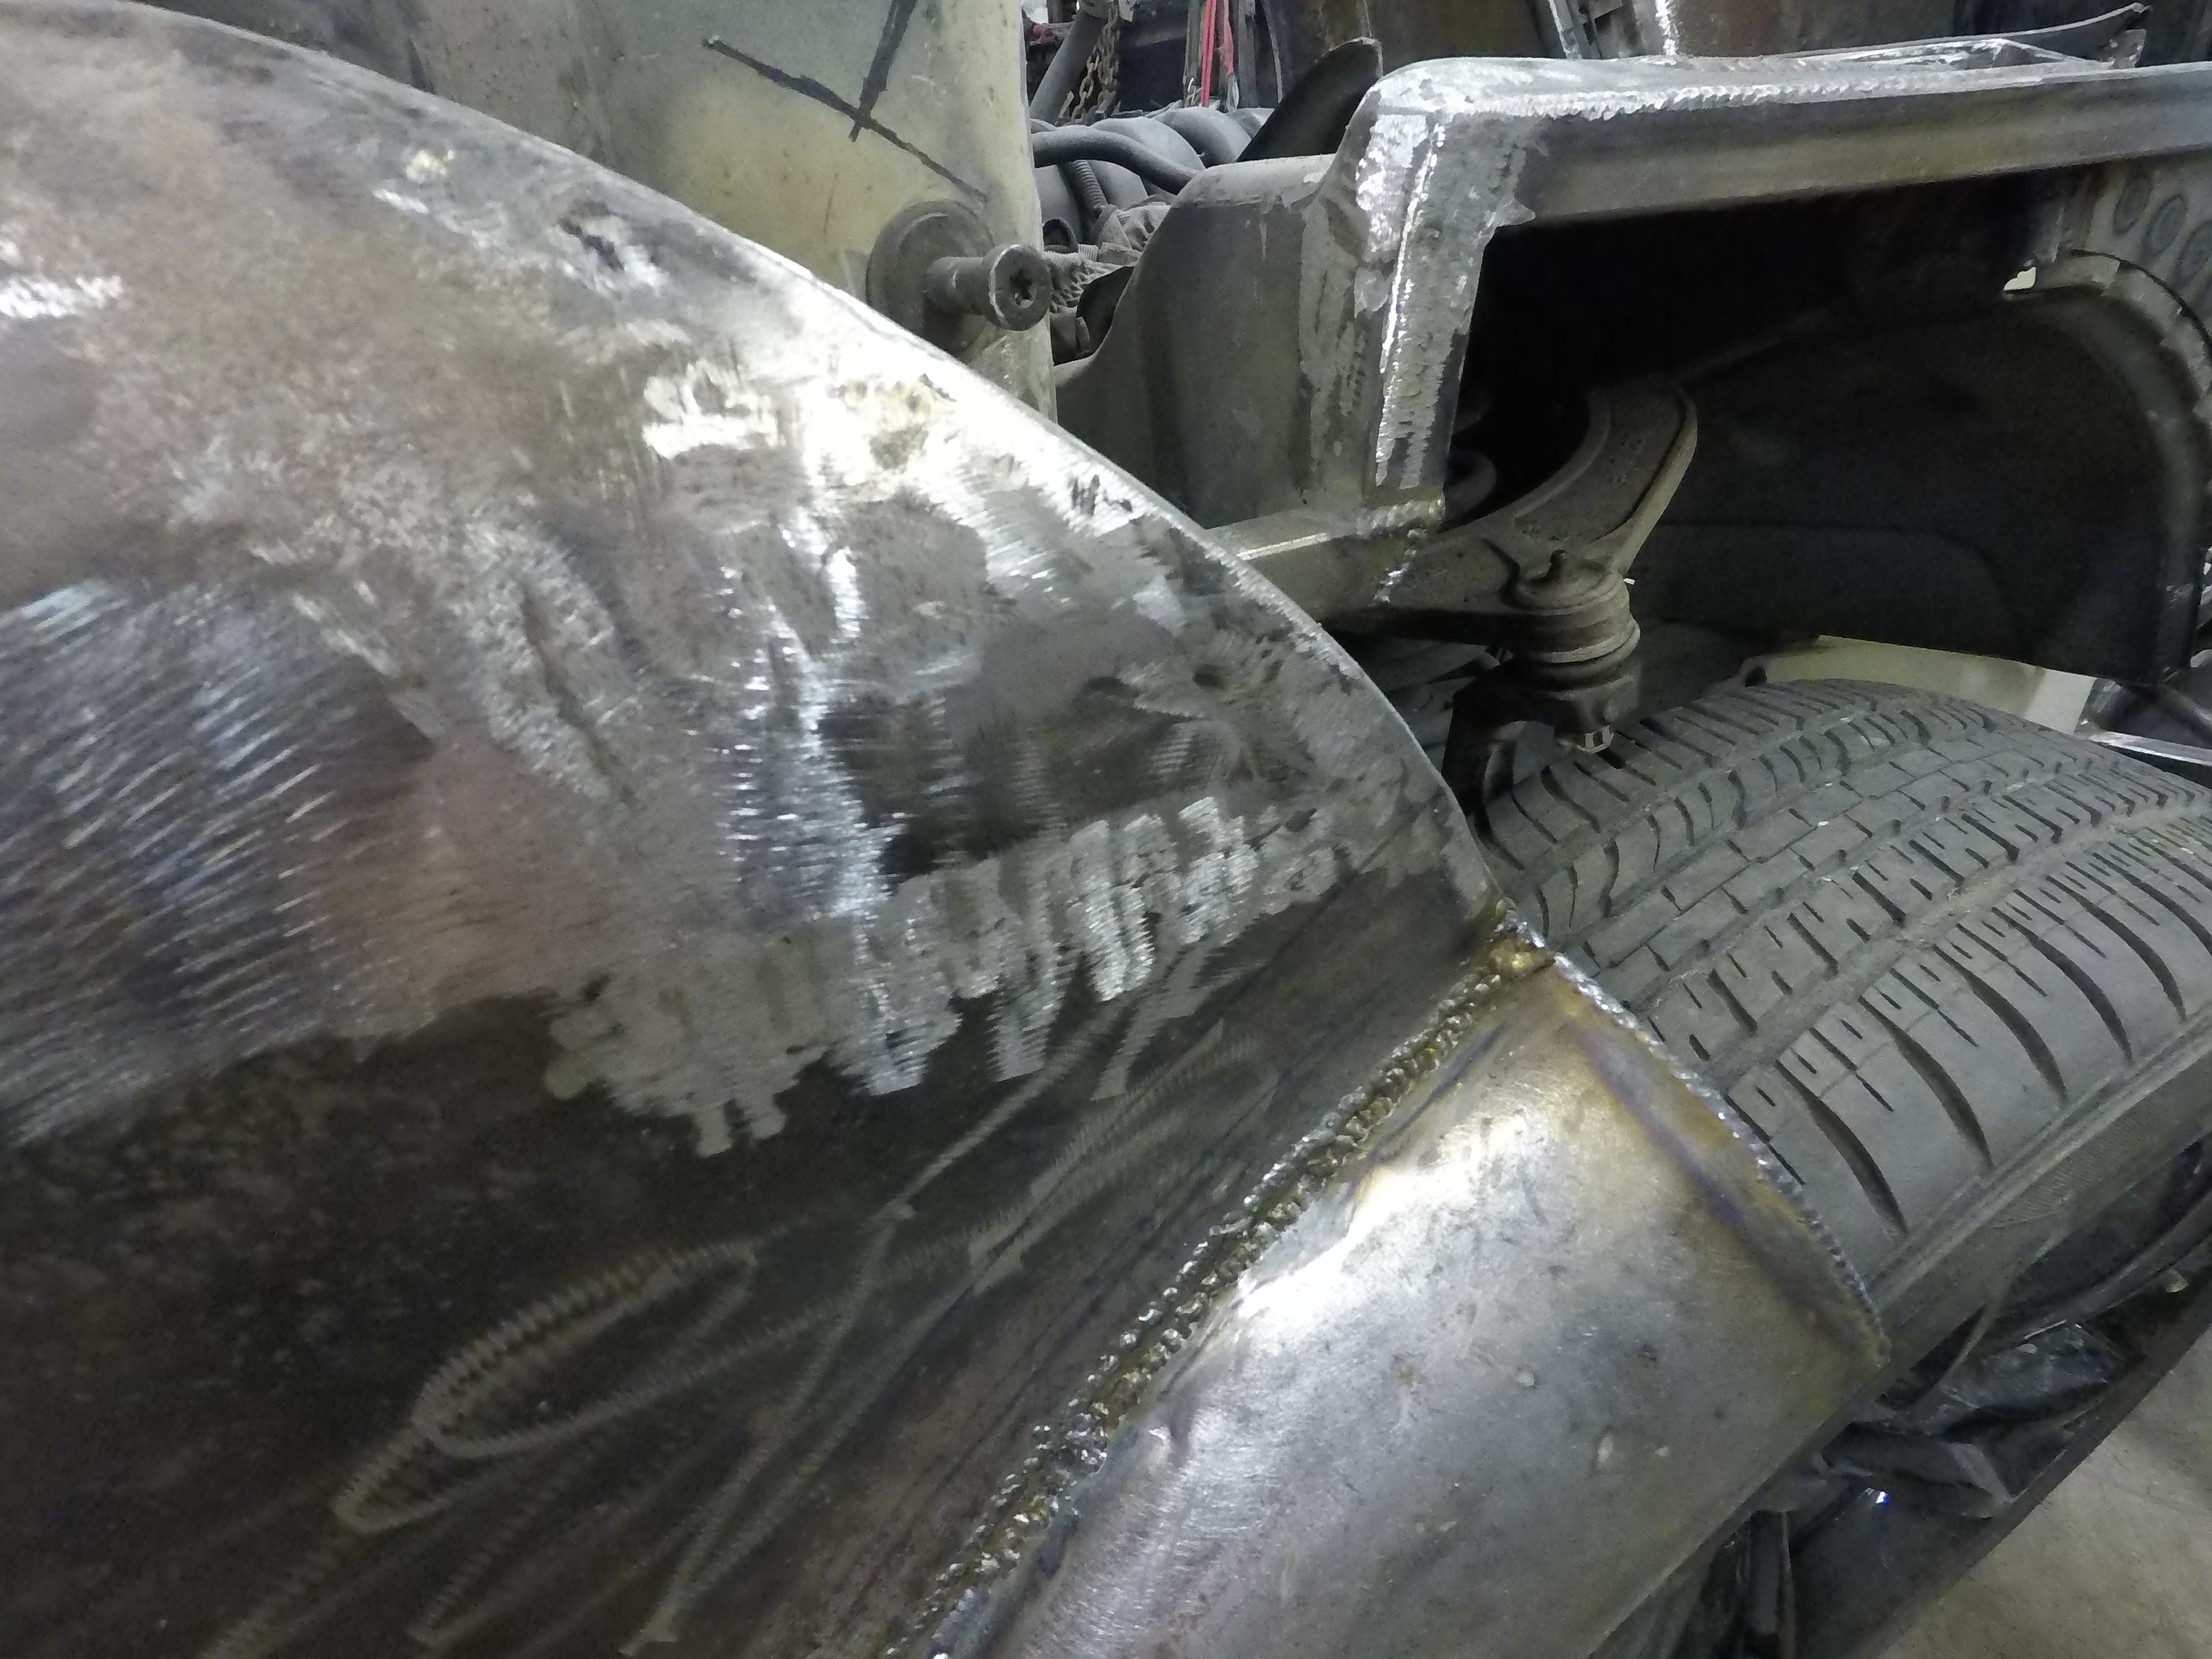
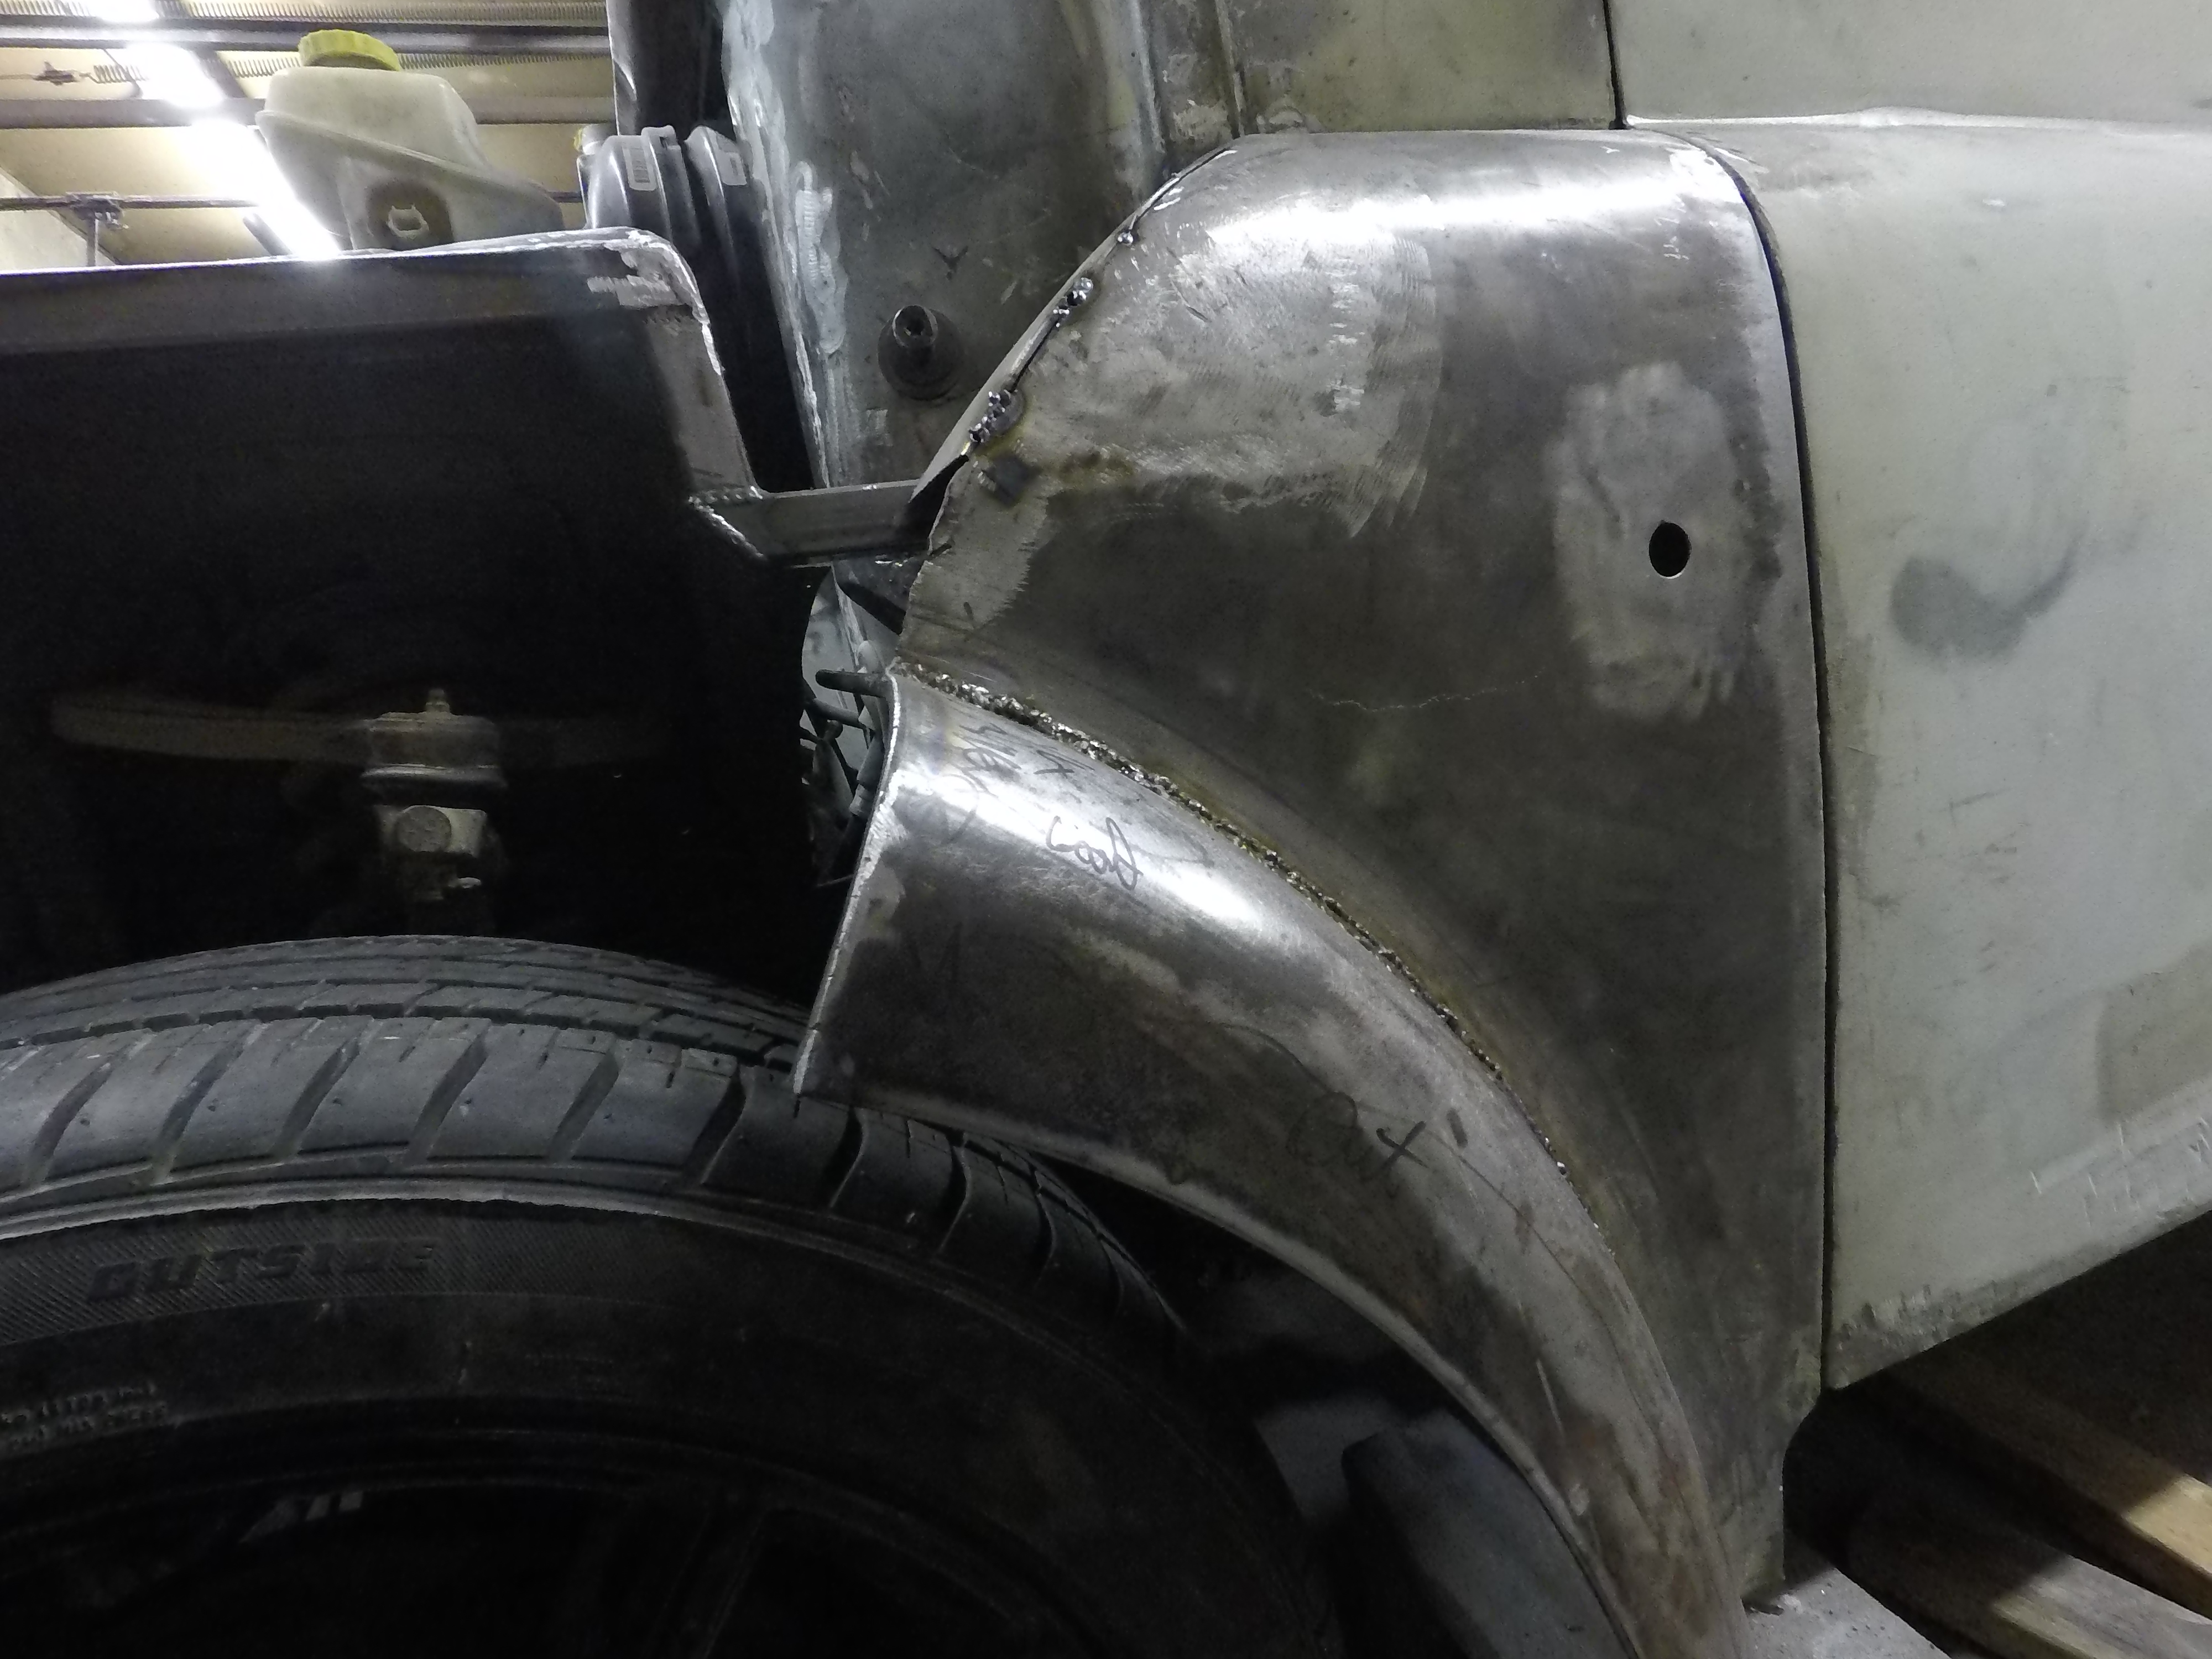
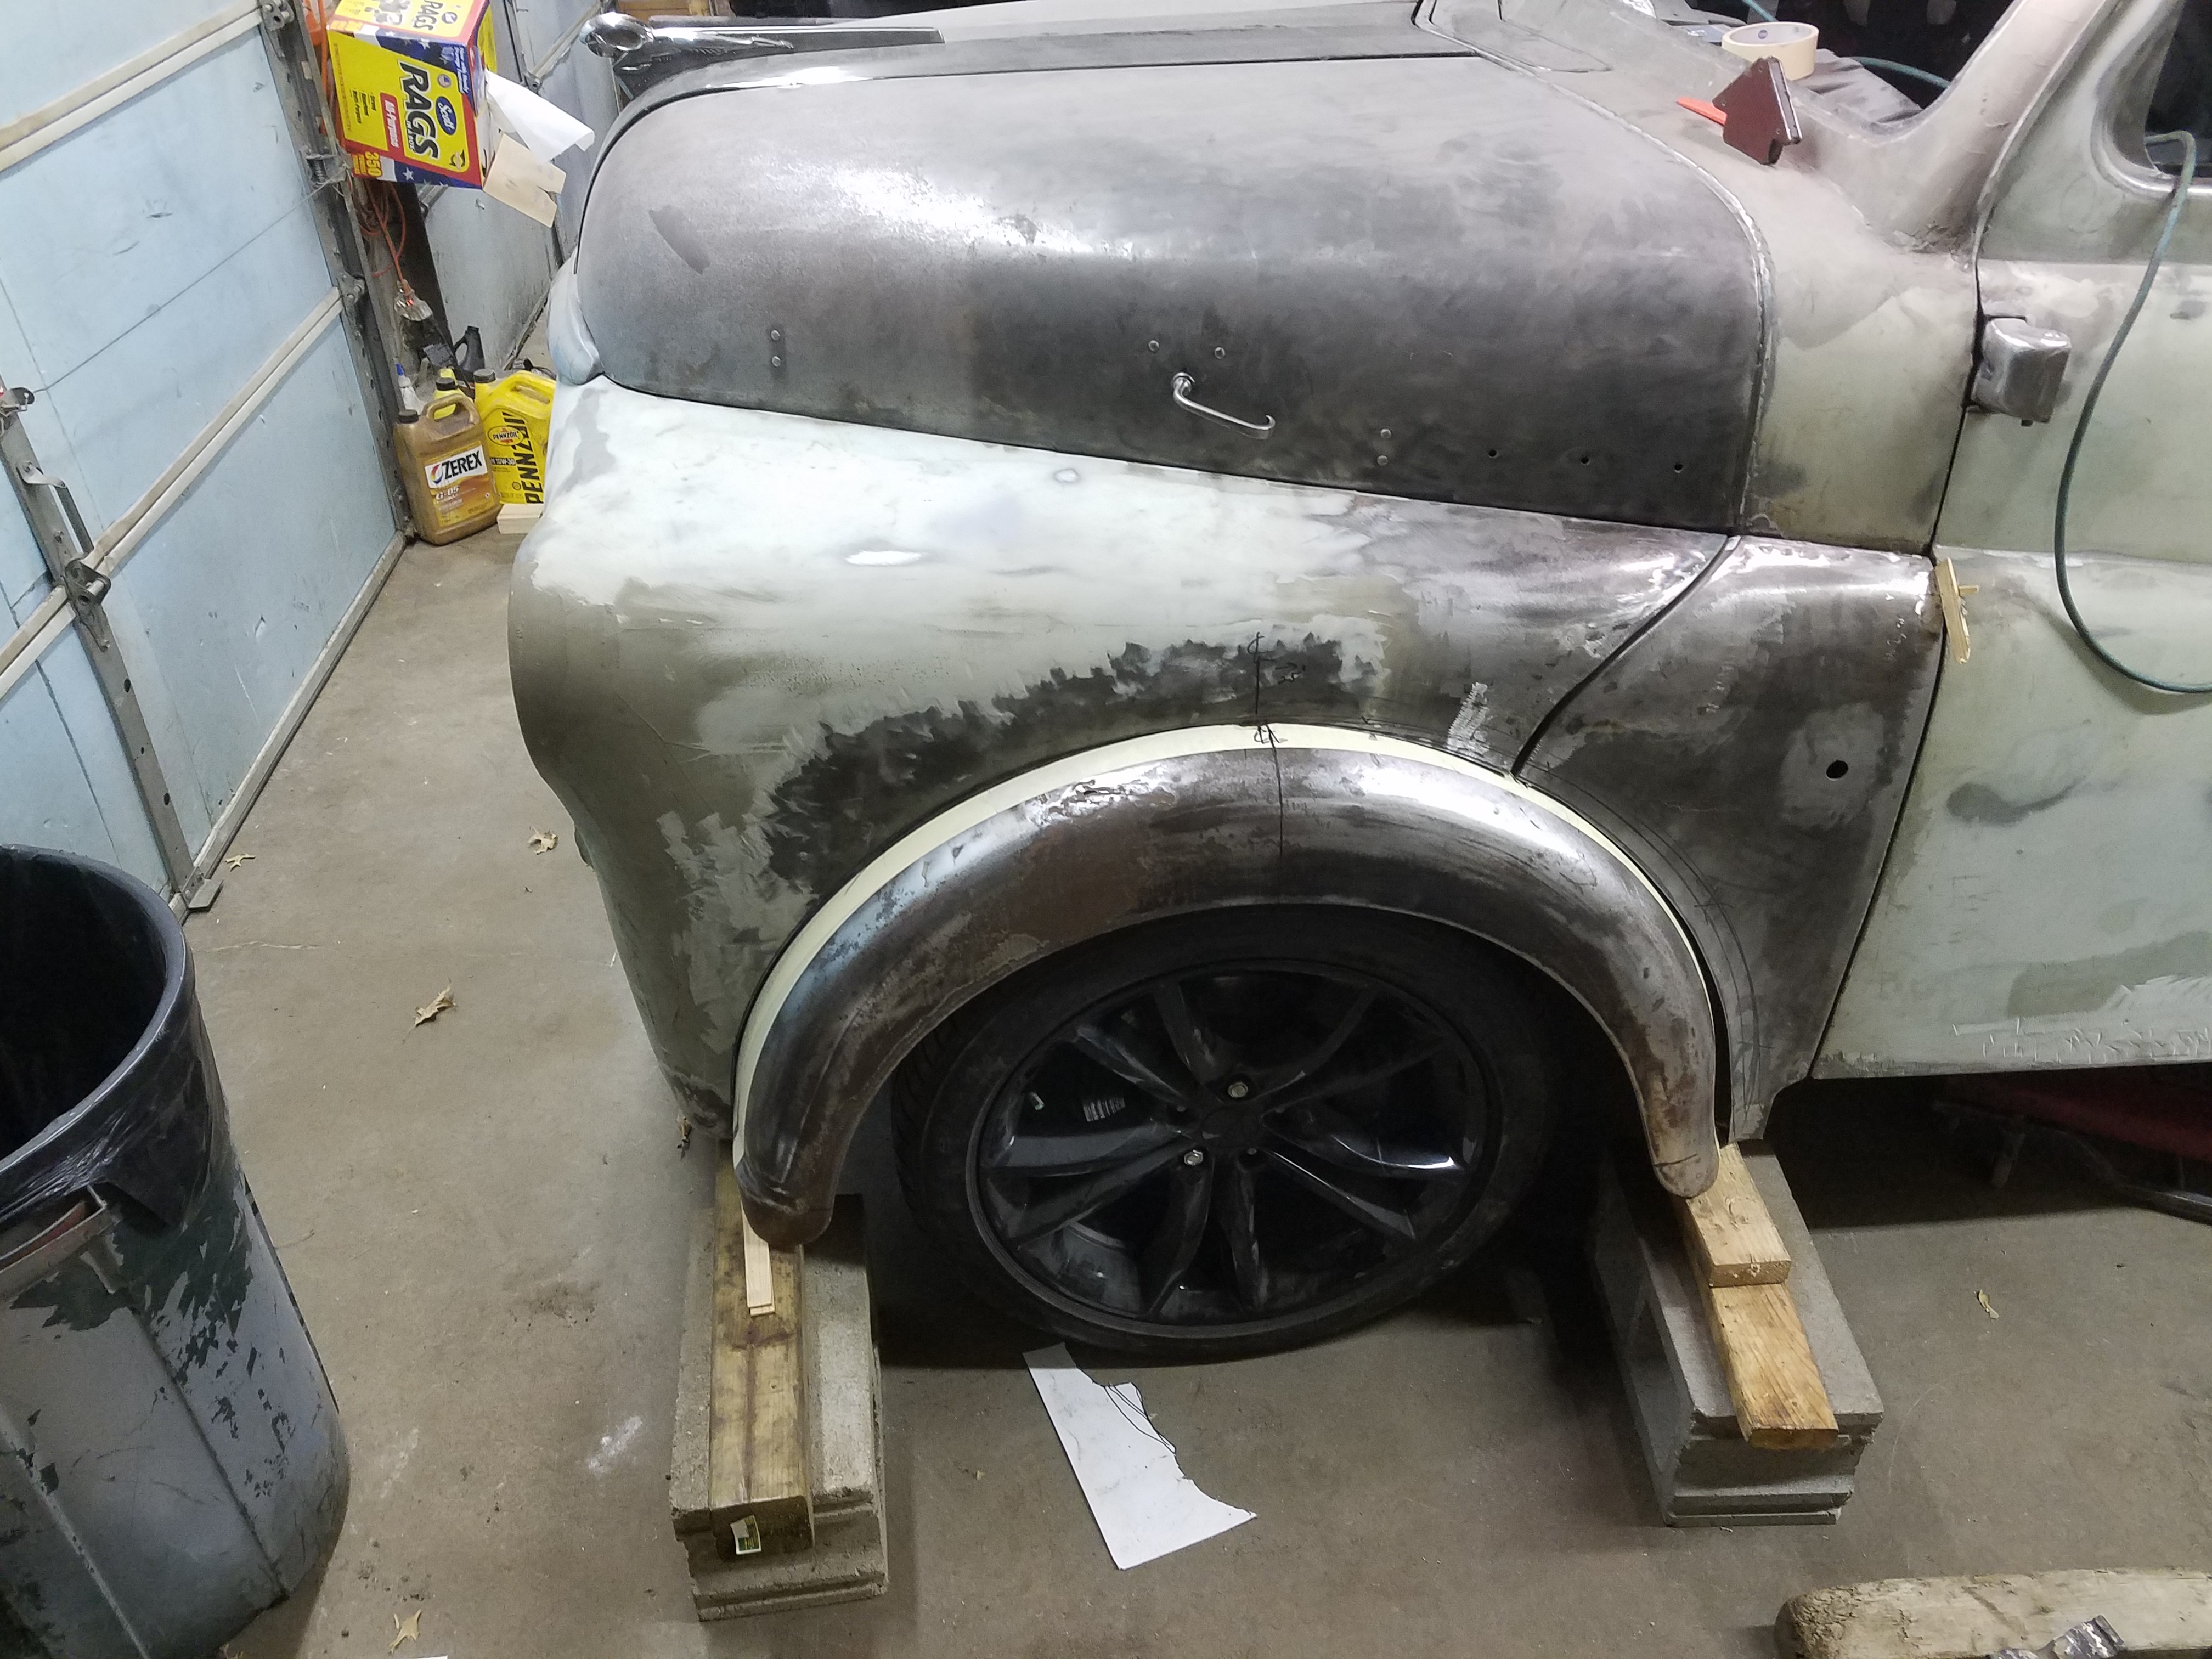
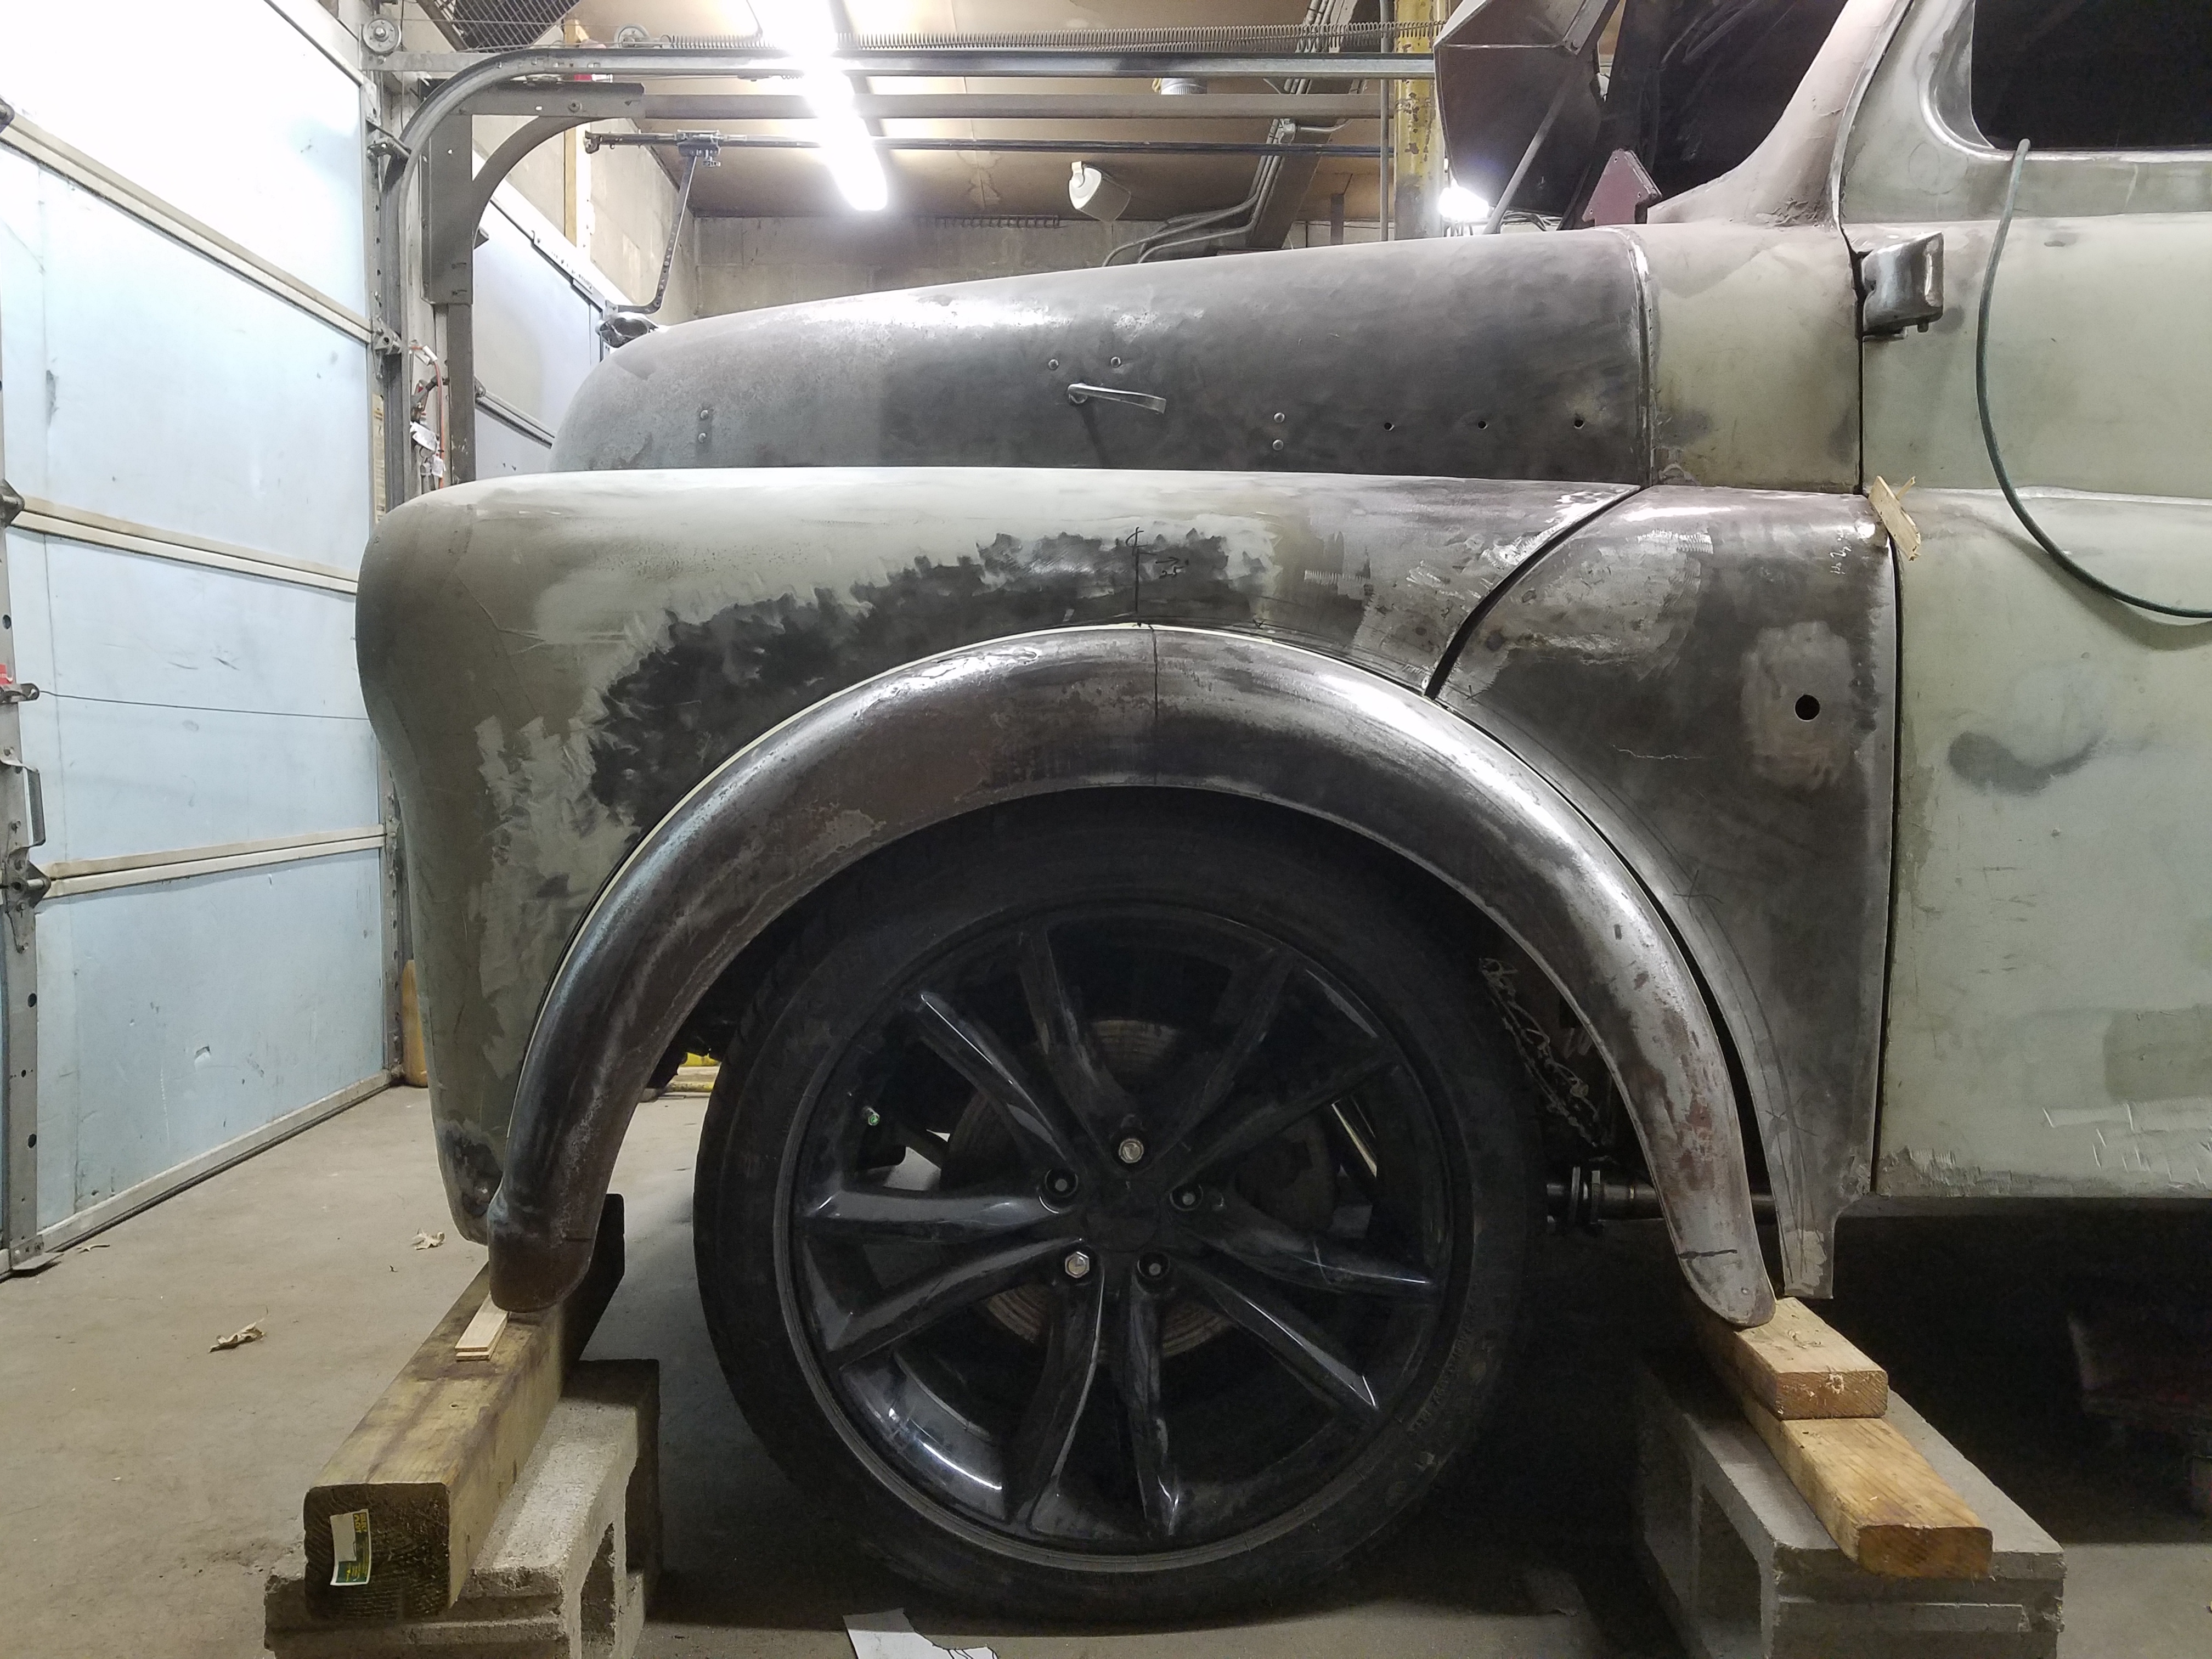
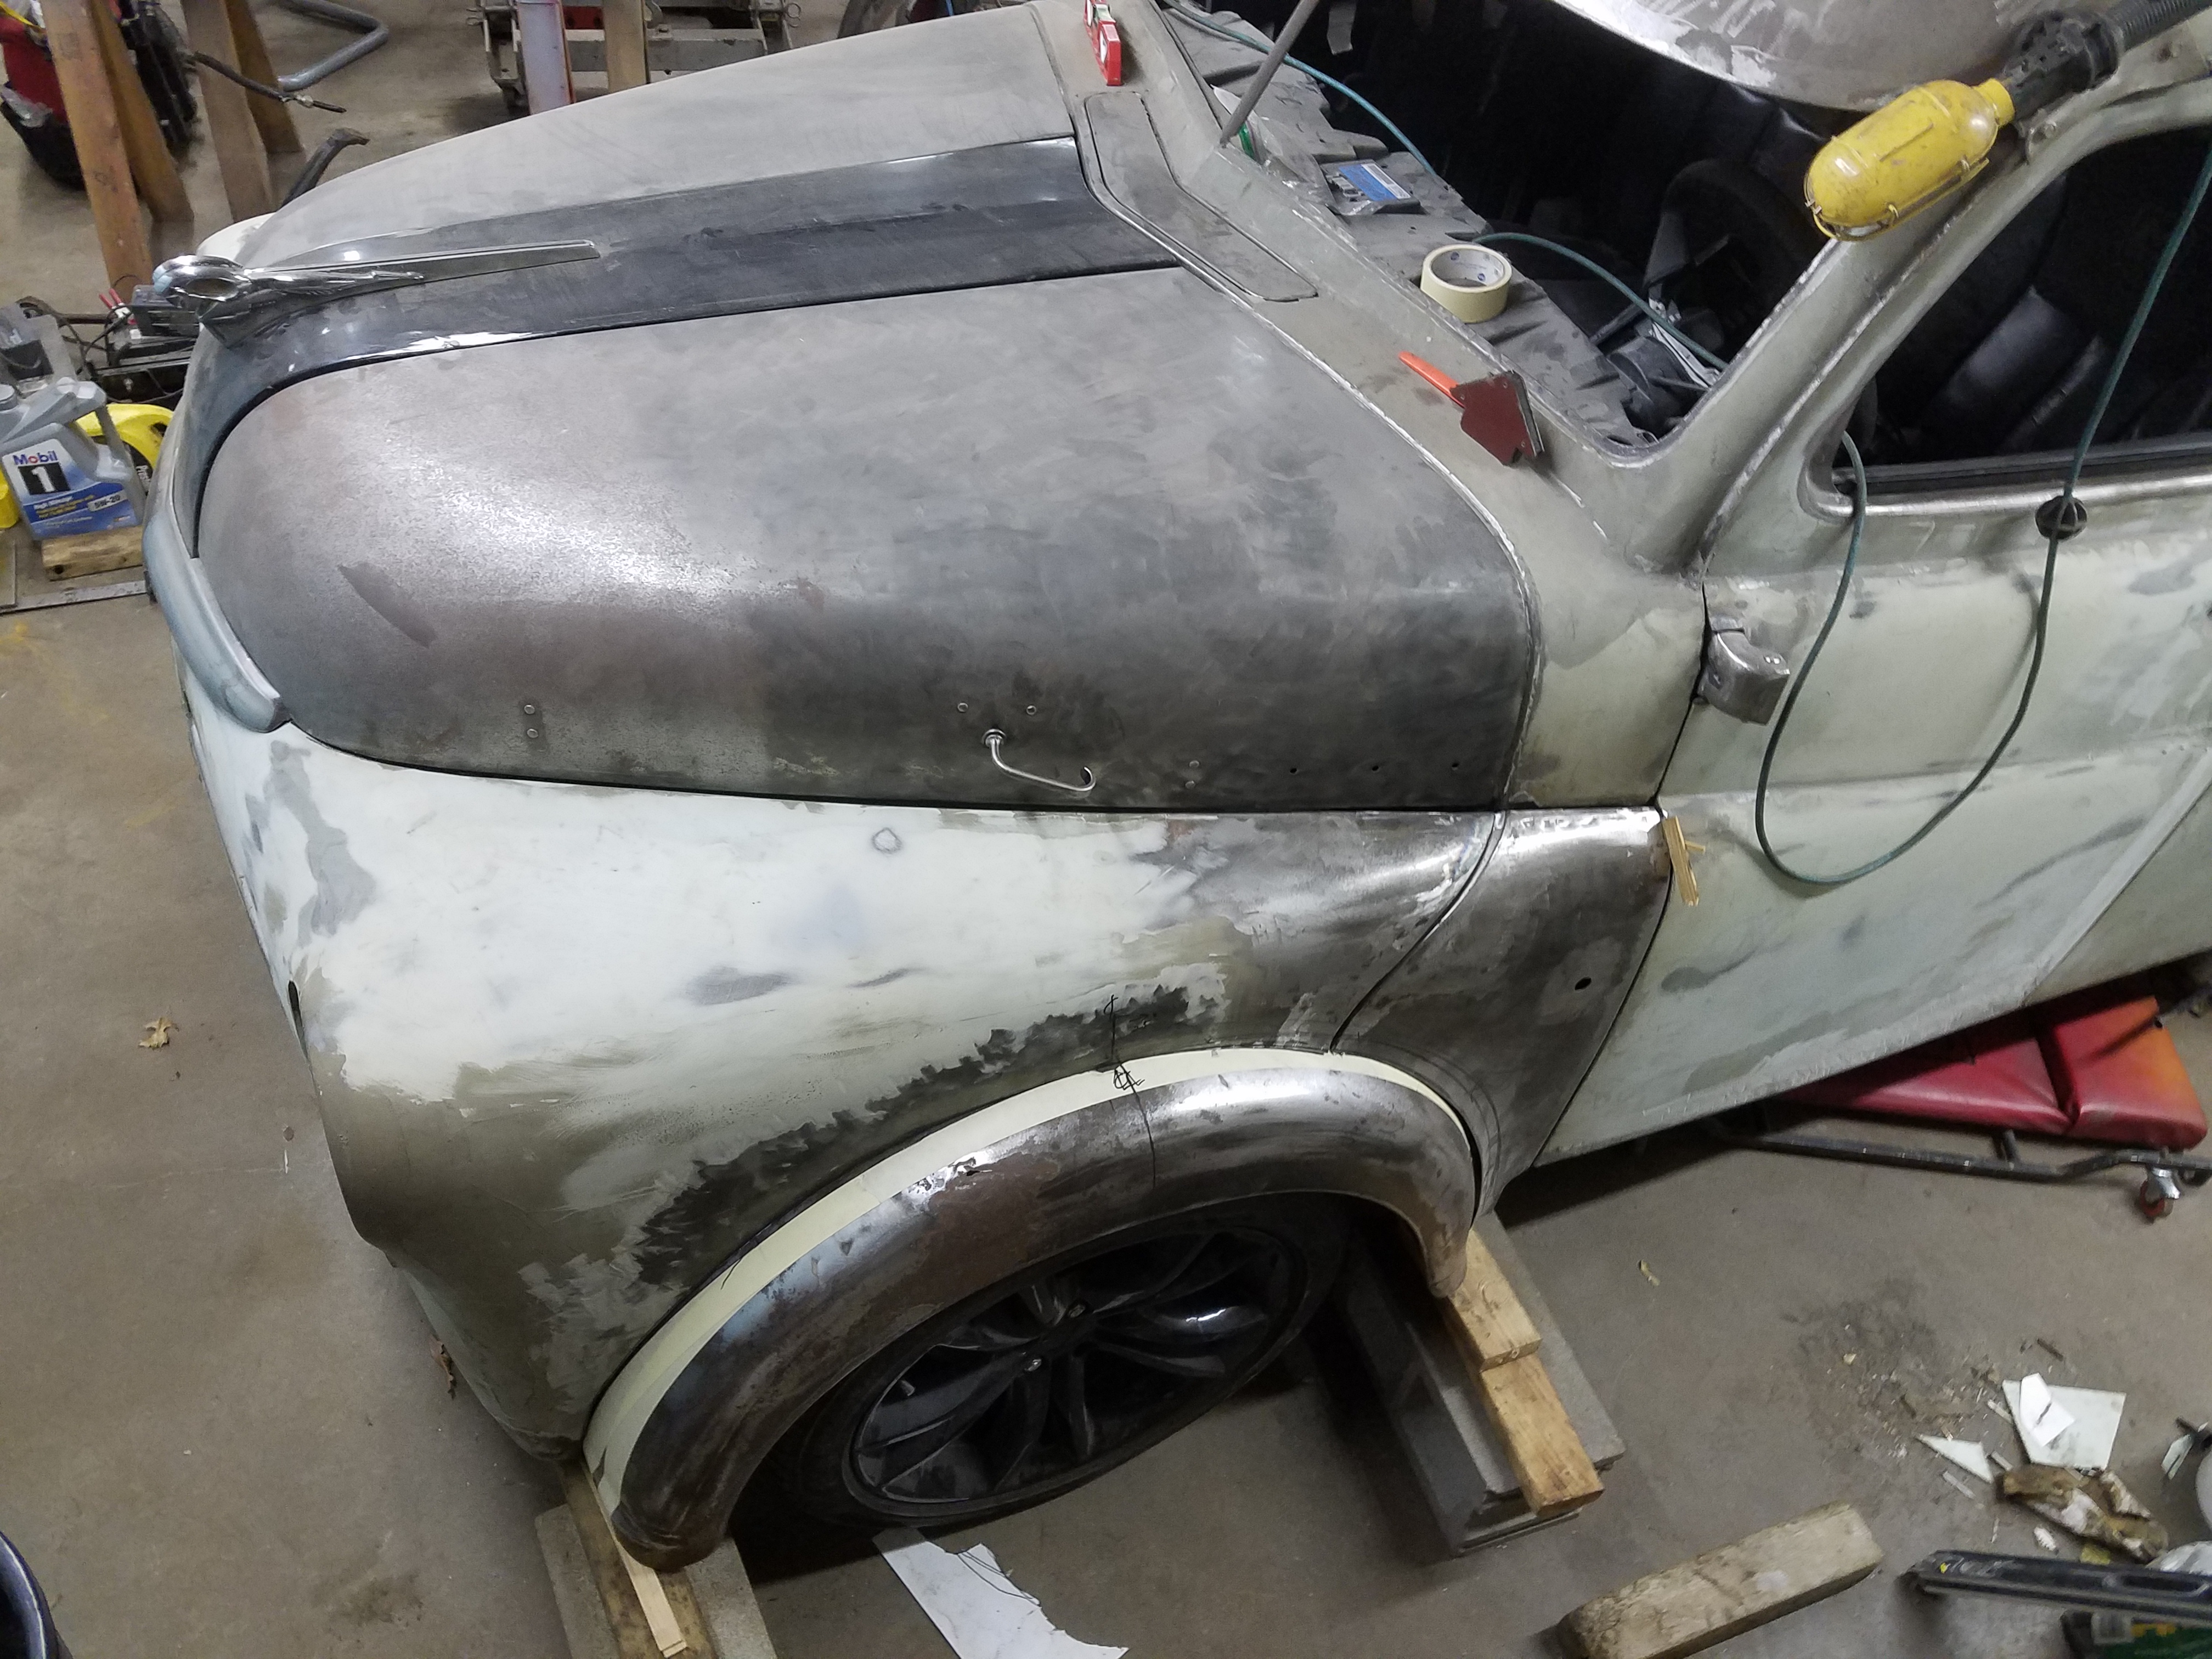
After committing to placement of the new fenders.
20180304_194258.jpg

20180304_194319.jpg

20180304_194127.jpg

20180304_194403.jpg

20180304_194107.jpg

20180304_194618.jpg


You can see the wave in the passenger fender that re-presented itself when I cut out the original flare (this is going to take some work to eliminate.
20180304_194008.jpg


The cut-off sections of fender.
20180304_184342.jpg
 
And... I am glad I waited to weld the new flares on! I popped the tilt front end open for a moment to be sure everything was working properly with the fenders last night. When I did... The passenger side sprung. The reason that fender is wavy is that it was bent just a smidge out of square. After playing with the tilt front end just a little bit last night, I could see the driver side wanted to do the same thing. So I realized that I need to do a little more work before I weld those things solid.

I didn't "engineer" the original square tube structure for the tilt front end well. It was really just designed as a rigid and strong structure to hold the fenders in place. But, when I started to add to the chassis under the front end, I removed a diagonal support from each side and "figured" I didn't need to replace them because the front end seemed to fit just fine. I was wrong. I chased the symptoms for a long time but now I know what the problem really was. I need to square it back up and weld some different supports in. This time, the supports will be tucked out of the way and will be adjustable.

Better to find it out now and rectify it than to realize it when I'm doing final prep for paint. I'll make a video of what's happening when I get home from work.
 
The video I promised yesterday showing the issues now that the fenders are cut:


I think I have a plan for adding diagonals. I know I need to remove some of the bracing I already have in place, so I added more bracing around the radiator shroud first. I'm hoping to continue adding the new bracing and make the new diagonals today. Look at the heat pattern on the top of the radiator shroud... I didn't set the welder correctly on the passenger side.

20180306_190031.jpg

20180306_190027.jpg

20180306_190040.jpg


These turnbuckles are SO overkill for this use. They're 3/4" fine thread and actually meant for a suspension link. The weld-in bungs are meant for 1.25"x.120" wall DOM tubing. Like I said... WAY overkill. But it's what I have lying around and on a pretty tight budget these days :)

20180306_190443.jpg

20180306_190519.jpg
 
The puzzle unveils one more dilemma. The characteristics of the build. Kinda keeps you thinking don't it
 
Adjustable diagonal bracing is installed! Welds aren't done yet, but dinner was done and so was I. The braces are in well enough to report that it worked out well, none the less. I ended up using the parts I had outlined yesterday. They're left over parts from a couple different 4-link suspensions I had done. One portion of the material was a 1" O.D. x .240" wall, 304 Stainless tube that was left over from an e-bay suspension kit. I drilled a short 3/4" hole into the end and welded in a cutoff bolt. The other end of the link is 1.25"x.120" wall DOM tubing with a nice left-hand threaded bung welded inside. Between the two ends is an adjustable threaded link that's meant for adjustable custom suspension applications. Again... Yeah, I realize it was way overkill. But I had most of it lying around, so I used it. And I'm actually pleased with how it all looks, too. Now, I'm ready to weld in some more appropriate supports between the inner fender wells and the radiator core support and see what I get. I sometimes feel like I'm eating an elephant with this project! ...you know. One bite at a time!


Wapow!
20180307_202558.jpg


Bottom End
20180307_202609.jpg


Adjuster
20180307_202611.jpg


Top End
20180307_202616.jpg


1"x.240" 304 Stainless Tubing
20180307_202645.jpg


I cut the ends off two grade 8 bolts and welded them in after drilling out the end of the tubing to 3/4".
20180307_202659.jpg

20180307_202730.jpg
 
The new bracing is in from the radiator core support to the strut tower. I don't like the looks, but the bracing is in. The new bracing will not transfer the forces to the right areas, but it is a start. I do have a couple ideas for better triangulation in other areas though. Strange as it may seem, I will probably triangulate the triangulating braces I just installed. Even if it's just with a gusset. Before I'm done, each strut tower will be connected to the firewall and possibly directly to the radiator core support as well. I'll have to figure it out as I go at this point.

Check out what I've got...


20180308_203444.jpg

20180308_203508.jpg

20180308_203513.jpg

20180308_203455.jpg
 
It's a long process to get the fenders just right! Wow... But the process is working. I will probably be re-working the passenger side fender (again) because it seems to have sucked into the truck. I've fought that fender the whole way... I get one portion of it looking great, and that pops another portion out of whack. Just GRRR. I thought it looked great as I moved onto the Driver side yesterday. But looking back at the pictures now, I can see I still have some work to do. I think I need to cut her free, twist her a bit and try again. At least the front 2/3 of it anyway. The passenger fender was torqued from the beginning. So, each stitch was a struggle since I needed to pull the fender into position with my right hand (while reaching through the headlight hole) and tack-weld with my left hand at the same time. It just kind of sucked. I'll have to rig some sort of jig up this time. Maybe it will be easier now that the fender is basically straight at the moment. I may be able to put a block of wood behind the fender sheet metal to hold it in position when I cut the new flare free. ... Ha. I'll show you how well that works! Maybe I'll take video of that for your enjoyment.


20180311_190251.jpg

20180311_190222.jpg
 
I am finally happy with how the fenders are lining up. And that's saying a lot! Are they perfect? Nope. Not at all. But they're close enough. Now, the final touches need to be applied. I need to re-gap the driver side where the main fender meets the fenderette (manufactured word referring to the fender behind the fender). Once the driver side is re-gapped and cleaned up, I can move back to the passenger side to clean up the same area. After those areas are buttoned up, I need to pay some attention to the lower front portion of the fenders where they used to be bolted up to running boards (in their former life as rear fenders on a pickup). I need to add some weatherstripping to keep the front end quiet as a Jaguar's hood when it closes. That's the goal anyway. I'll see how that ends up.

At some point, I need to figure out how to incorporate the gas struts into the operation of the hood sides. I'm thinking I'll incorporate some strategically placed round-bar to strengthen the hood sides. I would like the gas strut to be located in a position that it doesn't start pushing the hood up until after the hood is slightly open because I really want the strut to also pull the hood down. It really won't be a big deal. I just need to figure out what length strut to use to get the bottom fulcrum above the upper fulcrum when it's nearly closed.

Two videos today...
1 of 2:

2 of 2:
 
Last edited:
Little more progress on the tilt-front-end. Bent up a couple more pieces of 5/16" round bar to go on the fenderettes. They will help to keep the metal from flapping in the wind as well as keep the fenders lining up for years to come (once the round bar is all done, that is). Check out the videos and pics.


GOPR7029.jpg

GOPR7030.jpg

GOPR7025.jpg

GOPR7022.jpg

GOPR7074.jpg

GOPR7072.jpg

GOPR7071.jpg

GOPR7070.jpg

GOPR7069.jpg

GOPR7067.jpg

GOPR7065.jpg
 
Auto Transport Service
Back
Top