• When you click on links to various merchants on this site and make a purchase, this can result in this site earning a commission. Affiliate programs and affiliations include, but are not limited to, the eBay Partner Network.

1968 Charger, Ray Barton 528 Hemi, Pro-touring.

As you've found, when you get the frame straightened, you need to hang the other panels on in that area before you unstrap off the rack. The rails can be in spec, but the upper structures can still be out. You need to hang whatever goes on in that area and do additional pulls so the attaching parts will line up side to side, forward back, diagonal etc. In your case: fenders, hood, grille, bumper, valance, check fender to door fit, fender to cowl. Lots of extra tweaking needs to happen after the main frame pulls.
Grille and bumper is not possible I believe. Now you got me worried..
 
At the shop I managed, we would do whats called "sheet metal pulls" to the inner structures, otherwise the bolt on parts would not line up properly. You have to put those parts on before you take it off the rack to check for fit. Same type of deal if you are putting weld on parts, say quarter panels or multiple weld on pieces, you need to check the fit to the surrounding areas. Alignment to trunk lid, doors, fenders, bumpers, glass etc. We heard of one dim bulb from another shop, through the glass company we contracted out to, that a quarter got replaced on a PT Cruiser but the tech didn't check the fit of the quarter window. They go to put the car back together after painting and discovered that the glass was to big for the opening. It was either re-do the job or trim the glass down. They trimmed the glass. Anytime we did quarter replacements/repairs or rear panel replacement/repairs, they checked fits with the bumper fascias, tail lamps, trunk lids etc plus I had them water test the areas too. We would have one of the smaller techs get in the trunk with a flashlight and watch for leaks while we flooded the jambs, tail light pockets etc. It was amazing how many leaks we could get even on a small whack to the rear bumper that didn't require replacements.
 
You are not helping @ckessel !!
The manager is known for doing good jobs, I just need to make sure he stays on top of it..
Thanks for the input though.
 
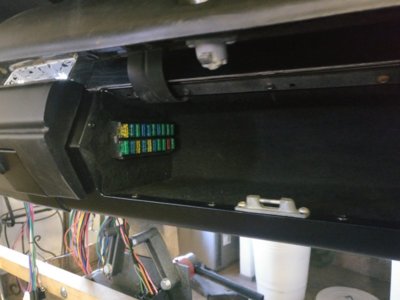
Friday night pleasure, fitted the fusebox.
IMG_20180824_201229.jpg
IMG_20180824_201249.jpg
 
I like the looks of that, sure beats crawling under the dash. Nice work
 
Sorry for making things look dire but its just things to be aware of. One of the many things I learned at that shop that I was unaware of. BTW, you dash is looking nice!
 
Love hat dash , nice work . What kind of material and how did you apply that wood gran to the factory pebble Finnish?
By the way that Barton HEMI is probable 700 + HP!
A suggestion for the torsion bars is 1.15 at least. Will make that Body flat and stable and still ride nice.
 
Love hat dash , nice work . What kind of material and how did you apply that wood gran to the factory pebble Finnish?
By the way that Barton HEMI is probable 700 + HP!
A suggestion for the torsion bars is 1.15 at least. Will make that Body flat and stable and still ride nice.
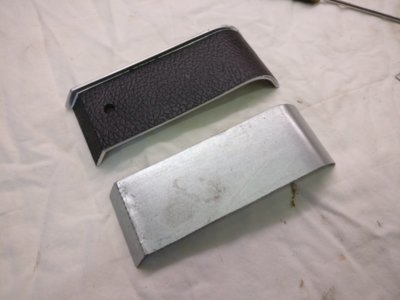
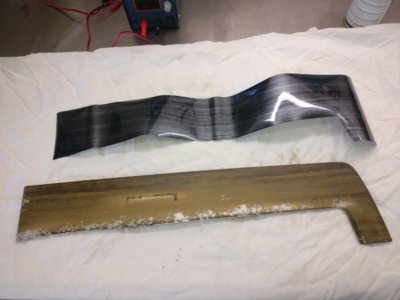
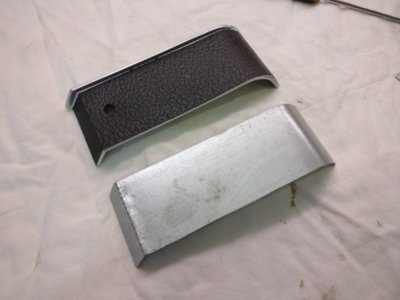
Thanks! I found a set of worn out factory woodgrain bezels (only the metal parts). They were cheap since they were a little bit warped and in a bad shape. Here is the ebay-link to similar vinyl.
https://rover.ebay.com/rover/0/0/0?mpre=https://www.ebay.com/ulk/itm/322608636383
I fabricated metalpieces for the small bezels on each side since I could not find any oem.

I have firm feels 1.06 torsion bars but I regret not buying sturdier stuff. Will try them out first, thanks for the advice!

IMG_20180801_193700.jpg IMG_20180801_145500.jpg IMG_20180801_193700.jpg
 
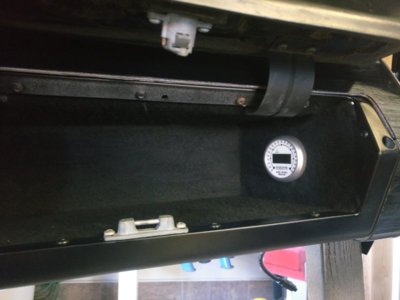
Completed the glove box and started to dig into the wiring. Changed place on the fusebox since some of the wires came a bit short in the old location. Fitted the air/fuel-meter on the right side, don't need to always see it.

IMG_20180902_150222.jpg IMG_20180902_150217.jpg
 
The engine came with an AC that I am ditching. It had some alu-brackets supporting also the alternator. Decided to cut off the bracket and reuse it to support the alternator only. The spanner didn't fit anymore so I drew up a new one and had it watercut. Think it will work.
aC7YZ3u9473jJl6YMo7GP3KDOzl12qcfOgIoIbJ3ZwSnqEBRWnBXLnFxNcvXA?width=495&height=660&cropmode=none.jpg

Rs1gdjLJ6ioc6oreMirc3BydOhDRg7vD3eWzpIW9sTy1A-QojB5Q9On2nsTZw?width=495&height=660&cropmode=none.jpg
 
Work is ongoing with the wiring behind the dash.
Had a look at the dimmer and found out it wasn't working, dismantled it, reglued the spring coil to the porcelain holder, put it back together but it is really hard to adjust the knob? Can it be greased to roll easier perhaps?
Found an android car stereo with a detachable screen. Will machine some custom alu-spacers so I can fit the stereo further back but still get a good angle on the screen and also positioned just outside of the lower pad. (I need to clean my working bench.:eek:)
Aso bought a small voltage meter that I will plock to pieces to see if I can fit it behind the Amp-meter faceplate. Fingers crossed.. I believe I have seen voltmeter sticker for these mopar gauges, anyone knows where?
fNTYJv0HdHVgYLuAp2SAAS6ZG3PW_nU_IEc0TXMGFWBz0Xa5TrpylsaoNT3tw?width=495&height=660&cropmode=none.jpg

HofudFYH1i0FkK801WLIoCDUImBgmGymCA_h6aVk5ghz1RjbMS6Bk-zRkZRoA?width=660&height=495&cropmode=none.jpg

DAThDJGrVfWqcRYH43SVtXT4pmVeDG75ae8Ch9sqru3QPgHtC_HqoZYH6eikA?width=660&height=495&cropmode=none.jpg
 
I like the parts & Interior stuff
nice choices, colors etc., classy
 
So, got the Charger back from the bodyshop so now it is finally square and I am back to square one again.. my Dad in the picture below, he looks a bit grumpy on this picture but I can assure you he is quite happy with me actually having some progress on this car at last.:)
My interest in these cars, especially the 2nd gen Chargers is all because of him. He's owned several original Hemi equipped mopars throughout his lifetime and it has sort of rubbed off on me, so I blame him..:D
He's very supportive and helps me in every way he can. It is our goal to have all three Chargers (-68,-69 and-70) roadworthy and in a nice shape (possibly)next summer so we can take them to a Swedish mopar-event.
18d_OoMDkK5uC5X5KIEbKWGOYdBAwOrgc784WL3s3wMlILmlm8DM6K-7EBjFw?width=660&height=495&cropmode=none.jpg


7DdjH70F54nldiSKrShnZSdXJVzd8gH7LkC_oETwyH5QU4m_52pdTsXU7YaiQ?width=660&height=495&cropmode=none.jpg
 
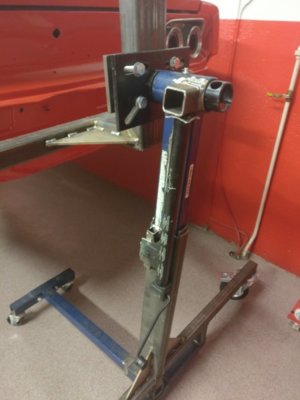
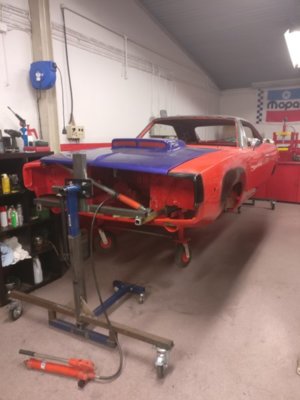
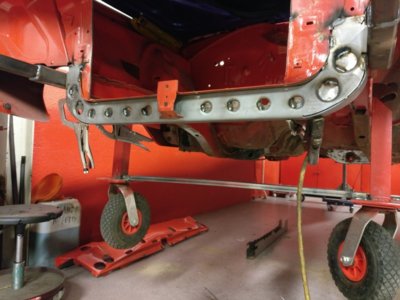
Finnished the rotisserie. Mounted two Mercedes carjacks I had lying around to make the lifting/adjusting easier. Just need to paint it..
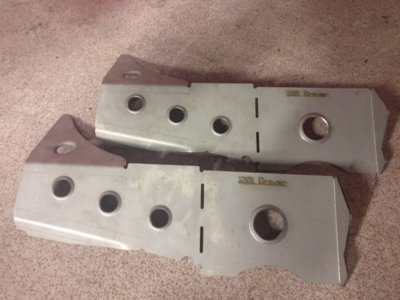
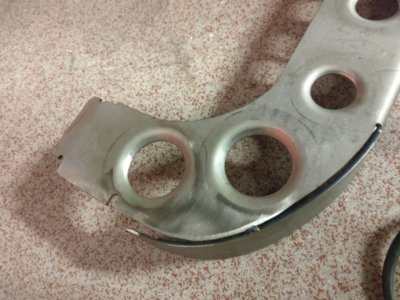
Opened the boxes with US car Tool stiffening kit.
Unfortunately I had received two driver side supports but US car Tool handled that very profesionally and sent me a new one free of charge. Nailed the center of gravity, I can spin the car around easily by myself manually.

IMG_20190101_153323.jpg IMG_20181220_185814.jpg IMG_20181220_185759.jpg IMG_20190103_175651.jpg
 
Tacked the rad core core support in place. Good fitment, just hade to open op the sides slightly.
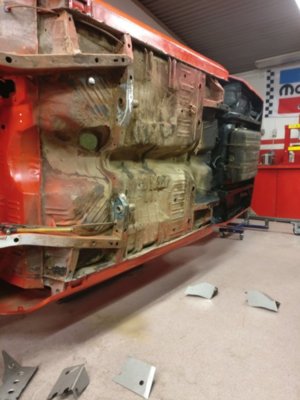
Next up is scraping the bottom of the car so I can start testfitting the subconnectors.
I have also decided to ditch the leaf springs and build my own 4-link with coil-overs. Any advice on coil-overs is appreciated.

IMG_20190103_172448.jpg IMG_20190103_184205.jpg
 
Auto Transport Service
Back
Top