• When you click on links to various merchants on this site and make a purchase, this can result in this site earning a commission. Affiliate programs and affiliations include, but are not limited to, the eBay Partner Network.

1968 Coronet RT

For some reason I can't find "bullet connectors" at the store that are the same size and will plug into existing OEM connectors. The opener came with a male connector on the end of a short wire. I bought female connectors rated for 14-16 gauge wire. The male was too big. I bought some rated for 10-12 gauge wire. The male was too small. I ended up cutting the original male off and replacing it. I glued the wire to the trunk hinge.
trunk1.jpg
trunk2.jpg
 
I put on the drip rail stainless trim - and then the rain started. I envy you guys who have a garage or shop big enough to work in.

dt1.jpg
dt2.jpg
 
I brushed on Weldwood Contact Cement. It seems most people say to use the spray on adhesive, but I have not had good results with the spray on glue in the past. Also the "pros" use something shot out of a gun, which I would think is not the same as the spray can stuff.
You can see the can in the 2nd, 3rd, and 4th pics in post #40.
 
Glued on both door seals. Glued on the trunk seal. Fitted the wire protectors. These are the screws I used. I don't know how many of you are familiar with these screws, but they are fantastic. The end of the screw is actually a drill. I put them in with my 18V impact. You run it fast, the drill tip makes a hole, and then the screw gets screwed in. Since I don't weld, that's how I am attaching the protectors. Got the parking brake pedal assembly in. Nice to have a working parking brake when you have a 4 speed. Made a mating wire and connector for the reverse light. Now I need to figure how the wiring from the trans switch was run. I just realized that switch also is for the back up lights. The car was originally an automatic, so I need to hook those lights and the reverse warning light up to the trans switch.

661.jpg
662.jpg
663.jpg
664.jpg
665.jpg
 
Last edited:
i went and got some of that contact cement. may do my headliner soon. thanks for info
 
Got all of the parking brake cables connected together. I think I have it adjusted well - I can push the car with the brake off but not with it set. Put in three window fuzzies that somehow didn't get installed with the other five. Rattle can painted the air cleaner lid. Installed the rear quarter upper panels, stainless trim, and lower panels. In addition to the convenience power windows afford, IMHO the look of the switches is much cleaner than a crank. Test fit the rear seat with the quarter panels in.

671.jpg
672.jpg
673.jpg
674.jpg
675.jpg
 
Worked on the interior today. Some of you out there might question why I seem to be sometimes putting things together, and then taking them apart. In the case of the carpeting, buddy seat, and front seats, here is why. The brackets for the buddy seat are home made, so not a perfect replica of the originals, and welded in by eye. I wanted to put the buddy seat in first, try to get it straight and centered, then put in the seats and check for spacing and straightness. The back piece of carpet has to have two slits cut in it for the rear buddy seat brackets. So I have to take out the rear carpet, get the seats and brackets in their correct positions, then take them back out, and then I can put the rear carpet back in and be assured the buddy seat brackets are correct, and then I can cut the slits in the carpet in the right place. I got the hole cut out for the gas pedal.
6191.jpg
6192.jpg
6193.jpg
6194.jpg
6195.jpg
6196.jpg
 
As the old saying goes measure twice, cut once. You're at least moving forward.
 
Engine rebuild done. Bored .030. Mild cam. Already had 6 pack rods and forged crank. 906 heads. OEM HP exhaust manifolds. OEM dual points distributor.


6291.jpg
6292.jpg
 
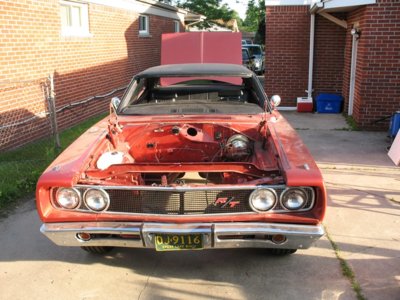
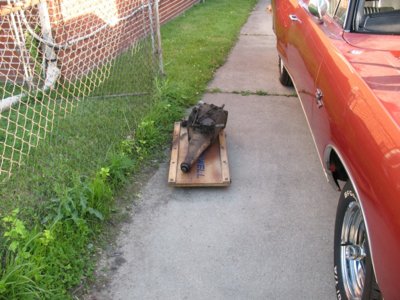
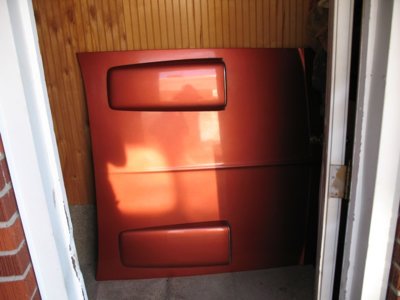
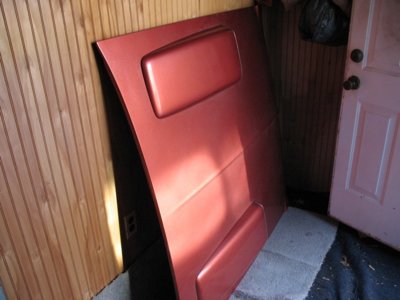
Laid down some paint. There was some welding done after paint, so some paint was burned in the trunk. Did the base coat, plan is to get the clear done tomorrow. Did some disassembly in order to do assembly - took off the hood in preparation of dropping in the engine. With very little available space in the garage, we put it in the mud room of the house. Tested a couple different ways to get the trans under the car. Best bet seems to be an old mechanics creeper. Still trying to figure a way to drop the engine attached to the trans all at once.

6301.jpg 6302.jpg 6303.jpg 6304.jpg
 
Got the clear shot. Bolted on the flywheel, clutch, bellhousing and starter. Mated up the trans. Still not sure if the motor and trans are going to go in as one with the car on the ground. One idea is to jack up the front end of the car, if need be, to get both in. Seeing as how much harder it is to mate up the trans underneath the car, we are going to give it our best shot.

711.jpg
 
Got the clear shot. Bolted on the flywheel, clutch, bellhousing and starter. Mated up the trans. Still not sure if the motor and trans are going to go in as one with the car on the ground. One idea is to jack up the front end of the car, if need be, to get both in. Seeing as how much harder it is to mate up the trans underneath the car, we are going to give it our best shot.

View attachment 792761
Best way to install both, from the bottom.
2.jpg
 
Auto Transport Service
Back
Top