• When you click on links to various merchants on this site and make a purchase, this can result in this site earning a commission. Affiliate programs and affiliations include, but are not limited to, the eBay Partner Network.

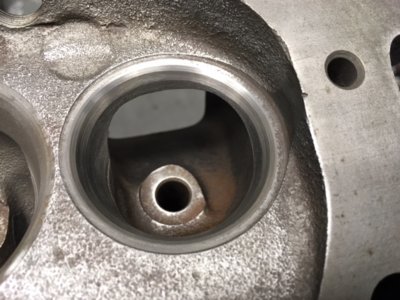
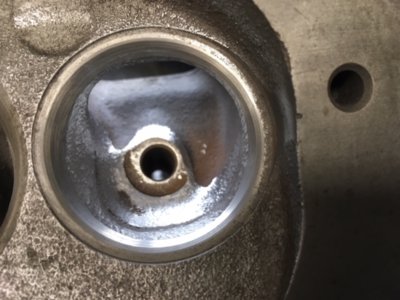
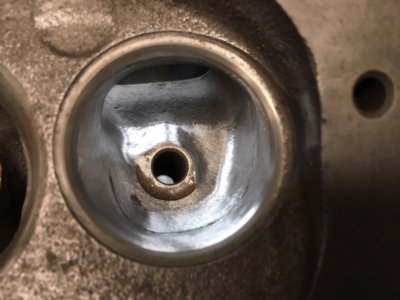
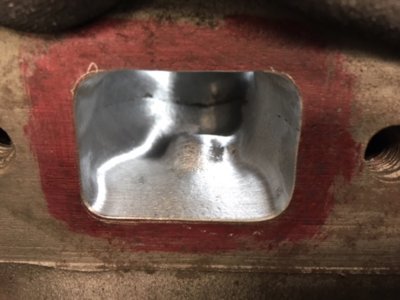
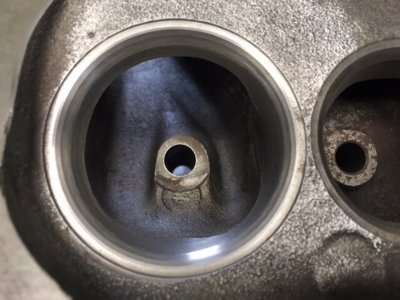
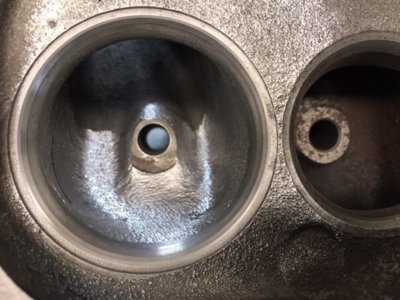
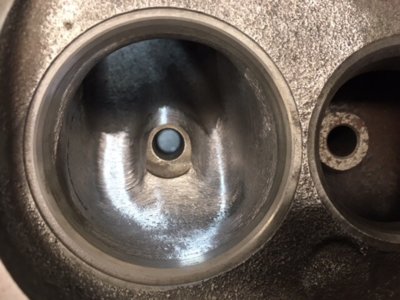
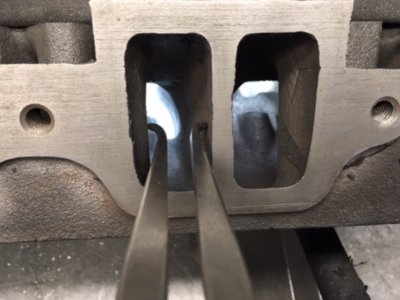
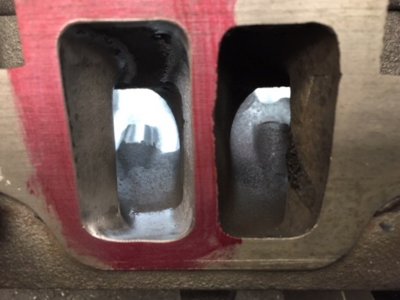
1st practice try at pocket porting on a 346 head

1967coronet

FBBO Gold Member
FBBO Gold Member
Local time
8:33 PM
Joined
Jun 19, 2014
Messages
5,635
Reaction score
8,980
Location
Iowa
Well I dug in so to speak. Old head to practice on and some ebay carbide bits.
I know I nicked the seat area a couple times and will stay away from the seat a little more in the future.
But for 1st try at pocket porting what do you guys think that know how to do this.
I got thick skin and remember I asked for this. :popcorn2:
108_8879 (800x600).jpg
108_8878 (800x600).jpg
108_8884 (800x600).jpg
108_8885 (800x600).jpg
 
I have never ported anything. I do have a lot of experience with A die grinder and the ABC’S of welding. Always Be Comfortable. Let the weight of the tool do the work.Electric Variable speed die grinders are great because you can the amount of material the bit is taking out better. Perhaps building an arm rest, It lets you have easier control with plenty of light. I think it’s super smart to have a practice head. If your about a new bit biting use it on scrap to break in the teeth. Looks good for a first try. You will get it
 
I prefer the air die grinder myself. I find the variable speed a little easier to control. I have used my Milwaukee electric extensively too. Getting the right carbide tools was the key for me. A few practice heads will give you the confidence. The ridge under the valve seat is the most important part. Narrowing the guide slightly helps. Don't open the bowl TOO much. Durability problems follow. You may ask how I know. The push rod lumps are an easy target, but be careful unless you are prepared to epoxy the outside. BTW, I found an inside caliper very helpful for consistency.
 
I prefer the air die grinder myself. I find the variable speed a little easier to control. I have used my Milwaukee electric extensively too. getting the right carbide tools was the key for me. A few practice heads will give you the confidence. The ridge under the valve seat is the most important part. Narrowing the guide slightly helps.
 
Years ago I used the DC templates for BB heads. Worked good.
 
Working at my home garage ,I have a air die grinder, I am going to the shop Sunday and grab a reg of one paint guns so I can tone down the die grinder a little. Going to try a couple more pockets. Thanks for looking at my attempt and any advice.
I have to round up a intake and exhaust gaskets and work those sides also to match. :D
 
Looking good pal. Restraint is a good idea. Those seats are sooo easy to slide up into. Keep in mind that what your shooting for is better flow. Not removal and shaping off every little thing. Just cleaning them up will make them better over stock. Get those gaskets and scribe the outlines and don't go too deep into the walls and weaken them. Looks great so far...
 
I think the word restraint is def applicable here.
What you've done has improved the flow from stock.

Don’t try and make pro stock heads out of them.
Sometimes less is more.

Don’t get carried away with the ex port openings.
They don’t need to be any bigger than the stock sized gaskets that are used with manifolds.
I’ve seen numerous porting jobs on those heads ruined by blowing out the ex opening.
They usually end up flowing less....... and making less power.

0883A489-9064-457E-815E-9BF4C52B73BC.jpeg FFF742E4-DCDC-4F7C-81A5-D2164CC50B43.jpeg 9817A2E1-8CDF-4F43-A465-CE6D3DF36F0E.jpeg
 
Couple more...

E6170451-9DCD-4EE5-89B9-1558E79AFB20.jpeg E3DC7AF9-E452-4856-A70B-FF7573513FF8.jpeg

Stock ex port flows mid-150’s.
That one flowed over 190 with the OE 1.74 valve.
 
Thanks guys for the advice and for the pictures PRHeads.
 
For the intakes...... you don’t need, or even want to get real close to the seats.
Making sure the bottom angle of the valve job is still pretty wide helps with the low/mid-lift flow.

3D4A76CB-BCA6-4CC2-8BF7-36285528EE69.jpeg A18B3D9E-2B9E-439B-915C-2A1F4CA744DE.jpeg F6E49508-5FFB-4631-B99D-F530B12CFCF9.jpeg

This intake port flowed [email protected] with some accompanying work to the port opening/pinch area.
 
Widened to 1.060”

Port opening matched to valley pan gasket.

Not worth anything til about .350-.400 lift, then it’s worth incrementally more as you open the valve farther.
A gain of 7-9cfm from .500-.600 lift.

4FD1B3A0-65F6-4858-A8BA-3E924666B07B.jpeg CD50AA4A-52E3-4421-8CC9-032511CA42A5.jpeg
 
Last edited:
Well I dug into a couple more. I still have to get myself to stay away from the seat area mabey another 1/8" down from the seat. I did leave some more meat around the guide area this time.
Thanks again for the pics. I had not seen them until now. they look great. hope my next set of pockets get a little better.
108_8886 (800x600).jpg
108_8888 (800x600).jpg
108_8893 (800x600).jpg
 
Auto Transport Service
Back
Top