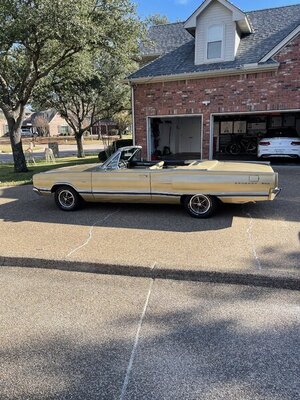
Sweet car! Hood luck with it. Looks like a solid starting point.
You are using an out of date browser. It may not display this or other websites correctly.
You should upgrade or use an alternative browser.
You should upgrade or use an alternative browser.
66 Coronet Convertible
- Thread starter Daytrepper
- Start date
Daytrepper
Well-Known Member
Dropped the 440 off at the machine shop today; will be cleaning up parts and getting things ready in the mean time.
Durandal25
Well-Known Member
Daytrepper
Well-Known Member
Is this the same daytrepper that was on dodgeintrepid.net?
Yes it is!
Daytrepper
Well-Known Member
Welcome sir,
I started my Charger restoration shortly after swapping my 2.7 over to a 3.5 with the help of your manual.
Cool, glad to hear the book was helpful to you. I still work on them from time to time; if you need any help or parts, let me know.
I still frequent DI net, still have my Intrepid; she's nearing 250K miles; still running like a sewing machine.
Daytrepper
Well-Known Member
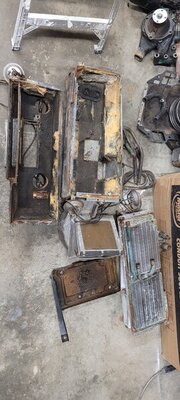
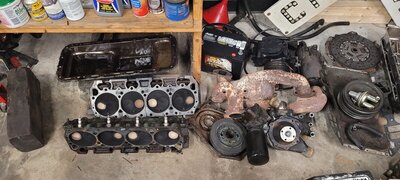
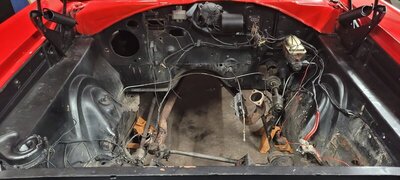
Lots of disassembly progress over the holidays.
The engine is at the machine shop, while thats going on, I'm going to rebuild the heater box, and the steering gear/column.
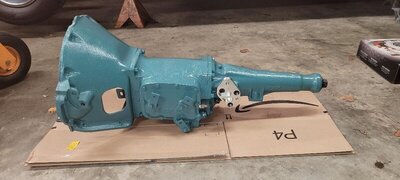
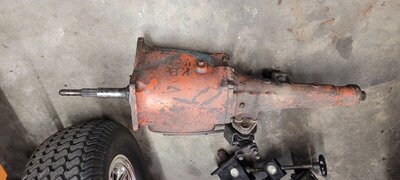
Go thru and replace all the gaskets and seals on the trans.
Not to mention there is a whole pile of parts to clean. That was the plan for today; but a parts order along with my parts washer solvent was lost by Fedex; again... lol.
Some pics of the carnage;


Daytrepper
Well-Known Member
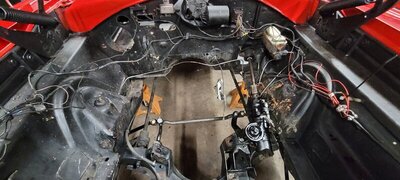
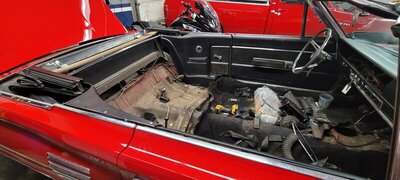
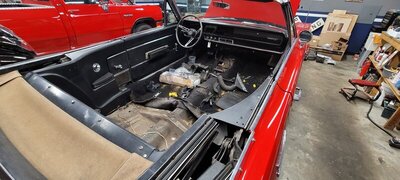
Lots more progress. Got the steering gear rebuilt, new tie rods/pitman arm, and interior pulled out for a refresh. Took the transmission apart today for fresh gaskets and seals. Found a few minor issues so I had to order some more parts. Also found an old extension cord powering the rear courtesy lights lol.
Waiting on parts for just about everything, hoping to be able to start putting her back together in the next couple weeks. Nice thing, no new rust!
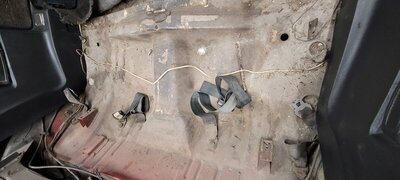
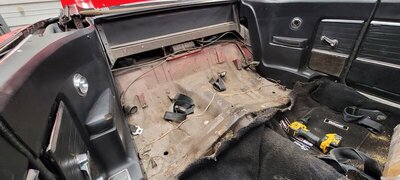
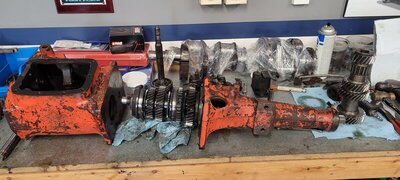
Waiting on parts for just about everything, hoping to be able to start putting her back together in the next couple weeks. Nice thing, no new rust!


Daytrepper
Well-Known Member
Thank you for posting! Keep it up!!
Daytrepper
Well-Known Member
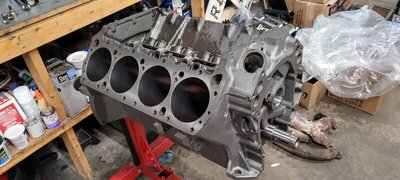
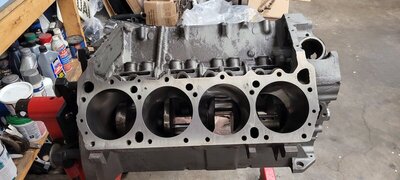
Today, got the block washed out after it came back from the machine shop, and mocked up/measured the crank, bearings, and oil clearances; everything was good, so I went ahead and installed it. Replaced the distributor shaft bushing and upgraded the main cap bolts to studs.
Whoever designed the rear main seal retainer on this engine has to be the devil's spawn....LOL....hope I never have to do that with the engine in the car.
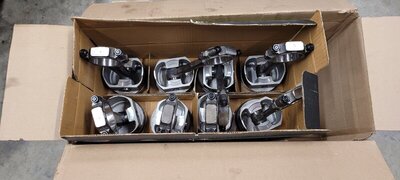
Checked all the ring gaps and got the pistons ready to install. I'll check the oil and rod clearances on those at the same time, make sure everything is good there. So far everything has been perfect, crank end play on the high side of spec, but good nonetheless. My piston ring compressor bit the dust, so I'll have to wait for a new one to arrive before going forward.
Found all the parts to get the old a/c working again too. Stay tuned.


Daytrepper
Well-Known Member
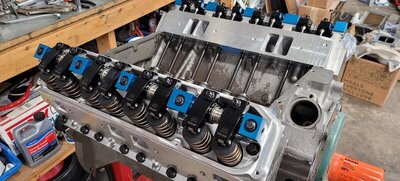
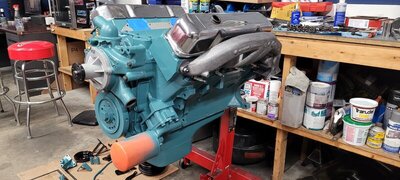
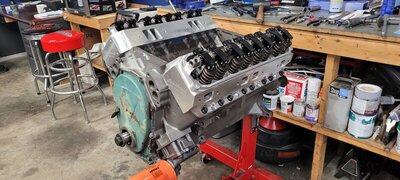
Got pretty far along with the 440 today;
Only one hiccup; yesterday during mock-up I found the machine shop installed one of the pistons backwards. LOL. Took it down there and they dropped what they were doing and swapped it to the correct direction--good people there.
Had to get the heads on to get a length on the pushrods; just waiting on those to arrive and I can set the valve train up, and close her up.
Pre-oil on the stand, paint, assemble accessories; shove it back in the car, hopefully start it up; LOL....

Dave6T4
Well-Known Member
- Local time
- 11:57 PM
- Joined
- Dec 31, 2020
- Messages
- 9,420
- Reaction score
- 22,805
- Location
- Ontario, Canada
It looks like your project is coming along well. Thanks for all the pictures. I was reading your post about rear end ratios and thought I might add my $0.02. Is just the centre "489" section a 1969 piece, or the whole rear end? The '66 and '67 B-bodies had the most confined wheel wells and really need to retain the narrower rear axle. On the subject of rear end ratios, I have found the 3.23 to be a nice compromise of economy and performance. I had once built a '67 Coronet wagon with a 440 and 4-speed, and had 3.55 gears in it. We planned on using it on a trip to visit family in Georgia (I am in Ontario), so I switched out to 2.94's. This dropped the rev's when cruising I-75, but made it much harder to get the car launched smoothly in first gear. I know a wagon is heavier than a convertible, but still something to consider.
![scan0002[2].jpg scan0002[2].jpg](https://www.forbbodiesonly.com/moparforum/data/attachments/1185/1185819-5188ec4995ef5c5f8d3bd150fa7dfdc1.jpg?hash=UYjsSZXvXF)
![scan0003[1].jpg scan0003[1].jpg](https://www.forbbodiesonly.com/moparforum/data/attachments/1185/1185820-f67a938f01cf4d44c974e3e8c0af10fa.jpg?hash=9nqTjwHPTU)
Daytrepper
Well-Known Member
It looks like your project is coming along well. Thanks for all the pictures. I was reading your post about rear end ratios and thought I might add my $0.02. Is just the centre "489" section a 1969 piece, or the whole rear end? The '66 and '67 B-bodies had the most confined wheel wells and really need to retain the narrower rear axle. On the subject of rear end ratios, I have found the 3.23 to be a nice compromise of economy and performance. I had once built a '67 Coronet wagon with a 440 and 4-speed, and had 3.55 gears in it. We planned on using it on a trip to visit family in Georgia (I am in Ontario), so I switched out to 2.94's. This dropped the rev's when cruising I-75, but made it much harder to get the car launched smoothly in first gear. I know a wagon is heavier than a convertible, but still something to consider.
Not sure on the whole housing. When I get to cleaning it up I'll see what I can find as far as casting numbers etc on it.
I'm sort of at a "wait and see" stance with the 2.94 ratio. Going to see how she drives with it and see whether I like it or not. I've had 3.55, 3.23 etc, but not a 2.94.
Daytrepper
Well-Known Member
Daytrepper
Well-Known Member
Daytrepper
Well-Known Member
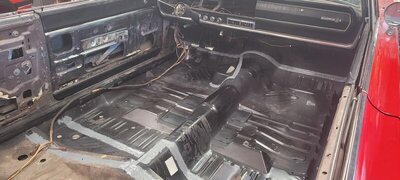
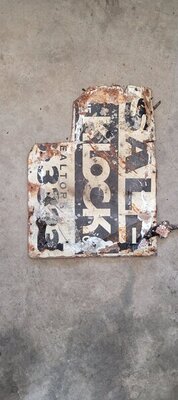
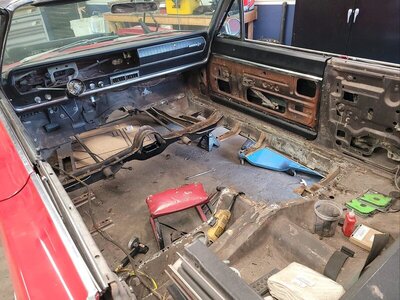
After a long conversation with a good buddy who does auto restorations for a living, I decided to go ahead and knock out the floor pan. It had a couple "soft spots" in the floor, didnt seem to bad. I was going to do it down the road. Well, glad I pulled the trigger and did it while the engine/trans and HVAC box is out; couldnt imagine doing it with them in the car. Also, the "soft spots" were worse than they seemed, which is usually the case. An old real-estate sign was used to patch the passenger side; and some smaller pieces on the drivers side and passenger rear footwell. Judging by the print on the sign this patch was probably done 30 years ago lol.
Glad I tackled it; right now, old floor pan is out, luckily, NO issues with any rocker panel rust, or any damage to the crossmembers and supports.
Got a new floor pan sitting here in the shop and next weekend I'm going to hopefully get it fitted up and welded in.
Here's the sign; now a piece of shop wall art; and as well as the car just before I prepped it for the new pan. Did all that today, including chopping out the remaining front section.


Daytrepper
Well-Known Member
Similar threads
For Sale: Not Mine
1970 Coronet 500 Convertible
- Replies
- 19
- Views
- 2K
- Replies
- 21
- Views
- 2K
- Replies
- 3
- Views
- 947
- Replies
- 2
- Views
- 1K

