• When you click on links to various merchants on this site and make a purchase, this can result in this site earning a commission. Affiliate programs and affiliations include, but are not limited to, the eBay Partner Network.

68 Charger R/T Clone refurb

The American Autowire harness requires you to change the connector on the steering column to match theirs, so I did that yesterday.

I got some braided split loom from Amazon that is a really nice option when you can’t slip loom over connectors. It peels open to slide the wires in and then springs closed. Very easy to work with and good reviews for durability and abrasion resistance. Secure the ends with tape or zip ties.

Alex Tech 25ft - 1/2 inch Cord Protector Wire Loom Tubing Cable Sleeve Split Sleeving For USB Charger Cable Power Cord Audio Video Cable - Protect Cat https://www.amazon.com/dp/B07FXF12HC/ref=cm_sw_r_cp_apip_neXXNF3BMvIMB

75027945-7C8E-4144-AF06-208715F5AB31.jpeg
 
Made some good progress today. Welded up a few small holes in the floor pan from sheet metal screws I used to hold the panels in place. Also drilled out and zapped a few areas In the rear floor section where there was some rust pitting.

Fumbled my way through applying body filler for the first time. I used Evercoat Rage Ultra and it was super easy to sand. I heard a lot of stories about filler that is rock hard but this was no problem at all. Depending on the weather tomorrow I will try to prime the engine bay and maybe the floor pan.

288676DC-14CC-4AA9-BAE6-F73B4D55363B.jpeg


I also set the seat in place to get an idea of what I’ll need to do to adapt it to the original mounting holes. Looks like it won’t be too bad, the only bummer is due to the contour of the floor pan I won’t be able to hide them under the carpet. No big deal though, I should be able to get away with 1/4” x 2” steel bar so it should be pretty easy to hide once it’s painted.

1E73B1CC-4483-4506-AC44-C49D17DDFD5B.jpeg
 
Last edited:
Made some good progress today. Welded up a few small holes in the floor pan from sheet metal screws I used to hold the panels in place. Also drilled out and zapped a few areas In the rear floor section where there was some rust pitting.

Fumbled my way through applying body filler for the first time. I used Evercoat Rage Ultra and it was super easy to sand. I heard a lot of stories about filler that is rock hard but this was no problem at all. Depending on the weather tomorrow I will try to prime the engine bay and maybe the floor pan.

View attachment 934450

I also set the seat in place to get an idea of what I’ll need to do to adapt it to the original mounting holes. Looks like it won’t be too bad, the only bummer is due to the contour of the floor pan I won’t be able to hide them under the carpet. No big deal though, I should be able to get away with 1/4” x 2” steel bar so it should be pretty easy to hide once it’s painted.

View attachment 934451
Those seats look really comfy. Should be able to drive quite a few miles without getting a back ache.
Duraglass with the fiber strands is the stuff that is really hard to sand.
 
Sprayed primer yesterday and will sand today once Easter festivities are over. I have to say the filler primer was much more of a pain to work with and clean up than the epoxy. It smoothed our pretty well but right out of the gun it was tough to get a nice even spray. Kind of splattered. Different gun from what i used for the epoxy, so that may have been part of it. Clean up was a chore that stuff got everywhere! Either way I’m happy with the result.
63651C84-B1F7-42C9-8D6B-B91E00523805.jpeg
 
Nice work! I've also been busy sealing old holes in the engine room, planning on spraying soon.
Keep it Up!
 
The weather has been too cold to paint so I’ve been working through some other jobs. I worked on the seat frame adapters for the modern mustang seats to the original seat anchor locations. The contour of the floor posed a few challenges but I think I have a reasonable solution. Once I get them finally located in the car side to side I will add a lateral brace as well.
I’m fairly tall so I put a little rake into the seat adapter to keep the rear down and lift the front.
It’s my first attempt at fabrication and I’ve already found things I would do differently to make them easier to install, so then driver’s side may look a bit different. I’ll get some pics of them installed later today.

4E1A6D9A-9782-45C3-8C4F-282EFDCBF050.jpeg


The slots in the top are reliefs for the seat adjustment mechanism.
 
Great thread - really enjoyed reading about your progress. If it makes you feel any better, my '68 Charger has been off the road for 8 going on 9 years - your plan was much better than mine. Keep up the posts, they're great and I'm learning a lot reading through it.
 
Great thread - really enjoyed reading about your progress. If it makes you feel any better, my '68 Charger has been off the road for 8 going on 9 years - your plan was much better than mine. Keep up the posts, they're great and I'm learning a lot reading through it.
Thanks for tuning in. I’ve been watching your build thread with great interest. Looks like you’re making some good progress!
A plan is only as good as the guy implementing it, and I have been known to get a bit off track :)
 
Thanks for tuning in. I’ve been watching your build thread with great interest. Looks like you’re making some good progress!
A plan is only as good as the guy implementing it, and I have been known to get a bit off track :)
We all do... Life gets in the way and your focus gets sidetracked & as long as you stick with the general plan eventually you finish the project... It's when you change the plan midstream that things often fall apart...

I watched guys building street rods back when the billet trend started, many were building cool rods that suddenly needed thousands of dollars spent on billet... A few years later billet had gone out of favor... So thousands of dollars spent & now you either aren't cool or the billet is getting removed....

Then it was the prostreet thing, cars almost done but now it needs wheel tubs & a tunnel ram...

Don't chase the current trend, set a plan & stick to it or you'll always be broke & the car won't get finished....

I know you have a plan & your working toward it so this rant isn't really aimed at you, just something bouncing around my head after seeing a guy I haven't seen since the early 90's.. His car still isn't done...... But it sure will be cool when it is.....
:lol:
 
The weather was great today and I was able to get some painting done. I put down epoxy in the interior and finished cleaning the engine bay for the last coat or 2 of sealer and then color! Weather should be good through the end of the week hopefully I can get it all knocked out before the weekend.
Then the parts start going back on!

I also cleaned out the windshield channel really well and brushed some epoxy on the bare metal spots.
BA252484-F934-4F4D-8B07-9760C9C7B311.jpeg

4E240CB2-B1CD-415E-AD17-3AF0D9AFFCCC.jpeg
 
Got the last coats of primer/surfacer shot today and stuck the heater on it to keep it warm overnight. I used the same primer, just thinned, with my other spray gun with a 1.4mm tip and it was much smoother going on, so I was pleased with that.

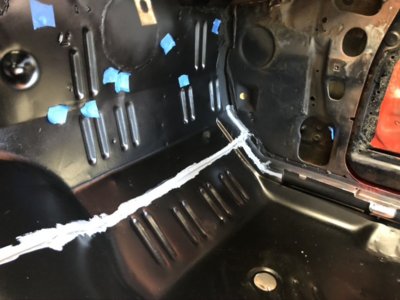
Also sealed the interior seams. I used the 3M Dynatron and it was really easy to work with.

C3B05100-CF52-4F2A-8280-6A4A92AA627F_1_105_c.jpeg
14C93FEC-0BF9-4A09-B9F5-012A520E91DD_1_105_c.jpeg


I also got out the VintageAir heater and started looking for places to mount it. After patching up a bunch of holes in the firewall, I REALLY hate the idea of drilling mounting holes for it, so I've been doing a bit of research on using urethane/acrylic/epoxy adhesive and bonding some mounting studs on the inside of the firewall.

This is the heater unit I went with, it will connect up to the factory defrost vents.

https://www.vintageair.com/heater-only/#

Tomorrow I'll be finishing up the seat mounting adapters and putting in the Dynamat.

Weather should be nice Friday so I should be able to finish sand and shoot color in the engine bay!

14C93FEC-0BF9-4A09-B9F5-012A520E91DD_1_105_c.jpeg
 
Last edited:
Color is in! And wow is it red. I think it's the correct color. I had some leftover Deltron from the previous owner and I opened the can to compare and they looked pretty similar. I'll know for sure once I get it unmasked and can see it against the older color. The existing paint is over 20 years old, so I'm sure it's not going to be an exact match, but... Hopefully I chose some good places to mask and the transitions won't be obvious.

I have a few problem areas though. Some small fish eyes on the passenger inner fender and some runs on the driver's side. The runs are a bit obvious, but if I can't fix them they should be hidden by the battery. Overall for my first paint job I'm pretty pleased.

D273735C-B4FC-4974-B1BF-FD09D136FA09_1_105_c.jpeg


I also spent about an hour reassembling my grille except for the headlight doors and vacuum pods. The reproduction mounting hardware is really crap compared to OEM.

53991375-D3DA-40A8-B89F-FB8F7B4F5CC8_1_201_a.jpeg


Then I installed Dynamat I had left over from another project. It got me most of the way through the passenger compartment. I was able to do the package tray, behind the rear seat and most of the floor and trans tunnel. I still need to do inside the doors and quarters and the firewall.
 
Having just read this entire thread, all I can say is well done on the progress so far. You have certainly taken on a number of tasks, and it is great to see you are doing it on your own....learning new skills is a good thing.
Well done. :thumbsup:
 
Thanks Kiwi, it's been an adventure to say the least! My grandfather would always say if he could spend the same money to buy the tools as he would pay someone to do the job, then at least he'd still have the tool when he had to do the job a 2nd time (which was often sooner than later :) ). He had a shed-load of tools and could fix everything except masonry, his life-long nemesis. :cursin:

I'm learning slowly, but it feels good knocking down jobs, even if it is 2 steps forward, 3 steps backward sometimes.

For example, I learned tonight that you shouldn't assemble the grille without the headlight doors in place first. :rofl:
 
After a lot of fiddly work, and using what I learned from my first attempt at the pass. side brackets, I finished the driver's seat mounting brackets. Just a bit of finish welding in a few spots and some paint and they're complete. They're hilariously overbuilt. I roped my oldest daughter into welding up the seams after I had everything tacked into place. She did great for her first welding job. Certainly loads better than my first attempt.

You can see how the front of the seat track is higher than the rear, and that's to try and bring some height to the front of the seat so your legs stay in contact with the seat bottom, while keeping your butt low. As big as these cars are, they are not super tall inside. :)

To try and understand how high to make them, I measured the height of the leading edge of the seat to the foot position in the footwell in both my SUV and my wife's minivan. They both measured about 14-15". With the seat flush on the floor of the Charger it was only 7-8", and felt awkward with my legs not being able to rest on the seat cushion. After a bunch of trial and error using wood blocks to test different options, I split the difference and angled them so I got about 11" in the full back position.

I positioned the seat based only off of measurements I took, and haven't yet had a chance to try them with the steering wheel in place, but the distance to the pedals feels comfortable, so I'm reasonably confident they will work out. Plus, the newer seats have a lot more front/back adjustment in the tracks than my originals did. In the pic the seat is adjusted all the way rearward.

If these don't work out I'll make another set and use these as a boat anchor or home defense weapon.

This is a used set of seats I got off eBay from a 2012 Mustang. These were a little tough to find as I wanted seats with full manual adjustment. Most late-model cars have motorized adjusters which makes them heavy and very tall/bulky at the base. I'll throw one on a scale to see, but if I had to guess I'd say 60 lbs a piece, which isn't much more than the original low-back buckets, and these still have the side airbags in them.

The driver's side has some cracks/wear marks in the vinyl on both side bolsters and a small tear in the back near the pouch. Once I finalize the passenger side brackets I'll see if I can find someone to touch up the worn spots.

IMG_2938.jpeg


This car had the buddy seat, and no console, so I need to think about what I'll do to take up the space on the trans tunnel. An original console sounds nice but they're pretty spendy even for an original, cracked one. Still not sure what I want to do yet.

I also used my last scrap pieces of Dynamat inside the rear quarter and installed the passenger rear window regulator.

There are some good threads on the process and I used this video to guide me.

 
While I wait for the engine bay paint to cure I did some parts ordering. I mentioned previously I wanted to see if I could mount the heater box to the firewall without drilling holes. I've seen people use Weld-Mount products, but the kits are very expensive, and spending over $200 for a variety pack of stuff, most of which I'll never use, doesn't make sense.

https://www.partsvu.com/58053-weld-mount-executive-adhesive-fastener-kit-w-at-8040-adhesive.html

So I bought some of their studs from Amazon. $30 for 10 of these buggers still seems like robbery, but I'll give it a shot.

https://www.amazon.com/gp/product/B00LAHEL4I/ref=ppx_yo_dt_b_asin_title_o03_s00?ie=UTF8&psc=1

I figure with 10 I'll be able to do the heater unit and MSD box under the dash.

I'm still trying to figure out what to use for adhesive. I like the idea of the 3M panel bond, plus I have other areas where I could use it, like reattaching the hood structure to the hood skin, but I'd have to buy the gun ($65) and I'm not sure I'd ever use it again. I don't want to completely cheap out, but $7 for JB Weld sounds like a decent alternative!

I also ordered the Dynamat knock-off by Noico and some heat barrier as well.

https://www.amazon.com/gp/product/B00URUIKAK/ref=ppx_yo_dt_b_asin_title_o00_s01?ie=UTF8&psc=1

https://www.amazon.com/gp/product/B07TKXMPH7/ref=ppx_yo_dt_b_asin_title_o00_s00?ie=UTF8&psc=1
 
...................

There are some good threads on the process and I used this video to guide me.


Thanks for posting that video clip. I like the line where he says when he first removed a window regulator set, there were no videos for tuition. That's exactly where I was....had to do it the hard way. :)
 
Still waiting on a couple Amazon orders to finish up the interior, then I can reinstall the dash, rear windows, and start on the wiring.

I was debating what to do for the underside, now that I have a combination of bare metal and e-coat. I called around a few places to see about some pro-applied bedliner (line-x, etc.) and the guy said the only way they'd do it if the car was on a rotisserie. Regular auto body shops didn't want to take the job, and the couple of small shops I did call weren't too excited about it. So I bit the bullet and decided on just DIY-ing it and bought some 2K bedliner and will roll/brush it on. Can't say I'm looking forward to the job all that much, but it does save me the hassle of loading the car up on a trailer (and finding a trailer).

I did run into a snag trying to install the rear quarter window whiskers. One of the clips is out of alignment and is preventing it from going in. I'll get some pics tomorrow, but it's about 1/8"-3/16" off. My options are to remove that clip, or enlarge the hole. Looks to be the same issue on both sides.

Then I spent an hour playing 'where did I put those parts I ordered 16 months ago'

After that I spent another 45 mins failing to remove the flexplate/torque converter bolts.

Time for a nap!
 
Auto Transport Service
Back
Top