• When you click on links to various merchants on this site and make a purchase, this can result in this site earning a commission. Affiliate programs and affiliations include, but are not limited to, the eBay Partner Network.

71 Charger Reborn

1986ed

Member
Local time
7:52 AM
Joined
Jun 19, 2022
Messages
22
Reaction score
25
Location
California
This will be a build thread for my first restoration project and all the excitement (or complications) that I'm bound to experience along the way. I bought my 1971 Dodge Charger from a family friend back on June 12th 2021 and now I'll a little over a year into it. I bought it from him completely disassembled as he was going to paint it. That task has now fallen onto me.

Not only is this my first restoration, but it's also my first Mopar, and my first muscle car in general. I've been tinkering with 80s Ford trucks since I was in high school but that often feels like a totally different animal! Ever since I was a kid I've been into classic muscle cars, especially Dodges, so I'm ecstatic to finally have one of my own.

As far as I can tell, there are essentially two different types of people when it comes to classic car restorations. The resto-mod guys and the OEM purists... I fall somewhere in between. While I admire the dedication, skill, and knowledge that is required to do a proper OEM restoration I find it silly to spend countless hours rebuilding a car only for it to run like it's 50 years old. On the other hand, while it does take a great deal of skill and creativity to make an old car look modern and unique, I feel that some of the beauty and charm held by old cars can get lost along the way.

My goal, with this project, is to try and maintain the original look of my Charger while introducing some modern technology in order to increase its drivability and bring it into the 21st century. Hopefully some of you will enjoy this thread and my journey. But at the very least I will have this thread to review my progress in the years to come.
 
Looking forward to seeing and reading your project. Have fun brother
 
Look forward to following this.
 
These are the first two photos I ever took of the Charger right after it was dropped in my driveway.

IMG_3518.jpg


IMG_3519.jpg
 
My initial plan was to leave the original paint and just start reassembling the car so I could drive it as soon as possible. So I began with steering, suspension, and brakes. This Charger came equipped with four-wheel drum brakes. There's a reason nearly all modern rides come with disc brakes as the stock option and as my dad always says, "What's more important? Acceleration or stopping?" Seeing as though I don't want to ram this thing into a tree and ruin all my hard work... I'll have to go with stopping.

I replaced the front drums with a set of Wilwood disc brakes and had planned to do the same to the rears until I was dissuaded by my dentist. (Shout out to Dr. Johnson) He's a huge Mopar guy and owns a bunch of them. He told me that the rear-end I have isn't very robust and thus it would be unwise to invest money into it. I hear that either a Dana 40 (?) rear-axle or a Chrysler 8 3/4 are the ideal way to go. Does anyone have thoughts on this? It's certainly something to think about for the future, but in the meantime, I'll be using what I have.

I'm 98% sure I have an 8 1/4 differential, that's what the little tag around the diff cover bolt says. Do the numbers stamped on the side of the diff corroborate this?

IMG_3631.jpg


IMG_3599.jpg


IMG_3563.jpg


IMG_3562.jpg


IMG_3597.JPEG
 
Last edited:
My next step was to refurbish the motor. Just about every step of this process was a first for me... I began by taking a bunch of photos so I'd have a visual guide in case I forgot where things went. Obviously, this thing has gotten some use over the years. It doesn't help that it was just sitting outside, getting covered in leaves and rain, for the last seven of them. Not only did I want to clean up the internals and replace all the seals, but I also wanted to give it a fresh new paint job.

IMG_5979.jpg


IMG_5978.jpg


IMG_5981.jpg
 
Naturally, my disassembly started from the top down. I did not take many photos during this time but I did carefully lay out the heads, push rods, lifters, and rocker arms on my shelf in the order they came off. I had the heads resurfaced, cleaned the old gunk off the rocker arms, and replaced the lifters and push rods.

During the disassembly process, seeing as though I pretty much went into it blindly, I found this video on YouTube, as well as this forum (naturally), to be very helpful:


My Charger came with a Mahle engine rebuild kit, but that's not where I got the lifter and rods. When I pulled them out of the box, they had already begun rusting pretty badly.:cursin: 
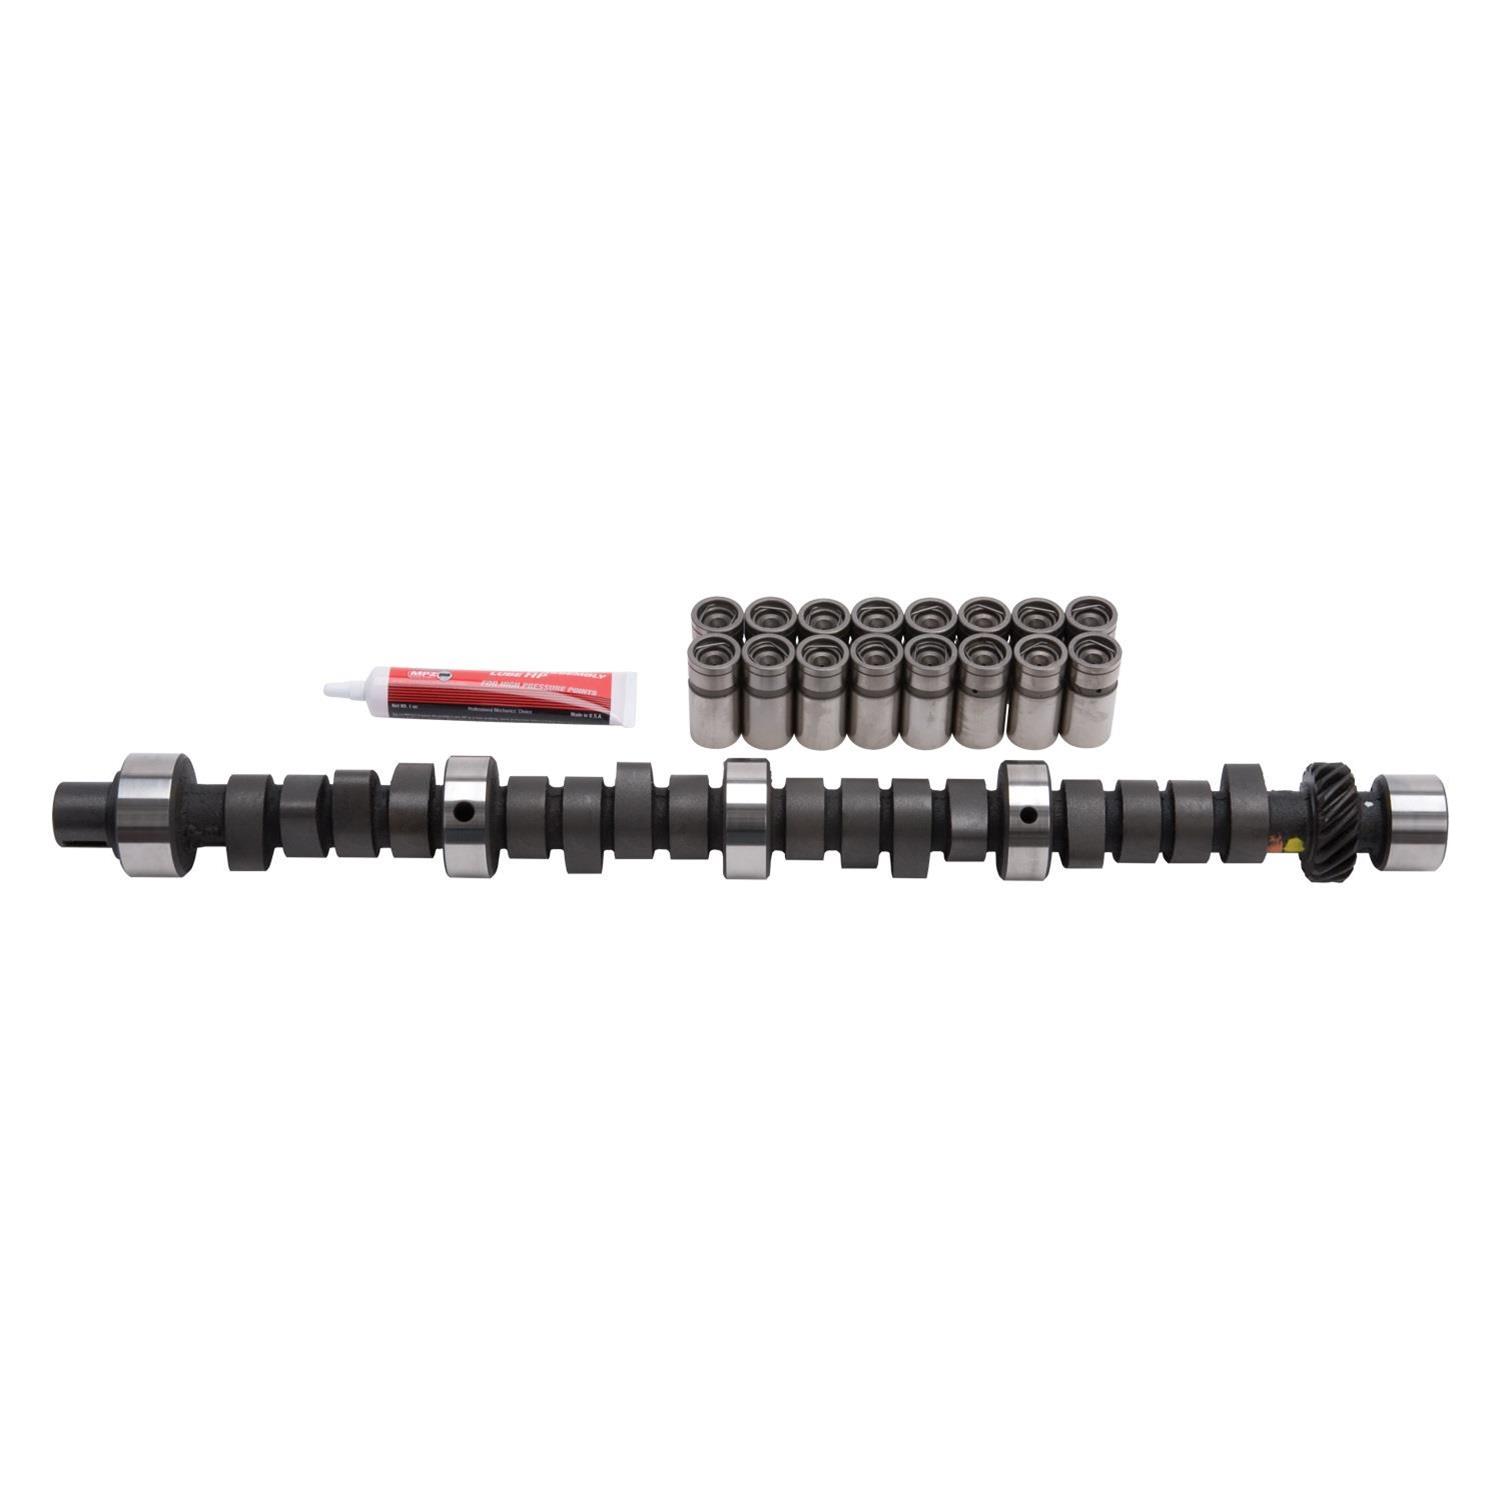
Luckily the aftermarket camshaft I ordered came with new lifters and I got some rods to go with it. I went with the Edlebrock 2177.

A new timing set (Edlebrock 7803), engine mounts, water pump (Gates 43026), oil pressure switch (SAA4589), PCV valve (PCA1005), oil filler cap (10066), and all the seals would be the last of the stock replacement parts on this motor.

IMG_6045.jpg


IMG_6044.jpg


IMG_6043.jpg
 
The real fun began when it was time to start stripping off the old paint (well what was left), oil, and rust. I used a metal wire wheel attached to my drill and went to town on it. The biggest issue I faced was that I was doing this in the middle of Winter. Although everything lives in a car tent, it still gets a little moist in there. Every time I had to stop what I was doing and come back the next day there would be a little rust forming. A mild inconvenience at best, but still annoying.

I was never a fan of the blue paint Chrysler used on their LA motors in that era. It just doesn't match the aesthetic of a muscle car. Thus I opted to repaint this 318 as a red one instead. First I added a couple of layers of Rustoleum high heat engine primer then I topped that off with good old Chrysler red (Duplicolor DE1632). Oddly enough, even though Carquest/Advanced Auto carries the Duplicolor brand, I couldn't order either Chrysler engine paint color through them. I had to get it from a NAPA instead.

IMG_3765.jpg
 
I love the look of chrome valve covers on a red engine block. But I'm not interested in them having "EDELBROCK" stamped on top (or any other brand for that matter). I also prefer the rounded style over the more rectangular style. This left me with one option for aftermarket valve covers.

But I wasn't interested in paying $80 for covers made out of the same material as the ones I already owned, just painted a little differently. Instead, I bought a can of chrome-colored Rustoleum spray paint, used the engine primer again, then painted over my old valve covers. The dark grey hue left by the primer is probably why my covers didn't come out very vibrant but I'm still satisfied with the outcome.

My plan is to update my Charger with the hippest ignition components and convert it to throttle body EFI. I went with the MSD Atomic EFI system.
What really attracted me to this was that it is self-tuning. I've never owned a carbureted car before and the prospect of spending hours tuning one of those things is a little intimidating. Besides all cars have been fuel-injected for years now, there's a reason for that.

The Atomic EFI kit will mount to any 4-barrel carburetor intake. Of course, the 318 only came with a 2-barrel intake so I had to replace my original one with an Edlebrock 2176. I equipped that and installed all the accessory bolts so I wouldn't lose them. But I haven't installed any of the ignition components yet. I did not want them to rust while I wait to install the engine so they're currently in a nice pile in my room right next to the dash. (Yes, my girlfriend hates me.)

I think the motor came out really nice and all the hours I put into it were worth it. Fingers crossed that it fires up the first time I start it.:praying:

IMG_6306.jpg


IMG_3821.jpg


IMG_6309.jpg


IMG_6307.jpg


IMG_6308.jpg
 
After I finished building my motor I realized that it would be silly to install all these new parts and freshly repainted parts onto a vehicle with an old and decrepit paint job. So I figured I'd bite the bullet and start the repainting process. Initially, I was just going to get a can or two of touch-up paint and fill in the gaps in the paint job. But after going to multiple paint shops with the vehicle's paint code (W3) I couldn't get a correct match. This is probably because I was trying to match a 50-year-old paint job with brand-new paint.

I was never a huge fan of the white paint in the first place so this gave me a great opportunity to make it something different. I've never painted a car before, let alone use a paint gun. The closest thing I've done is use a can of spray paint. So first off I had to get the spray gun. I got a great 3-gun set from my local parts store but then I quickly remembered that I don't have an air compressor.

Luckily one of my mechanic buddies was trying to get rid of his old one, all I needed to do was replace the pump. The motor and tank worked just fine but the pump had a bent crankshaft. I got a cheap pump and filters from harbor freight then went to work on assembling the compressor. 5 trips to the hardware store later and that thing was rigged up and ready to go. It's certainly not pretty but it gets the job done.

IMG_6522.jpg


IMG_6521.jpg


IMG_6520.jpg
 
By now I've just about primed half the body. I've been using a thick wire-wheel attachment for my angle grinder to grind all the old paint off and bring the car to bare metal. I've been using Rustoleum automotive primer and Specialty Reducer to prime the car.

Since there is so much car I've been doing it in sections. Clean up one spot, spray it with primer, then do another section on another day. First I remove all the old paint, then I wash it with Simple Green to remove any dirt or oils, then I rinse it off with water. While the water is drying I fire up the compressor and start mixing the primer and reducer. By the time that's all ready the metal is dry and ready to go.

Painting is a lot like welding... for every 10 minutes of painting/welding, there are 5 hours of prep.
I started with the engine bay. Seeing as though this was my first time painting I figured I'd start with an area that people wouldn't see a whole lot of, one that would be covered by quite a few parts. My first attempt went horribly, I set the paint gun down on my toolbox and it spilled all over the tools I also kept rubbing the back of my shirt on the areas I just painted. But oh well, it's all a learning experience. After a few more passes with the gun, I think it came out quite nicely, although I will be going over the whole area again after I've primed the whole car.

IMG_6439.jpg


IMG_6448.jpg


IMG_6447.jpg


IMG_6444.jpg
 
I have a few rust holes I'd like to take care of but I'm not sure of the best way to do so. If they weren't out in the open I'd ignore them but they're right at the base of the windshield. I don't want to use Bondo because I hear it's fraught with issues. What about doing small tac welds over the holes and then using a flap disc to flatten them out? What have you done to remedy this issue?

IMG_3970.jpg


IMG_3969.jpg
 
My initial plan was to leave the original paint and just start reassembling the car so I could drive it as soon as possible. So I began with steering, suspension, and brakes. This Charger came equipped with four-wheel drum brakes. There's a reason nearly all modern rides come with disc brakes as the stock option and as my dad always says, "What's more important? Acceleration or stopping?" Seeing as though I don't want to ram this thing into a tree and ruin all my hard work... I'll have to go with stopping.

I replaced the front drums with a set of Wilwood disc brakes and had planned to do the same to the rears until I was dissuaded by my dentist. (Shout out to Dr. Johnson) He's a huge Mopar guy and owns a bunch of them. He told me that the rear-end I have isn't very robust and thus it would be unwise to invest money into it. I hear that either a Dana 40 (?) rear-axle or a Chrysler 8 3/4 are the ideal way to go. Does anyone have thoughts on this? It's certainly something to think about for the future, but in the meantime, I'll be using what I have.

I'm 98% sure I have an 8 1/4 differential, that's what the little tag around the diff cover bolt says. Do the numbers stamped on the side of the diff corroborate this?

View attachment 1302034

View attachment 1302035

View attachment 1302037

View attachment 1302038

View attachment 1302039
It's Dana 60, not 40. Just fyi.
 
By now I've just about primed half the body. I've been using a thick wire-wheel attachment for my angle grinder to grind all the old paint off and bring the car to bare metal. I've been using Rustoleum automotive primer and Specialty Reducer to prime the car.

Since there is so much car I've been doing it in sections. Clean up one spot, spray it with primer, then do another section on another day. First I remove all the old paint, then I wash it with Simple Green to remove any dirt or oils, then I rinse it off with water. While the water is drying I fire up the compressor and start mixing the primer and reducer. By the time that's all ready the metal is dry and ready to go.

Painting is a lot like welding... for every 10 minutes of painting/welding, there are 5 hours of prep.
I started with the engine bay. Seeing as though this was my first time painting I figured I'd start with an area that people wouldn't see a whole lot of, one that would be covered by quite a few parts. My first attempt went horribly, I set the paint gun down on my toolbox and it spilled all over the tools I also kept rubbing the back of my shirt on the areas I just painted. But oh well, it's all a learning experience. After a few more passes with the gun, I think it came out quite nicely, although I will be going over the whole area again after I've primed the whole car.

View attachment 1305116

View attachment 1305117

View attachment 1305118

View attachment 1305119
By putting water on bare metal, you caused it to start rusting. Even though you are putting primer on it, it will rust. Proper way to prep for paint is use a grease and wax remover you buy at the paint store, followed by a tack cloth. You can't use automotive paint over rustoleum primer, it is an oil based paint.
You really need to go to an automotive paint store and find 'the guy' that knows how to paint a car and what all the products are and their good and bad qualities. Hate to see you put so much time and effort into something and then have it start bubbling and rusting months after it's done.
Read some of the build threads on this page. Most guys go into a ton of detail as to the process of painting. Good luck and I really like 71 Chargers
Screenshot 2022-06-27 8.10.52 PM.png

This is what I've been using. Are you telling me that this primer will not work for automotive applications even though it specifies that it's for automotive applications?
 
Your differential is the 8 1/4"...decent axle and will hold up well to a basic small blocl, and even a stock big block but a 8-3/4" unit is what I'd want to run.
 
View attachment 1305284
This is what I've been using. Are you telling me that this primer will not work for automotive applications even though it specifies that it's for automotive applications?
I have never used it, so I cannot comment. I would take it into an automotive paint store and ask an expert as to what you can topcoat over it, or if it is even compatible. Usually rustoleum is an oil based paint, which is why they say it is a rust preventative. Also, I have never seen an automotive paint product that says it can be brushed on.
Also, after you spray water all over a panel, let it dry and then take some clean paper towels and wipe over it. It'll look orange, that's the rust forming already.
 
Auto Transport Service
Back
Top