• When you click on links to various merchants on this site and make a purchase, this can result in this site earning a commission. Affiliate programs and affiliations include, but are not limited to, the eBay Partner Network.

8 3/4 build follow along

dvw

Well-Known Member
Local time
9:22 AM
Joined
Feb 16, 2010
Messages
8,957
Reaction score
16,929
Location
waterford mi
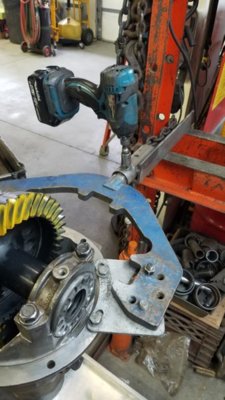
So being laid off I'm finishing up projects. This is a 4.10 with a spool for a friends 65 Belvedere. He's had my center section in it for years with a sure grip. Car runs 11.30s. I'll say right now, if you dont do at least a couple axles a year, the time and tools probably arent worth the trouble. Mark the caps for side to side. Knock it all apart. If you dont have a bearing puller you can cut thru the outer race. Knock the race and rollers off. Then you can slice into the inner race. Be careful not to get into the carrier. Then knock the race off with a chisel. Save the old pinion shim. Clean it all up and we'll get started. I built a fixture that mounts to my press to hold the carrier. A few homemade tools. The spanner is a piece of 3/4" stock with two
20200411_142939.jpg
7/16" bolts. A couple pieces of pipe to drive the bearings on. Old races split with a cutoff wheel to drive the new races in. 3/4" aluminum to use a jaw protectors for the vice
Doug
20200411_143516.jpg


20200412_112836.jpg
 
So now we're cleaned up. Old races and bearings removed. Stone the back of the ring gear, mating surfaces of the caps, and the carrier or spool. Warm the ring gear up and slip it over the carrier/spool and start the bolts. Alternate side to side until they're snug. Remove each one individually and apply locktite. Torque to 50lb/ft. Holding the spool in the vice can be tricky. I use a 13mm socket to wedge against the jaw. A 3/8- 1/2 adapter keeps it from falling thru. Next I polish the pinion so the bearings are a snug slip fit. This procedure is shown by Stange axles in their tutorial. Some people dont agree with this. So if you have the proper tools to pull the pinion head bearing off a few times to get the pattern perfect you can do it that way. Start with your original shims for pinion depth and pre load for a 742 case. Slide (or press) the pinion head bearing on. For a 489 leave the crush sleeve out for the time being. Tap the pinion races in. Set the old sliced races flipped over backward on top of the new races. Use a punch and tap on the old races to seat the new ones. Install the pinion, bearings, yoke. 489 case snug the nut just enough to make the pinion slightly stiff to turn. 742 case snug the nut. If it spins free you have to much pinion preload shim, to tight the opposite .
Doug
20200411_162309.jpg
20200411_162657.jpg
20200411_143126.jpg

20200412_114236.jpg
 
Now we're getting somewhere. Press the side bearings on with a piece of pipe. It needs to have an inner diameter slightly larger the the inner diameter of the bearing. Otherwise it will get stuck. The outer diameter has to be smaller than the bearing cage. Oil up the bearings and set the carrier in place. Set the threaded adjusters in the case. Important; make sure when installing the caps that they set flush and the adjusters spin freely before tightening the bolts. With the bolts snug they should be able to rotate easily. If not STOP. Get them installed correctly. Set your dial indicator against the tooth. Snug the backside adjuster and loosen the opposite side until you have .001" backlash. At this point both adjusters should just be snug barely touching the bearing races cap bolts should be snagged. Now tighten the tooth side adjuster. This will preload the carrier bearings and create backlash. Start at .006"-.008". Apply marking compound. Load the ring gear by laying a pry bar against it while spinning the pinion. I use a 1/2" drill motor with a 1/2" driver for the socket. Dont use a impact. The pulses vibrate and create an un even pattern.
Doug
20200412_132626.jpg
20200412_115920.jpg
 
Last edited:
Now we read the pattern. If the pattern is high as in the 1st photo the pinion shim is to thin. If it's too deep towards the root (bottom) of the tooth the shim is too thick. Where the the pattern ends up toe to heal means nothing. It took me 4 times to get the pinion depth and preload correct. Generally speaking if you add .005" to pinion shim you'll need to add roughly .005" to the preload shim pack. Once the depth I'd good the preload shim pack can be adjusted for proper pi in preload. In this case I ended up with 23"/lbs. Lacking a inch/lb rotary dial torque wrench you can do it by feel. It shouldn't spin free. I you should be able to rotate the yoke by hand with resistance. If you can barely turn it it's too tight. With a 489 case the pinion preload is set at final pinion install with the seal. Sneak up on it with an impact gun crushing the sleeve, SLOWLY. If you over tighten a 489 you will need another crush sleeve. Top photos are .089 pinion shim. Bottom photos ended up with a .098" shim
Doug
20200412_110049.jpg
20200412_110057.jpg
20200412_123658.jpg
20200412_123726.jpg
 
Now knock it all back apart. Clean the pinion threads of oil. Install the seal. Ivadd teflon paste to the splines to prevent oil seepage. Locktite the nut I hit them nut as hard as it'll go with the impact. Reinstall the carrier for the last time. Resetting backlash for the last time. Install the threaded adjuster locks and you're done. So every time the pattern is wrong it all comes apart. The pinion bearings come off to be resumed. This is why I polish the pinion. I have a pinion depth checker. As this center section came to me in pieces I had no starting shim. The checker told me .091". Useless but it was a starting point.
Doug
20200412_125015.jpg
20200412_130813.jpg
 
Thanks Doug.
I was thinking about setting up the 8.75 in my kids car. This is helpful.
 
To be honest its time consuming to get them right. I liken it to doing front end alignments. Guys I worked with hated doing them. They didn't know how far to move a component to get to the desired reading. I could tell them how many shims to move or which cam. Knowing how to adjust camber and caster with one move was the key. I could do them in 15 minutes. Axle set up is the same way. How much shim too add/subtract at a time? When you add/subtract how much does that react to other adjustments you have. I'm learning to make bigger moves at least .005" or if the pattern is way off .010". I do maybe one axle a year. It frustrates me being so slow at it.
Doug
 
Nice tutorial Doug! I use the old side bearing cone to press on the new ones, it will tap off with a small hammer when done. I place the case in my vise to install the guts, clamp the top flange. Did you build the case fixture?
Mike
 
To be honest its time consuming to get them right.

That's an understatement! Lol I lost count how many times I had the last one apart before it was good to go. You almost have to do them everyday to really get good at it.

Thanks for the Thread :thumbsup:
 
Professor dvw more great lessons.

The bench fixture makes working on third way easier. Bought one for a f*#d 9" and adapted it to my 8.75". $35 with Amazon prime, worth every penny.
 
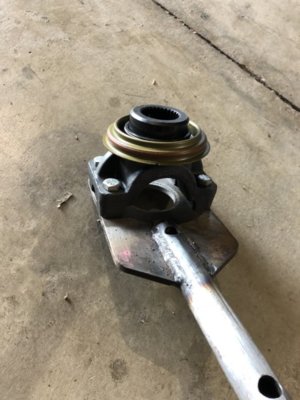
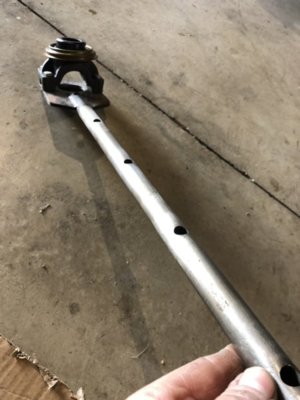
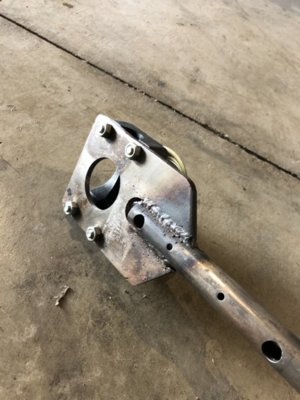
The fixture is when I was a Chevy dealer tech. Its actually for a Geo Tracker. Pulled it out of the scrap pile. I built a yoke/companion flange holder as well. Seldom use it. Never had trouble with a nut coming loose with locktite and the air gun. The holder is the proper way to do it so that the nut could be torqued to spec.
Doug
 
I remember when I was a kid I did a 8.25. I used the open end 9/16 wrench to hold the yoke attachment ear where the u joint mount bolts screw in. Jammed against the floor. Just a split second later I had 2 piece wrench ! :mad:
 
Thanks Vintage! Rocker shaft? Yes, why not? Perfect! LA will work nicely. Once more thanks for the reply vintage chromoly.
 
That's an understatement! Lol I lost count how many times I had the last one apart before it was good to go. You almost have to do them everyday to really get good at it.

Thanks for the Thread :thumbsup:
I agree my neighbor helped me rebuild my 8.25 to a sure grip Saturday. It only took him 3 hours, probably less if I hadn't been asking so many questions.
 
Back
Top