• When you click on links to various merchants on this site and make a purchase, this can result in this site earning a commission. Affiliate programs and affiliations include, but are not limited to, the eBay Partner Network.

Build Thread- 64 Fury Convertible

sixtiesmuscle

Well-Known Member
Local time
7:24 PM
Joined
Apr 12, 2020
Messages
256
Reaction score
446
Location
Greensboro NC
Hey Guys,
I'm building a Driver 64 Vert. It has been wrecked, Painted Original Chestnut Brown Once, and two different shades of White when I got it. It Has had had poor body work incl. Riveted Patch panels in Lower quarters, and Flat riveted Floor Pans over the rust holes....So, My goal is to build a nice Driver quality Car. It has the original 361 2bbl and Push Button Trans. Its tired but everything Functions. I drove the car this summer to cruises etc while I Bought the wheels and tires, and New Bumpers, Top etc etc.... Everything Got test fitted, Front end was rebuilt, Bumpers aligned with New Brackets, Now , I have started the complete tear down..... I also Came up on a deal on a 440/727 Combo that I got. We went through the engine and prepped it to go in Car. Plans are to run a Sniper set-up.This is not a resto or a fancy Resto-mod...The car drives great, so I just want a nice Dependable cruiser.... I got a lot of good stuff at Carlisle in the spring, and a console, and several other parts and pieces already from members here....
93250598_3210390785662506_2961830904978210816_n.jpg
00808_60r94B5vCMr_1200x900.jpg
IMG_6761.jpeg
IMG_6758.jpeg
119865463_3534711193227274_6214367262713855752_o.jpg
 
Beautiful. Looks like same unibody fab as my 65 Coronet. Hope bigger brakes or discs are on your list with that roaring 440 going in.
 
Looks good, always great to see another 64.
 
Beautiful. Looks like same unibody fab as my 65 Coronet. Hope bigger brakes or discs are on your list with that roaring 440 going in.
Yes, I actually have a M-Body I picked up just to get the complete front Power disc brake set-up...I'll also be selling the other stuff off of it if anybody needs M-Body stuff...
unnamed.jpg
 
Cleaned off all old undercoating,etc etc...Looking for any hidden Rust.Treating the Inner fenders with Etch Primer, and Anti Rust treatment. I will re-undercoat as well later. I also have Frame paint to put on Frame as well...I'm doing the fenderwells in Black,(Not Body color)... Will do Body Color on Inside fenderwells and Firewall. Black on radiator support and behind Grill....
740232_n.jpg?_nc_cat=111&ccb=2&_nc_sid=0debeb&_nc_ohc=fxKvJzEKZhcAX_9BkDl&_nc_ht=scontent-iad3-1.jpg
515195_n.jpg?_nc_cat=102&ccb=2&_nc_sid=0debeb&_nc_ohc=6syXoGv_2MMAX_YYYn9&_nc_ht=scontent-iad3-1.jpg
980683_n.jpg?_nc_cat=101&ccb=2&_nc_sid=0debeb&_nc_ohc=Zfyl74z1pw0AX818oNO&_nc_ht=scontent-iad3-1.jpg
174115_n.jpg?_nc_cat=103&ccb=2&_nc_sid=0debeb&_nc_ohc=L0iD1k7ty9cAX-w4sWf&_nc_ht=scontent-iad3-1.jpg
319436_n.jpg?_nc_cat=107&ccb=2&_nc_sid=0debeb&_nc_ohc=jofYgpIOiVAAX_Asl65&_nc_ht=scontent-iad3-1.jpg
934400_n.jpg?_nc_cat=109&ccb=2&_nc_sid=0debeb&_nc_ohc=1A9HykXNC_EAX87A-30&_nc_ht=scontent-iad3-1.jpg
066824_n.jpg?_nc_cat=107&ccb=2&_nc_sid=0debeb&_nc_ohc=r76kJdcYta0AX8q9ajj&_nc_ht=scontent-iad3-1.jpg
241988_n.jpg?_nc_cat=101&ccb=2&_nc_sid=0debeb&_nc_ohc=VAXS3dukbHAAX9Pxruq&_nc_ht=scontent-iad3-1.jpg
777880_n.jpg?_nc_cat=106&ccb=2&_nc_sid=0debeb&_nc_ohc=FnRXKXFcJEoAX-fbbrx&_nc_ht=scontent-iad3-1.jpg
104950_n.jpg?_nc_cat=101&ccb=2&_nc_sid=0debeb&_nc_ohc=qhFzetU6qt0AX8s22Cu&_nc_ht=scontent-iad3-1.jpg
 
Last edited:
I have Trunk Drop downs, Rocker Panels, Lower fender Patches.... I had gotten two lower quarters from Carid ( Shermans) but man they were rough... I'm returning them.... What are my options on lower quarters...I havent seen an AMD one anywhere. Was there a guy making them on this forum?? Earl
 
Fitting The Sub Frame Connectors in Place, Dropping exhaust and Welding in the connectors tomorrow, then I'm going to start removing the Bad floor pan areas.
IMG-7572.jpg
 
BTW.... Basically, This is the Goal...But I'm removing the top of Hood, and Top of Trunk Trim and using a Short Hemi scoop but scoop will be Body Color
no bottom moulding.jpg
73158092-770-0@2X.jpg
.... with Viper Red over White sealer.
 
Very nice project you have there, Earl. Always great to see another early B body convertible being saved!

Since your seats are out of your car, could you do me a favor and post up a few pics of your rear seat frames? I'm restoring a 64 Dodge Polara convertible and am curious to know if the 64 Plymouth and Dodge convertibles used the same frame? It will help my search for some frames for my car if they are.... Thanks!
 
Looks like a nice body to start with. That's half the battle.

I noticed your oil pan and if you're using the factory steering components you might have clearance issues with the center link. The pan I used measured 2 5/8" tall where the center link passed under and it was just starting to touch. Anything measuring less than 2 5/8" would be fine. FYI

https://www.forbbodiesonly.com/mopa...p-new-residence.114133/page-34#post-911534354
 
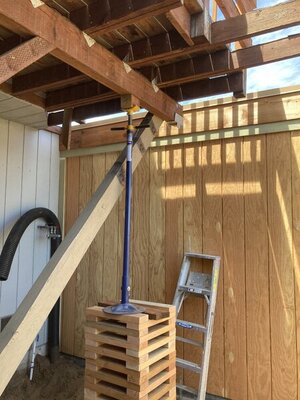
Nice project. Two things I would suggest since you are getting that involved. #1 is boot the old wiring/electrical system. Old electrical with sketchy connections/grounds etc don't play well with EFI. Time for some updates and add a bunch of grounds, replace switches/senders/sockets etc. #2 is if you are putting frame connectors in, do them with the drivetrain out and the car gutted if you are going to use a two post lift. When using a two post the car sags when you lift it and its fully loaded which causes door problems if you put frame connectors in. If the car is empty it won't sag on the lift. And having a ragtop makes it an even bigger issue with the sagging. If you can't empty the car out, use the lift to elevate it some and then set the car down on its wheels with them resting on some tire stands and make sure the doors work. That way when you do the structural, the car will be loaded/doors can open close normally and you won't have to fight the sag issue preventing normal operations of the doors. The picture shows some of the stands I built being used to support my deck while I was working on it. To give you an illustration of the amount of sag you will experience, jack the car up on the front and put jack stands under the car where the lift pads would be on the front, roughly the front frame rails and t-bar crossmember junction. Set it on the stands, let the jack all the way down and TRY to open and close the doors. With all that weight and no roof structure its really going to sag.

F34D90F9-1A71-40CC-B67D-7DFBD06F990C.jpeg
 
Is This what you mean ?? The rear seat sits pretty much on the seat support bar, and hooks in here on the floor pan ??

Very nice project you have there, Earl. Always great to see another early B body convertible being saved!

Since your seats are out of your car, could you do me a favor and post up a few pics of your rear seat frames? I'm restoring a 64 Dodge Polara convertible and am curious to know if the 64 Plymouth and Dodge convertibles used the same frame? It will help my search for some frames for my car if they are.... Thanks!
IMG-7693.JPG
 
Very nice project you have there, Earl. Always great to see another early B body convertible being saved!

Since your seats are out of your car, could you do me a favor and post up a few pics of your rear seat frames? I'm restoring a 64 Dodge Polara convertible and am curious to know if the 64 Plymouth and Dodge convertibles used the same frame? It will help my search for some frames for my car if they are.... Thanks!
Now I've reread this... Do you mean the actual seat Frame ( Under the Upholstery Metal framework) ??
 
Nice project. Two things I would suggest since you are getting that involved. #1 is boot the old wiring/electrical system. Old electrical with sketchy connections/grounds etc don't play well with EFI. Time for some updates and add a bunch of grounds, replace switches/senders/sockets etc. #2 is if you are putting frame connectors in, do them with the drivetrain out and the car gutted if you are going to use a two post lift. When using a two post the car sags when you lift it and its fully loaded which causes door problems if you put frame connectors in. If the car is empty it won't sag on the lift. And having a ragtop makes it an even bigger issue with the sagging. If you can't empty the car out, use the lift to elevate it some and then set the car down on its wheels with them resting on some tire stands and make sure the doors work. That way when you do the structural, the car will be loaded/doors can open close normally and you won't have to fight the sag issue preventing normal operations of the doors. The picture shows some of the stands I built being used to support my deck while I was working on it. To give you an illustration of the amount of sag you will experience, jack the car up on the front and put jack stands under the car where the lift pads would be on the front, roughly the front frame rails and t-bar crossmember junction. Set it on the stands, let the jack all the way down and TRY to open and close the doors. With all that weight and no roof structure its really going to sag.

View attachment 1049343
Thanks for the tip, We were already aware of that, and if you'll notice the wheel Cribs in my photos we had the car sitting fully loaded on the suspension on the cribs when we welded them in. We actually used the lift arms to support the Connectors up into place firmly against the frame and floor boards but with the car resting on the wheels nice and straight !!! thats still a great tip for anyone doing connectors etc etc. We are also doing Rocker panels so we wanted the connectors in before we cut those outers for extra support. Once they are in, we will do the floorpan repairs. My best friend whose shop the car is in has done restoration work for years. Two convertibles in the past couple of years....
 
Tons more Progress today !! Sub Frame connectors welded in, Pass side inner fenders cleaned with Needle scaler ( more rust there), cut out complete outer rocker on Passenger side, small section of rocker behind seam on drivers side. cleaned more of the Drivers quarter, Started removing the shoddy **** from the lower quarters and wheelwell arches on Passenger side...... They used Tin riveted in for quarter Patches, Spray foam on drop downs, and Bondo 3/4 in thick to "Build" Passenger side wheel Arches...... More patches for us to weld in properly before Body work....
928565_n.jpg?_nc_cat=102&ccb=2&_nc_sid=0debeb&_nc_ohc=IQIGLzl0SBMAX9vel2X&_nc_ht=scontent-iad3-1.jpg
490866_n.jpg?_nc_cat=103&ccb=2&_nc_sid=0debeb&_nc_ohc=7NQRkt3wBaMAX91emIh&_nc_ht=scontent-iad3-1.jpg
823028_n.jpg?_nc_cat=107&ccb=2&_nc_sid=0debeb&_nc_ohc=SMHKP74KFrUAX9jkdeN&_nc_ht=scontent-iad3-1.jpg
293738_n.jpg?_nc_cat=102&ccb=2&_nc_sid=0debeb&_nc_ohc=T2hQQITZE-QAX8gaasT&_nc_ht=scontent-iad3-1.jpg
445804_n.jpg?_nc_cat=100&ccb=2&_nc_sid=0debeb&_nc_ohc=K3iPyiHxnTAAX-eWfX9&_nc_ht=scontent-iad3-1.jpg
602571_n.jpg?_nc_cat=111&ccb=2&_nc_sid=0debeb&_nc_ohc=tOIvi-QOEE0AX9t8pb_&_nc_ht=scontent-iad3-1.jpg
692936_n.jpg?_nc_cat=107&ccb=2&_nc_sid=0debeb&_nc_ohc=HM4GHqA6bLwAX8LBiul&_nc_ht=scontent-iad3-1.jpg
567140_n.jpg?_nc_cat=106&ccb=2&_nc_sid=0debeb&_nc_ohc=W_pm29QCQ1IAX9c3DBg&_nc_ht=scontent-iad3-1.jpg
 
Look at how much Bondo is in the Pass side wheelwell arches !! theres no metal there in the middle at all... The just " built" it from Mud....
Sub Frame connectors into frame
unnamed (1).jpg
236675_n.jpg?_nc_cat=104&ccb=2&_nc_sid=0debeb&_nc_ohc=SAE_WndZFMYAX9AUGdR&_nc_ht=scontent-iad3-1.jpg
 
Auto Transport Service
Back
Top