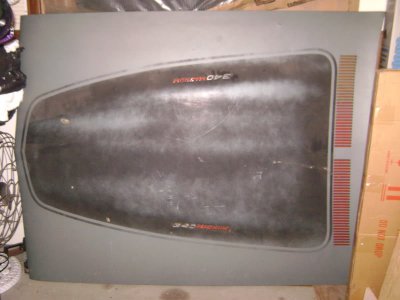
This 1972 hood blackout instruction/diagram is great info for those of you who are paint gurus. However, us mere mortals could use a translation.
What are you struggling with? This is using standard drafting methods that are the same since the 50's.
I'll take a shot at the basics.
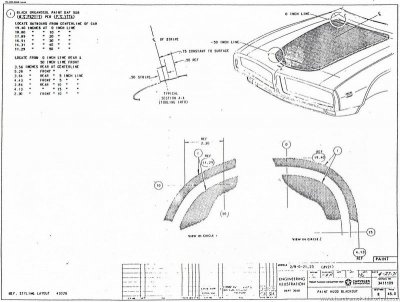
1. On the hood there is an X with a "C L" overlapping each other to the top. That means "center line" and is the exact center of the hood/shape. All dimensions will be from the Center line.
2. There are two circles numbers 1 and 2. The zoomed in diagrams show exactly what is in circle 1 and 2.
3. The 1 in a circle is called a "balloon" and it is referring you to the details in text in the upper right. This detail EXACTLY tells you where the stripe curves are and changes in shape. This is outstanding detail! They refer to the Zero inch line and 50 inch line so you can be perfect.
4. The zero inch line and 50 inch line show you the exact length and it is referred to in the ballon pictures. That allows you to measure to the exact curvature points and duplicate the shape.
5. Any dimension noted that has a "ref" next to it means that it does not have a tolerance and should be within capability of the other controlled dimensions. Its basically the leftovers. Use the non-ref dimensions to determine the exact location. In general, if the dimension has two decimal places, its plus or minus .01 or .02 (depending on the internal mopar guidelines)
6. The section A-A area is detailing out the very tip of the shape. It is a tooling reference for use in the factory.
7. The boxes on the lower right are kinda cool. Approved April 27 1971 and revised twice. If you could get the styling layout noted in the lower left corner that would help. It might have additional dimensional info.
Identification of the exact location of the zero inch line could be tough from the drawing, but that is the origin of all measurements.
I gotta ask, this is a proprietary Engineering Drawing owned by chrysler. Where did you get it? If you had a high resolution copy, I'd love it PM'ed to me.
Randy
![WH23U2A141321a[1].jpg](https://www.forbbodiesonly.com/moparforum/data/attachments/153/153688-b18619252d39ab5f4c9a62d91ed840c0.jpg?hash=sYYZJS05q1 "WH23U2A141321a[1].jpg")
![WH23U2A183804h-postresto[1].jpg](https://www.forbbodiesonly.com/moparforum/data/attachments/153/153687-a458dc9dc742a1f957a306161d787bdc.jpg?hash=pFjcncdCof "WH23U2A183804h-postresto[1].jpg")
![PDR_2670[1].jpg](https://www.forbbodiesonly.com/moparforum/data/attachments/153/153686-6be8f9cb0430a92005e336d4712ca02d.jpg?hash=a-j5ywQwqS "PDR_2670[1].jpg")
![PDR_2665[1].jpg](https://www.forbbodiesonly.com/moparforum/data/attachments/153/153685-9d1df3c18cc162e69bb2755425d61347.jpg?hash=nR3zwYzBYu "PDR_2665[1].jpg")
![72_hood_paint_inf_004[1].jpg](https://www.forbbodiesonly.com/moparforum/data/attachments/153/153693-03c1e6db161fba63e03241c87a57c267.jpg?hash=A8Hm2xYfum "72_hood_paint_inf_004[1].jpg")