• When you click on links to various merchants on this site and make a purchase, this can result in this site earning a commission. Affiliate programs and affiliations include, but are not limited to, the eBay Partner Network.

Door Hinge Bushing installation

64Orange

Well-Known Member
Local time
4:43 PM
Joined
Feb 9, 2021
Messages
212
Reaction score
197
Location
Newport Beach, CA
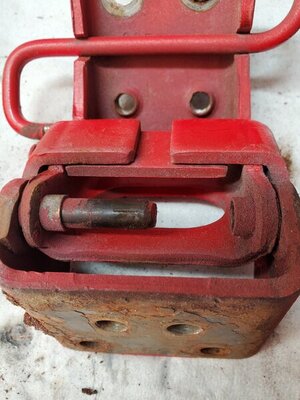
Working on my '64 and my doors are sagging. I got the door hinge kit from Joe Suchy and I attempted to put the bushings on over the weekend. When I finished installing the bushing I tried to put the door half of the hinge on and it would not slide in. It would bump into the shoulder of the bushing. Attached is a picture of the driver's side upper hinge. Did I install the bushings upside down or do I need to file down part of the hinge? Thank you in advance.
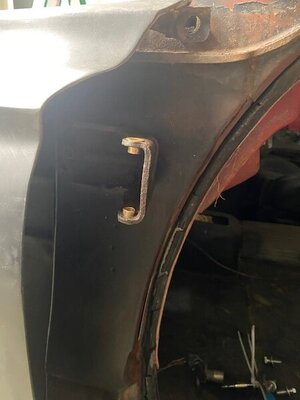
hinges.jpg
 
Unless there is a major difference in hinge design on later b-body,s 66up then you need to remove the fender and door part of the hinge and assemble them then press the new bushing into both while assembled.
 
Taking the fender on and off is no problem. Pressing the bushing into both sounds reasonable. Where I am getting confused is where does the shoulder for the bushing go? On the body half of the hinge or the door half of the hinge?
 
Its been awhile since I did mine but I went out and double checked them just now. With the hinge assembled the bushings both press downward to join the two hinge sections. What I did was assemble the hinge, press the lower bushing in first so the the shoulder will be on the inside of the door hinge and then the top one, the shoulder is on the fender side of the hinge.
 
Its been awhile since I did mine but I went out and double checked them just now. With the hinge assembled the bushings both press downward to join the two hinge sections. What I did was assemble the hinge, press the lower bushing in first so the the shoulder will be on the inside of the door hinge and then the top one, the shoulder is on the fender side of the hinge.

I think I understand. Let me see if I got this straight. On the photo I posted: The lower brass bushing is upside down so I need to remove it and flip it around so the shoulder rests on the fender hinge. The upper brass bushing needs to be removed from the fender hinge and placed on the door hinge with the shoulder on top of the door hinge with the rest of the bushing sliding into the fender hinge.
 
I think I understand. Let me see if I got this straight. On the photo I posted: The lower brass bushing is upside down so I need to remove it and flip it around so the shoulder rests on the fender hinge. The upper brass bushing needs to be removed from the fender hinge and placed on the door hinge with the shoulder on top of the door hinge with the rest of the bushing sliding into the fender hinge.

So in an attempt to show you I went to grab a picture and what I did worked but looks like this may be the proper method. As in this reproduction hinge you can see the bushings are pushed into the frame side of the hinge only like you have. Most likey they just grind away enough or press the two hinges together in a vise to gain the clearance for the shoulder. I think I had the same issue you are having so I went top bushing through the frame and door hinge and lower just through the frame hinge as shown here.
upload_2022-1-26_12-25-21.png
 
WRONG!!!!! The hinge was not designed for any bushings.
There is no "right" way to do it with bushings.
The correct procedure is an oversized pin fitted to the hinge. The brass bushing will fail and now the hinge pivot pin hole will be too big to accept a proper steel pin. The lower hinge carries the weight of the door. Think about this, if the solid steel pin hole wore out, what do you think is going to happen to a much softer brass bushing ?
If brass would have worked, the factory would have made them that way.
These "pin & bushing" kits , just another set of upper bushings and a set of standard sized lower pins, are just parts in a bag that have no instructions because they are put together by parts sellers, not the car manufacturer.

As anyone who has tried to drill the outer part of the hinge body has found out. A standard drill bit will not scratch it. You need a Carbide drill bit and reamer to drill the outer part. It is hardened plate steel. This is because the edge that the roller rides on and had to be hardened as to not wear down.
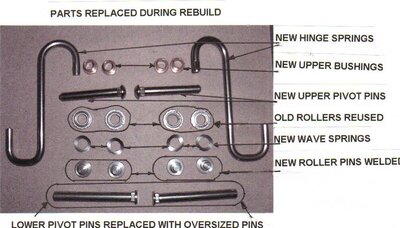
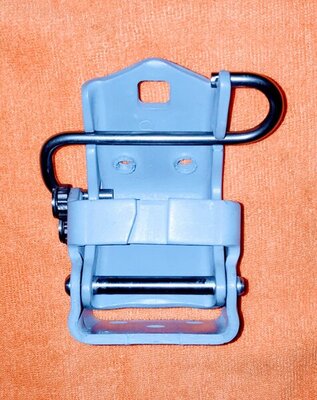
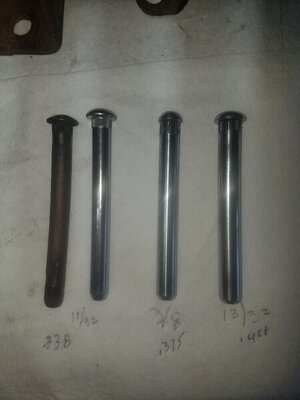
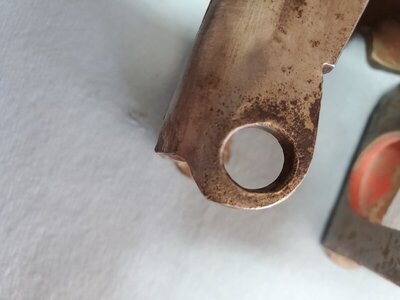
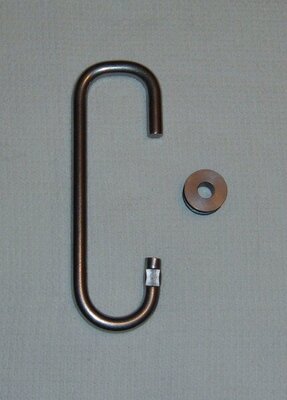
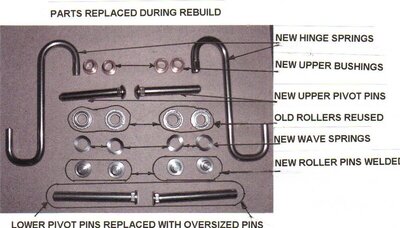
The first picture is a hinge that was modified to accept a bushing,We had to discard the hinge, the second picture shows the parts we use in a proper rebuild. Note the oversize pin at the bottom.
We have 3 different oversized pins. Joe Suchy sells my springs and rollers.
You don't know what size is needed until you disassemble the hinge and bore the pin hole to the smallest size possible but still make it round.
The same as boring a cylinder until it is round. You don't just bore all blocks to the same size just because there is only one size piston made.
Now you will need to get another set of hinges and since they haven't made them (factory, not Taiwan junk) for over 50 years, good ones are getting hard to find.
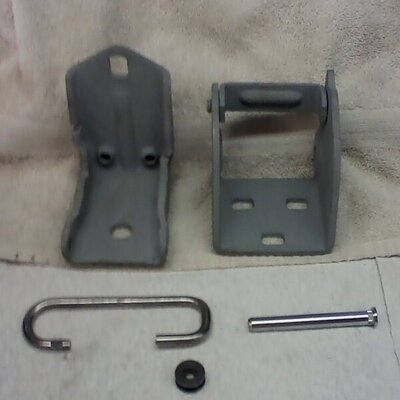
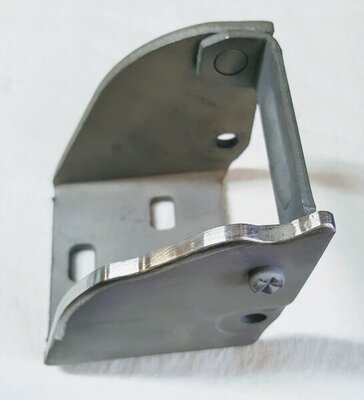
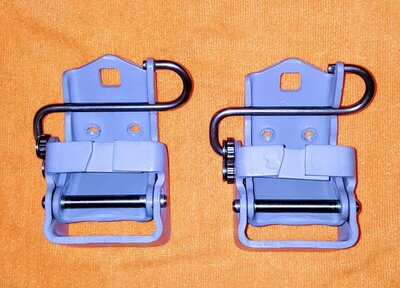
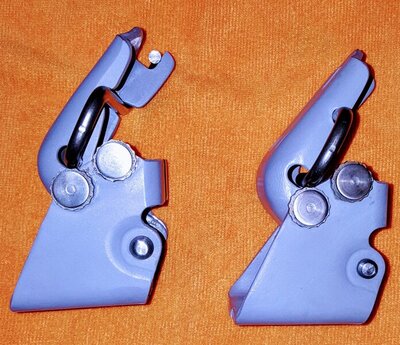
The other pictures show how we use oversized, custom steel pins.


bad hinge 2.jpg HINGE REBUILD PARTS info.jpg 5132017 023 (2).jpg 20200721_111807~2.jpg 20200627_200742.jpg
 
Last edited:
With the hinge assembled the bushings both press downward to join the two hinge sections.

This is nonsense. If the bushing pressed into both pieces then the pin basically serves no purpose.

IF rebuilding with bushings, the bushings go in the inner piece. The two hinge parts go together. The pin goes through the two hinge pieces. The pin has a knurl close to the head to lock it into place. This way the pin turns in the bushings but not in the hinge section.
 
Working on my '64 and my doors are sagging. I got the door hinge kit from Joe Suchy and I attempted to put the bushings on over the weekend. When I finished installing the bushing I tried to put the door half of the hinge on and it would not slide in. It would bump into the shoulder of the bushing. Attached is a picture of the driver's side upper hinge. Did I install the bushings upside down or do I need to file down part of the hinge? Thank you in advance.

View attachment 1230639

You need to assemble the hinge as one unit sir. The sleeve needs to be tapping in both parts....then the pin driven home.
 
WRONG!!!!! The hinge was not designed for any bushings.
There is no "right" way to do it with bushings.
The correct procedure is an oversized pin fitted to the hinge. The brass bushing will fail and now the hinge pivot pin hole will be too big to accept a proper steel pin. The lower hinge carries the weight of the door. Think about this, if the solid steel pin hole wore out, what do you think is going to happen to a much softer brass bushing ?
If brass would have worked, the factory would have made them that way.
These "pin & bushing" kits , just another set of upper bushings and a set of standard sized lower pins, are just parts in a bag that have no instructions because they are put together by parts sellers, not the car manufacturer.
The first picture is a hinge that was modified to accept a bushing,We had to discard the hinge, the second picture shows the parts we use in a proper rebuild. Note the oversize pin at the bottom.
We have 3 different oversized pins. Joe Suchy sells my springs and rollers.
You don't know what size is needed until you disassemble the hinge and bore the pin hole to the smallest size possible but still make it round.
The same as boring a cylinder until it is round. You don't just bore all blocks to the same size just because there is only one size piston made.
Now you will need to get another set of hinges and since they haven't made them (factory, not Taiwan junk) for over 50 years, good ones are getting hard to find.
The other pictures show how we use oversized, custom steel pins.


View attachment 1230668 View attachment 1230669 View attachment 1230683 View attachment 1230686 View attachment 1230689
So if bushings were used , are saying that they could not get repaired the CORRECT way. Asking for a friend :)
 
After you drill out the hole(s) to fit the bushings, and/or file the hinge to fit the bushings lip, The hinge is now too thin to repair.
These hinges were not designed to "rebuild". They were not intended to be used for 50 years. Cars were/are disposable.
We have custom made oversized steel pins made for us to do it the way the factory would have done it. All steel, no brass.
We have been doing them for over 25 years now and have well over a 1000 sets in use worldwide. Mopar is all we do.
Click on the links below.
20210106_120530.jpg bad hinge hole.jpg
 

Attachments

  • DOOR-HINGE-PROCEDURE (1) (4).pdf
    108.9 KB · Views: 169
  • 2022 MEMBER HINGE PRICE LIST.pdf
    107 KB · Views: 148
Last edited:
After you drill out the hole(s) to fit the bushings, and/or file the hinge to fit the bushings lip, The hinge is now too thin to repair.
These hinges were not designed to "rebuild". They were not intended to be used for 50 years. Cars were/are disposable.
We have custom made oversized steel pins made for us to do it the way the factory would have done it. All steel, no brass.
We have been doing them for over 25 years now and have well over a 1000 sets in use worldwide. Mopar is all we do.
Click on the links below.

View attachment 1230716 View attachment 1230717

Why isn't 66 B body included in your price list?
 
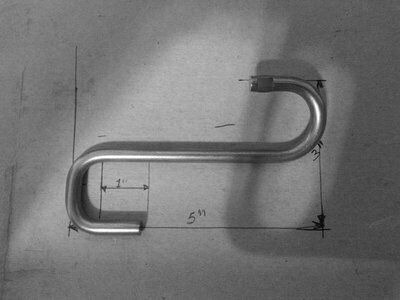
The 66 is a transitional, 1 year only hinge. It uses the 67 body side and the 65 door side hinge lower body. The spring is an "S" style with a roller. We must modify 67-up springs to fit the 65-down roller.
Lots more work but same price.


S-SPRING-SPEC (2).jpg 62 65 spring 002.JPG
 
Wow! Lots of input throughout the day! Thank you for the suggestions and ideas. Looks like I have some thinking and work to do.
 
That is the difference between someone who does it daily verses someone who just buys parts and tries to figure it out. There is a reason that instructions don't come with these parts kits. They are not Factory, just put together by people who buy parts and then put them in a bag.
 
Though steel is fine may I add here. Bushings were used in many factory applications. Many Mopar uppers are bushed. Along with many GM cars. So explain to me in engineering terms how the lower hinge takes all the load? Hogwash. I just did Duster hinges for a friend. Had no issue assembling them with a bushing kit. When I restored my Challenger 18 years ago there were no bushing kits available. I modified the hinge and used GM bushings. Doors still line up and shut nice. No slop in the hinges. But we all know late model E body doors are feather weights, LOL
Doug
 
Bushing were only used on the uppers which only locate the door, not support the weight. If the original hinges were intended to use a soft, brass bushing the factory would have used them. Explain why you have to modify the hinge so a bushing will fit. The factory hinges lasted for 50 years or more, how long will a bushing job last ? There are no instructions that come with "bushing kits" because the hinges were never intended for the hinges to ever need the pins serviced. Cars have always been considered by the factory to be a disposable item.
Modern cars are truly disposable and bushings are used on a lot of them now. Dorman also sells a lot of parts kits to repair them as well.
We are talking about cars and their parts that were made of real steel, not mjuch plastic. That is probably why you have one.
There are always 2 ways to do things, the easy way and the correct way. Do you really think that a brass bushing is better than a hardened, steel pin ?
Lets see how the door hangs and lines up in a few years of use.
To each his own. I do this professionally and have done well over 1000 sets on all models of Mopar's worldwide and I have to stand behind my product.
Somebody has to buy these kits I guess. I also replace the door check pins and springs. You can't buy those parts because they are custom made for me. I do a complete rebuild, not just a ring job.


HINGE REBUILD PARTS info.jpg A-B-REBUILT-LOWER-HINGES-2020.jpg 20200627_200853.jpg
 
Again I ask. Explain to me how the bottom hinge holds all the load? Is not the upper hinge in tension? The lower hinge in compression? Many years in the service business i repaired/replaced hinges where the upper was worn, but not the lower. Even on my 95 Ram, upper only. The industry has no issue using bronze bushings in connecting rods, roller lifters, and rocker arms. All have way more load than the weight of a door. I'm sure your hinges are nice. But there's more than one way to do things. Especially when cost is factored in. As stated above my E body bushed (upper and lower) home built hinges have survived 18 years and operate fine.
Doug
 
Auto Transport Service
Back
Top