• When you click on links to various merchants on this site and make a purchase, this can result in this site earning a commission. Affiliate programs and affiliations include, but are not limited to, the eBay Partner Network.

How much for a factory paint job?

So, I'll extrapolate. I don't have a spray booth at my disposal anymore.
Not painting it in my garage in the winter.
He did everything I said previously, plus shot it with sealer, put the basecoat on,
next he shot the car with three coats of clear and baked it. He waited two days
and then machine sanded the whole car down with 600. Wiped the whole car down
and shot two more coats of clear on. Baked it and took it out of the booth.
Next day he set up the hood, fenders, deck lid and doors and sot the inside.
Baked them. The next day Two days later he flipped everything over and shot
that side. Bake it again! He had everything about three weeks. I'm happy!
No dirt in my job and smoothe as glass. I'm going to cut and buff it and I
won't have that much to do because he did a beautiful job. All I have to do
is figure where all the damned parts go now!
 
So its really 5 digits for a factory quality (not worse, not better) paint job these days?
Man thats really a lot.
I thought for like 10 or 15 grand it must be a way superior to factory result.

When i imported my charger this year the shop that handled the EU conversion, inspection and everything asked me if i would
be interested in repainting the car as it has imperfections all around. (original paint).
(At this point i was not sure what to do with it. Now i decided to leave it as is.)

I asked them how much they would charge and they quoted me about 15 grand.
I thought they were trying to rip me off big time.
But probably not the case?
 
Cant really judge anything based on a video but he seems pretty happy with his 2 grand paint job :D

 
Last edited:
The labor in the prep is what kills you. Would you work for $5.00/Hour?
The guys at the paint shop won't, and the Spies Hecker material is far
superior than the swill that they applied to our cars from the factory.
You can go single stage and save some money, and it will still look better
than stock. It's not the paint labor, it's the prep labor that kills you.
My car will have "imperfections" soon, and the longer I enjoy it the more
"Imperfections" it will get. Sometimes it's better to have a survivor car
that you can say, "It's got the factory paint on it"! You can enjoy it just
as much. Let the next owner spend the dough.
 
Dang! Nice headlight removal.
Maaco did a nice job for the money! Probably used pretty
good quality materials.
 
I can probably round up some lacquer paint in Mexico. Probably even R12. Anything goes down there.
 
I talked to Maaco about paint and they said: I could bring my own paint, no problem, or they would use their paint, but there would be no discount if I brought my own.
That's reasonable enough. I wanted to do my own sculpting, as I can, and it's rewarding when it's successful.
They said the car would only be scuffed and masked, no body work for the base price. They would be happy to fix any blemishes, but that would cost extra.
I drove by their lot every few days and checked out cars in the finished lot. I think I would have been happy, but I used the money to buy a Binks gun and painted it myself.
 
I don't really understand why you bought an unmolested numbers matching 69 Charger R/T with such a great patina some people would kill for and then want to repaint it??? You would be much better off to sell your Charger and buy one that has been restored - you will probably save a lot of money too!
True, it's your car and you can do whatever you want to but don't assume that destroying that original paint with its patina will earn you much respect in the Mopar world.
Here's the Charger we're talking about: https://www.forbbodiesonly.com/moparforum/attachments/10-jpg.979019/
 
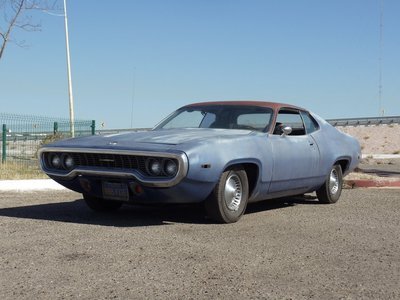
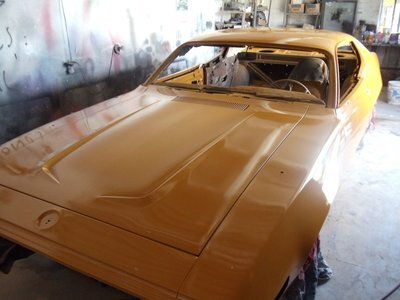
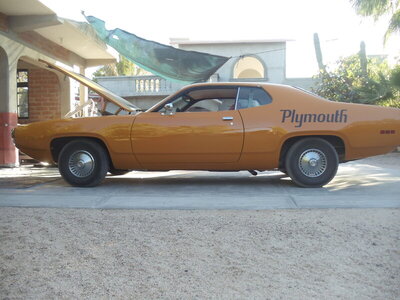
I took my car in to a busy shop (Mexico), it was out the door in 10 days. That's how efficient, competent people paint cars. Are you willing to wait and pay a shop which parks your car outside, can't remove a bumper (probably just a stall story anyway), and puts you on edge everyday while you wait and worry? Having work done in Mexico, labor is cheap but the people work like dogs for their money. They also do a lot of things the hard way, which in the long run is often better. In my case, the roof was rusty under the canopy vinyl and the vehicle had one previous re-paint to blue from the factory Tawny Gold Y9. I think I got my money's worth with a one-stage using Dupont/Axalta materials, about $1,500.00 labor/materials and I did not need meds/drugs/alcohol during the process to calm my nerves:

https://www.forbbodiesonly.com/mopa...project-odyssey-a-1972-super-satellite.91765/

blue sat.jpg yellow sat.jpg
 
After re reading the original post the op asks about a factory style or quality job.
This will included bad gaps and orange peel in a single stage job.
The original factory paint jobs ma.mopar was putting out the door in 69 were closer to macco than the $10,000 clear coated cut and buffed diamonds we are used.to seeing.
I'm in agreement , I've seen pics on here of the car.
It's a pretty nice example and I hope its left as is.
 
I was just watching vice grip garage doing a "budget" paint job for like 100 bucks.
As everyone knows paint jobs range from like 500$ maaco specials up to 5 figures high end jobs. Basically no limit.
That made me wondering what one has to spend these days to get a paint job comparable with the one our cars had from the factory.

Lets say you got a technically sound car with a faded original paint job and want to repaint it the same color (so no color change).
You do not want to do anything yourself and as stated above want a comparable result to what the factory did when they build the car.

How much?
What do you think?

Just wondering
In my area depending on color & paint type it could be between $1,500 & $2,500 just for the paint materials. That is no sand paper, tape, masking paper, ect.
 
I would not equate a "factory" paint job with a "budget" paint job......especially with a light metallic color

base coat has made it easy to apply metallics without the "blotch" ....... and clearcoat has made it easy to get around dust nibs and slight imperfections........ the ability to sand the base between coats is a huge plus when it comes to cleanliness in the clear coat

you have basically one shot at a single stage metallic job......... it has to be clean, even, and shiny, without metallic sag......

I shot a lot of centari back in the day working at a conversion van shop........ silvers, golds, mint green and light blue metallics are super tricky........ the early coats need to cover and shine, the later coats need to be "fogged" to even up the metallics without making it "dry"........reducers and hardners must keep the paint wet in order for the "fogged" top layer to melt in and "flow" ...... I haven't shot any single stage metallic in 30 years.......... its a lost art that base/clear has made obsolete...... all that being said, if you nail a nice acrylic enamel job; it looks great right out of the booth........buffers be damned
 
Last edited:
I don't really understand why you bought an unmolested numbers matching 69 Charger R/T with such a great patina some people would kill for and then want to repaint it??? You would be much better off to sell your Charger and buy one that has been restored - you will probably save a lot of money too!
True, it's your car and you can do whatever you want to but don't assume that destroying that original paint with its patina will earn you much respect in the Mopar world.
Here's the Charger we're talking about: https://www.forbbodiesonly.com/moparforum/attachments/10-jpg.979019/

Dont worry i will not repaint this car. :)
Im just curious.
 
Just to add I went through two gallon's of Matrix base coat B 5 blue. That ends up being four gallons reduced. But think my paint booth exhaust fan pulled a lot of it away when painting. Also had some problem and had to wet sand some thing's down due to runs and reshoot them. But in the end it look's grate. So if we don't try we will never have the pleasure of saying I painted my own car. Orange peel and fish eye and all. LOL.
 
I shot a lot of centari back in the day working at a conversion van shop........ silvers, golds, mint green and light blue metallics are super tricky........ the early coats need to cover and shine, the later coats need to be "fogged" to even up the metallics without making it "dry"........reducers and hardners must keep the paint wet in order for the "fogged" top layer to melt in and "flow" ...... I haven't shot any single stage metallic in 30 years.......... its a lost art that base/clear has made obsolete...... all that being said, if you nail a nice acrylic enamel job; it looks great right out of the booth........buffers be damned

Modern single stage acrylic Urethane lays down like Centari and are shot basically the same. I did this Duster in B5 with Nason. 3 coats and a fog coat to get the metallic to stand up just like any Centari I ever shot. I got more compliments on that paint job over any base clear job I ever did. Total was about 3k for everything start to finish.

IMG_1626 (Large).JPG
IMG_1632.JPG
IMG_1640.JPG
 
Look's pretty good to me. Like we say you don't see the imperfections at 60 MPH down the road. LOL.
 
How are you guys doing your "drop" or fog coats, does this sound right. I was told to get your coverage, say 3 or 4 coats of base and then go right into drop coat while the last coat was still "wet", reduce air pressure down 3-4 and double your gun to panel distance and use 50 percent overlap. Do you guys completely finish your last coat on all panels before you start your drop coat treating the drop coat as its own coat or do you have to do it in sections so that it stays wet enough, meaning for example : spray last coverage coat on roof and then do drop coat before moving on to other panels. I'm new to this stuff and really want to learn, it's getting harder and harder to find shops that will take on full paint jobs of these old cars and I completely understand that.
 
I just had the shell to paint and did my door's and other part's off car. 3 coat's of base coat. Then while paint dry's as per directions for next coat started the clear coat. If you drop pressure you will get orange peal effect. 50 per cent over lap on every thing. The clear is touch due to being thinner and could run. Light coat's are better than thick. Spray all edges first then cover the bulk of the panel's. The distance is with thumb and pinky finger extended is a good rule of thumb. For your gun to be form the painted surface. Smooth even strokes and don't turn the gun when spraying. Doing the dance so I call it is the hardest part on big surface. Don't stop and move have to flow with it. In the begging I started on the roof with the base coat and had the hole shell painted. Thought I had over lapped enough but ended up with a darker stripe down the middle. So let the paint dry for a few hour's then had to wet sand the roof. This time really reached over the car each time and blended to the sail panel area. only took two coat's to bring every thing back to what I wanted. Not being a pro. made a few mistakes. So with the base coat clear coat their are way to work the base coat if you mess up some. Get some poster board and practice first that is the cheap way to learn. My friend Pete on U tube gives good tip's on spraying car's. I even talked to him on the phone a few time's a real good guy. One subject is painting a car by our self. Hope this was some help. Don't be afraid just take your time. blue69runner :thumbsup:
 
I just had the shell to paint and did my door's and other part's off car. 3 coat's of base coat. Then while paint dry's as per directions for next coat started the clear coat. If you drop pressure you will get orange peal effect. 50 per cent over lap on every thing. The clear is touch due to being thinner and could run. Light coat's are better than thick. Spray all edges first then cover the bulk of the panel's. The distance is with thumb and pinky finger extended is a good rule of thumb. For your gun to be form the painted surface. Smooth even strokes and don't turn the gun when spraying. Doing the dance so I call it is the hardest part on big surface. Don't stop and move have to flow with it. In the begging I started on the roof with the base coat and had the hole shell painted. Thought I had over lapped enough but ended up with a darker stripe down the middle. So let the paint dry for a few hour's then had to wet sand the roof. This time really reached over the car each time and blended to the sail panel area. only took two coat's to bring every thing back to what I wanted. Not being a pro. made a few mistakes. So with the base coat clear coat their are way to work the base coat if you mess up some. Get some poster board and practice first that is the cheap way to learn. My friend Pete on U tube gives good tip's on spraying car's. I even talked to him on the phone a few time's a real good guy. One subject is painting a car by our self. Hope this was some help. Don't be afraid just take your time. blue69runner :thumbsup:
I've been watching his videos and i also like the ones from "Paint Society". I jammed the car in and did the dash, engine compartment so far but haven't done any larger panels yet. Do you or anyone else out there have any good pictures/ info on the best way to set up a temp. garage "spray booth". I know that there is a science to how much cfm air flow needed and all that but what are the rules of thumb for fans, size of fans,filters needed?
 
Auto Transport Service
Back
Top