• When you click on links to various merchants on this site and make a purchase, this can result in this site earning a commission. Affiliate programs and affiliations include, but are not limited to, the eBay Partner Network.

MP valve covers with a twist

Canadian1968

Well-Known Member
Local time
6:27 PM
Joined
Nov 13, 2012
Messages
696
Reaction score
862
Location
london
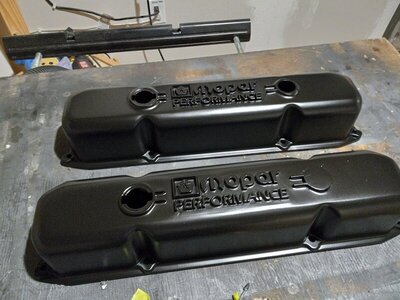
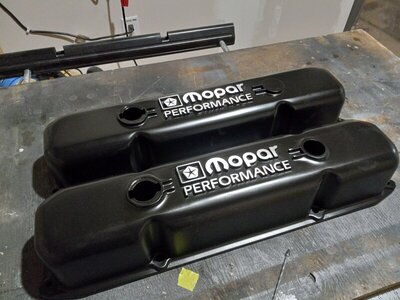
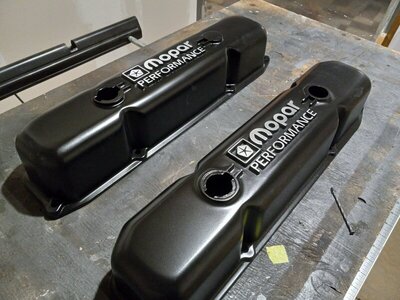
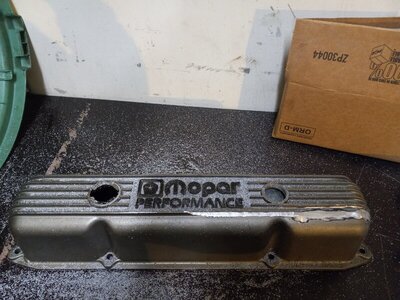
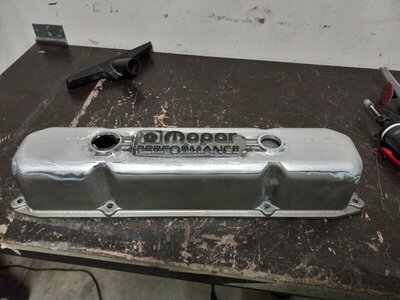
Decided to do an engine bay make over this winter . Wanted some new valve covers of some sort. But couldn't bring myself to spend $200+ on some of the ones that I liked. Plus the potential of fitment issues with a new set So my compromise was to modify my MP valve covers. I had already painted them a different color years ago. This time I went a bit further.

I shaved the fins and stripped the covers again. Painted them with some Hot Rod black from SPI. The I blocked the lettering and brought them to a "brushed" finish.

Pretty happy with how they turned out. The hardest part was around the letter and oil / breather holes. They are not flawless but once installed and caps installed I think they will look great !
20211127_153415.jpg 20211204_174755.jpg 20220126_183113.jpg 20220126_184847.jpg 20220126_184915.jpg
 
THANKS for all the comments ! I was just looking at the new Felpro gaskets I got for them. They are the thick black ones. I see that one side had a noticeable rounded edge and the other had a "clean cut" flat surface. Which way do you guys put these on ? My thought was to put flat side down on cylinder head ?
 
THANKS for all the comments ! I was just looking at the new Felpro gaskets I got for them. They are the thick black ones. I see that one side had a noticeable rounded edge and the other had a "clean cut" flat surface. Which way do you guys put these on ? My thought was to put flat side down on cylinder head ?
I always did the flat side down because my stamped steel covers had curved edges.

Very cool modification, I like seeing different stuff!
 
Wow, how did you shave them @Canadian1968 ? Those look AWESOME! :thumbsup:

For the fins close to the letters and circles I used a carbide griding bit. Used 4 1/2" sand disk on my angle grinder for edges and a smaller 2" disc on my die grinder . Then used a combo of DA sander and metal file to try and smooth everything out. It was time consuming not going to lie
. Since it's a aluminum it easy to remove a lot of material fast ! So you have be careful.
Filled any big gouges with jb weld. Then primed with 2k high build sanded and filled any large imperfections again. Primed again, sand , and finally sealed and painted.
Wow, all by hand. Mercy!
 
They look great. people will ask where you bought them for sure
 
clear satin powder coat em & that sweet paint job should last forever i'd think
 
clear satin powder coat em & that sweet paint job should last forever i'd think

The paint is a 2k urethane single stage . It may not be as bullet proof as powder coat , but it should be pretty durable !
 
Yours look great. I milled the Indy logo off these valve covers. Wanted a cast cover that looked more stock. A little bondo and paint. Don't be afraid to use bondo on engine parts. This engine has been painted 11 years. Urethane single stage.
Doug

20210308_175030.jpg
 
Auto Transport Service
Back
Top