• When you click on links to various merchants on this site and make a purchase, this can result in this site earning a commission. Affiliate programs and affiliations include, but are not limited to, the eBay Partner Network.

Question about roof support "beams"on 69 Coronet.

Mocajava

Well-Known Member
Local time
11:05 AM
Joined
Jun 2, 2015
Messages
964
Reaction score
448
Location
Brighton Colorado
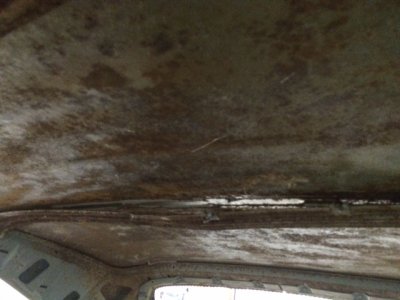
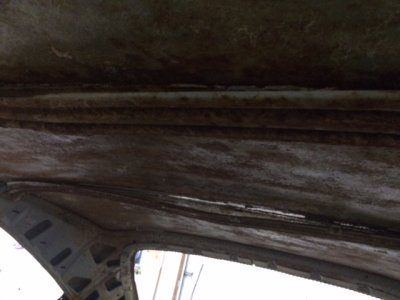
Need a little help to figure out what to do here with my 69 Coronet roof. The two crossmembers that support the roof have seperated from the roof and have a downward bulge in them. There is rust between roof and crossmembers which I want to remove before reattaching the crossmember. I don't know if I should try and romove the spot welds on the ends, take thecrossmember completely out for easier access to rust or just work under them, between crossmember and roof. The amount of downward bulge is identical which makes me think this is a factory made aspect and the reverse bow is used for a structural aspect. Is the crossmember bowed down to start with and then pushed up and "glued" in place during assembly? Is this glued or am I not seeing some tack welds that may have come loose? I will post pictures when I get a chance but just wondered if anyone else has seen this issue and worked through it. Could use your help before I do something that mars the lines of the roof. Thanks Professors! Mocajava
 
IMG_0567.JPGIMG_0568.JPGHope these are easy enough to view and you get an idea of what I am dealing with. Not sure how easy they would be to remove but will entertain all ideas you might have...especially if this a problem dealt with before and remedied. Thanks in advance.
 
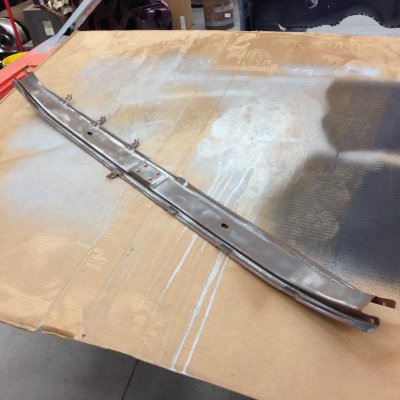
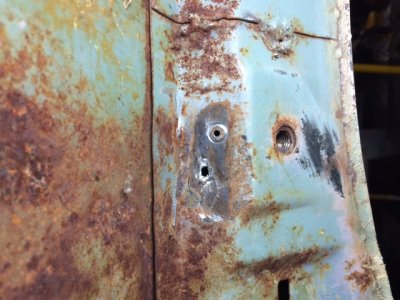
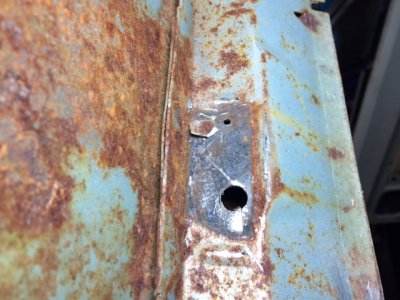
They look bent to me. I just finished removing one in my Challenger. It too was bent. I drilled the spot welds on each side of the brace, there is two on each end. Easy peasy. Straightened it out and while it was out I sanded and primed the inside of the roof (not totally necessary). Then re-installed it. I asked about using seam sealer and was told it was likely better than structural adhesive as it is flexable. So that's what I stuck it back in with.

IMG_2557.jpg

IMG_2558.jpg

IMG_2559.jpg

IMG_2563.jpg
 
Thank you SIR!! I am a visual guy and the pictures helped tremendously along with your explanation. Bought a spot weld bit today assuming that is how they were mounted. Wanted to do it right and now I have a pictorial example to follow.
 
You're more than welcome. Take some rough sand paper and scuff the spot welds. It helps to expose them and make it easier to see where to drill.
 
Good tip, never used a spot weld bit before. I am guessing that tacking back to the roof is probably not a good idea? A little filler could bland in the depressions on roof from the tacks but don't know if it is needed or even good practice. Trying to see if there are substantial reasons NOT to tack it to underside of roof....?
 
I pretty sure (almost positive) they were not tacked to the roof. They just used glue. Once you straighten it, it will fit fairly snug up against it. Then you can get structural glue or use seam sealer. Maybe someone else will say no to the sealer, but I used it on the words of a body man.

When using the spot weld cutter, you can use a punch to make a center point for it to hold in to or sometimes I use a very small drill bit and make a small hole that the tip will fit. Don't go too far with the cutter. Just through the first layer. Even if you have to use a chisel to get it separated, it's better than drilling all the way though both layers.
 
Those are bent and need to be repaired and no they are not welded to the roof skin. M3 has good adhesives, I use Sikoflex black.
 
Will follow the leads of Gdrill and Superfreak to get this fixed correctly. I appreciate the hard earned knowledge from you two and will post pictures as I get it better then OE. Mocajava
 
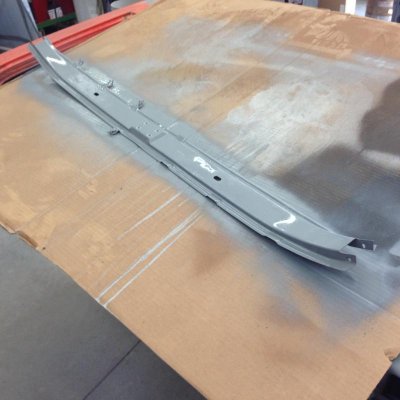
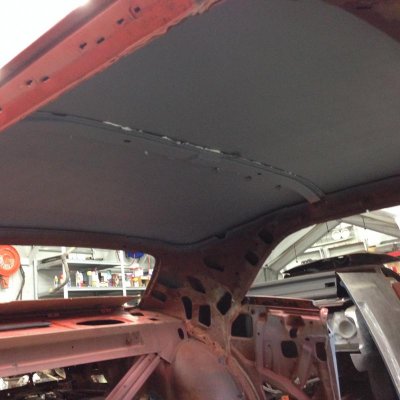
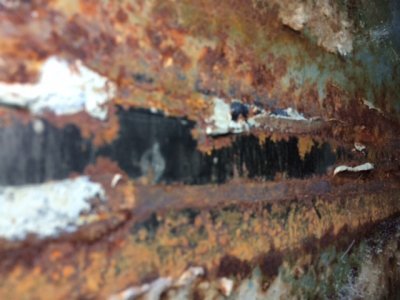
I made my first attempt with a spot weld drill on my roof over the weekend. Would love to tell you I did a perfect job but that would be a blatant lie. Had issues because I couldn't seem to get the drill exactly perpendicular to the surface because of its bulk and went all the way through on the first try. I did get better and with the help of the chisel I was able to get them out without much distortion. Cleaned them up and got them primed and painted. Now to address all the rust on the inside roof. IMG_0575.JPGIMG_0576.JPGIMG_0577.JPG
 
Minor detail. You can fill that when you re-install. I used a DA sander on my roof rust. Just be careful however you do it. Don't get it hot. You don't want to warp the roof. And wear a mask, the rust dust is bad for you!
 
Is THAT why I have been hacking lately?! When you do sheet metal prep work, are you knocking 80 - 90% of the rust off and using the phosphoric acid to stop the rust and also etch, and then priming? A whole bunch of the edge area you cannot get to as it is behind other stuff. I was planning on getting all i can reach and then the acid and primer route for the stuff I can't get to. I couldn't tell from your pictures if you had done the acid step. I am scared to leave even a small spot of ruct anywhere as it will come back to haunt me. Probably being to **** about this, but it is all new ground for me to cover.THX again
 
I just used 80 grit and knocked the majority off. To me there really is no way to get it all especially around the edges. I just made sure where the beam contacts was really clean so the paint would stick and hence the glue. It is inside the car and wont be seeing a whole lot of moisture anyway. I would bet if you pulled the headliner out of most cars you would find the same surface rust. Now exterior wise, I definitely make sure all the rust is gone.
 
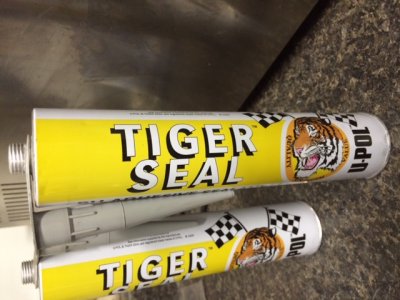
Getting ready to install the roof supports. Have been spending a lot of time figuring out which grinder/buffer/sander is the best to remove rust AND which attachment does a better and faster job. I think my mid size electric grinder with a twist wire cup brush does it faster. The picture is the stuff the local body men use as it bonds yet is still flexible....Tiger Seal. Acts as a bonding agent and a vibration dampener without making the contact point rigid. Plan on ruffing up the roof plus area on the rib that will be in contact with the Tiger Seal. Will post more when I get farther along. IMG_0599.JPG
 
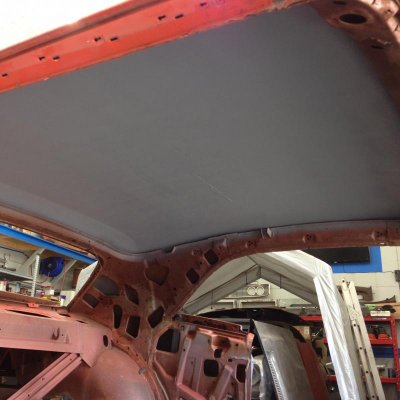
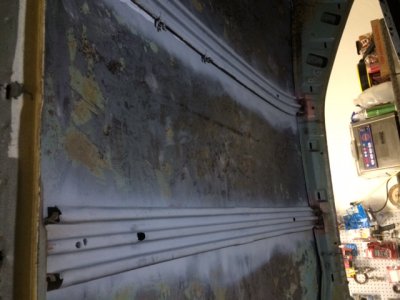
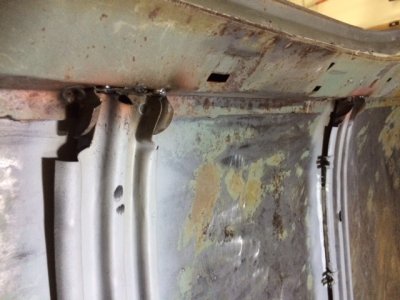
IMG_0604.JPGIMG_0605.JPGGot the braces back in place, used the tiger seal plus tack welded. Will post a few pictures tomorrow, a little late up her now. Temps are dipping to the freezing mark most nights so the work I was able to do in the driveway has pretty much ended. All inside now and cramped quarters plus the odors of paint or mess of blasting/ grinding will slow my progress over the winter. Take care and keep the tips coming.
Posted a couple pictures as promised. Not getting much time on the Bee, work,teens and other projects are taking it's toll. Will be getting all the surface prep done before I mask off car, tape the garage off and shoot with the primer. Being leary of painting that is something I will have to ease into...just can't wait too long as the temps are dropping quickly.
 
Last edited:
Auto Transport Service
Back
Top