• When you click on links to various merchants on this site and make a purchase, this can result in this site earning a commission. Affiliate programs and affiliations include, but are not limited to, the eBay Partner Network.

Rear shoulder belts in a 1970 Charger

Some people have precision instruments to measure and fabricate unique parts.
Others like me use tape measures, torpedo levels and caveman logic.
Inside the trunk of this car…

IMG_1760.jpeg


The retractors will mount to the back side of the upper rear seat mounting panel. Since it is sloped back for seat comfort and since the retractors Rich and I are working with prefer to be mounted “close to vertical/plumb/upright”, I’m looking at ways to make mounts to reverse the rearward angle of the seat back panel. The goal is to make a platform that is plumb to attach the retractors.
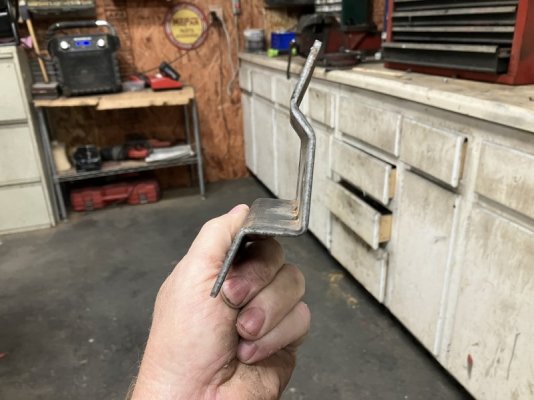
This bracket illustrates the concept…

IMG_2701.jpeg


When viewed at approximately the angle of the seat back panel…

IMG_2702.jpeg

Suddenly there is a vertical mounting point. Inside the trunk looking forward….

IMG_2693.jpeg


Look close, to the upper left you can see the horizontal slit where the belt passes through.

IMG_2694.jpeg


Note the diagonal brace and where it ends near the package tray. Now the right side.

IMG_2695.jpeg


To the upper right is the seat belt slot but look where the diagonal brace ends. THAT is Chrysler build quality in the 60s!

IMG_2696.jpeg


How much of this mis alignment is due to the drive shaft tunnel offset that our cars have? I never noticed this in these cars before.
 
The strange placement of the upper ends of the diagonal bracing means that the left and right brackets will have to be different. Those braces are important, they provide torsional resistance to the roof moving sideways in relation to the lower section of the car. Up front, the windshield in a small way achieves a similar function. I'm wondering if I could trim back the left side a bit like so:

RSB 6.JPG


I could add more welds to the brace to equal the right side...I count 7 spot welds there. If I cut and removed what is above the line, I could add welds below it.
I took a torpedo level (approx 10" long) and held it plumb with the top of it resting on the back side of the trunk/seat back panel. The bottom of the level was approximately 1 1/4" from the panel so I made a quickie cardboard mock up test bracket...

RSB 11.JPG


This will be attached to the trunk divider panel back side, likely welded at the side flanges.

RSB 12.JPG


The side flanges could be drilled and bolts with nylocks could also be used. I wouldn't want this to rattle loose not only for the safety issue but for the rattles as well.

RSB 13.JPG


Knowing I'd need to cut it to fit around the diagonal bracing, I got back into the trunk armed with scissors.

RSB 18.JPG


Right side, I'll trim the cardboard back a bit and test fit....

RSB 21.JPG


It is very hard to lay in a trunk, hold a flimsy piece of cardboard and get a decent picture with one hand...!
Look at the white cardboard piece. Note the distance the top is from the horizontal slot in the package tray where the belt passes through...

RSB 52.jpg


The seat belt sits real close to the edge of the retractor frame so maybe the brackets I'm making need more of a standoff from the trunk divider panel to get the belt in better alignment with the horizontal slot.
 
Last edited:
I might try to crawl into my trunk but the subwoofer is in the way. I just used the flat bracket mine came with and welded several spots to the diagonal brace where it touched.
 
Auto Transport Service
Back
Top