• When you click on links to various merchants on this site and make a purchase, this can result in this site earning a commission. Affiliate programs and affiliations include, but are not limited to, the eBay Partner Network.

Rear shoulder belts in a 1970 Charger

It was determined that a 7/16” bolt would work to retain the retractors. I wanted to reinforce the area so I used some square washers…

IMG_2915.jpeg


I cut some off the bottom to get the hole closer to the bottoms of the bracket.
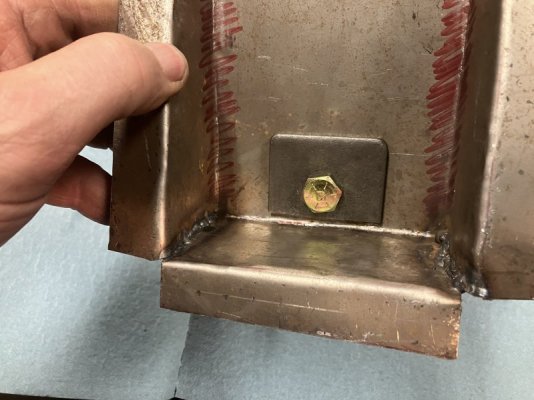
IMG_2916.jpeg

IMG_2917.jpeg


MIG welder…

IMG_2924.jpeg


I added a small plate up above the bolt to reinforce where this tab comes through.

IMG_2939.jpeg


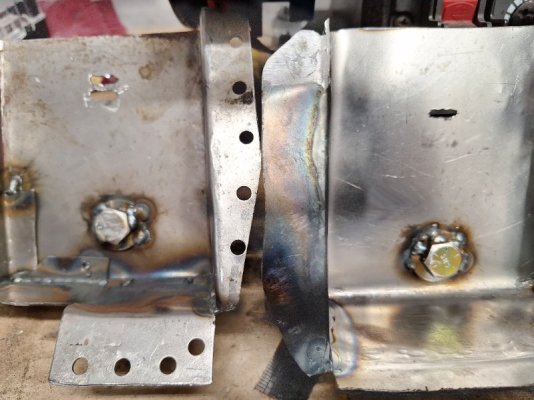
I welded the bolt to the back side so the front side sees it as a mounting stud. From there I just put a washer and a Nylock nut on it.

IMG_2925.jpeg


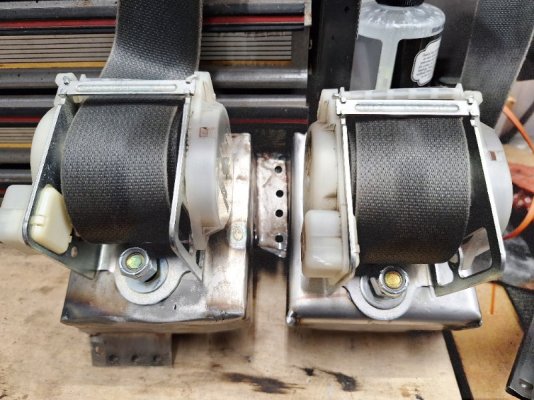
The retractors will come off next. The brackets will get welded in then the retractors can then be bolted in place. This will be the arrangement for the left side.

IMG_2931.jpeg


Upper left corner is the floor mount using the stock mounting point normally used with a small retractor. Now all the retracting is done in the trunk at bottom of picture. To the right hip will be a fixed section of belt with the receiver.

IMG_2940.jpeg


IMG_2941.jpeg


IMG_2923.jpeg
 
Not sure if these have been mentioned, but a vise brake might help with the fab work, they are cheap enough you could modify as need as well.

IMG_0348.jpeg
 
That is an interesting suggestion. That looks useful for small scale jobs like these. Thank you.
I’m probably overthinking this but I decided to reinforce the face where the retractors attach.

IMG_2942.jpeg


The two holes are needed for the 7/16” bolt and the dowel.

IMG_2944.jpeg


IMG_2945.jpeg


If you decide to use belts like these from a LX series car like a Charger or 300, this mount needs to come off.

IMG_2946.jpeg


In stock form, the retractors are mounted on the upper edge of the quarter panel at the C pillar. The belt runs straight up to the swivel bracket as seen in this Picasso level artwork…

IMG_2947.jpeg


IMG_2948.jpeg


I have four brackets made now, a pair for each Charger. I’m using the Jigsaw Charger as the test mule.

IMG_1833.jpeg
 
I’d donate these to be tested in Camaros and Chevelles. There are plenty of those around.
 
The belts are in the “test mule” Jigsaw Charger.

IMG_1833.jpeg


I just put the shoulder belts in the left and right sides and left the stock lap belt in the middle.

IMG_3018.jpeg


Backing up a bit….
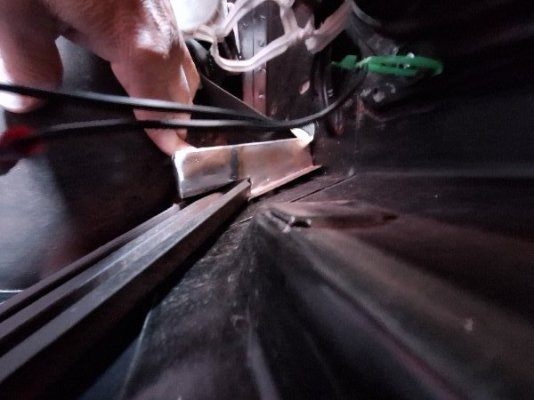
The left side was first. I cut the lower right corner to clear the diagonal brace.

IMG_2985.jpeg


IMG_2986.jpeg


IMG_2990.jpeg


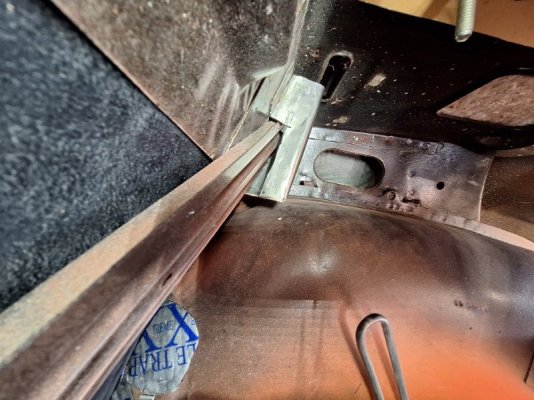
I attached the mount to the body with a couple of self tapping screws while I plug welded the holes that were punched in the flanges.

IMG_2996.jpeg


Yeah, the bracket is slightly out of plumb. Welding while laying on my side in the trunk of a car is not an ideal set of working conditions.

IMG_2997.jpeg


The base is plenty wide thought and there is room to pivot the retractor assembly to get it plumb.
Right side….

IMG_3001.jpeg


Plenty of welds to hold the bracket in place. I really hope to never actually test the strength of these.

IMG_3003.jpeg


The retractor is within 1/16” of plumb.

IMG_3005.jpeg
 
The left side was bolted in plumb too.

IMG_3008.jpeg


Just like Ma Mopar could have done.

IMG_3010.jpeg


The other end of the belt just attached to the lower corner anchor point where the stock belt used to attach.

IMG_3012.jpeg


I may have mentioned that a retractor was there. I had it wrong. All the belts in these cars had sliding adjusters, no retractors. The lower bracket in the newer seat belts was smaller than this step in the bolt:

IMG_3020.jpeg


I just took a file to it and took it down a fraction until the bracket could slide up closer to the hex of the bolt.

IMG_3015.jpeg


Boom. Rear shoulder belts for under $100.
 
The rear seat is back in for now.
Keep in mind that this car is a S L O W work in progress! The seat will be recovered and be swapped to the red car, Ginger.

IMG_3031.jpeg


I sat in the seat and tested the right side belt. It fits nice and comfortable.

IMG_3034.jpeg


I wish that the female buckle receiver had a longer belt on it so it would sit up higher and be easier to reach.

IMG_3032.jpeg


I may see if there are other seat belt designs that fit the buckle while having a longer belt.
Another thing… the bolt used to anchor the belt near the floor:

IMG_3037.jpeg


It needs to be shorter. It interferes with the lower seat frame and makes installation and removal more difficult.

IMG_3035.jpeg


You can see at least 1/4” if not 3/8” of the unthreaded shank sticking out.

IMG_3036.jpeg


I don’t mind minor setbacks. It helps fine tune the process.
Cheers.
 
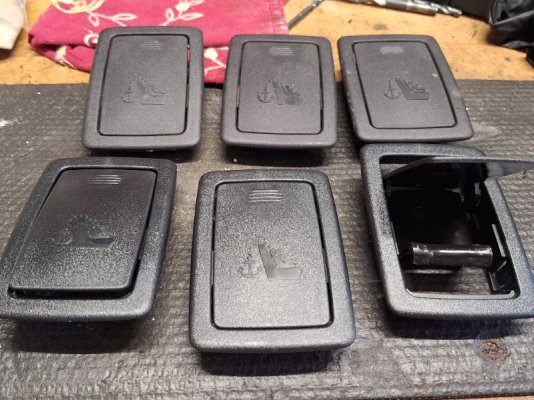
Child seat LATCH hold down

View attachment 1930860
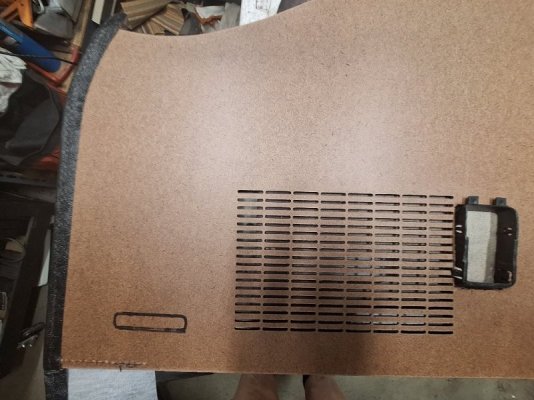
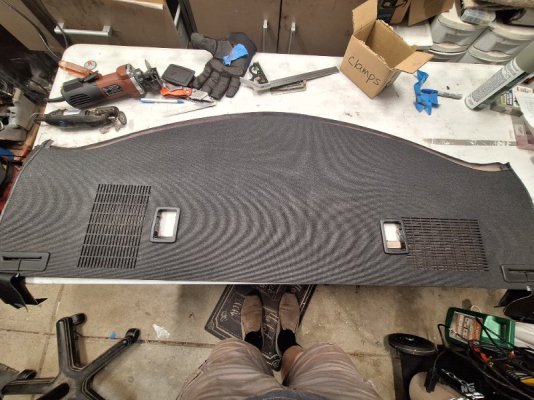
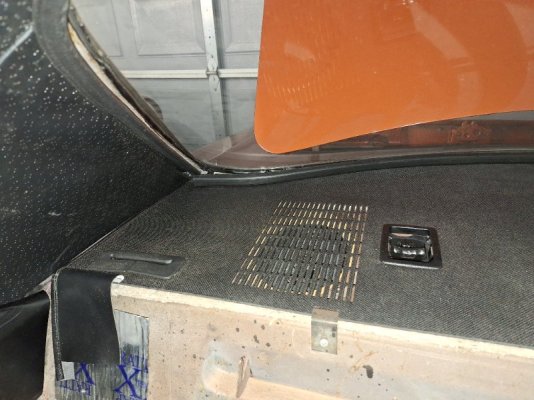
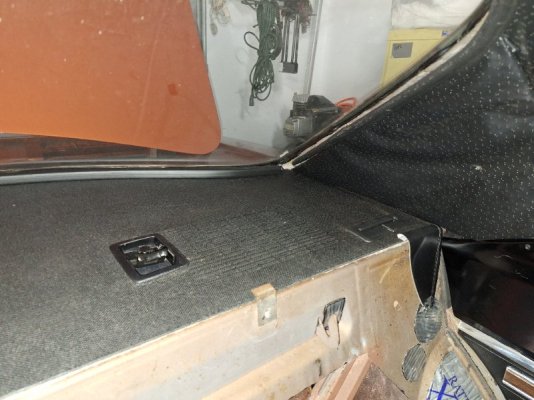
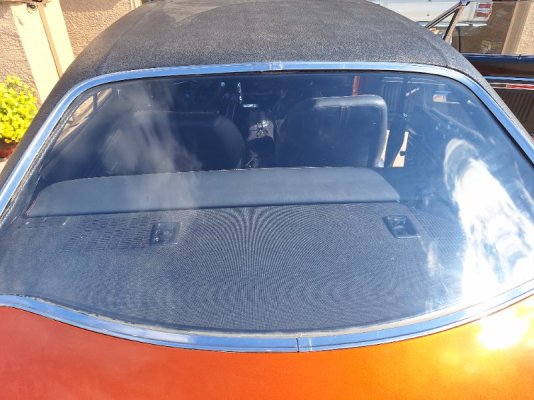
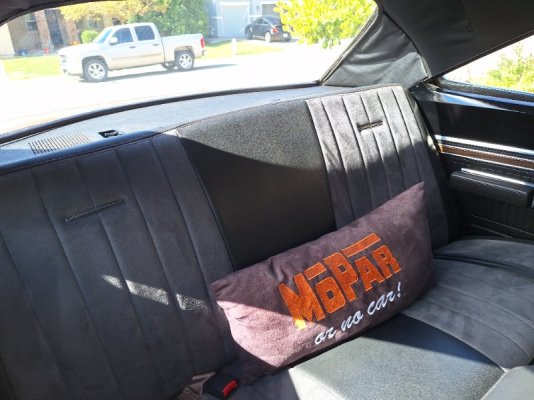
I'm several steps behind Greg on the seat belt retractors as I had a minor setback on the car seat hooks. My measurements on the package tray cover were off by about 1/2", which created a hole that was off-center to the hooks. Still functional, but the gap was too obvious for me to ignore. The package tray cover that came with the Coronet was originally a saddle tan, which I covered with the black material to match to rest of the interior. The fabric has since faded to grey. The cover was in just fair shape anyway, so I ordered a new cover and jute backing from Classic Industries and started over.
More careful measuring and cutting this time.
20251026_102623.jpg20251026_122847.jpg 20251026_102724.jpg
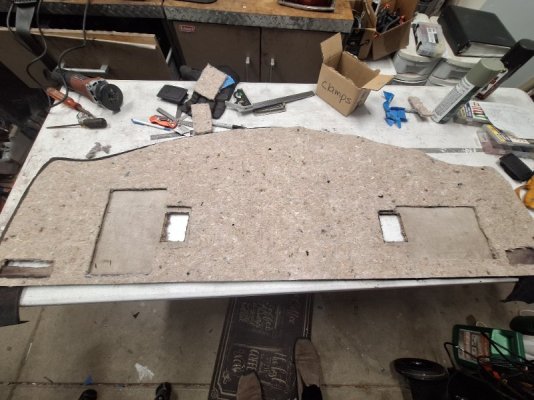
Next came the jute backing. My Coronet has the asymmetrical speaker cutouts in the package tray.
20251026_123733.jpg
 
Last edited:
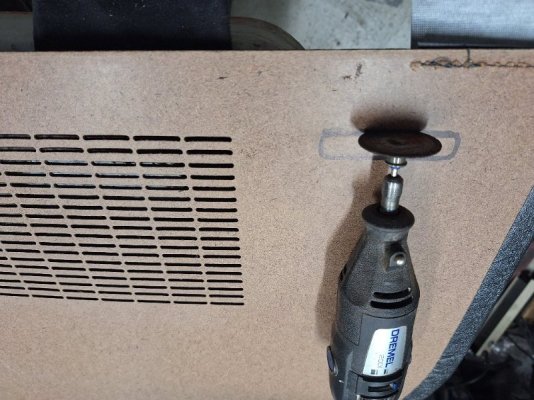
The other issue I had with the first cover was that the cutouts were just slightly larger than the bezel flange. The holes need to be small enough so that the bezels will snap down in place. I started with a smaller diameter and kept working at it with the Dremel until the brackets snapped down.
I was banking on the jute backing being thick enough to raise the package tray cover enough so that the hook bezel cover could be closed.
20251010_153517.jpg
Upon installation, the hook stood about 5/8" above the bezel. Raising the package tray cover wasn't an option as it would be higher than the seat back cushion. The hook has to be mounted below the surface of the package tray, either in a recessed pocket, or bolted from underneath using spacers. Either option required cutting the package tray for the hook, which I wasn't willing to do. So for now, the hooks stand proud above the package tray.
20251027_110409.jpg20251027_110416.jpg20251027_131920.jpg20251027_131943.jpg
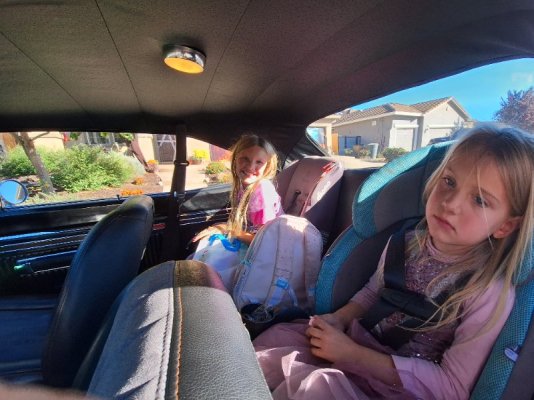
Since the install, I've driven the grandkids around several times. I'm able to clip the car seat tether to the hook and cinch it down.
Picked up the girls from school; Nora was bushed after grinding out the school day.
20251028_152710.jpg
 
One thing that needs to be mentioned.
The whole point of this change is to improve safety for the rear seat passengers even though many of us don't have 4 people in the car that often.
Lap belts will hold them in the seat but the shoulder portion of the belt keeps the upper body from being thrown forward toward the front seat headrests.
The belts need to extend enough to reel them out to wear them but then still LOCK up in the event of a collision.
I have concentrated on making the assemblies as close to vertical/plumb as possible so the belt would reel out/extend. It did not occur to me that there might be an issue with it locking up as intended when installed in a manner other than OEM.
Rich tested one of his belts and found that when the belt is pulled out straight UP, he can get it to lock but with the belt going UP and then 90 degrees forward, it just extends and does not lock.
Obviously this is not acceptable since it renders the belts useless in a collision. They'd give a false sense of security like these did...

1762472711533.png


I went out and tested the belts in Jigsaw. They work just like stock, extending when pulled slow but locking up when pulled out fast. Tomorrow, Rich and I will compare retractor/belt assemblies and see if we find the problem. I wonder if the belts we both got came from different year model cars that may have had some minor differences.
More to come....
 
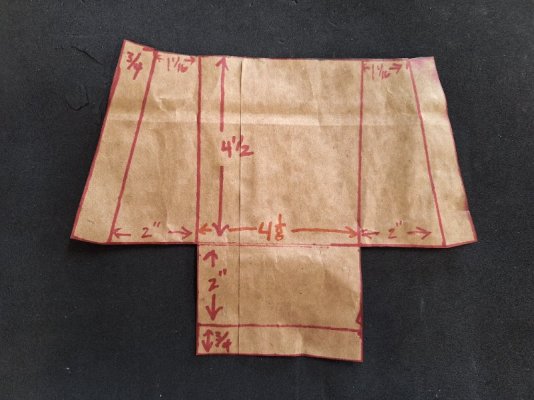
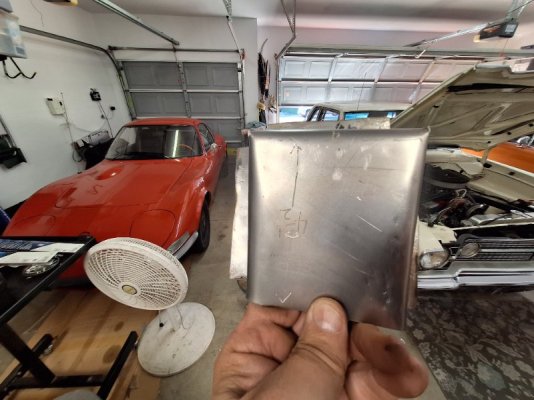
Stepping back a moment, Greg came by last week with the paper template and some sheet metal plates we had picked up at the local yard.
20251106_095709.jpg
Being that both cars are B Bodies, his initial fab work made life easier for me. He also brought a prototype mount for the driver's side, that fit the Coronet with just a little persuasion. Using the template, it didn't take very long to fab up the passenger side.
20251029_161652.jpg20251029_161703.jpg
Mocking up the driver's side:
20251030_133503.jpg
And the passenger side:
20251030_152409.jpg
 
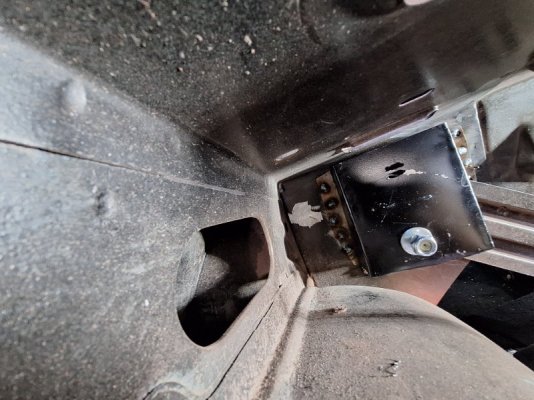
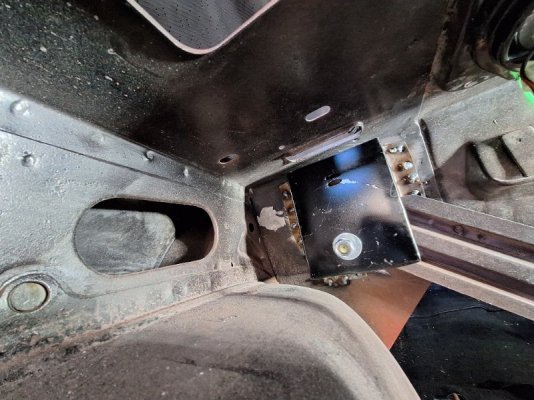
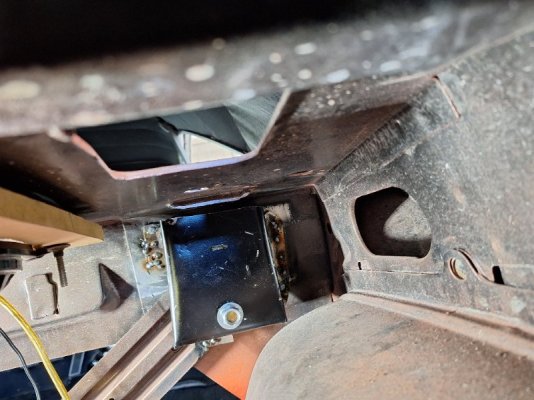
I don't have much to add to Greg's account of fabbing up the mounts. I also welded a 7/16-14 bolt to the back of the mount and secured the retractor with a nyloc nut.
For me it's been a rewarding time because it's my first welding project. Earlier this year in Feb/Mar, Greg and I took a welding class at the local JC. For Greg it was a refresher course, but it was first time for me. Since then I bought a new welder, mixed gas, cart, and accessories, but I've only been practicing on scrap metal. I've really enjoyed my time metal working and welding.
20251103_150744.jpg20251103_150850.jpg

Yesterday, Greg came over to help installing the mounts in the trunk. It's one thing to weld on a table, it's quite another to weld inside a trunk. My welder is an Arccaptain, and it has a spot weld function. It came in handy on the plug welds, although Greg still went through after me and tuned up some of the welds.
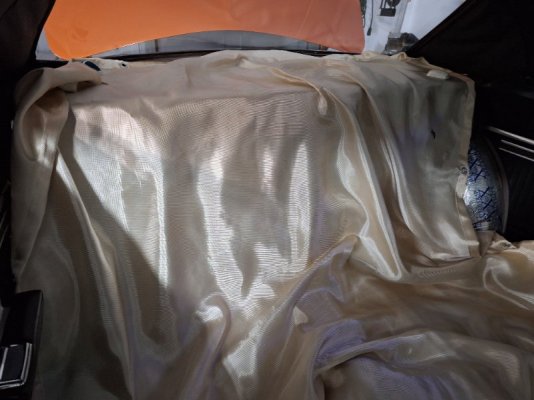
I bought a welding blanket specifically for this job.
20251106_094700.jpg
The mounts are installed:
20251106_100338.jpg20251106_100414.jpg20251106_100458.jpg
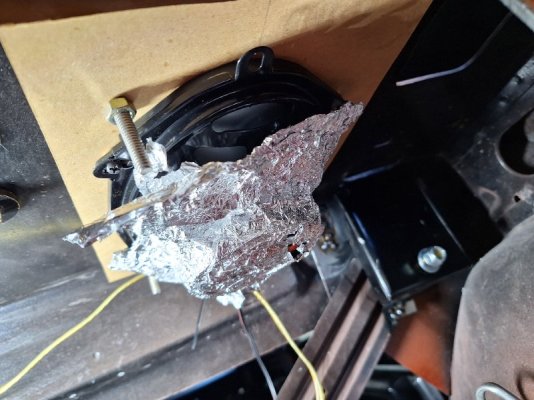
I used tin foil to protect the speakers
20251106_100541.jpg

Today was going to be an easy day, install the retractors and then reinstall the interior. As Greg mentioned already, I hit a snag with the retractors. The installed angle is within the range to allow the belt extension, but now the belt won't lock when its pulled abruptly. The belts came out of a late model Charger, and they mounted in the C pillar. The belt then rose straight up about 5 - 6", where it then went through another bracket that was also attached to the C pillar, before angling down towards the cushion. In the Coronet, the belt makes an almost 90° turn less than an inch out of the retractor, before running down the upper seat cushion. I wondering if the sharp turn defeats the locking mechanism.
However, Greg's Charger has the same routing and his retractors lock up. Hmmm. Tomorrow he's bringing Jigsaw over and we'll take one of his retractors and install it in the Coronet and see what happens.
 
Back
Top