friendofvirgil
Well-Known Member
I forgot I have the 1961 parts manual included in the binder with my 1963 parts manual!Actually did this one a few days ago
View attachment 768258 View attachment 768259 View attachment 768260
I forgot I have the 1961 parts manual included in the binder with my 1963 parts manual!Actually did this one a few days ago
View attachment 768258 View attachment 768259 View attachment 768260
I would install the cable to seal off the tach drive, then mask off the cable housing, old dist cap, mask the seal at the bottom of the cap, and a good plug in the gear end.HalifaxHops, thank you! What if I want to grit blast (aerospace term for sandblast) this housing? How do I mask well enough to ensure that I don't get media in the gear shaft? It's a rusty POS everywhere except in the drive and in the main shaft stem bushing area. Seems like I'm destined to remove this cap and disassemble.
I use cap plugs with a bit of tape on them to protect the opening (shh trade secret)HalifaxHops, thank you! What if I want to grit blast (aerospace term for sandblast) this housing? How do I mask well enough to ensure that I don't get media in the gear shaft? It's a rusty POS everywhere except in the drive and in the main shaft stem bushing area. Seems like I'm destined to remove this cap and disassemble.
Wonder if you could knock it out from drive side. Maybe OP could download a service manual at mymopae.com for a 1961 Chrysler 300G. It came with tach drive dist, I believe.
I would install the cable to seal off the tach drive, then mask off the cable housing, old dist cap, mask the seal at the bottom of the cap, and a good plug in the gear end.
I use cap plugs with a bit of tape on them to protect the opening (shh trade secret)
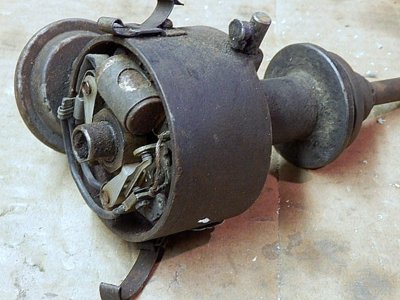
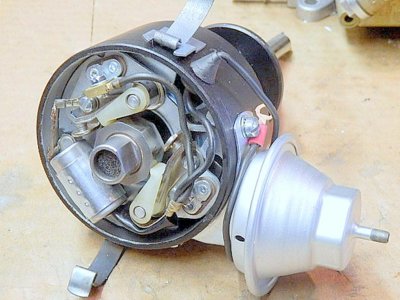
Page 8-6 in the 1964 parts book has a good exploded view the service manual is illustration 8-27-18. Best I can do, wont copy for me, Do not hit it from the cable side you will damage the housing. I have seen them in police packages also in other years if it helps.
Once HALIFAXHOPS pointed out this was a standard freeze plug, I wanted to remove more so I could access and thoroughly clean out all the gunky grease than anything else. I shut her down here on the internets yesterday to take all y'all's warnings and directions forward to see what minimal damage I could inflict on this old distributor. It looked like the freeze plug had a cadmium or zinc plating on it. I ended up wire wheel brushing the freeze plug to good substrate metal. Using my body panel stud gun, I welded on a stud. The darn thing popped out with hardly any pull.About the only safe way to get that plug out, will be getting a small hole in the center.
Don't use a drill...don't know what's behind it!
A screw turned into the hole, and use the screw head, as a puller surface. Even so, it will be a hard one to get out.
Hold yer mouth right!
That's beautiful, 62MAX! Especially on B/RB engines, the distributor is such a focal point for me that an extremely detailed-out one sets your build apart from the others. I've seen enough max wedge cross-rams in my day. My eyes go immediately to the details. Well done, Sir.Same here,and end results,you can make this
View attachment 768857
Look like this.
View attachment 768858
I would install the cable to seal off the tach drive, then mask off the cable housing, old dist cap, mask the seal at the bottom of the cap, and a good plug in the gear end.
So, I proceeded to the solvent tank after freeze plug removal and got it all cleaned up with a final blast of brake cleaner. Wow. The old grease was more like glue. The gear drive moved effortlessly spinning in the bore. As you can now see after solvent clean that the assembly is an interference/press fit between the drive stem and the gear. See 2nd photo. I could not resist the urge to grit blast, so I cap plugged everything and proceeded to the cabinet. I blew grit past the plugs into the drive. I know, Jenious, right!? Wish I'd stayed on the internets long enough to catch HALIFAXHOPS' trade secret to wrap tape around each cap plug for tighter fit. So, I have a press and some 1" diameter thin wall tubing. I don't trust my multiple floodings with brake cleaner and air nozzle removed all the residual grit. I'll post my results later.I use cap plugs with a bit of tape on them to protect the opening (shh trade secret)
That is one bitchin' engine color, 33 IMP! I'll take turquoise over orange every time. Bias lives here!Now you guys are making me feel bad/lazy, for just throwing mine back in without making it pretty.
View attachment 768905 View attachment 768906

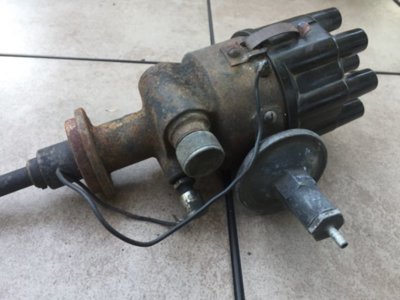
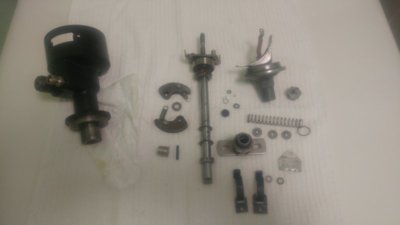

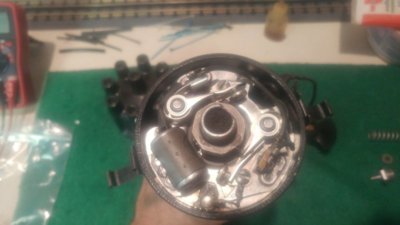
Here is a hemi one I build from a core I found at Carlise and some NOS parts I found also. Build it as a 4014A.
View attachment 768941 View attachment 768942
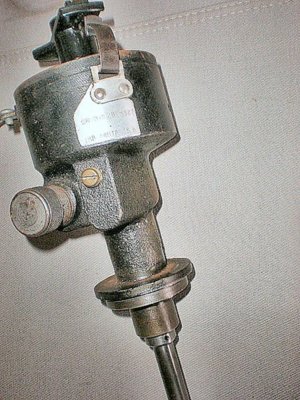
 Any RB can be used as a hemi though. I just used all original parts based on what Prestolite manual said would be in a 4014A. 69 hemi.
No, that is not a 4014A; but you know that.Any RB can be used as a hemi though. I just used all original parts based on what Prestolite manual said would be in a 4014A. 69 hemi.
Just have to keep rinsing and blowing it out till there is nothing coming out. How did you end up getting the plug out of the tach drive or did you find a new one?So, I proceeded to the solvent tank after freeze plug removal and got it all cleaned up with a final blast of brake cleaner. Wow. The old grease was more like glue. The gear drive moved effortlessly spinning in the bore. As you can now see after solvent clean that the assembly is an interference/press fit between the drive stem and the gear. See 2nd photo. I could not resist the urge to grit blast, so I cap plugged everything and proceeded to the cabinet. I blew grit past the plugs into the drive. I know, Jenious, right!? Wish I'd stayed on the internets long enough to catch HALIFAXHOPS' trade secret to wrap tape around each cap plug for tighter fit. So, I have a press and some 1" diameter thin wall tubing. I don't trust my multiple floodings with brake cleaner and air nozzle removed all the residual grit. I'll post my results later.
View attachment 768896 View attachment 768897 View attachment 768898
if you read my words it said maybeFran Blacker and vance.dykes that is not a screwdriver slot similar to the screw-in head type used on the Corvette distributors. miller is correct that the slot is for the key, or tang, on the cable. This tang style is more common on Mopar drives. Generic Motors used a square-formed end on the drive end of the cable.
miller, hopefully Auto Lite or Prestolite or whoever the manufacturer's name really is, didn't add a snap ring inside behind that cup that looks like a reverse freeze plug. I used a small brass drift bar and hammer to try tapping on the face of the drive slot to see if it would move. Reasonable knowledge of force energy tells me I've hammered hard enough on this that it should move. Any more force and I think I'll cause damage to the part or myself. I'd like to know what's inside. BTW, my 63 Plymouth manual shows an exploded view of a non-tach drive cast body AutoLite dual point used in the 383HP police motors. I think I'd need either a C-body/300 manual or a Max Wedge supplement manual to see an exploded view of what's inside. Hopefully, either will have.
Actually two parts press fit. The drive part (gear) is on the shaft the tach drive cable goes into. You have to gently drive the shaft out from the gear side to disassemble it if it makes sense.Fran Blacker and vance.dykes that is not a screwdriver slot similar to the screw-in head type used on the Corvette distributors. miller is correct that the slot is for the key, or tang, on the cable. This tang style is more common on Mopar drives. Generic Motors used a square-formed end on the drive end of the cable.
miller, hopefully Auto Lite or Prestolite or whoever the manufacturer's name really is, didn't add a snap ring inside behind that cup that looks like a reverse freeze plug. I used a small brass drift bar and hammer to try tapping on the face of the drive slot to see if it would move. Reasonable knowledge of force energy tells me I've hammered hard enough on this that it should move. Any more force and I think I'll cause damage to the part or myself. I'd like to know what's inside. BTW, my 63 Plymouth manual shows an exploded view of a non-tach drive cast body AutoLite dual point used in the 383HP police motors. I think I'd need either a C-body/300 manual or a Max Wedge supplement manual to see an exploded view of what's inside. Hopefully, either will have.
