• When you click on links to various merchants on this site and make a purchase, this can result in this site earning a commission. Affiliate programs and affiliations include, but are not limited to, the eBay Partner Network.

Replacing the bent all to hell oil pan on the '68 GTX

moparedtn

I got your Staff Member riiiight heeeere...
FBBO Gold Member
Local time
9:04 AM
Joined
May 14, 2011
Messages
17,242
Reaction score
32,433
Location
On the Ridge, TN
The original 4 quart stock oil pan on the replacement 440 in my 1968 GTX was seriously dented up, to the point it was causing oil pressure issues at times.
It came time to do something about it...

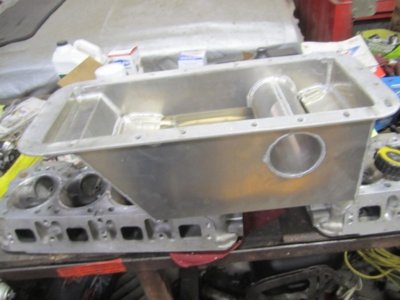
A call in to 440Source and a new 6 quart hemi oil pan, gaskets, pickup and windage tray arrived.

Arrangements for someone else with a lift fell through.... *cough*
Fine, I'll do it myself!
Here we go....
 
new 6 qt hemi pan and fsm.jpg

I fetched a reproduction "hemi" 6 quart oil pan, matching pickup and windage tray from 440Source.
Gave the pan a coat of satin black and used Permatex "utra gray" to glue on a gasket ahead of time.
Well, since the dude blew me off on doing the work for me yesterday, today I got mad enough to do it
myself - knowing the consequences.
Factory service manual at the ready...
fsm sez.jpg

FSM sez "get on with it, fat boy!" :)
Actually, it was pretty simple... disconnect battery, drop the steering drag link at pittman
and idler arm, drain the oil, have at it.

Roger that... and yes, please note the jackstands. Ed used actual jackstands. Alert the media!
up in the air oil draining.jpg
 
Well, things went surprisingly easy and I even started having flashbacks to 30 years ago.
Holy crap, I REMEMBER this stuff! Pretty awesome, really...
Pan came off so fast it dang near hit me in the head.
The results weren't pretty:
bent up pan 1.jpg

bent up pan 2.jpg

bent up pan 3.jpg


THAT is one bent up, caved in 699 pan right there. Looks like someone actually used it
to jack up a car at some time in the past... no wonder the car would sporadically "starve" for oil,
especially facing downhill.

As you might expect, the pickup didn't fare much better:
bent pickup.jpg

Let's just say it wasn't parallel with the engine....or anything else, for that matter.

Oh, but there was actually some GOOD news, though.
The engine had a factory windage tray installed:
existing windage tray.jpg


Of course, it was gratifying to see the forged crank once I took the windage tray off, too. :thumbsup:
Finally, it was a relief to note there was next to zero debris in either the pan or the pickup screen!
Onward I went...
 
Holy cow! How long was that pan that way?

The two front pan bolts go easy with a 1/4” drive short well socket. Fits in there nicely, if your mounts are okay.
 
Ok, so pan off, windage off, pickup off and on the bench. I chucked it up in the vise and
straightened it up just for the heck of it, then compared it to the 440Source (probably Chinese)
supplied new one:
440 source pickup vs stock pickup.jpg

Lo and behold, they were within about 1/8" of each other in length.

I had read about how the 4qt and the "hemi" 6qt pans were actually the same depth/dimensions,
with the additional 2 quarts coming from the "belly" just being longer.
Here they are, side by side:
4qt 6qt side by side.jpg

What I'd been told (and read) was absolutely true. they were both the exact same depth from flange to bottom: 5".
Where I'd read differing opinions was in how close the pickup needed to be to the bottom of the pan - all
sorts of answers on that one.
I measured each pickup installed in the actual engine and - the new one was shorter!
As it turns out, I needed the additional depth the stock one provided, as the 440Source one came up well over
1/2" short of the pan bottom.
*sigh*
Dutifully, I cleaned up the stock pickup, installed it and firmly (but gently) manipulated it to an approximate
state of parallel with the block rail and within a measured 1/4-3/8 of pan bottom.
That was the first departure of the plan, but it wasn't the last...

I had made a mistake in preparing for this job in that I hadn't run by a hardware to fetch longer pan bolts.
That wound up affecting the job, too - the 440Source windage tray is considerably thicker than the stock one
and wouldn't you know it - the existing pan bolts weren't long enough to use it...
:mad:
Departure from plan #2: Clean up the original windage tray and use it again as well.

This is the 440Source windage tray. Very nice piece, very substantial and Made in the USA! :usflag:
440 source windage tray.jpg

Reckon I'll be selling it, the new pickup and a spare new gasket, too. Oh well...
 
Holy cow! How long was that pan that way?
The two front pan bolts go easy with a 1/4” drive short well socket. Fits in there nicely, if your mounts are okay.
Precisely what I used. That said, I got big ol' ham hands, so....
As to how long the pan was like that, I bought the engine that way a couple years ago, so I'm guilty of knowing for all this time. Beyond that, who knows?
 
Last edited:
Conclusion coming, I promise!
Ok, original windage tray in place (read: Permatex + 4 pan bolts holding it up in place temporarily - I only got 2 hands, after all) and revamped existing pickup installed, it was pan time.
I measured the pickup to rail again, then the rail to bottom of pan again....
and did it again once under the car.
I wanted to make damn sure not to screw that one up!

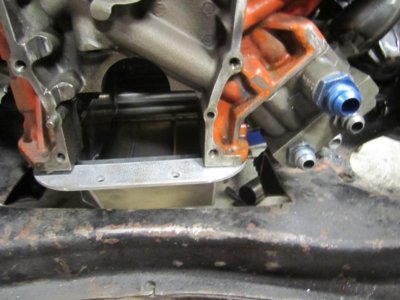
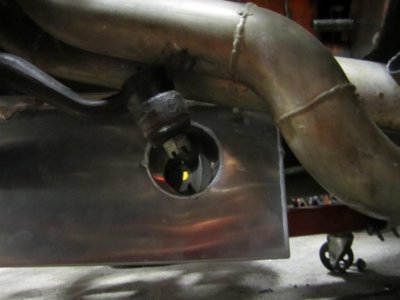
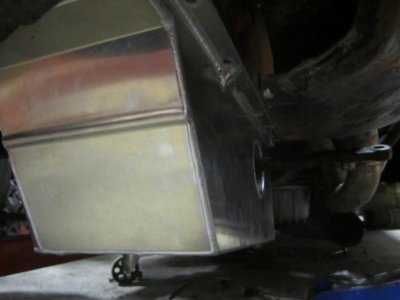
Lots of contorting, cussing, use of both hands and a foot, more cussing, whatever it took....and eventually I got all the pan bolts started, then finally tightened!
new pan in 1.jpg

new pan in 2.jpg

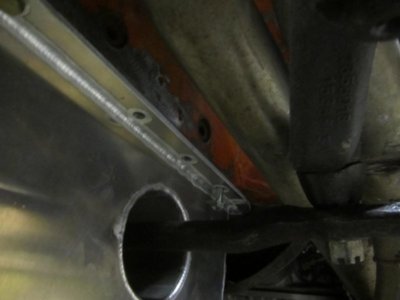
The steering drag link back up and installed, there was plenty of room. :)
(Yeah, I know, I got a date with some POR15 down there one day soon...)
One last check of everything and I got everything picked up and me out from under for the last time - thank God.
There's a reason they tell me to stop this sort of thing...ouch. A lot.

Anyways, time to fill 'er up and see what we got. The choices were pretty standard:
vr1 10w30 wix racing filter.jpg

Wix racing filter (cost a buck more, so what the heck) and Valvoline VR1 for all that wonderful zinc and phosphorous every good purpleshaft flat tappet cam loves.
Six quarts in, filter installed, battery hooked up.
Wife watching on (she does that when I'm doing stupid stuff like this), I hit the key and pray....
The moment gas works back up to the carb, the GTX lights off instantly as she always does, me staring a hole at the oil pressure gauge - which does nothing for what seems like an eternity.
(It probably was more like 5 seconds). :praying:

Me cajoling and begging, the gauge finally FLIES over to 80psi all at once!
Yes_Baby (2017_10_11 10_04_54 UTC).jpg

The GTX settles into its' familiar lopety and the wife and I take turns looking for leaks and such.
After a bit, I shut her down, check the dipstick (which also works fine with the new pan, of course) and add the additional quart for the filter.
Unreal.
Apparently I can still do this stuff?
It may not be much to most of you, but this sort of thing is pretty big stuff for me these days.
Very gratifying to see 1)I remember how! and 2)despite my own "chassis issues", I can still shadetree!

Oh....and screw you, dude with lift who blew me off. EABOD. :)
 
Well, things went surprisingly easy and I even started having flashbacks to 30 years ago.
Holy crap, I REMEMBER this stuff! Pretty awesome, really...
Pan came off so fast it dang near hit me in the head.
The results weren't pretty:
View attachment 812117
View attachment 812118
View attachment 812119

THAT is one bent up, caved in 699 pan right there. Looks like someone actually used it
to jack up a car at some time in the past... no wonder the car would sporadically "starve" for oil,
especially facing downhill.

As you might expect, the pickup didn't fare much better:
View attachment 812120
Let's just say it wasn't parallel with the engine....or anything else, for that matter.

Oh, but there was actually some GOOD news, though.
The engine had a factory windage tray installed:
View attachment 812121

Of course, it was gratifying to see the forged crank once I took the windage tray off, too. :thumbsup:


Looks like you Jacked it up by the oil pan!
Finally, it was a relief to note there was next to zero debris in either the pan or the pickup screen!
Onward I went...

047.jpg
 
Hey Ed- just out of curiosity how much daylight you got there between the pan and steering link? I'm not asking for a measurement, just a guesstimate is fine....I use a Milodon pan w/ stock tray and I've had to wiggle the mounts and bolts to get things to sit as 'up' as possible and I still get only maybe 1/4" clearance at the closest..
 
Hey Ed- just out of curiosity how much daylight you got there between the pan and steering link? I'm not asking for a measurement, just a guesstimate is fine....I use a Milodon pan w/ stock tray and I've had to wiggle the mounts and bolts to get things to sit as 'up' as possible and I still get only maybe 1/4" clearance at the closest..
That's more than enough!
 
It's slot harder. to do these things at this stage of life.
I think we don't have the confidence we used to have?
Or maybe it's because people say,Are you still crawling
around under there at your age??????
I've decided I have a Hell of a lot of experience,more
than most of the guys that day the above
I can still do this stuff,maybe a different way I
Used to,but I get the job done.
 
Hey Ed- just out of curiosity how much daylight you got there between the pan and steering link? I'm not asking for a measurement, just a guesstimate is fine....I use a Milodon pan w/ stock tray and I've had to wiggle the mounts and bolts to get things to sit as 'up' as possible and I still get only maybe 1/4" clearance at the closest..
It's not as close as it even looks in the pic - I wanna say like 1 1/2" or better?
It's almost like everything was figured out for us before! :)
 
Auto Transport Service
Back
Top